** UPDATES BELOW **
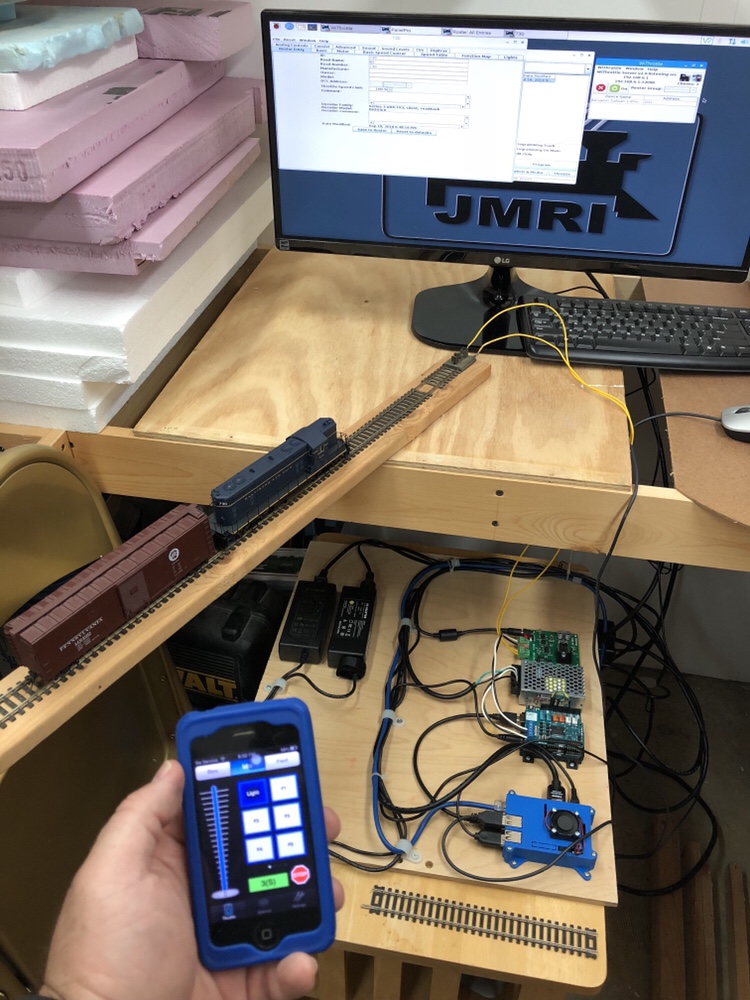
The prototype DCC system is up and running. I decided to home brew my DCC when I read about DCC++ and realized I had an Arduino laying around with no real purpose. I bought a motor shield and hooked up my laptop and an old power pack to test it out. It worked but I knew I had to come up with a more complete and permanent setup.
I immediately considered the Raspberry Pi (RPi) as it’s a low cost, full featured Linux computer and I can run JMRI on it! I needed a power supply and a bit of research found others doing similar things using various inexpensive devices. I also wanted a proper booster so I chose a Tam Valley unit. I’ll invest in a second one for my other power district in the future. EDIT: I used Steve Todd’s “JMRI RaspberryPi as Access Point” which is a pre-built configuration for RPi which sets it up by default as an access point, connects to the DCC++ system and runs PanelPro, etc. It’s fantastic and worked right away.
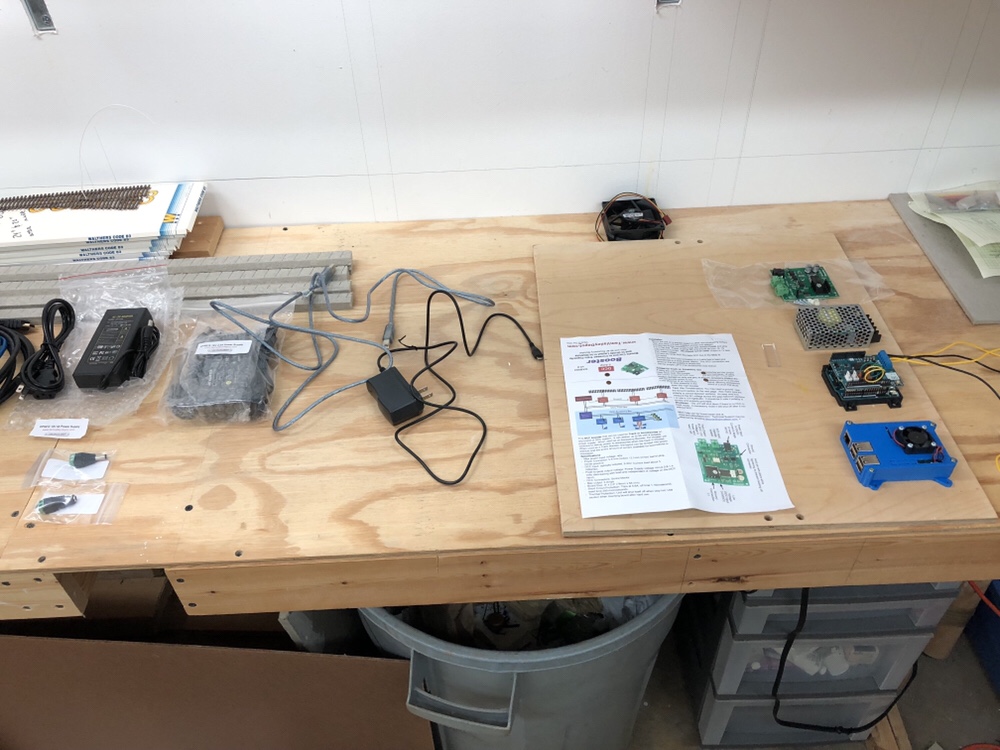
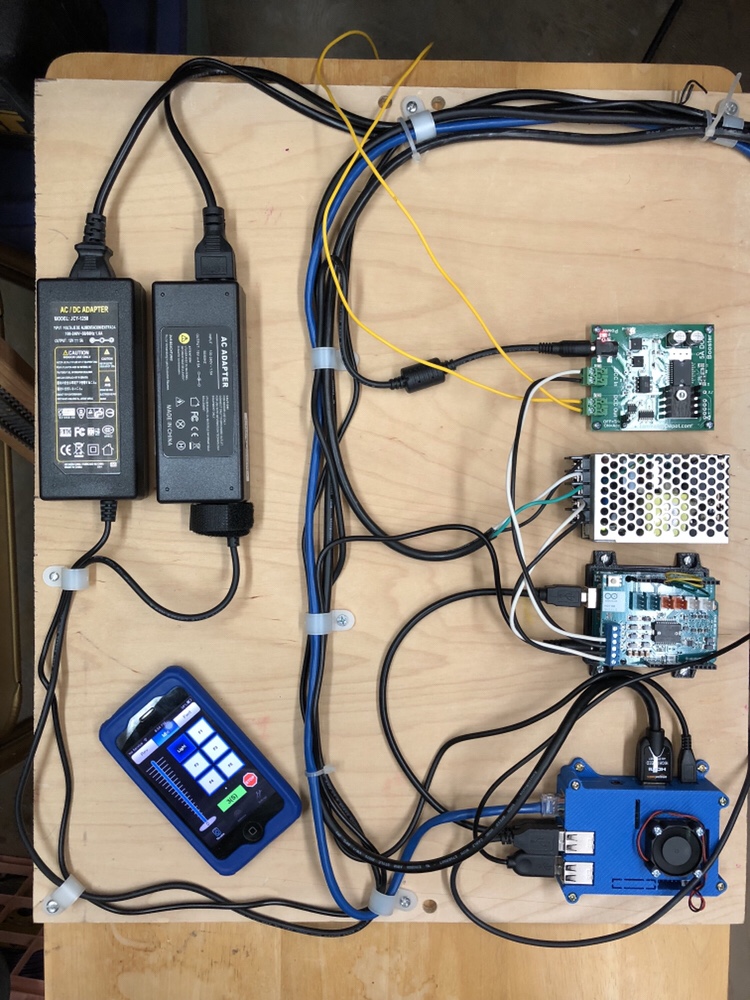
Today I spent several hours putting all the pieces together that I had collected over the last couple years. The monitor was a donor from my dad. The mouse, keyboard and cabling was all old stuff laying around. I put everything onto a board, first laying it out and planning the cable routing. Once everything was good, I screwed the pieces into place.
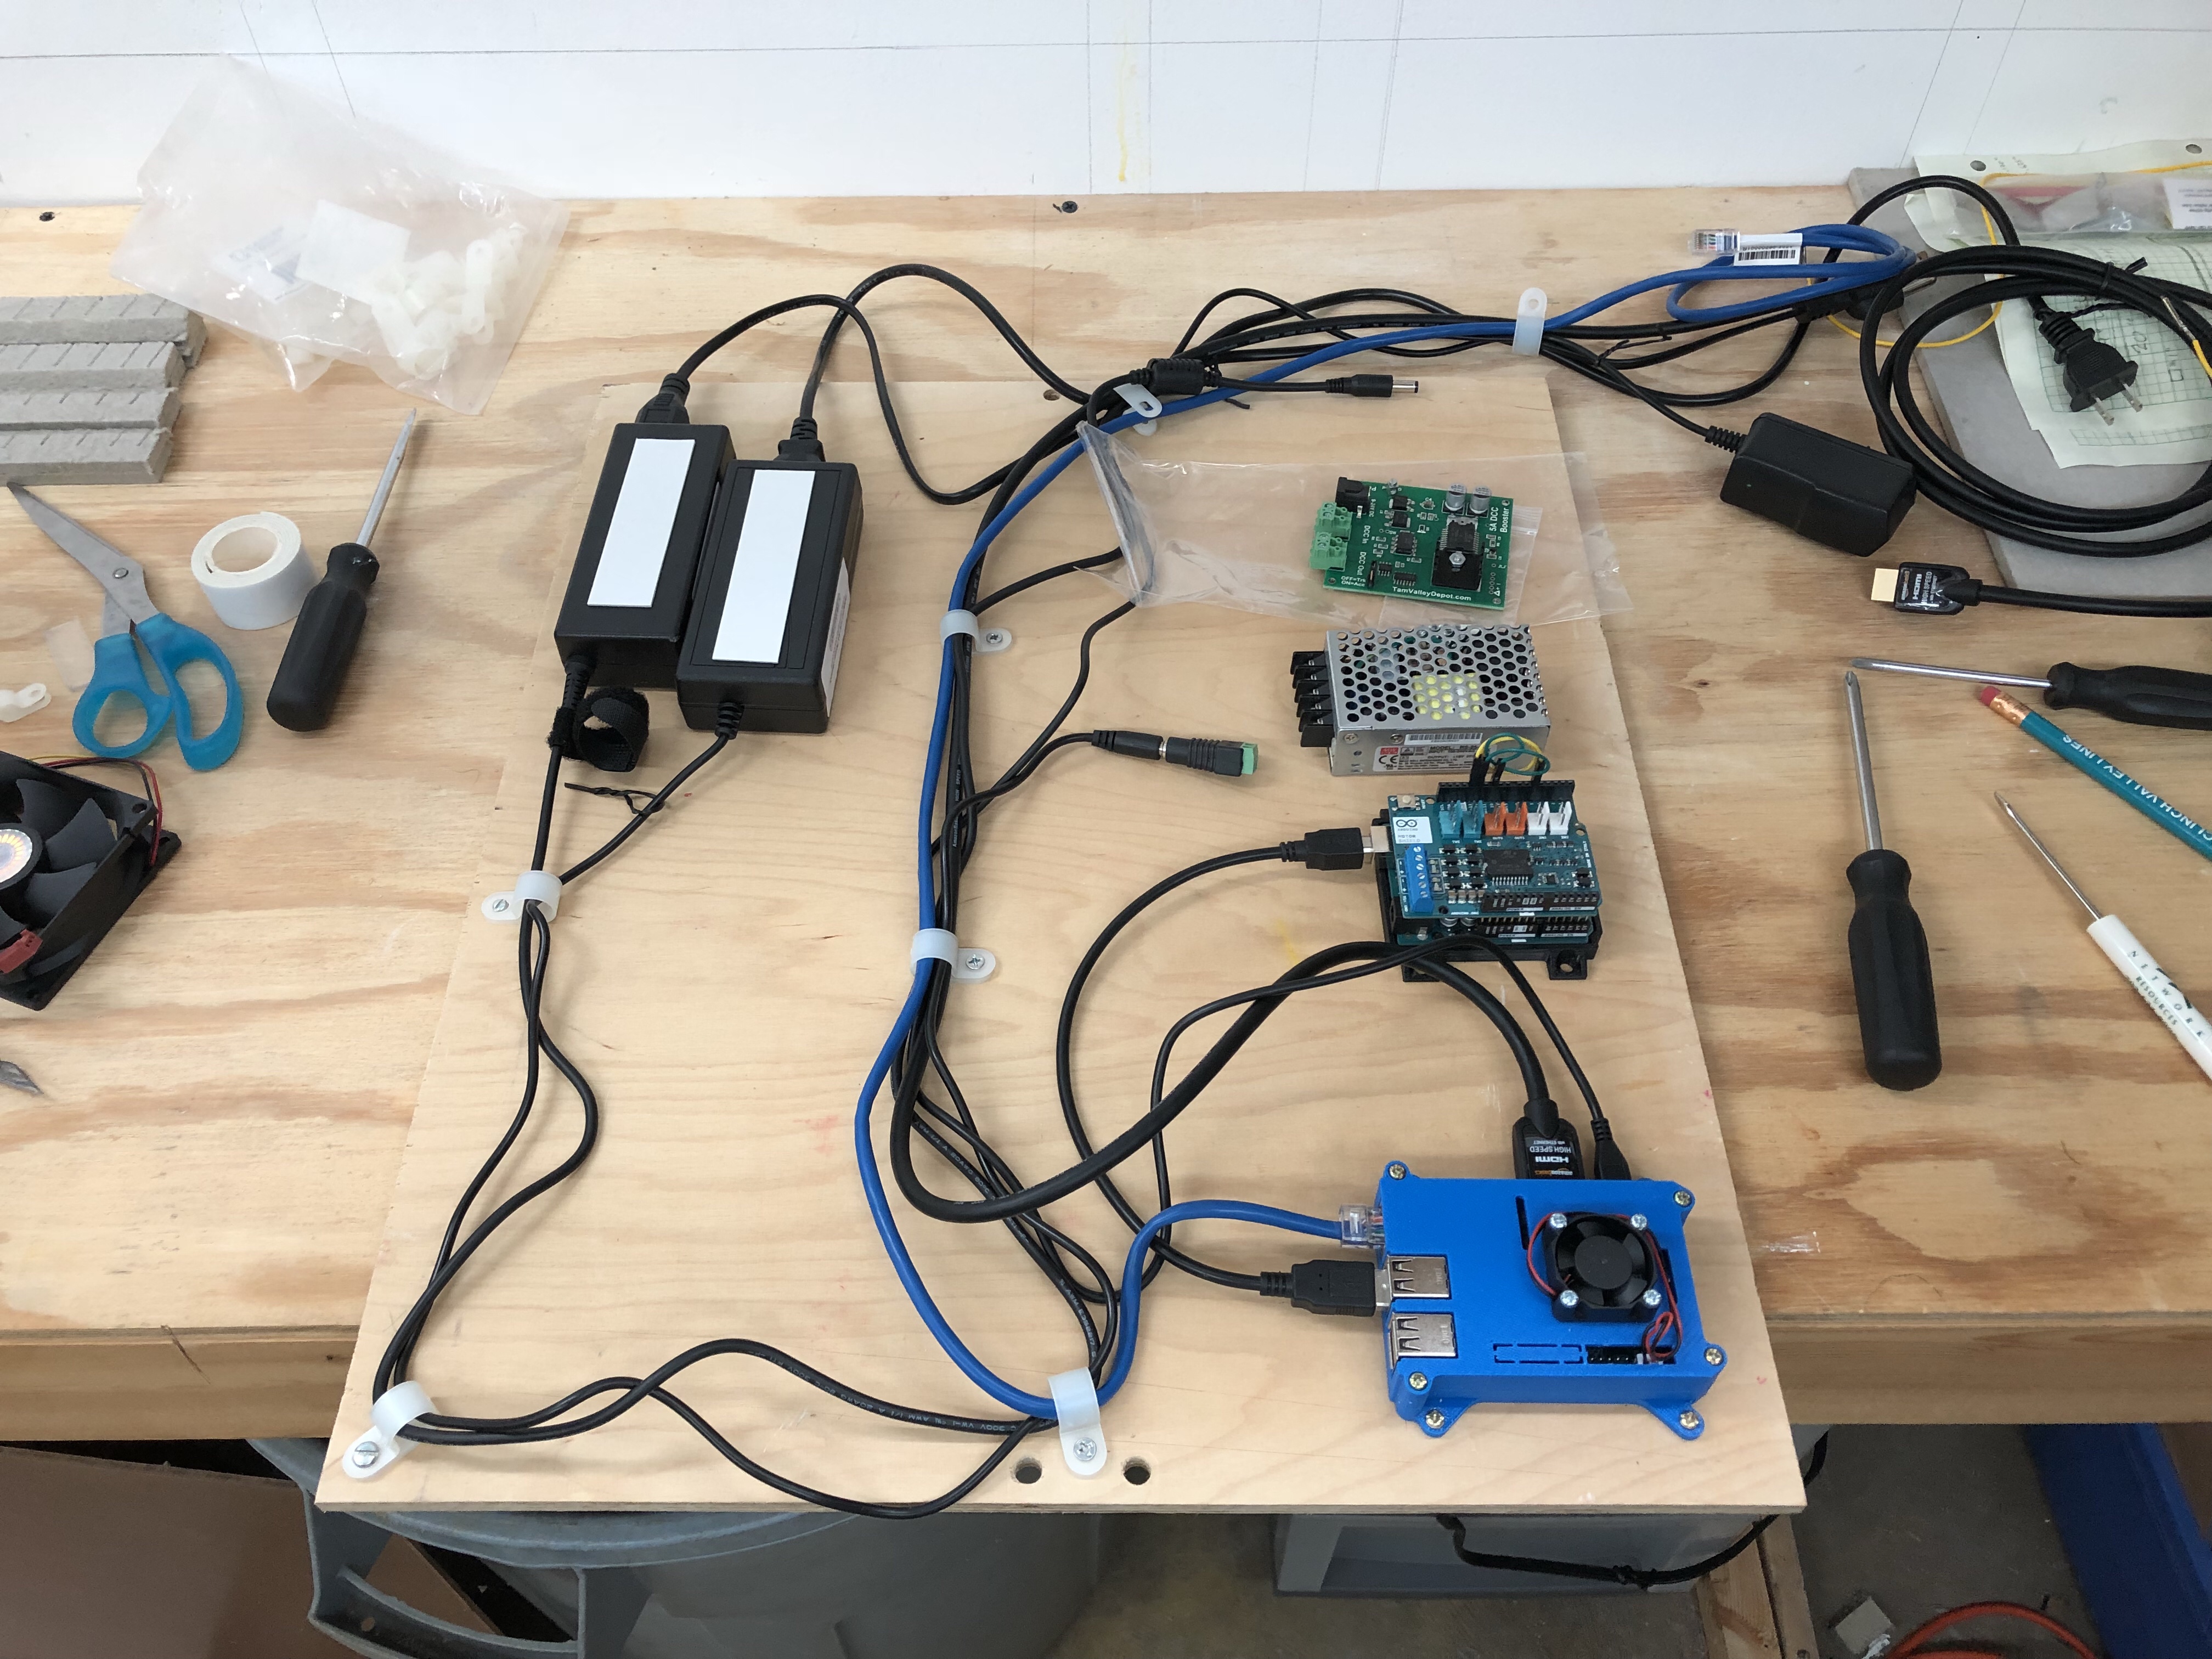
Next was to test voltages and see what worked. A bit of tinkering and everything looked good. I set it all in place and started configuring things in the RPi. A bit of trial and error getting things to talk to each other, with some luck, and it’s working!
There are still lots of kinks to work out and I need to experiment with a lot of the features. My intention is for this to be a fun project and provide a robust DCC system to get me started for the Georgetown Branch. We will see how it works in the long run.

incidentally, I had planned on taking apart my Proto2000 GP7 to have a look at the plastic gears, as last time I ran it it was making lots of noise.
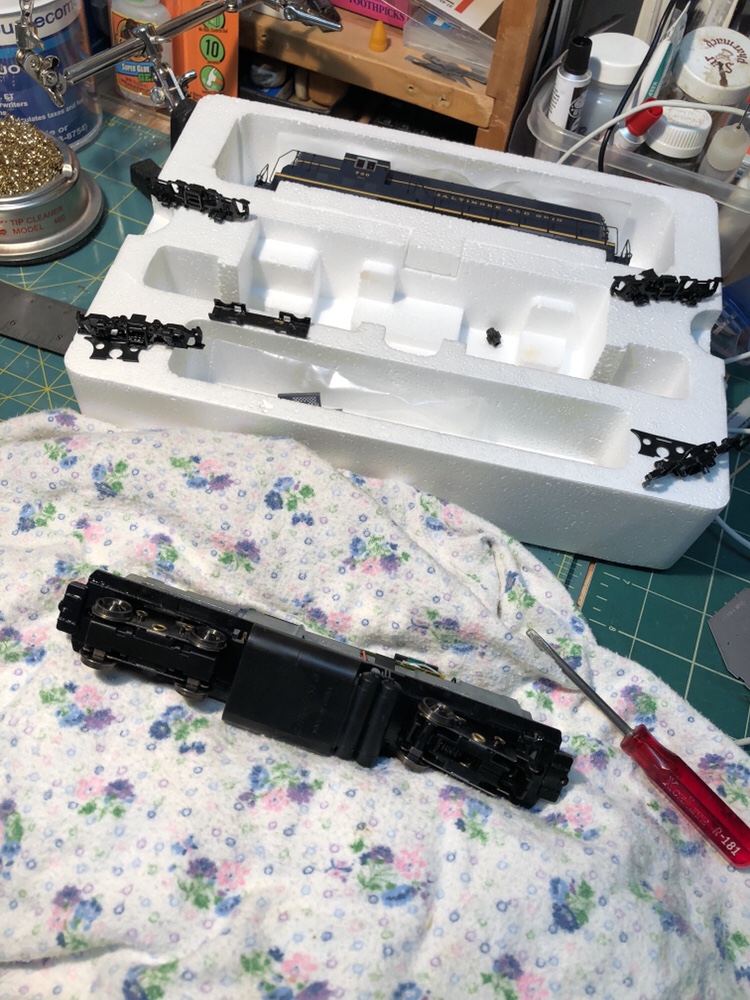
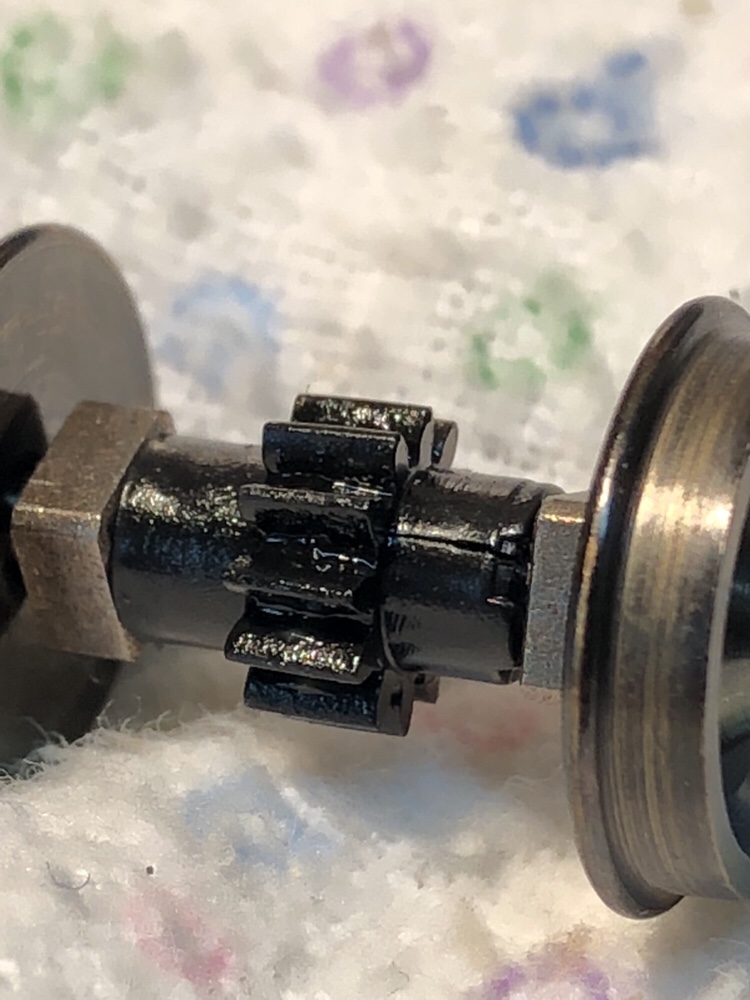
Wouldn’t you know it, all four gears were cracked! I replaced them with Athearn units, like a charm. Here’s one of the cracked units:
I was asked to give some more details about parts and prices so here is a list. Building this setup requires many things that you probably already have on hand, so the cost will vary. Also, you can find things on sale occasionally and you can simplify or streamline it with your own skills or modifications. I included rough estimates for a few things which you will need just to get the ball rolling. Feel free to reach out with any questions you have.
List of parts: (Updated 1/2/2022)
- Arduino Uno, Rev3 $23.00 (can use off-brand; YMMV.)
- Arduino Motor Shield, Rev3 $33.49 (can use off-brand; YMMV.)
- Arduino case (Use whatever you like/have. Prices on Amazon ~$5+)
- 26 AWG M-M Jumper wires $4.99 (can use 26 AWG solid core wire too!)
- Raspberry Pi 3 B $34.99 (*1/2/22: I have been unable to find one for sale right now. The new Pi 4 is $45, also hard to find.)
- Raspberry Pi 3 case (Usewhatever you like/have. Prices ~$10 and up on Amazon.)
- Tam Valley Depot DAB002 DCC Booster $54.95
- Tam Valley Depot DPS016 16V 4.5A Power Supply for Track Use $16.95
- Tam Valley Depot 12V 5A Power Supply for Accessory Use $16.95
- MeanWell RS-25-15 Switching Power Supply $20.00
- 3-prong power cable $4.59 (mine came from an old PC. Anything certified is fine.)
- Amazon Basics Wired Keyboard $13.30 (Any wired standard USB keyboard will do.)
- Amazon Basics 3-button Mouse $8.23 (Any wired USB mouse will do.)
- Monitor (Any HDMI monitor will do. May need HDMI-VGA adapter for older monitors.)
- Wire (Assorted wire for connecting devices.)
- Small screws (Assortment to fit your devices.)
- Plywood (Any mounting surface you like. I used what I had.)
- 3M Scotch Double Sided Mounting Tape $6.28
- Smartphone (Any iOS/Android device w/ WiThrottle/Engine Driver)
- USB 2.0 Type B male to Type A male 10″+ cable $1.60
- Cable management (zip ties, velcro wrap, etc)
- HDMI cable, 6′ $6.99
- Cooling Fan, 0.15A 12V 2-pin 30mm x 30mm $8.99 (not essential)
A few more things
Updates: (1/2/2022) – this is not definitive, but rather a couple notes.
DCC++ Issues
I ran into issues with my DCC++ setup, essentially it would read some decoders and not read others. I spent hours troubleshooting it and eventually moved on. I suspect it has to do with my power settings, but as I am not a programmer by nature, I didn’t feel like spending more time figuring it out. I’ve moved on from using DCC++ but would VERY much like to revisit it in the near future as I think there have been some wonderful developments with the growth of the DCC++ EX project; essentially an updated version of the old DCC++ project. They even have a Discord! I have tried DCC++ EX but still have issues. Again, I’d like to revisit this.
Raspberry Pi / Arduino Availablity
I don’t know why Arduino and Raspberry Pi units are so hard to come by right now. I basically couldn’t find ANY for sale right now, anywhere. I’m not sure if this is a result of the global chip shortage, the global shipping crisis, a combination of the two, or something else entirely. If you are in the market for one of these, you’ll have to get creative. It really is a frustrating situation! Let me know if you see things change.
JMRI RaspberryPi as Access Point
Model Railroader and programmer Steve Todd has designed and offers totally free a whole lot of cool stuff on his website. This includes Engine Driver, the awesome Android app you can use to run trains on a WiFi-equipped DCC system! In addition, he offers a completely self-contained, packaged solution for using a Raspberry Pi as an access point to run your layout with JMRI and WiThrottle. Simply write the image to your RPi SD card, boot it up, point it at your DCC system (with WiFi enabled), configure your throttles (smart phones) and you are running trains. It’s amazing. You don’t even “need” a keyboard/mouse to do this. Here is a link to the page with all the info you’ll need: https://mstevetodd.com/rpi I have set this up on my layout and it works great. Really awesome!
That’s all for updates for now. Good luck with your DCC++ adventures. I’d love to hear more about what you all are up to!