Recently Lance Mindheim visited Kelly Regan’s Georgetown Branch layout and did a very nice writeup on the project! I highly recommend you visit Lance’s blog and have a look. Bravo, Kelly!
Category Archives: News
Georgetown Branch Clinic on YouTube
Back in September I gave a clinic at the Mid Atlantic Railway Prototype Modeler meet on the Georgetown Branch project. It was a blast! Last week I gave the presentation for the Operations Special Interest Group (OpSIG) and thankfully it has been recorded and posted to YouTube for all to enjoy.
Many thanks to the OpSIG team for having me!
Checking In

It’s been three months since my last post and a lot has been going on. Between sending my kids off to college, presenting a clinic on the Georgetown Branch at the Mid Atlantic Railway Prototype Modelers meet, a trip to Portugal to watch my daughter compete in the Acrobatic Gymnastics World Championship, prepping for and attending the Great Scale Model Train Show for the weekend as a vendor with my model RR club, presenting a clinic on upgrading Proto2000 GP7/GP9’s for the Potomac Division of the Mid East Region, NMRA, Parents weekend at aforementioned kids’ schools (JMU/Quinnipiac), traveling to New England to visit family for a long weekend, attending a Slowdive concert in Philadelphia and a Brothertiger show in DC, layout ops and open houses and much more…
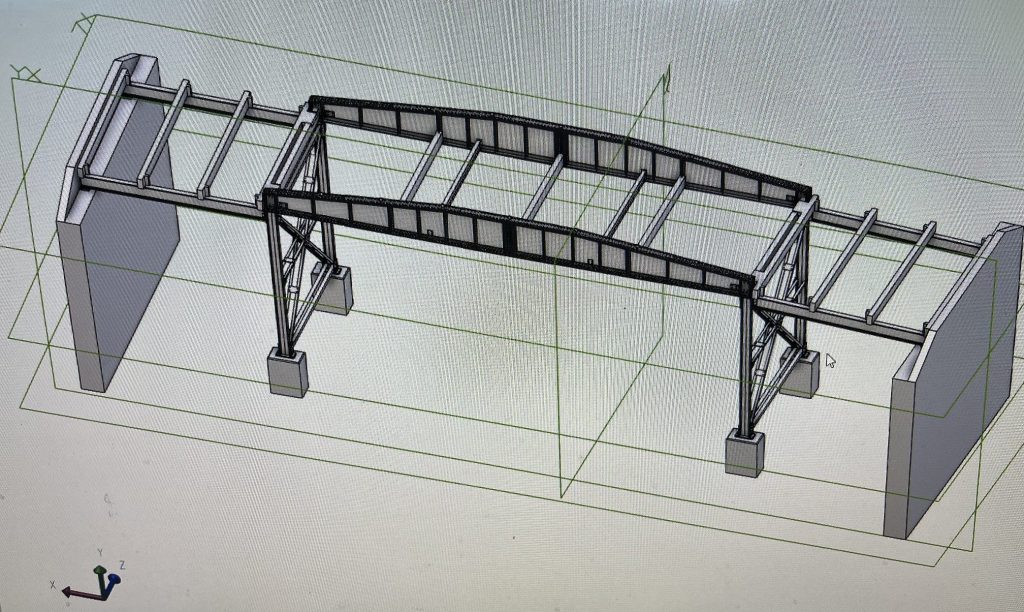
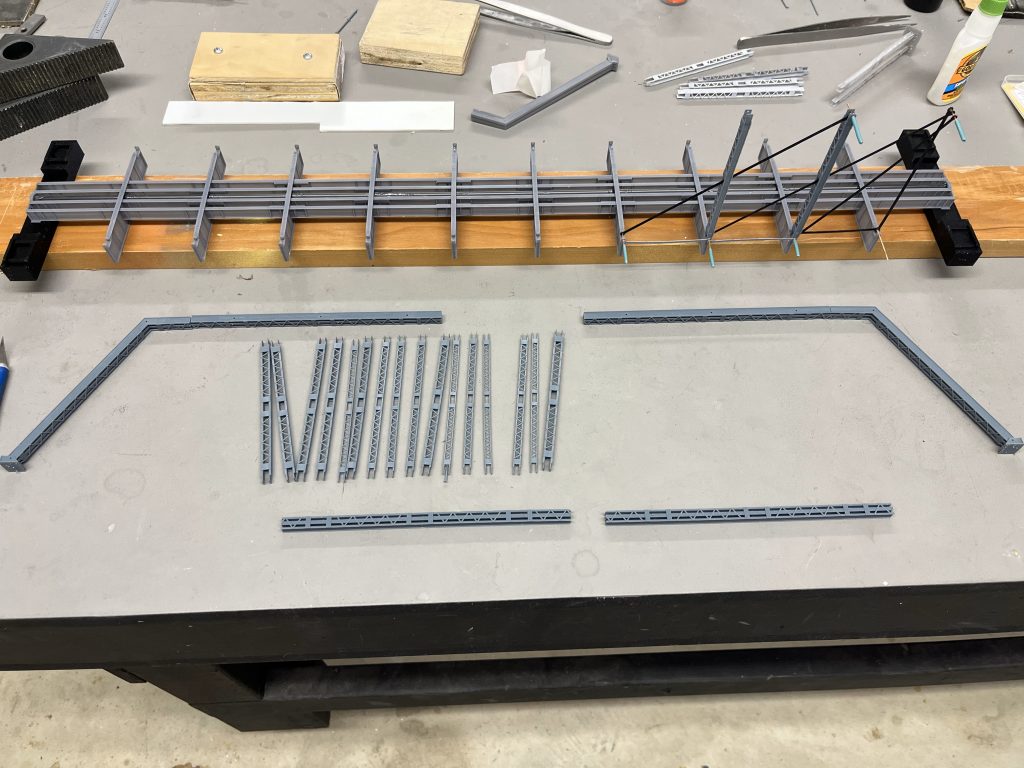
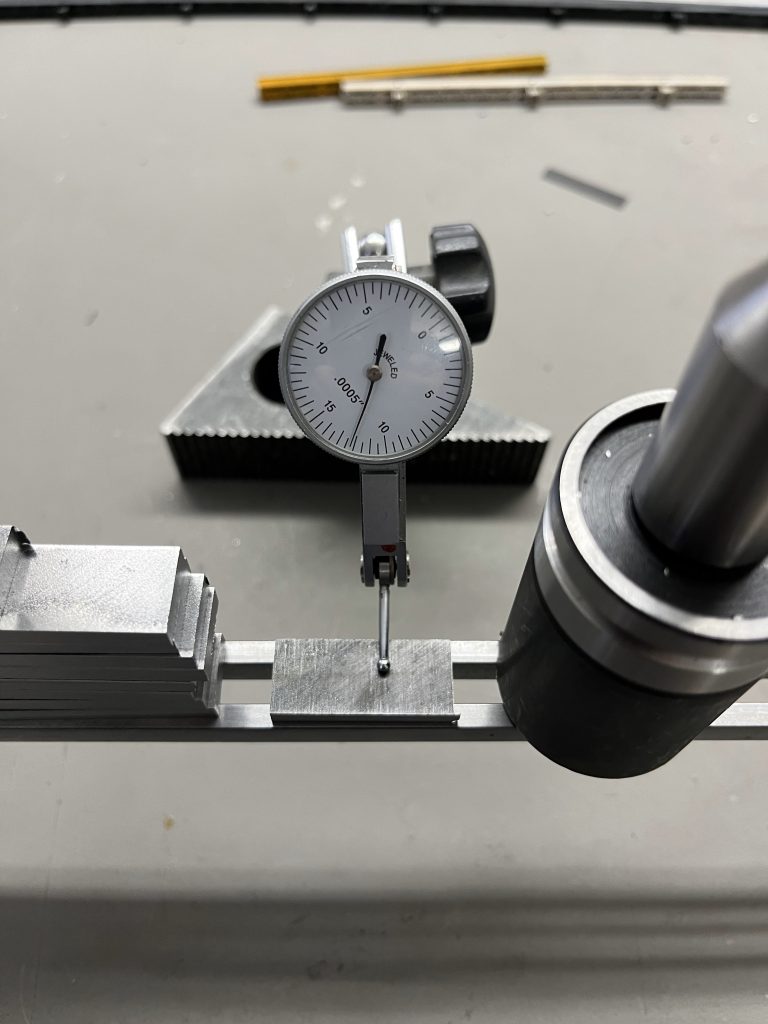
So, yeah, it’s been hectic. The Georgetown Branch project has taken a back seat this Fall to “life” but fear not, it’s still very much active and moving forward in different ways. I have been talking to Kelly a lot lately as he pushes through with his designs of the Whipple Truss bridge across the C&O Canal. He’s been working on this for the last couple years and recently revamped his approach, integrating steel beams for support due to the wide span. Testing of the fine 3D printed parts continues with promising results. I think he’s close to a final design and will be producing test prints soon. It’s exciting times.
Follow along on Kelly’s Blog.
Regarding the MARPM Georgetown Branch presentation, which hopefully some of you witnessed. Fear not. While that clinic was not recorded, I will be presenting it online for the OpSIG group Virtual Meetup on December 8th, at 7:00pm. It will hopefully be recorded and posted to their YouTube channel afterward for public viewing.
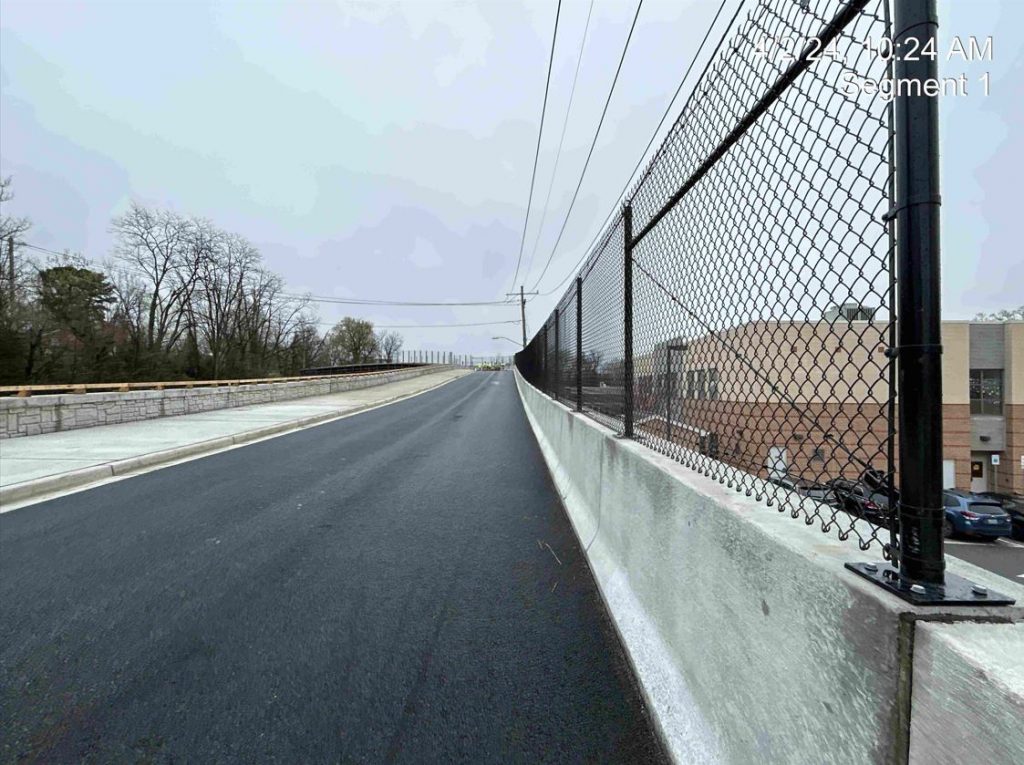
New Talbot Ave Bridge is Open
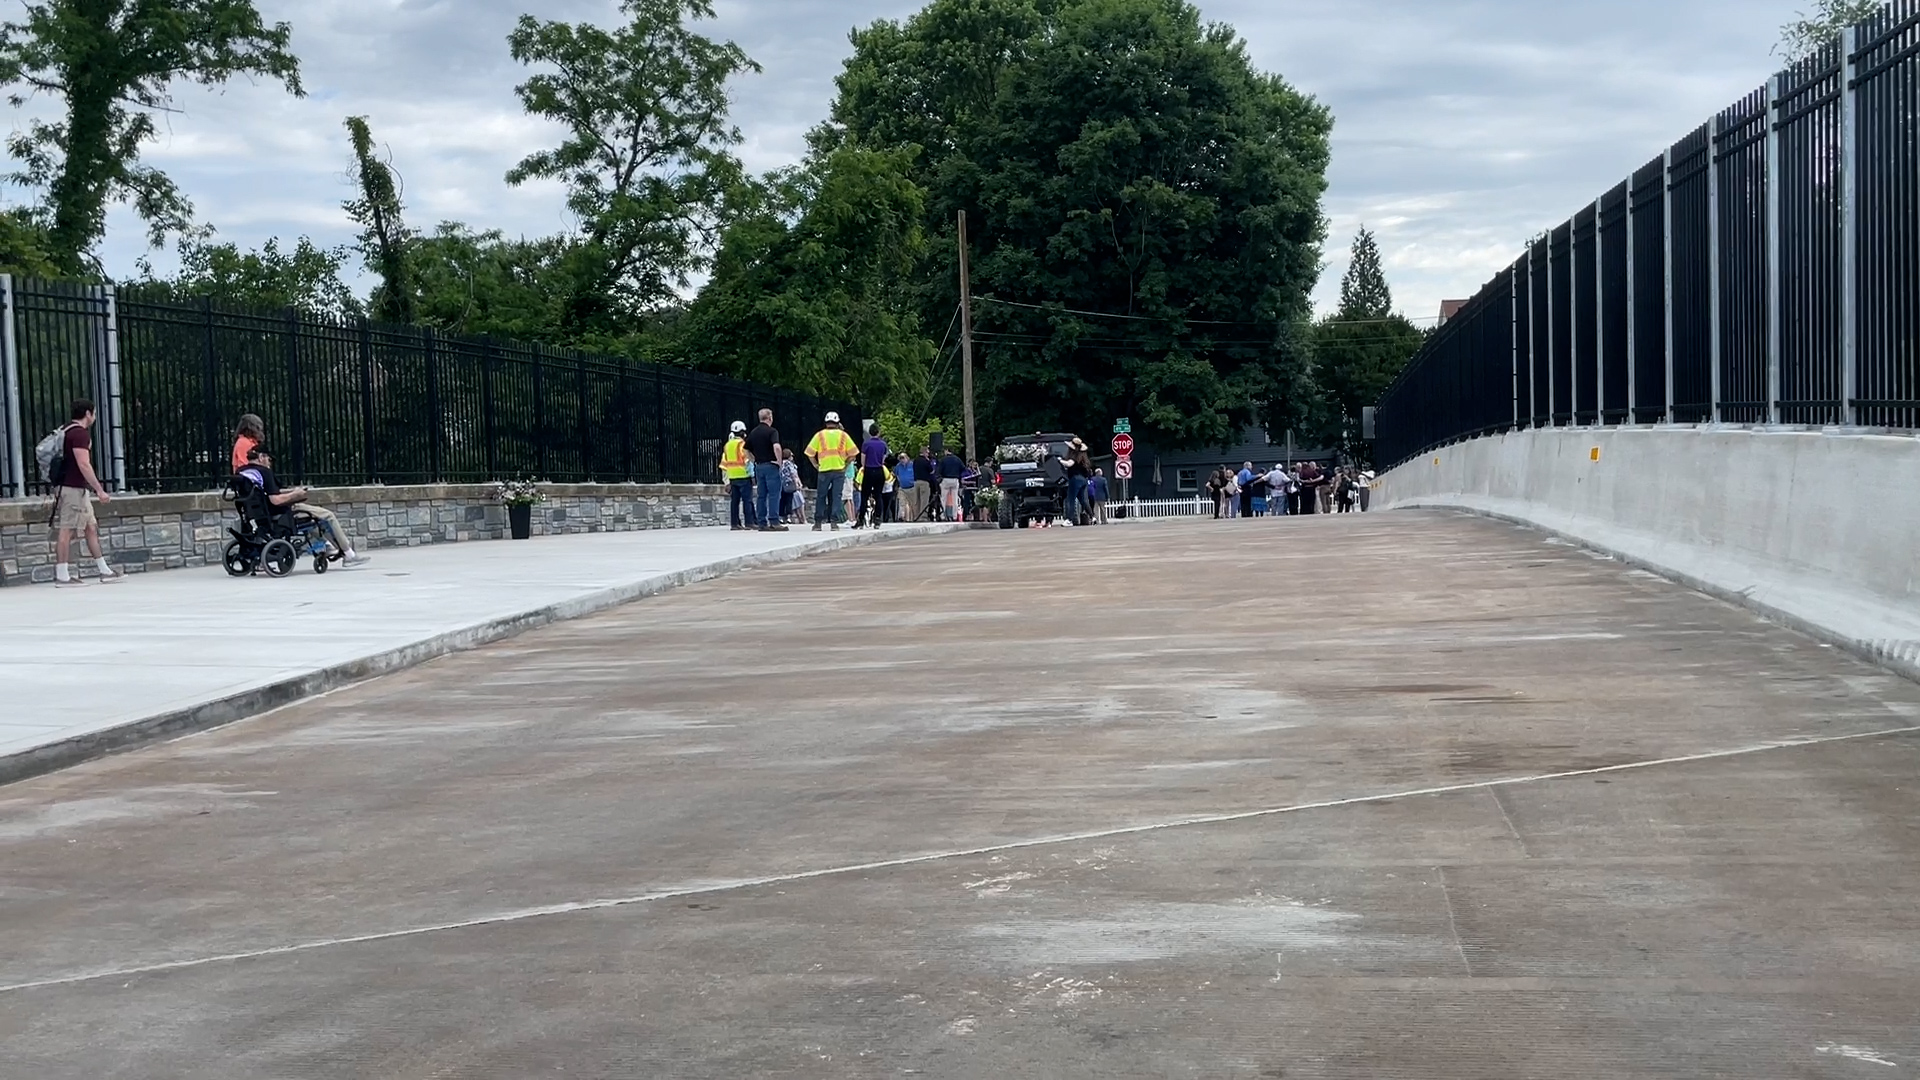
The new Talbot Ave bridge across the Metropolitan Branch at Georgetown Jct has officially opened.
https://x.com/MCDOTNow/status/1795569974876270652
Layout Progress – Lower Deck
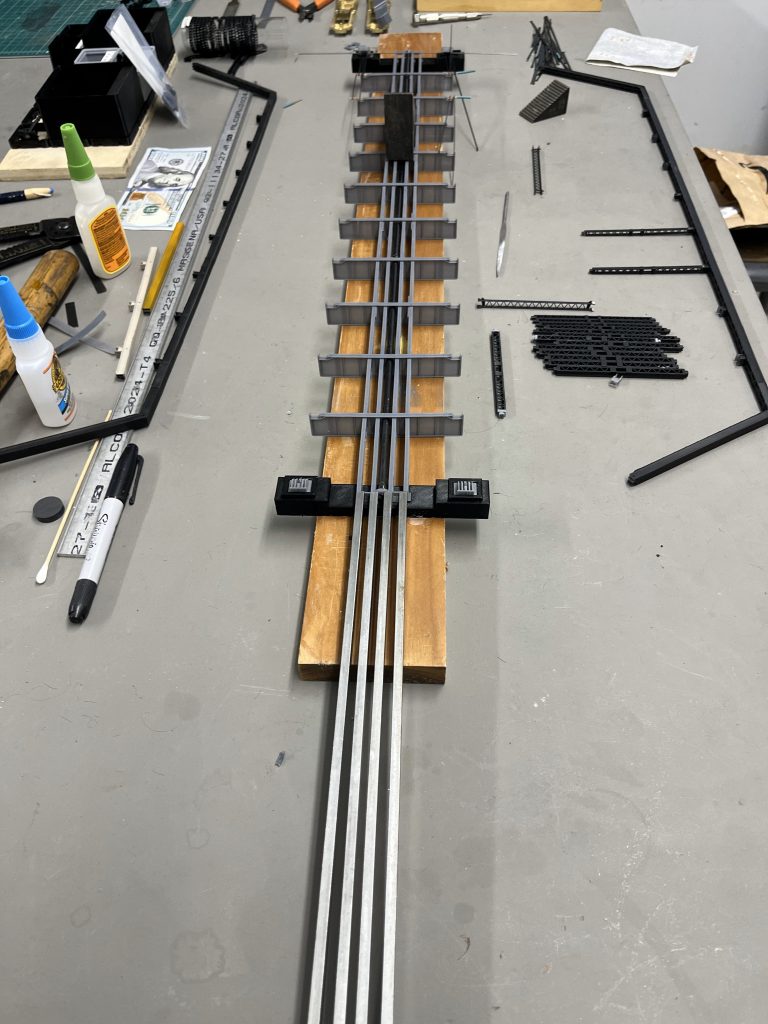
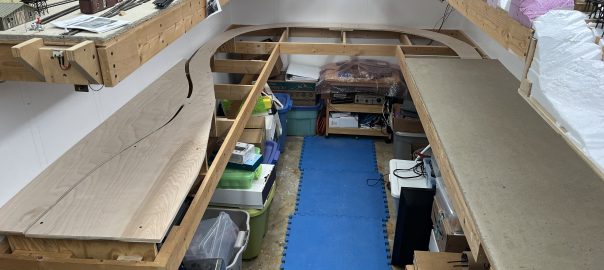
Over the last two weekends I managed to squeeze two big work sessions in and made some great progress. First up was nailing down the rough track plan based on lots of trial and error over the last year.
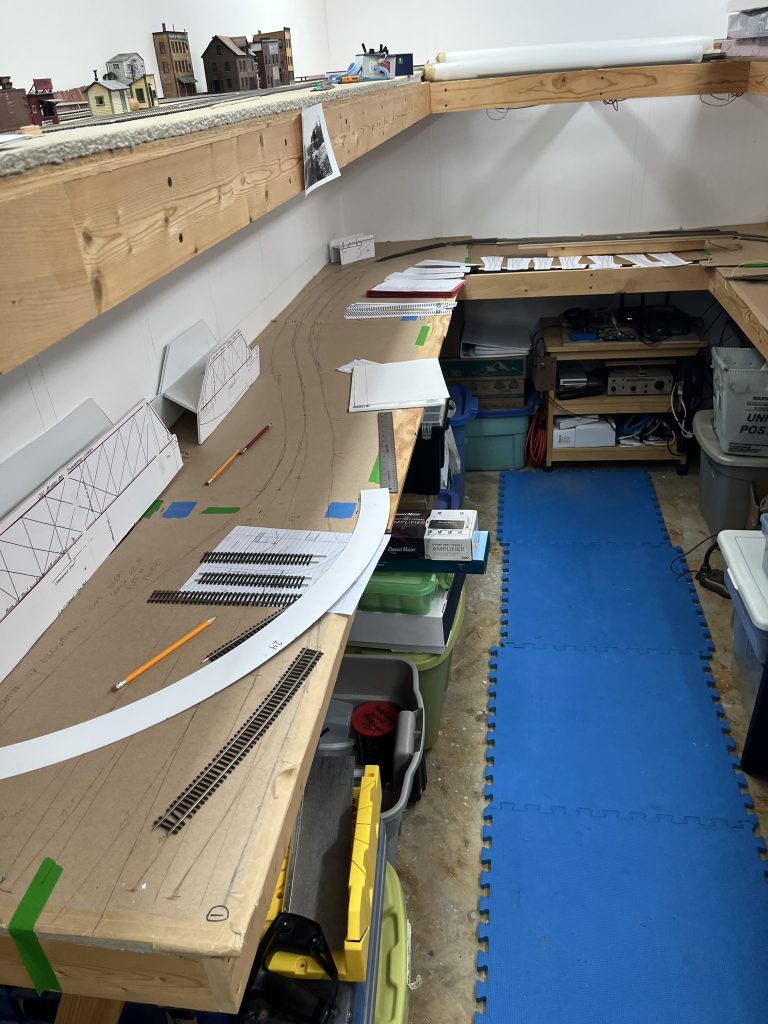
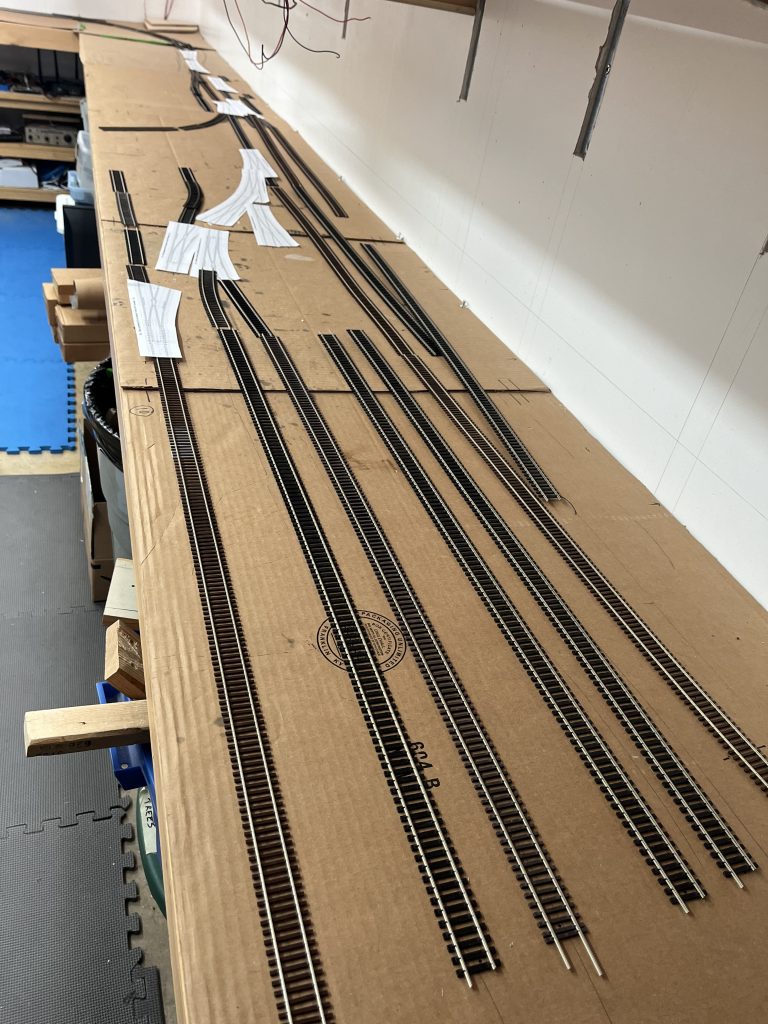
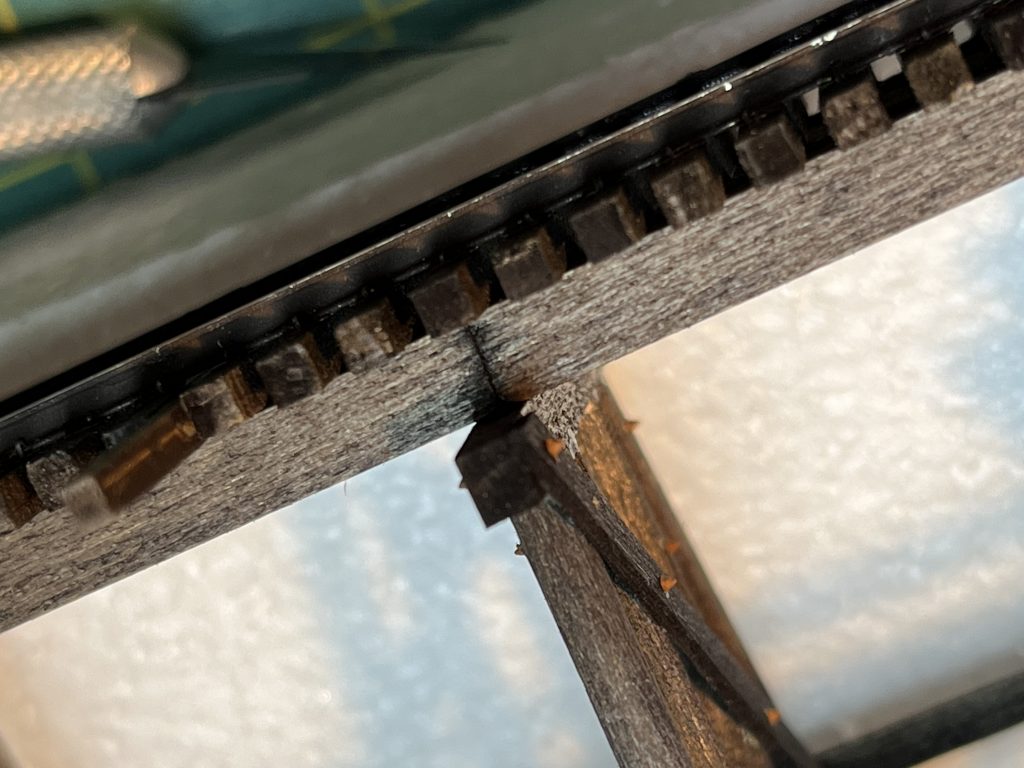
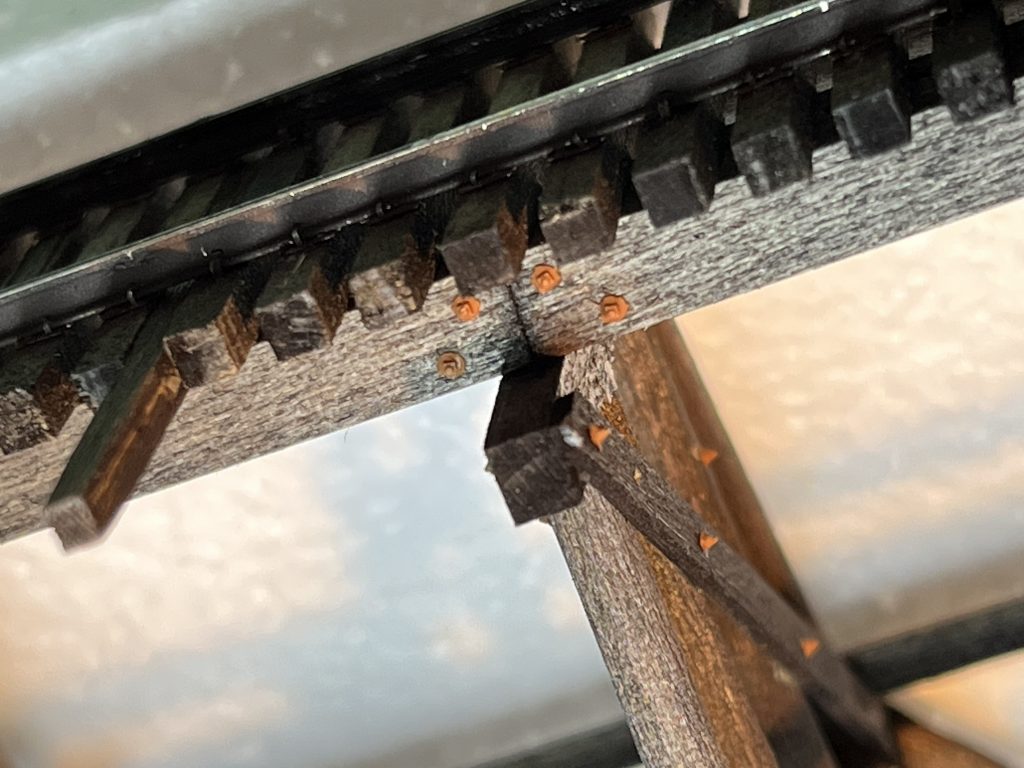
So, this weekend Kelly was able to swing by and we had a marathon construction session. After checking all of the templates and doing a lot of measuring, we took them up to the garage for some cutting.
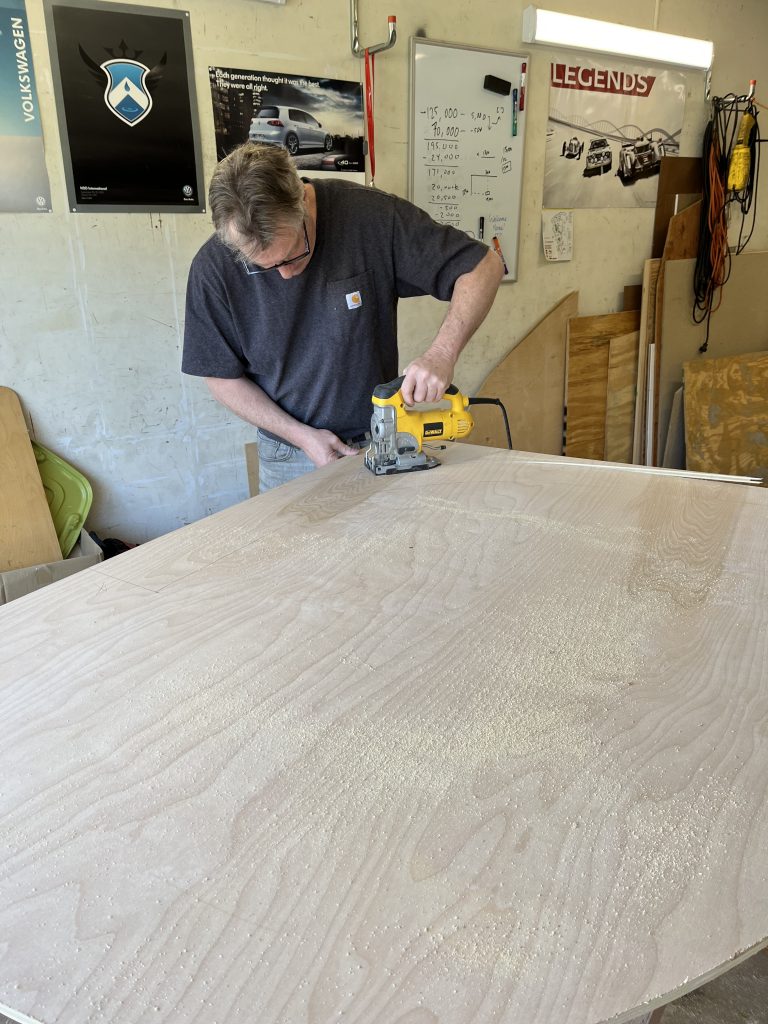
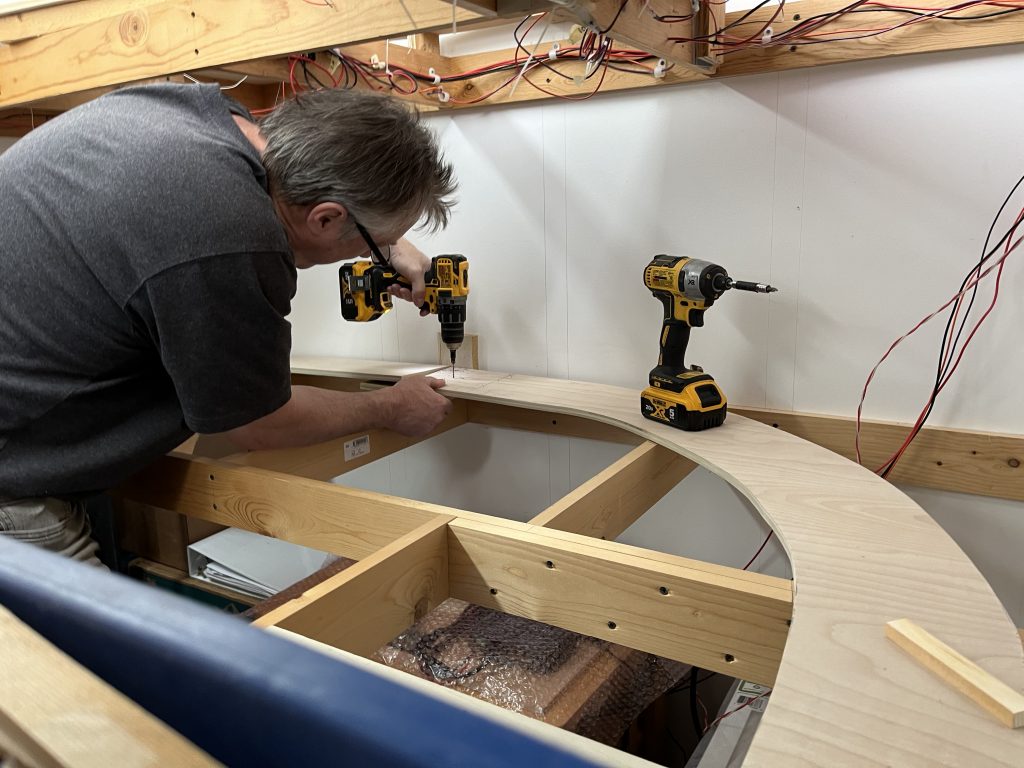
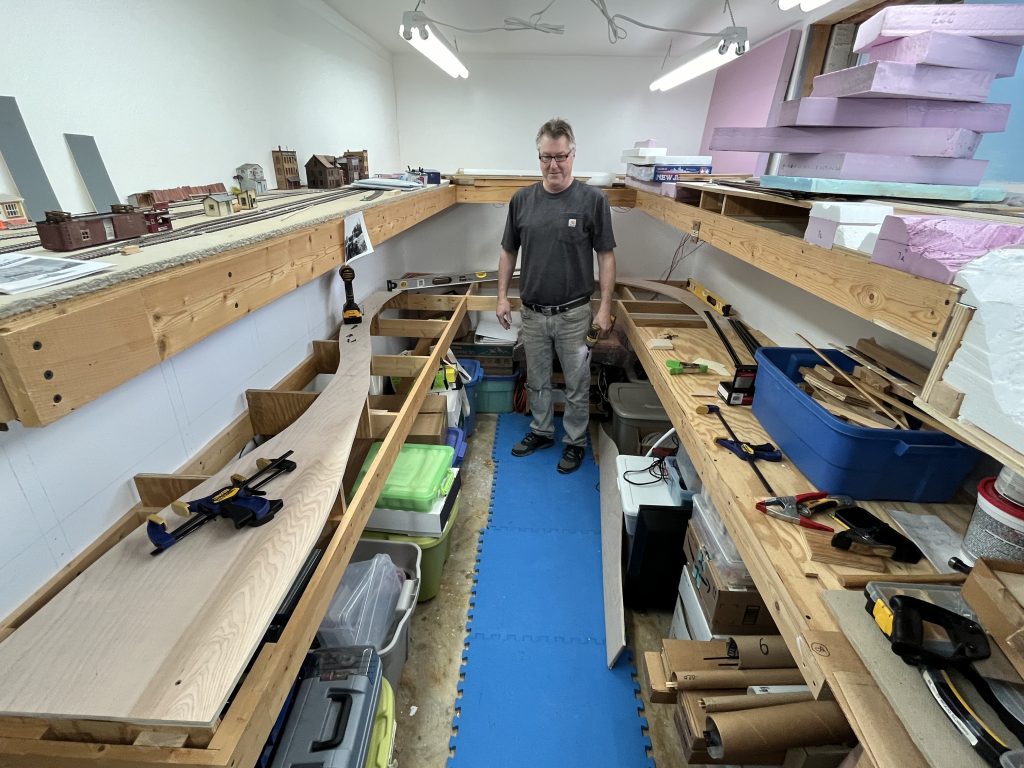
After cutting the sub roadbed and splicing it together, we measured and cut risers. We then spent a considerable amount of time figuring out the grades, as Dalecarlia is a few inches higher than Georgetown on the layout. After a LOT of fiddling and experimenting, we got it figured out and permanently installed the risers. Last was cutting and installing Homasote over all of the Georgetown waterfront area (the plywood-covered sections.) It turns out I was shot one 28″ square piece, but thankfully Kelly has some extra at his house that he is going to give to me. Sweet! Here are a couple wrap up photos of what the layout currently looks like:
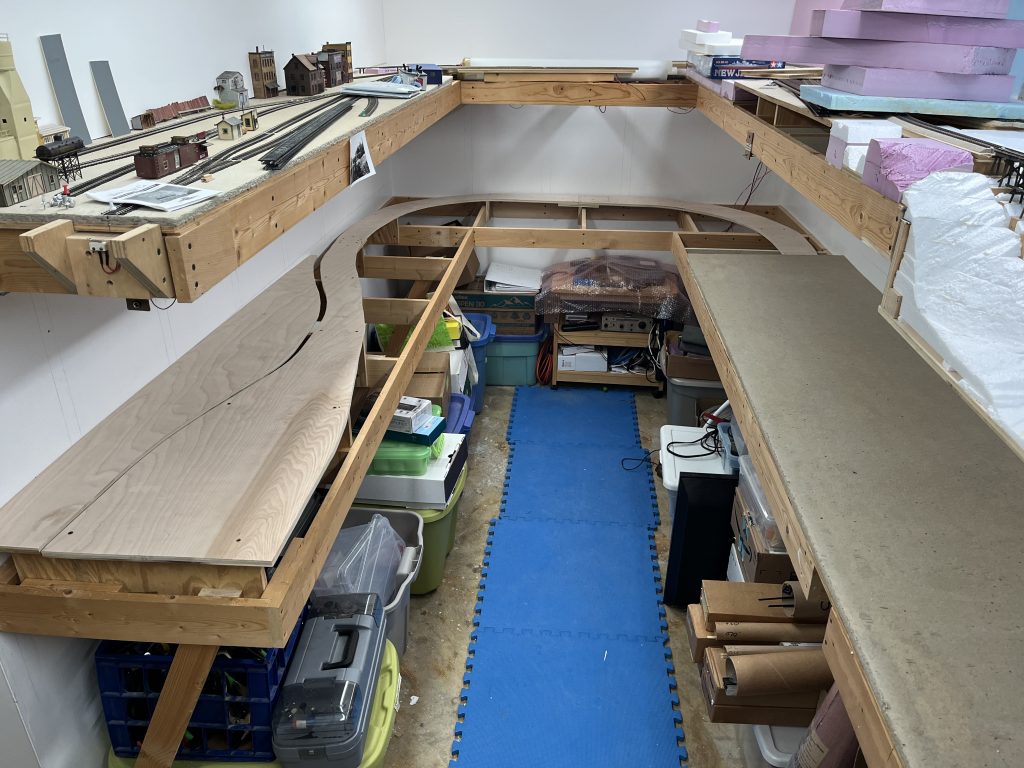
Next steps are to do a bit of finishing on the Homasote and fasten it to the plywood base. I will also finish designing and building the bridge from the helix into the layout room, which will be a basic sheet of plywood and Masonite. I then need to empty out the room so I can get under the layout to cut holes and run bus cables. I need to do some work on the walls and figure out the backdrop corners as well as a few other things. A huge thanks to Kelly for pushing me today to get all of this done! The most progress I’ve made in a very long time.
Onward.
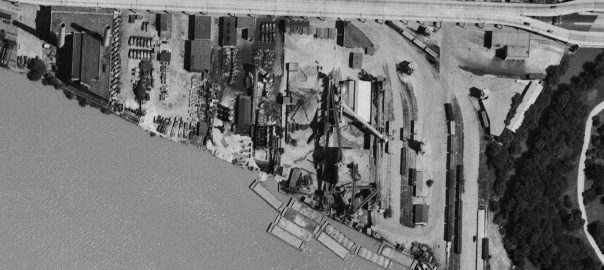
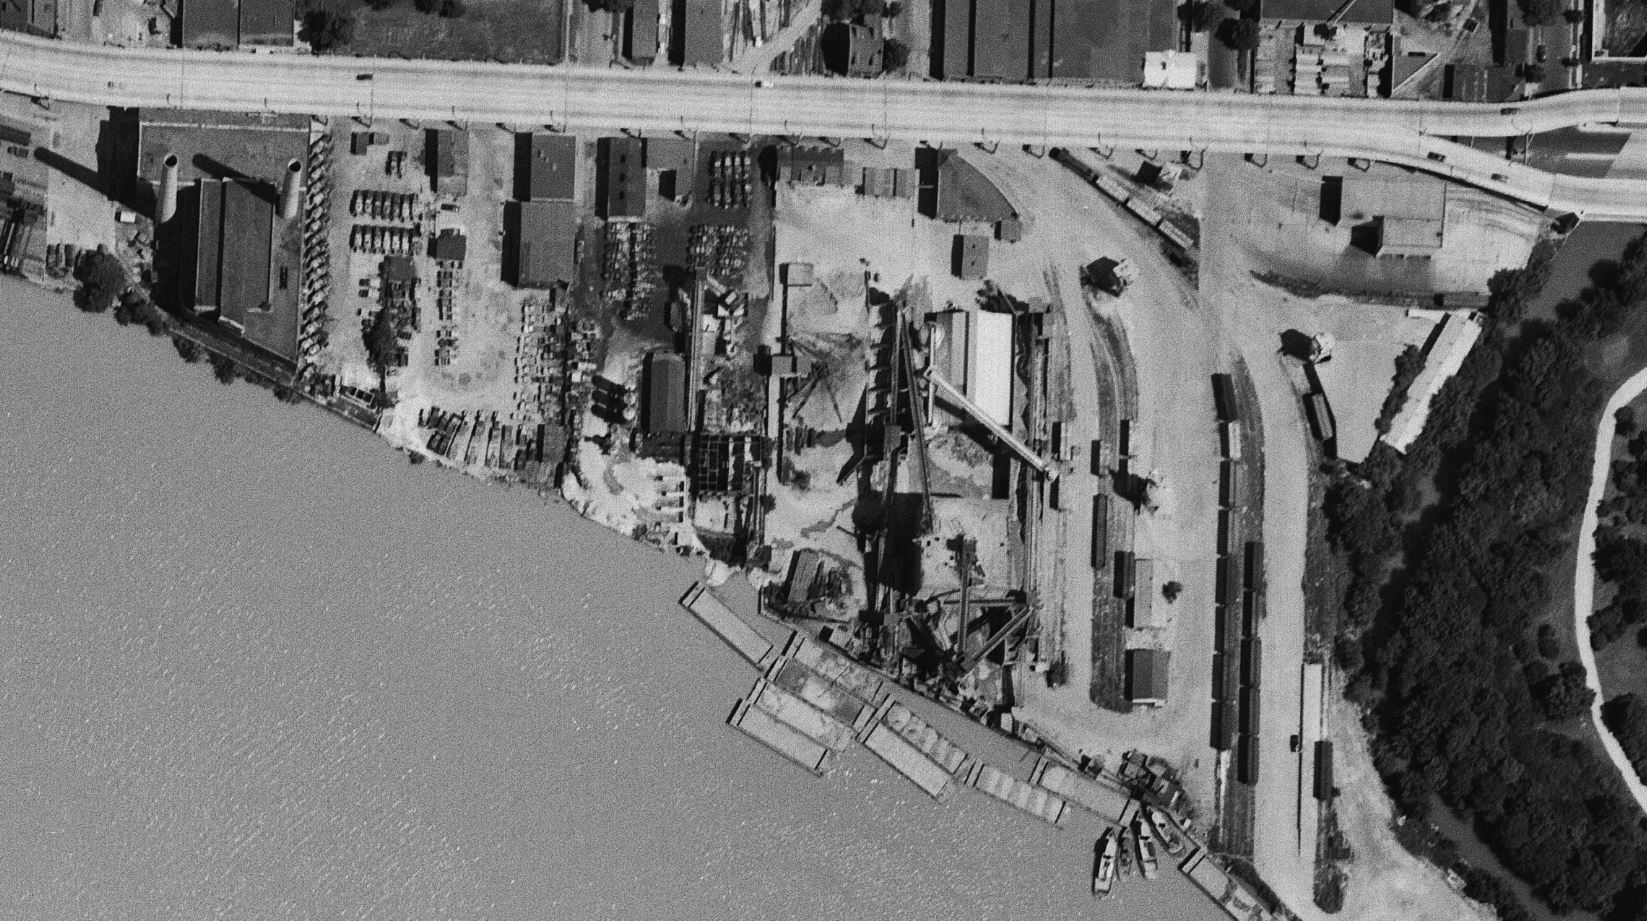
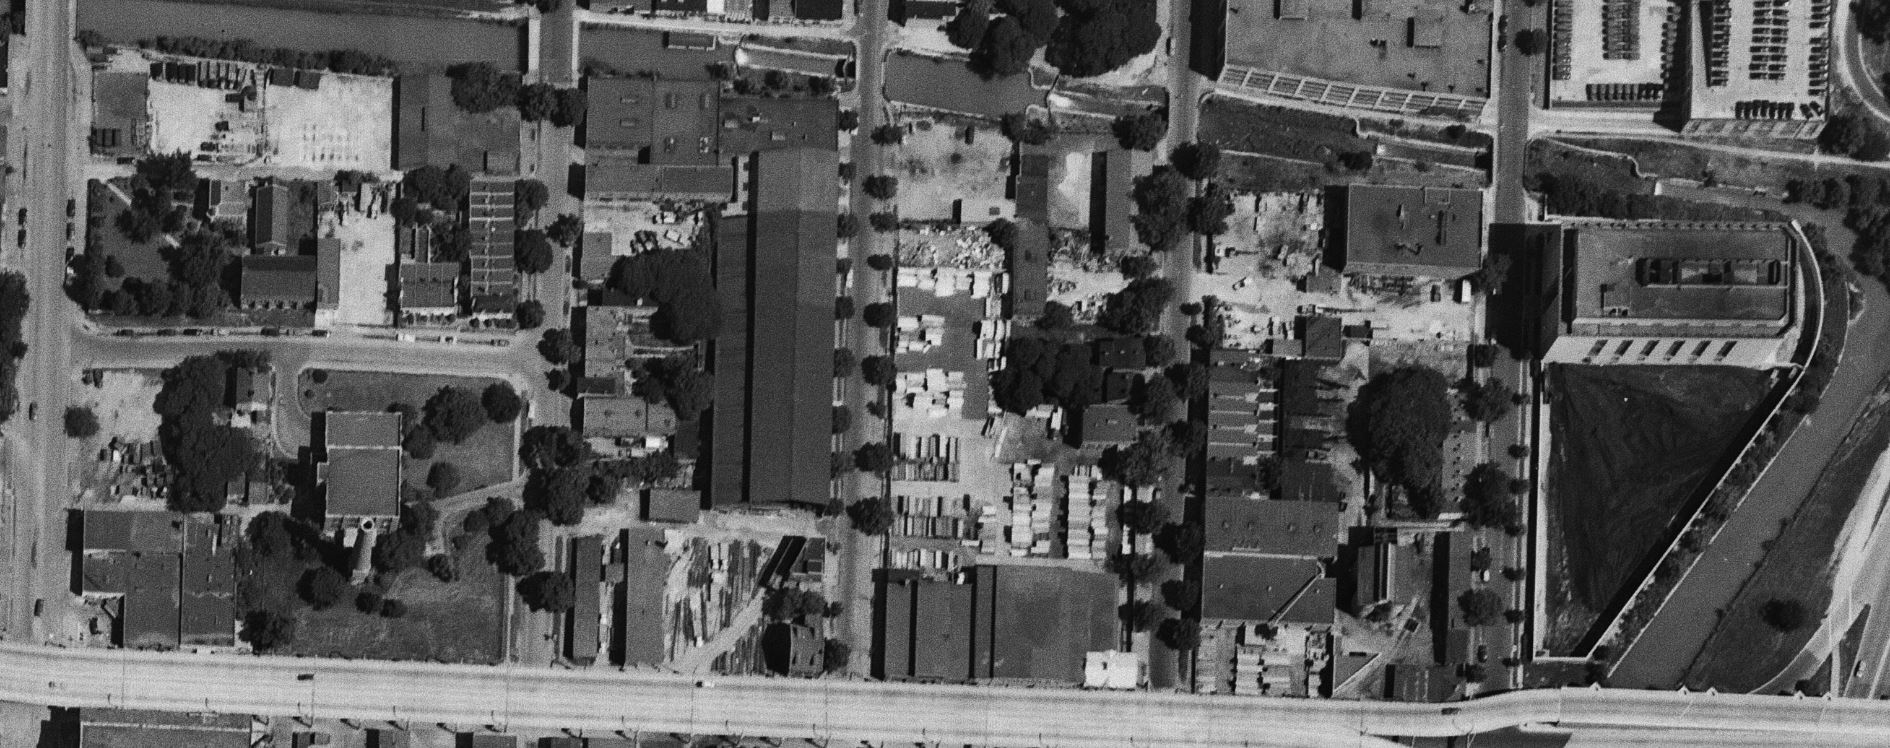
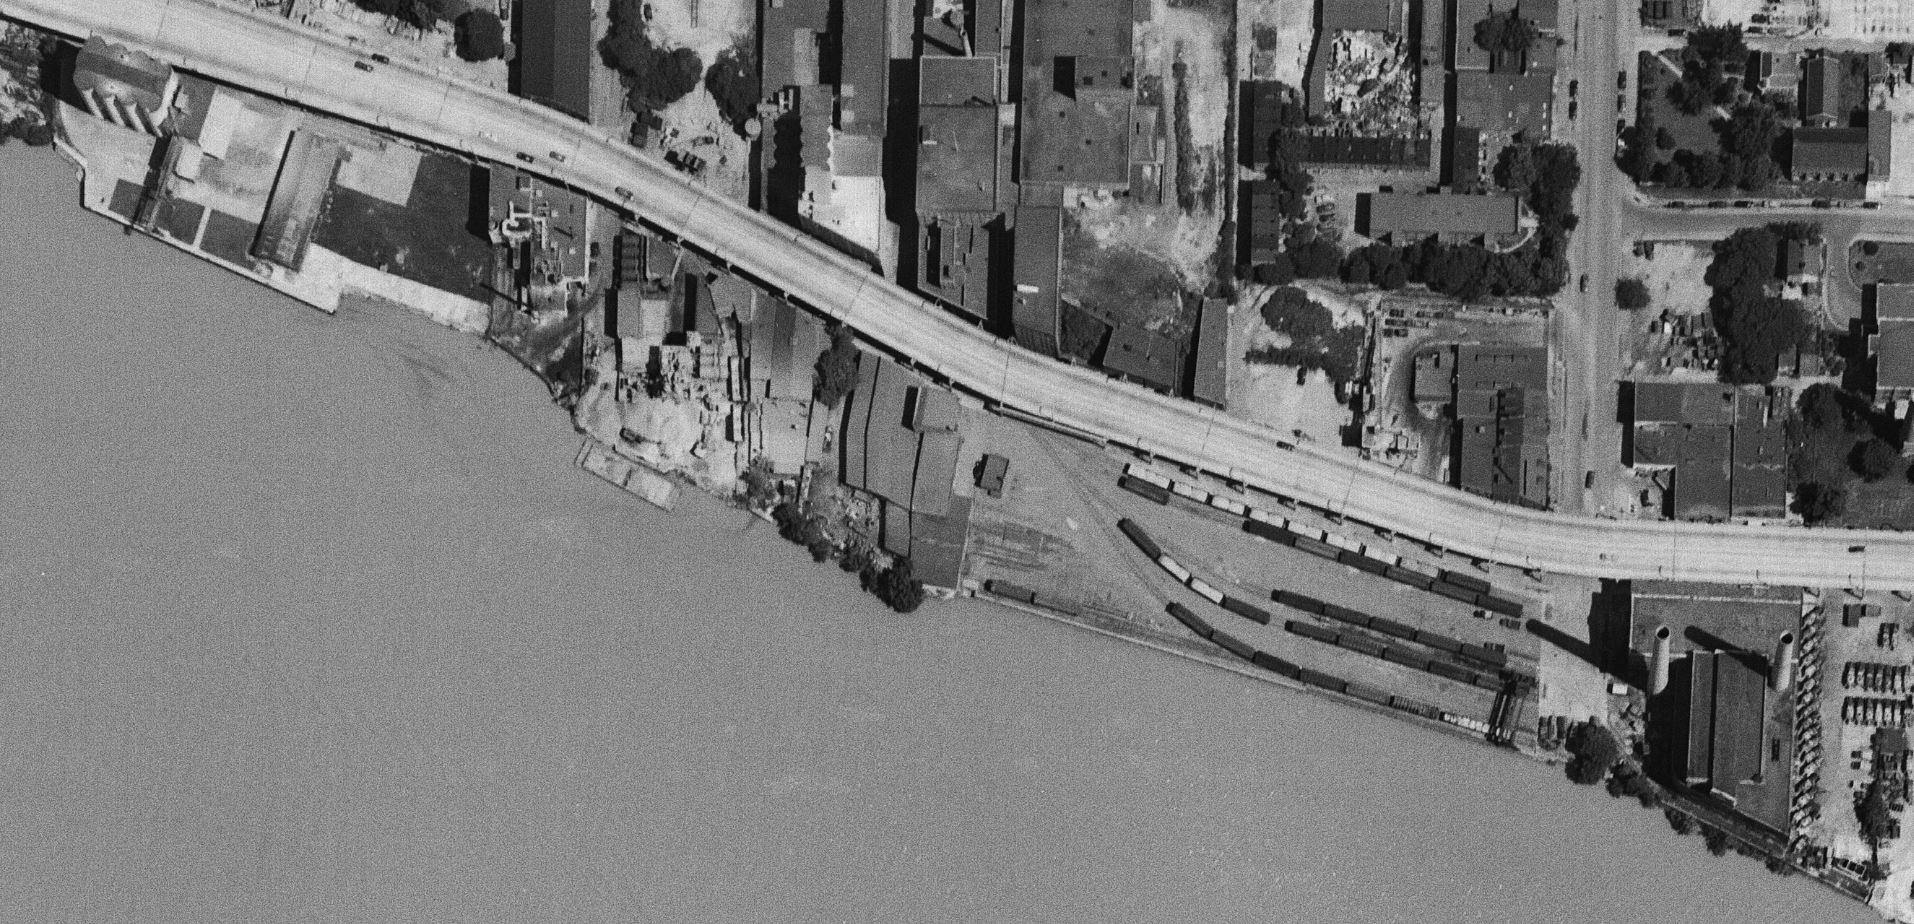
1951 Georgetown Aerial Images
While going through some old notes today I found a link to the USGS EarthExplorer website with the note “will want to create a login.” This puzzled me, so I went ahead and explored the site a bit. After creating a login (a somewhat involved process) I was able to access some pretty wonderful imagery. There are aerials going back to 1949 and some of them are full of tremendous detail that I enjoyed exploring. First up is a crop of the downtown Georgetown area:
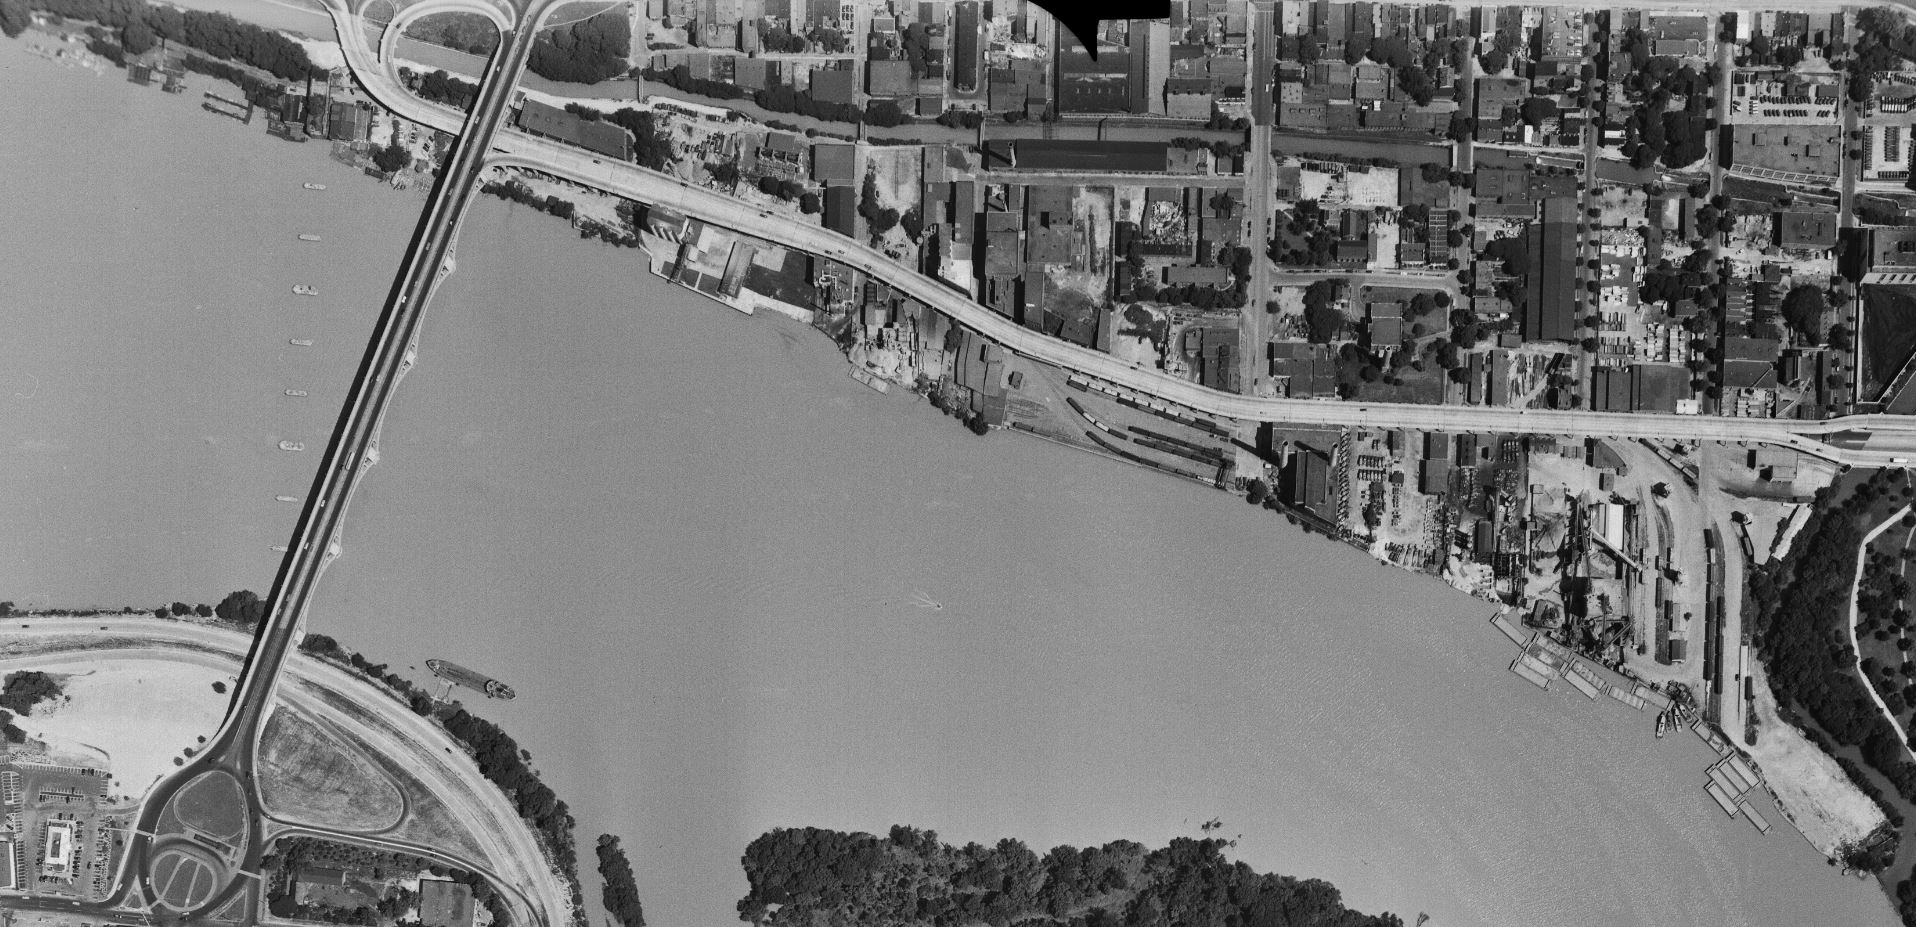
Let’s drill down a bit.
Starting on the east end of town, we see a relatively busy yard full of boxcars, covered hoppers and a gondola. The photo was taken in early July so it’s not surprising that there aren’t too many coal cars in the yard. The switching loco is visible at the top right next to the Whitehurst. Note the sharp shadows being cast. A fantastic view of the Smoot Sand & Gravel operation along with the cement vendors next door. It’s pretty incredible how many trucks they had! The idle power plant stands silent.
On the north side of Whitehurst we get a closer look at some industries. To the right is the West Heating Plant and its large coal yard. Next is the diminutive King & Sons Coal, still in service, but not long for the world. Next door is the massive sprawling W. T. Galliher Lumber complex with its large storage yard. They were a major customer of the Branch up to near its end. Further left is the massive Rosslyn Steel shed, with a freight car on the siding leading into the plant. Note that about four years prior the massive cement silo structure which sat along that curved track had been removed. Next is the DC Incinerator and then Wisconsin Ave.
Now we get a nice look at the “new yard” which is really packed! From my eyes, it looks like there’s ten carloads of gravel (or other aggregate) sitting in the yard along with many boxcars and at least one gondola. On the left side of the yard are the two old MoW cars which housed equipment. The Maloney Concrete batch plant was across the street. Several other industries are visible as we move further to the west.
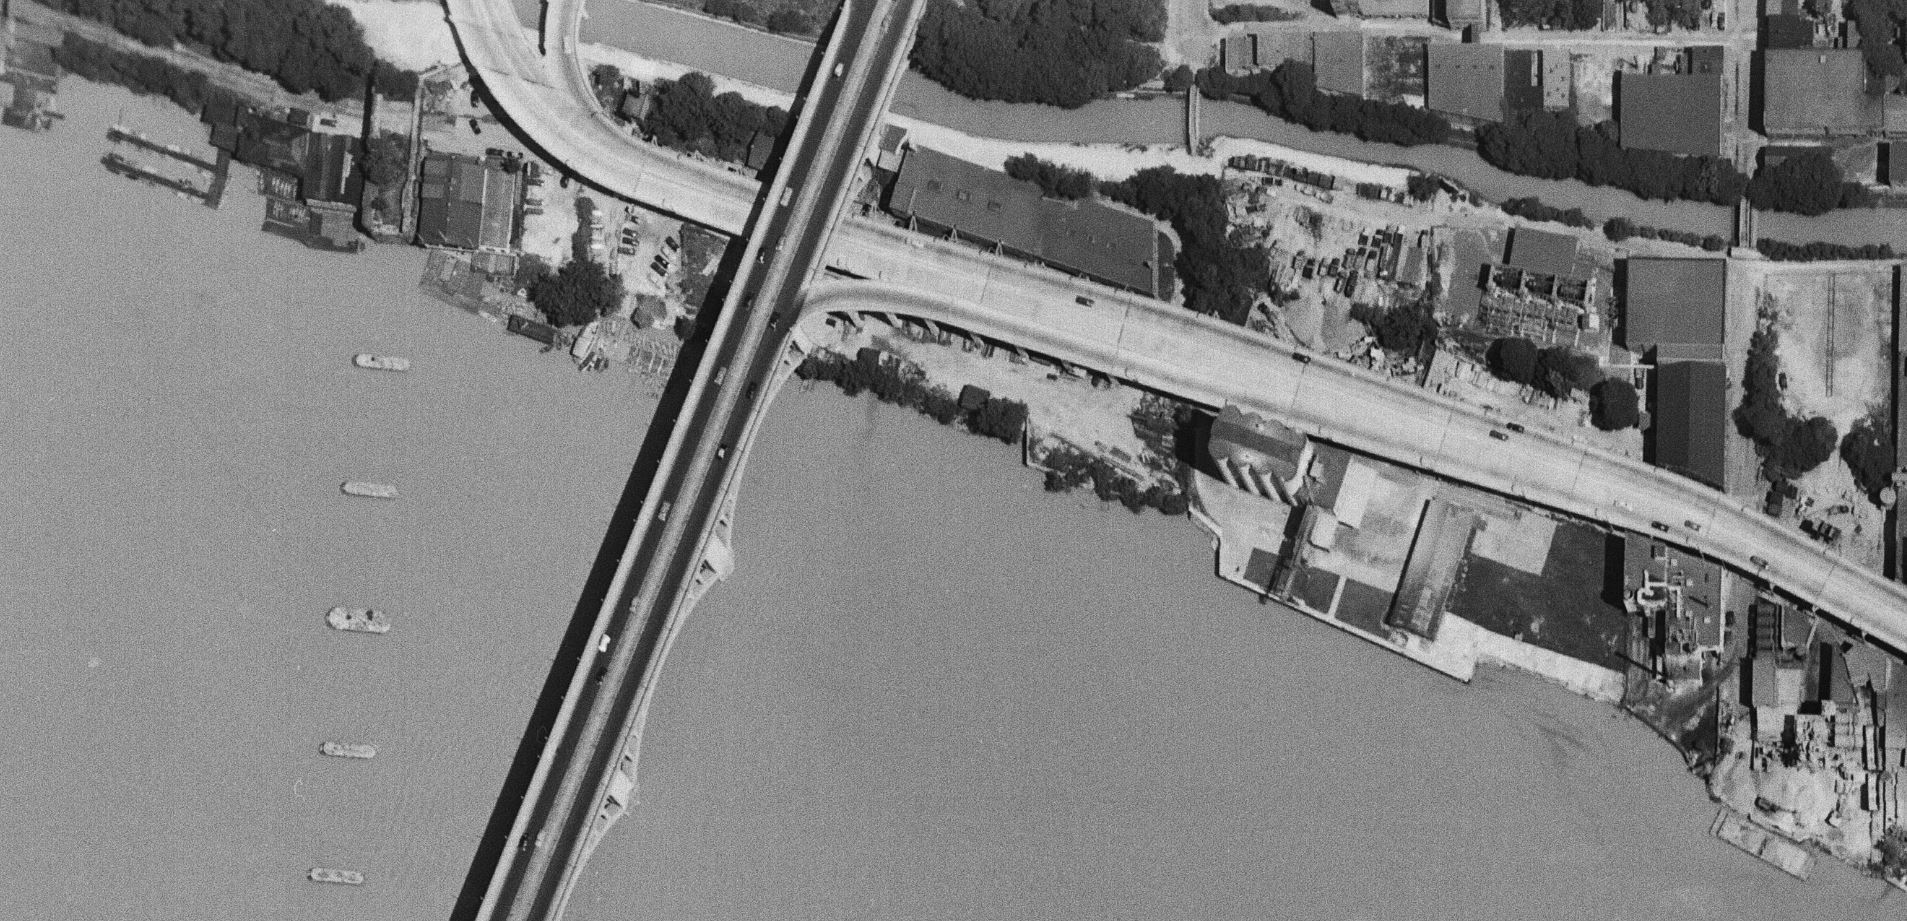
Finally, here’s the west end of the industrial area of town. Some great views of Lone Star cement, Key Bridge and all the layout of industries in this area. For sure all of these images will be indispensable when planning the Georgetown area of my model RR because this is pretty much exactly how I’d like to represent it! Very exciting to find this image set.
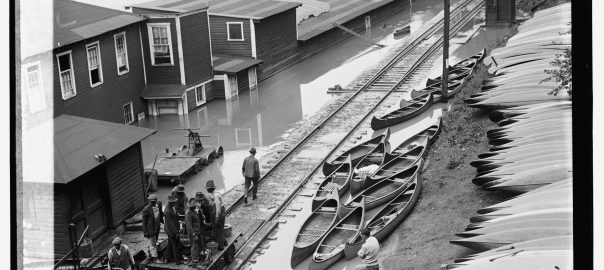
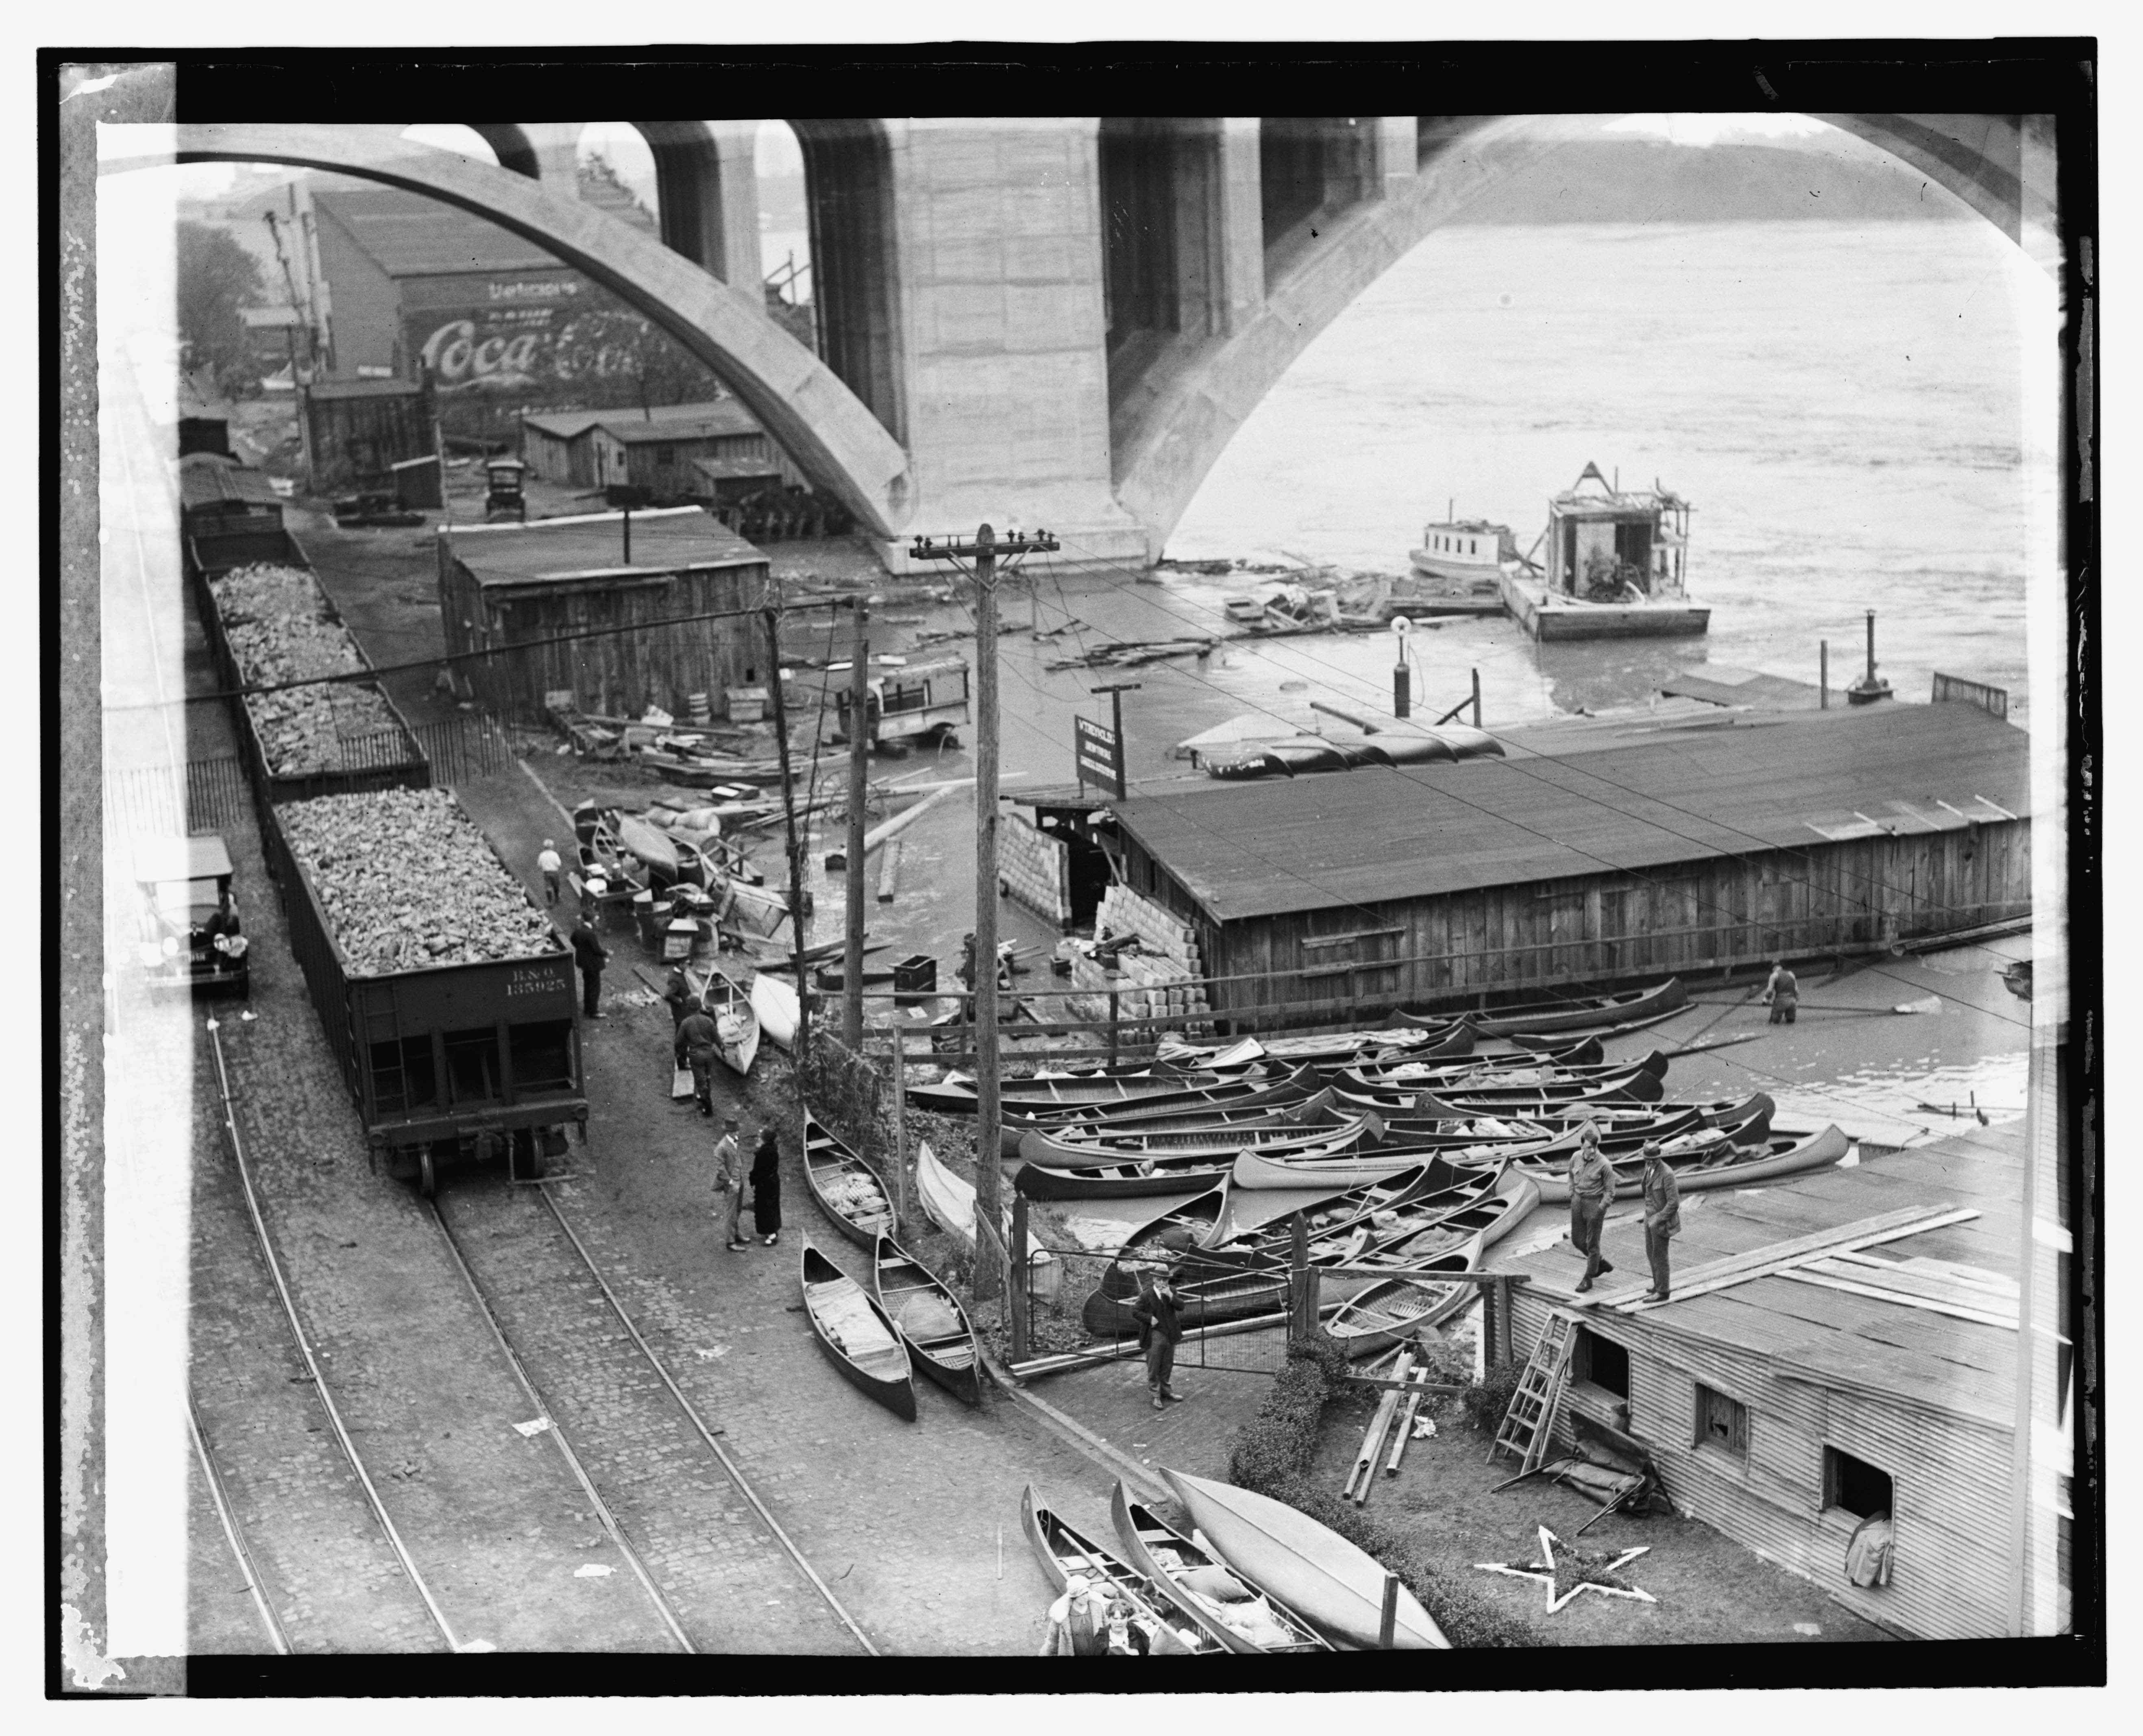
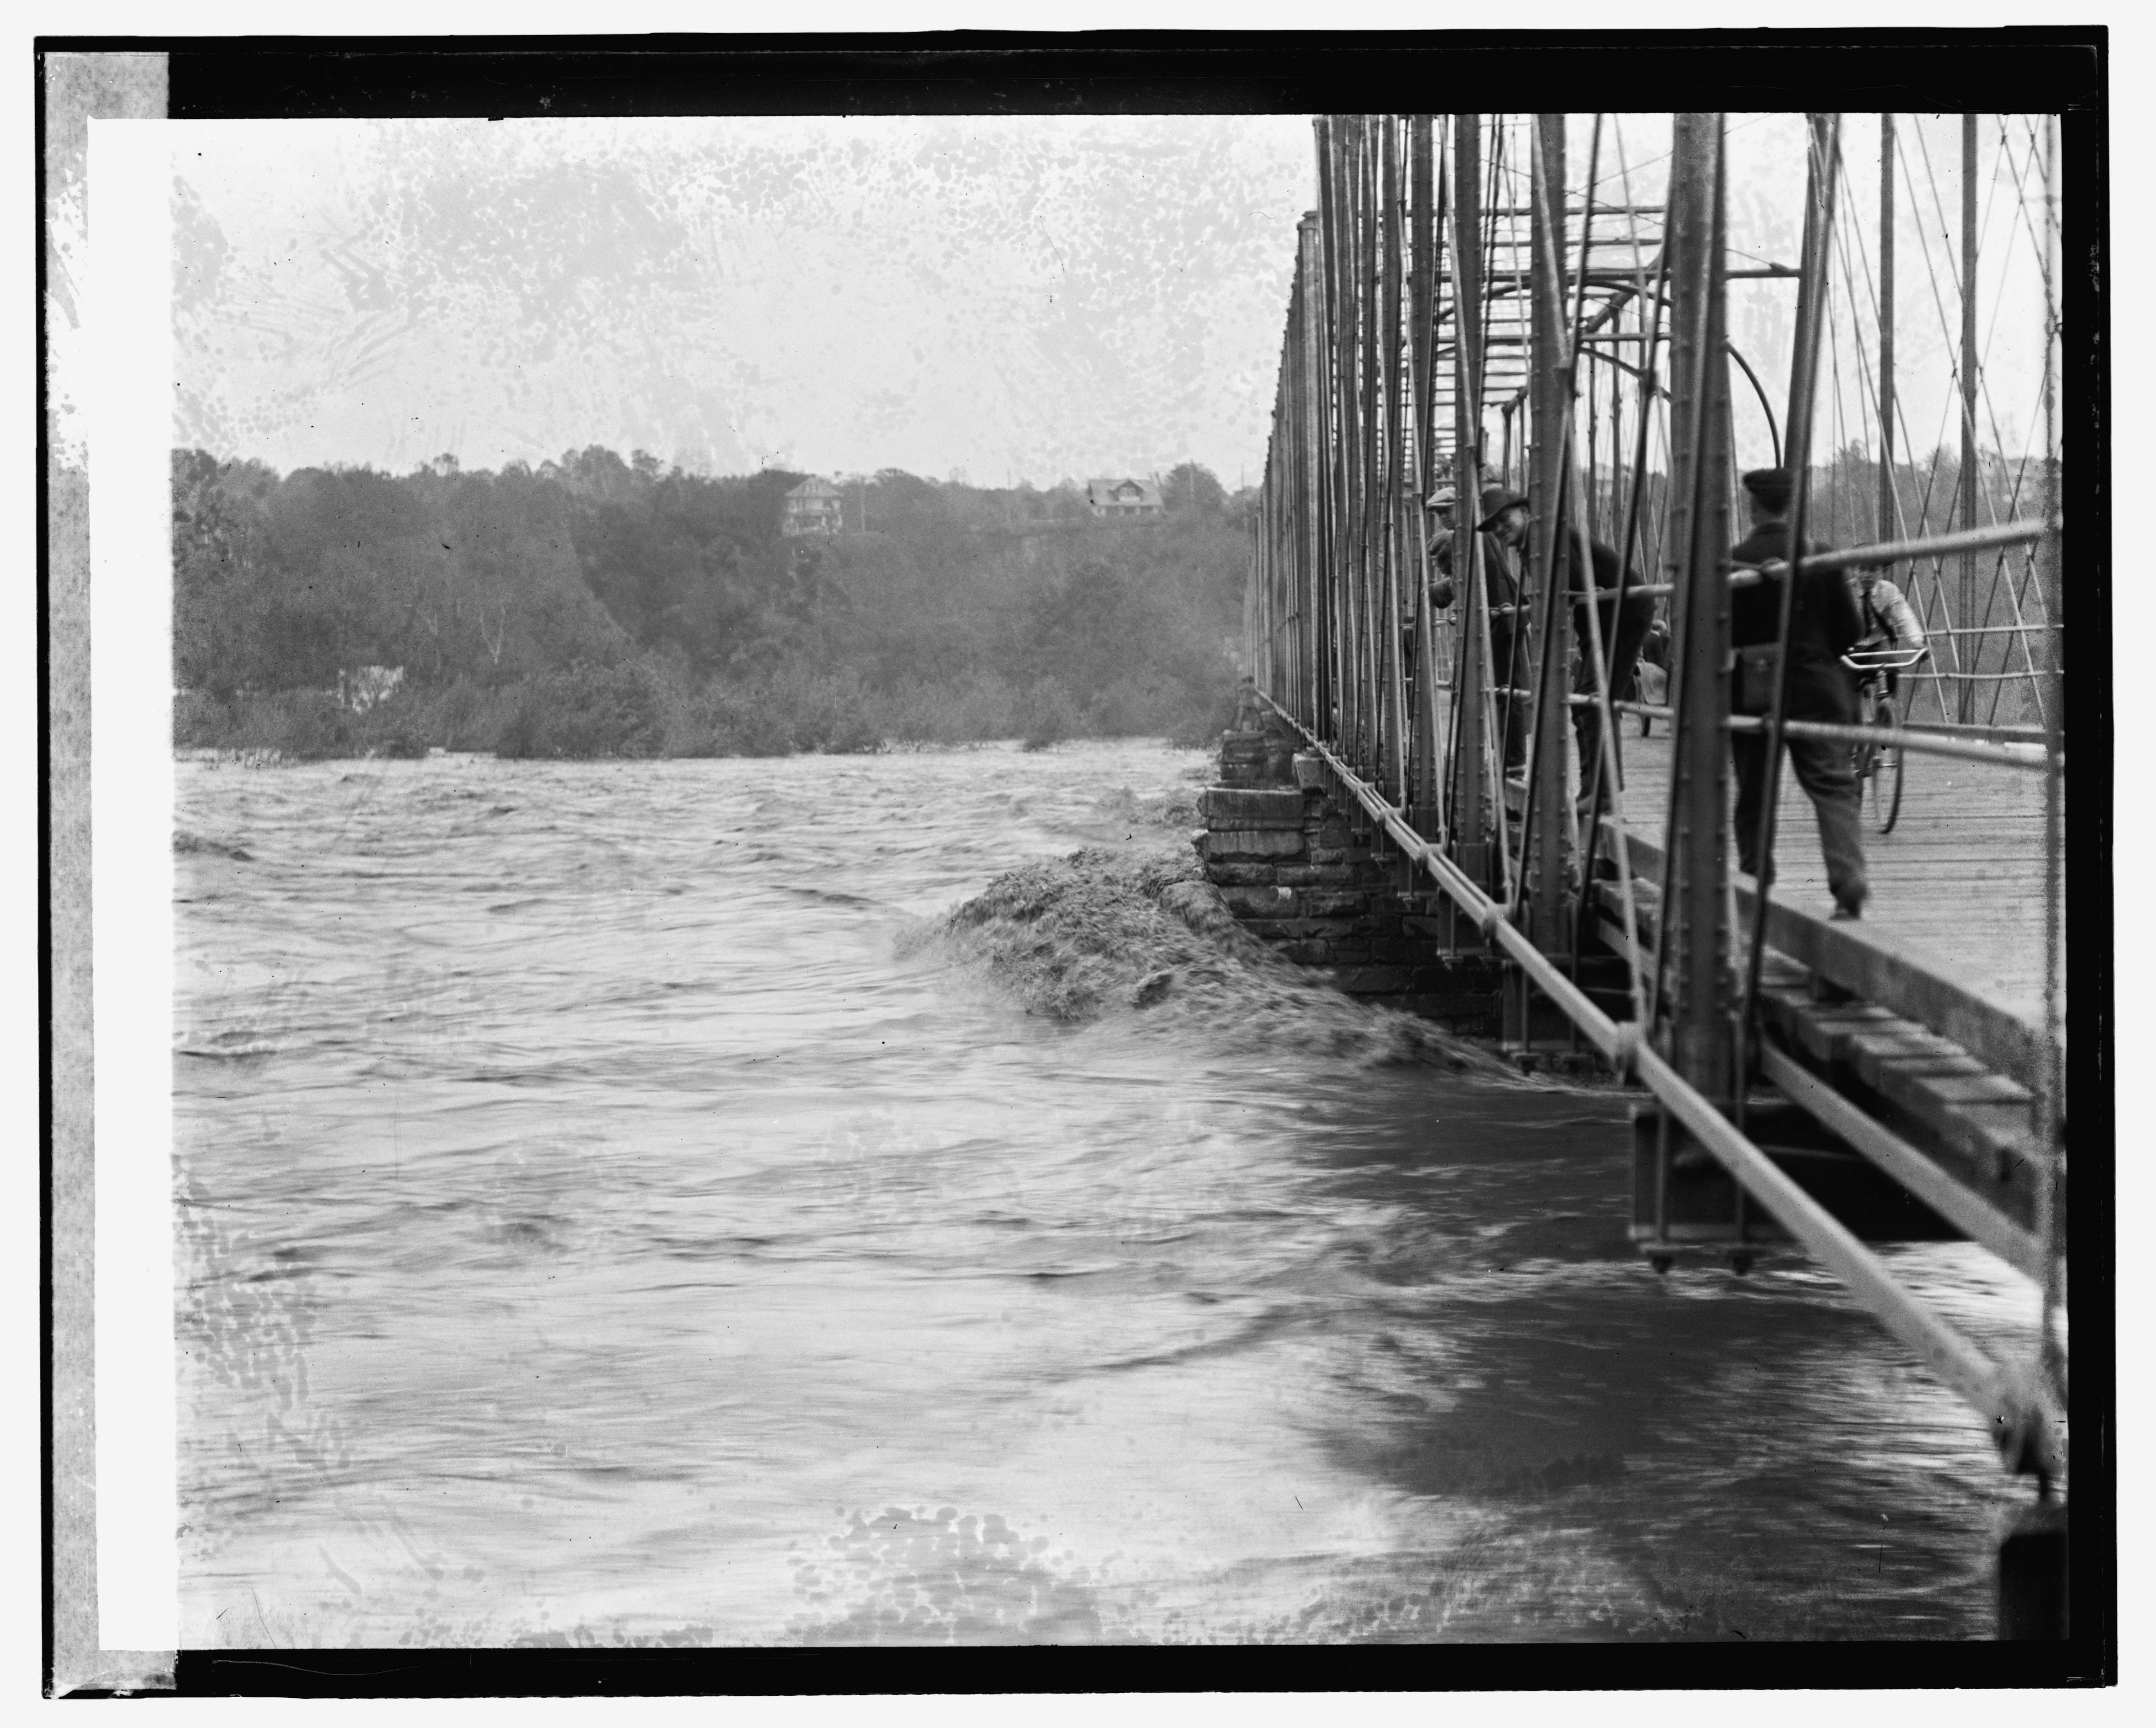
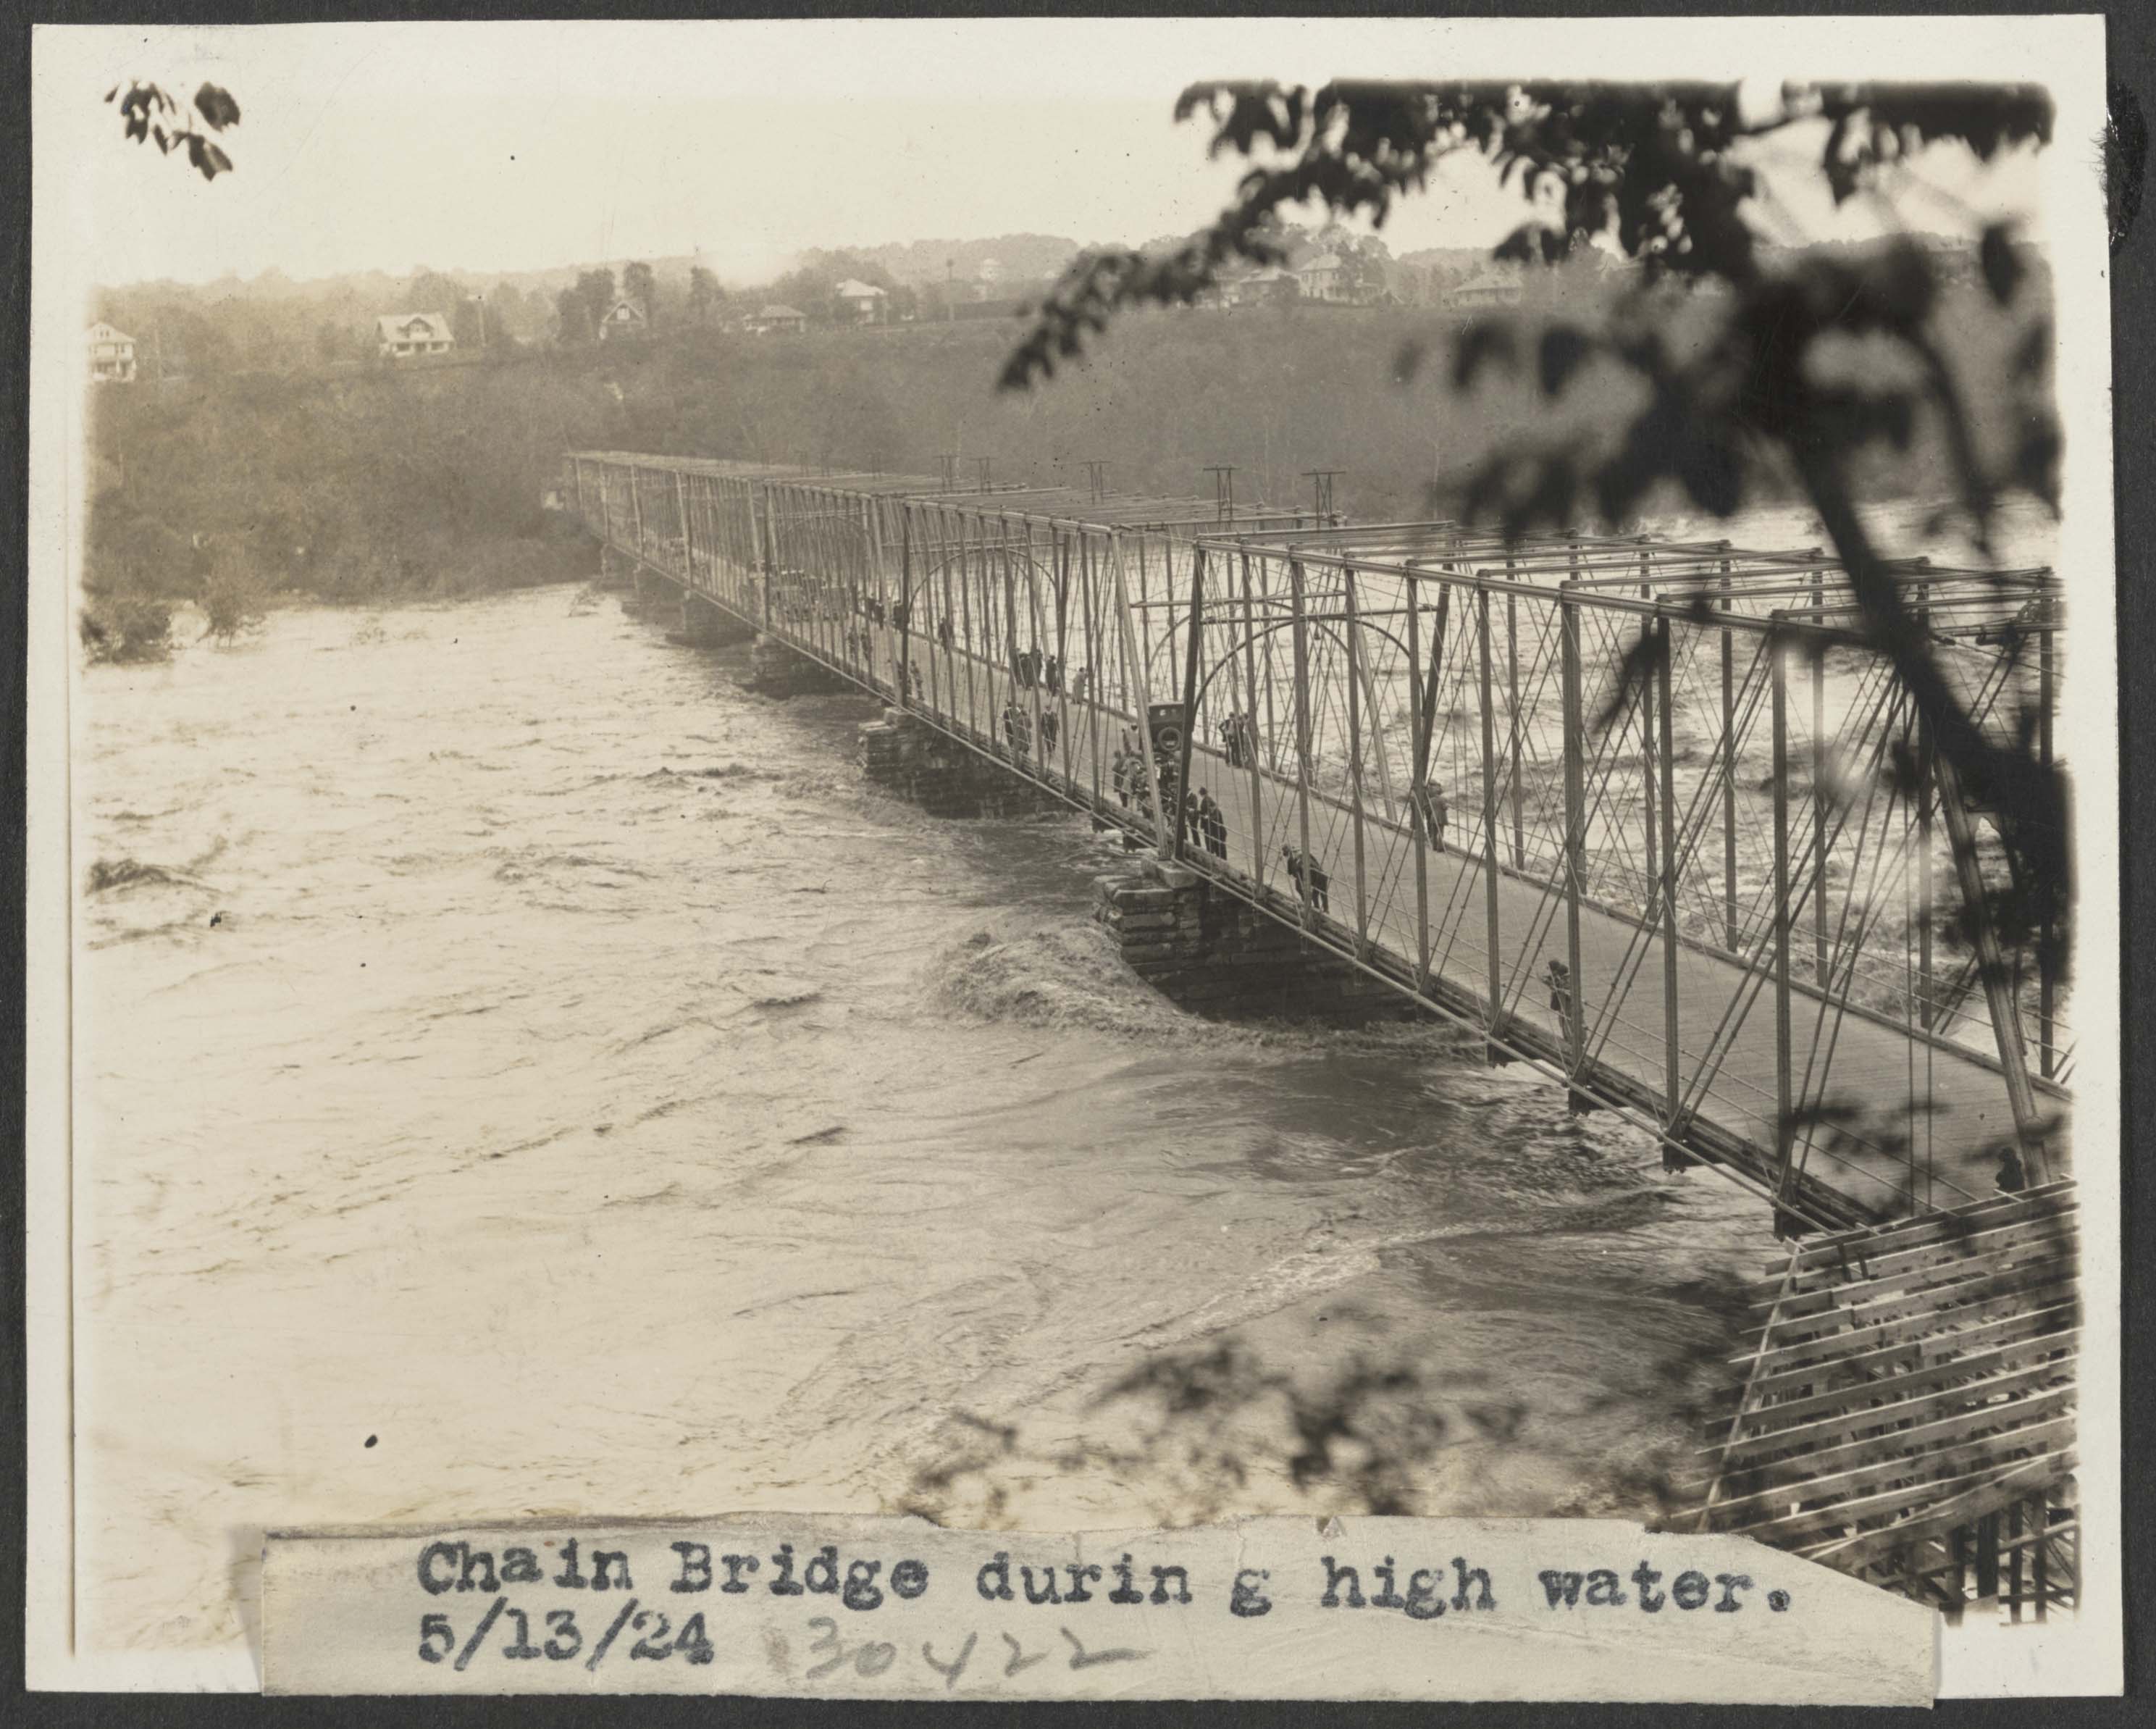
May 13, 1924: Flooding in Georgetown
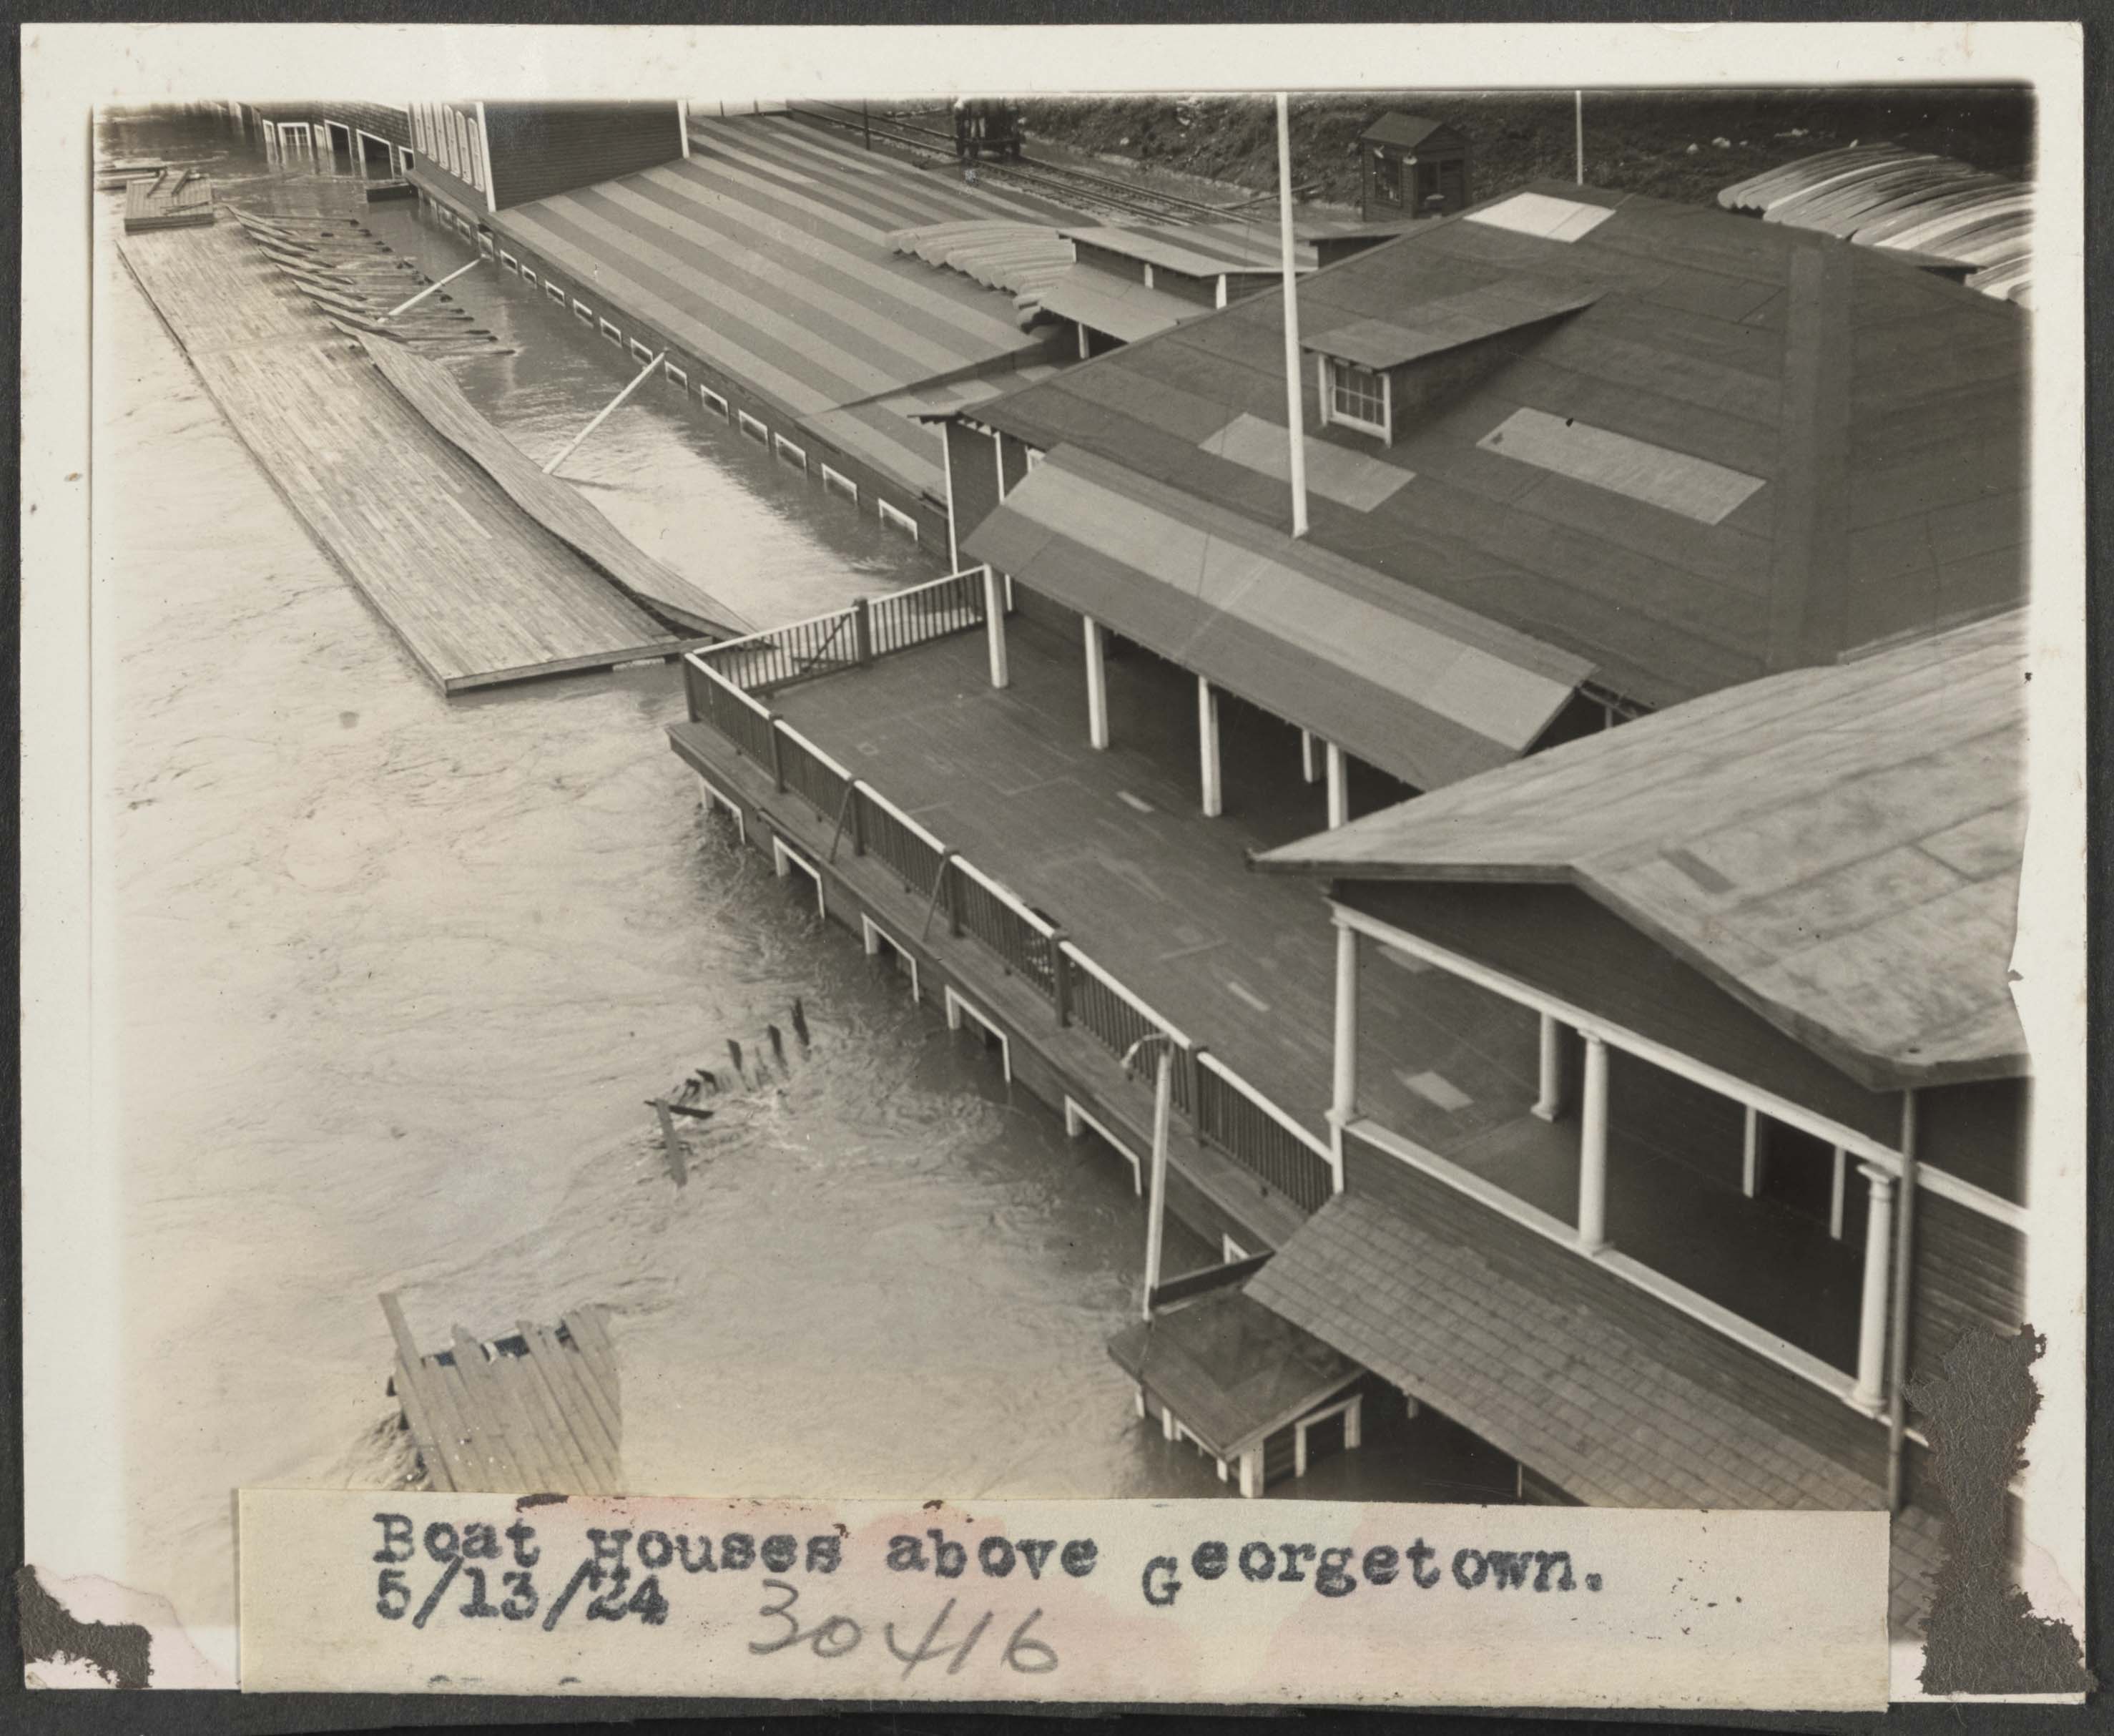
Stumbled across this photo on eBay earlier this week (above) and it reminded me that I’ve been sitting on a handful of really fascinating images I found on the Library of Congress site capturing the flood of May 13, 1924. Like so many things on eBay it’s far from rare or original, but rather just an overpriced print of a Library of Congress file that you can snag at high-res via the website. Pro tip – before you purchase that print, search the LoC thoroughly to possibly save yourself some dough.
The subject matter is interesting because it shows not only the scale house in Georgetown, but also a hand cart full of railroad employees, no doubt headed out to inspect the line as the waters recede. Note the jacks and other tools they have on the cart. They would have been met with some troubling finds. There are many photos on the LoC – here is a selection of relevant ones I found interesting. In the following image I believe it is the same crew; note the lighter color pants on the gentleman standing at the back left of the hand cart, visible in both photos. Note the detail of the scale and scale house as well as all the equipment around the section shed.
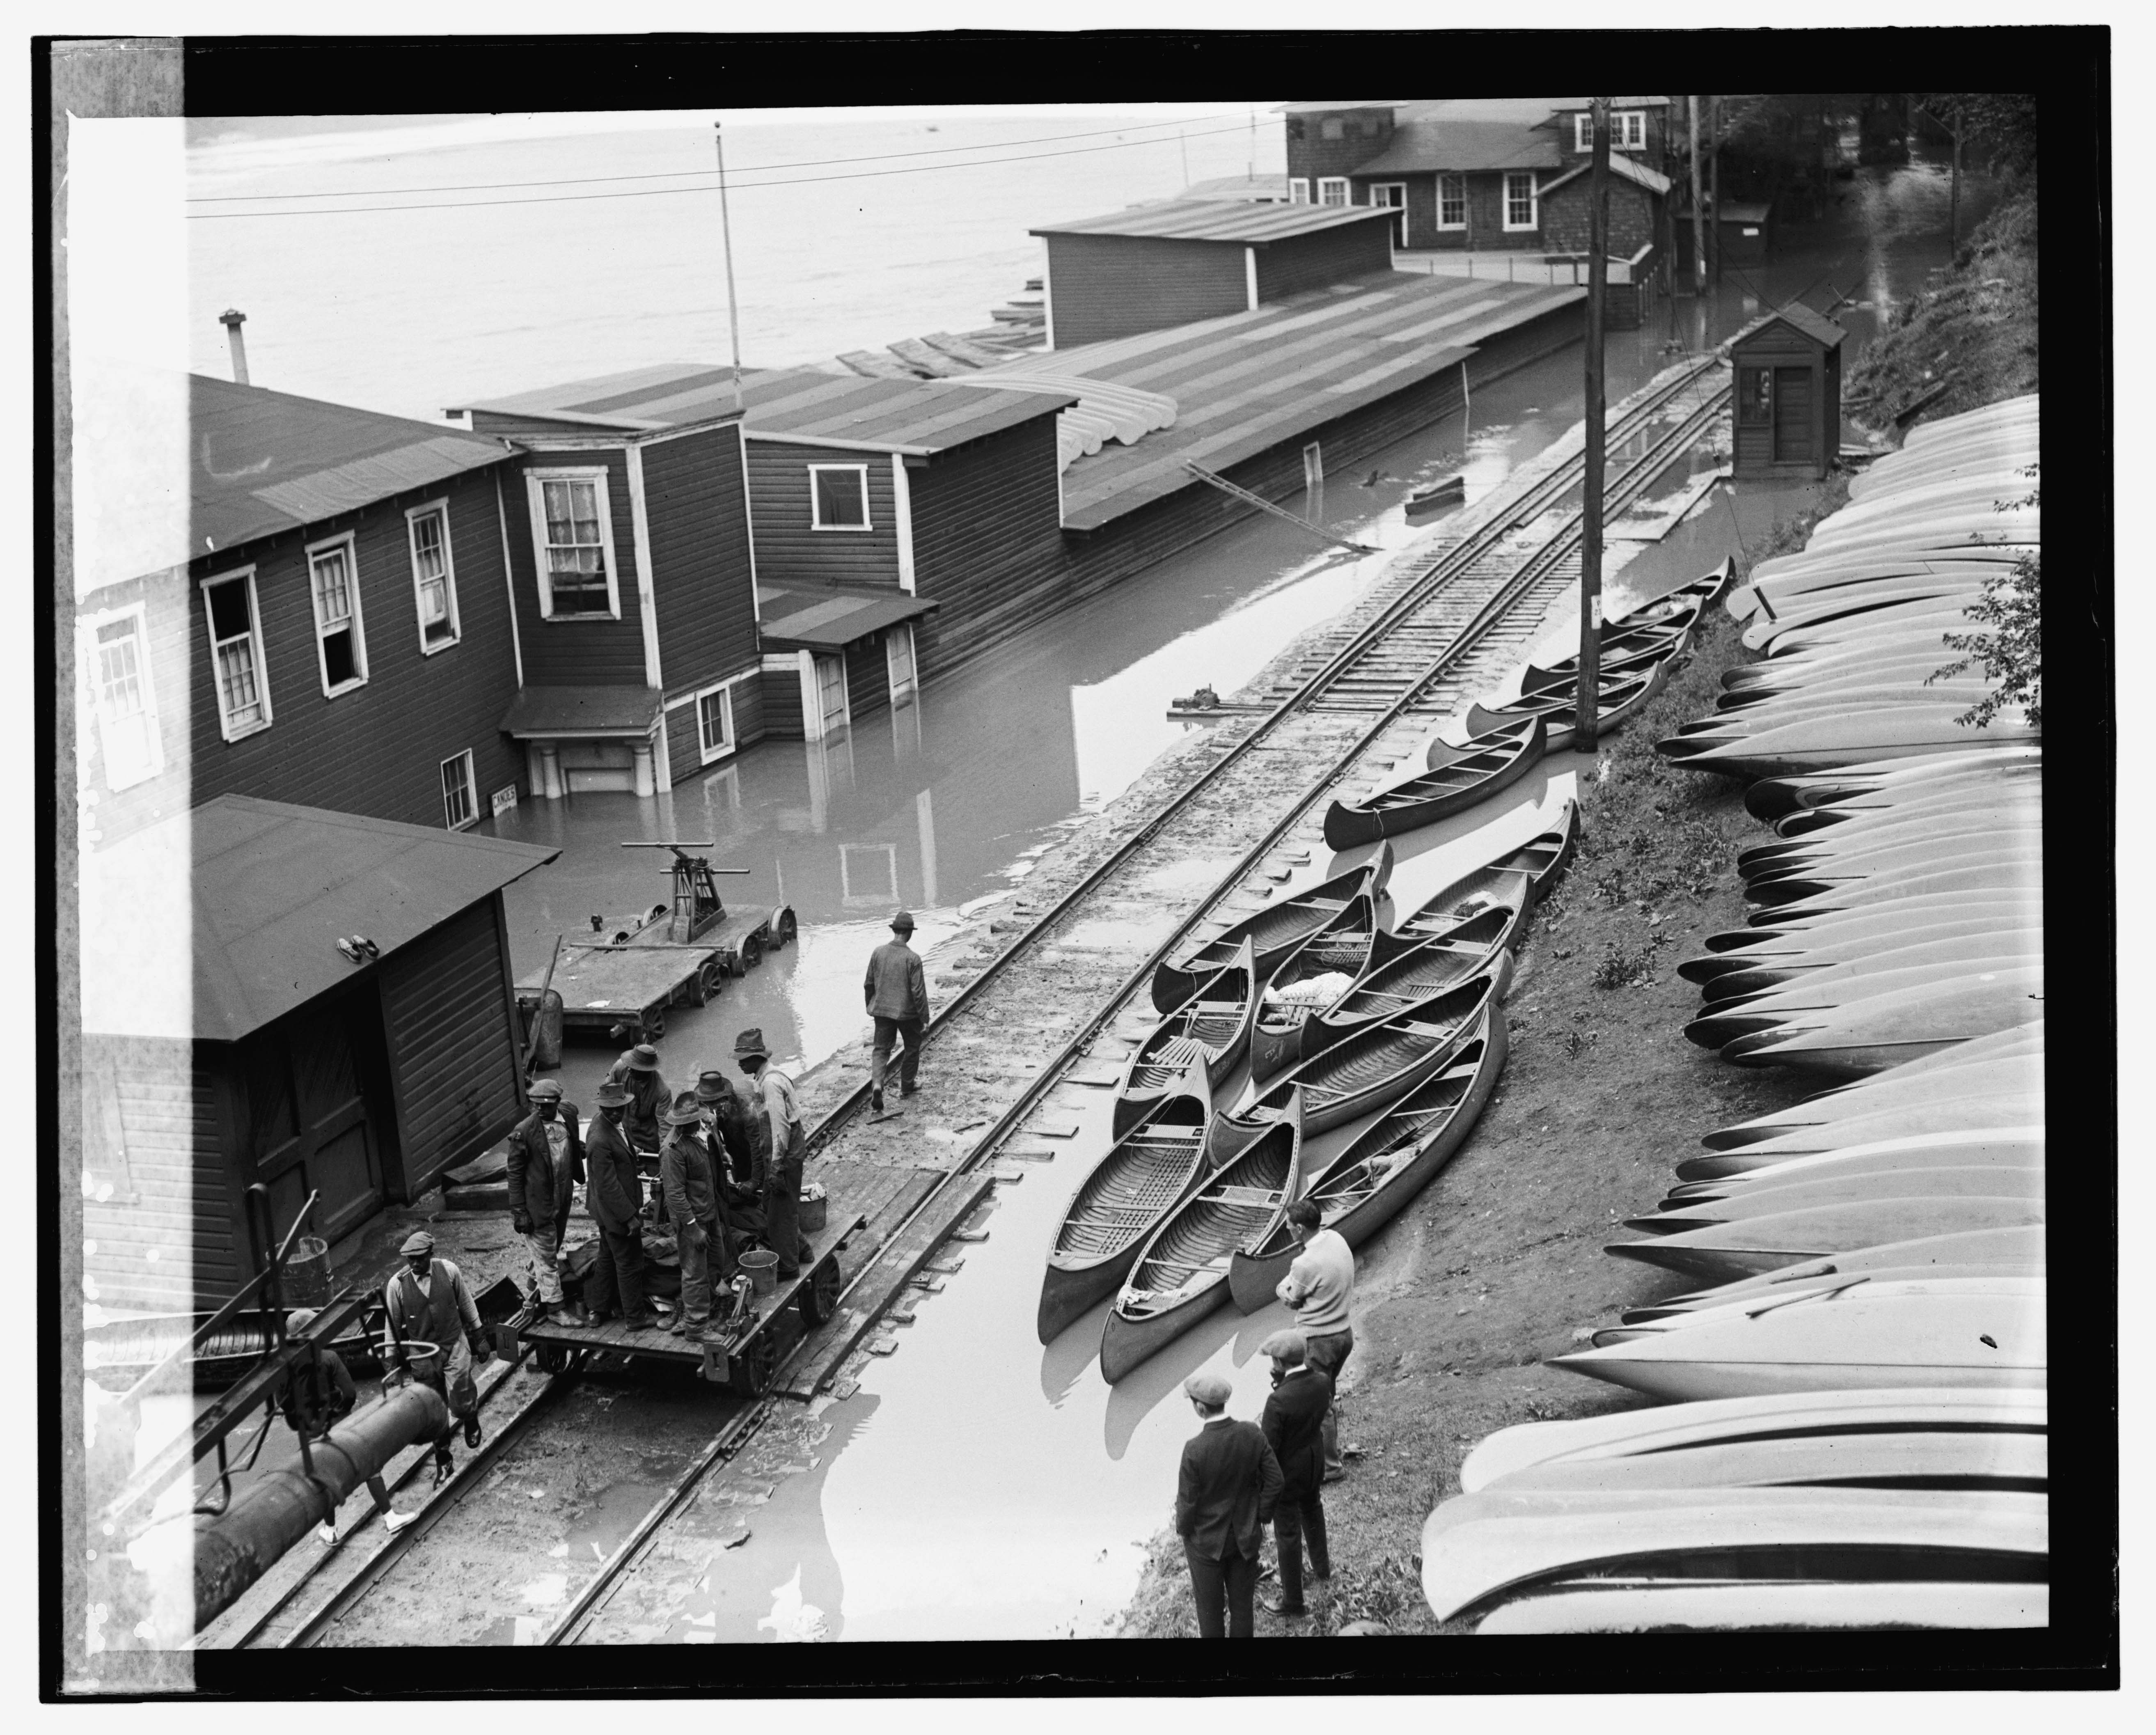
Flood. , 1924. Photograph. https://www.loc.gov/item/2016837495/.
A neat thing I noticed, if you look really closely in the top right, you’ll see a B&O steam loco doing some switching, with someone sitting on the front pilot. It is likely moving the freight cars you’ll see in some of the next photos. Pretty cool!

Flood. , 1924. Photograph. https://www.loc.gov/item/2016837490/.
Eric Hansmann has a wonderful set of resources for the 1926 B&O freight car fleet: https://designbuildop.hansmanns.org/bo-freight-car-fleet-of-1926/
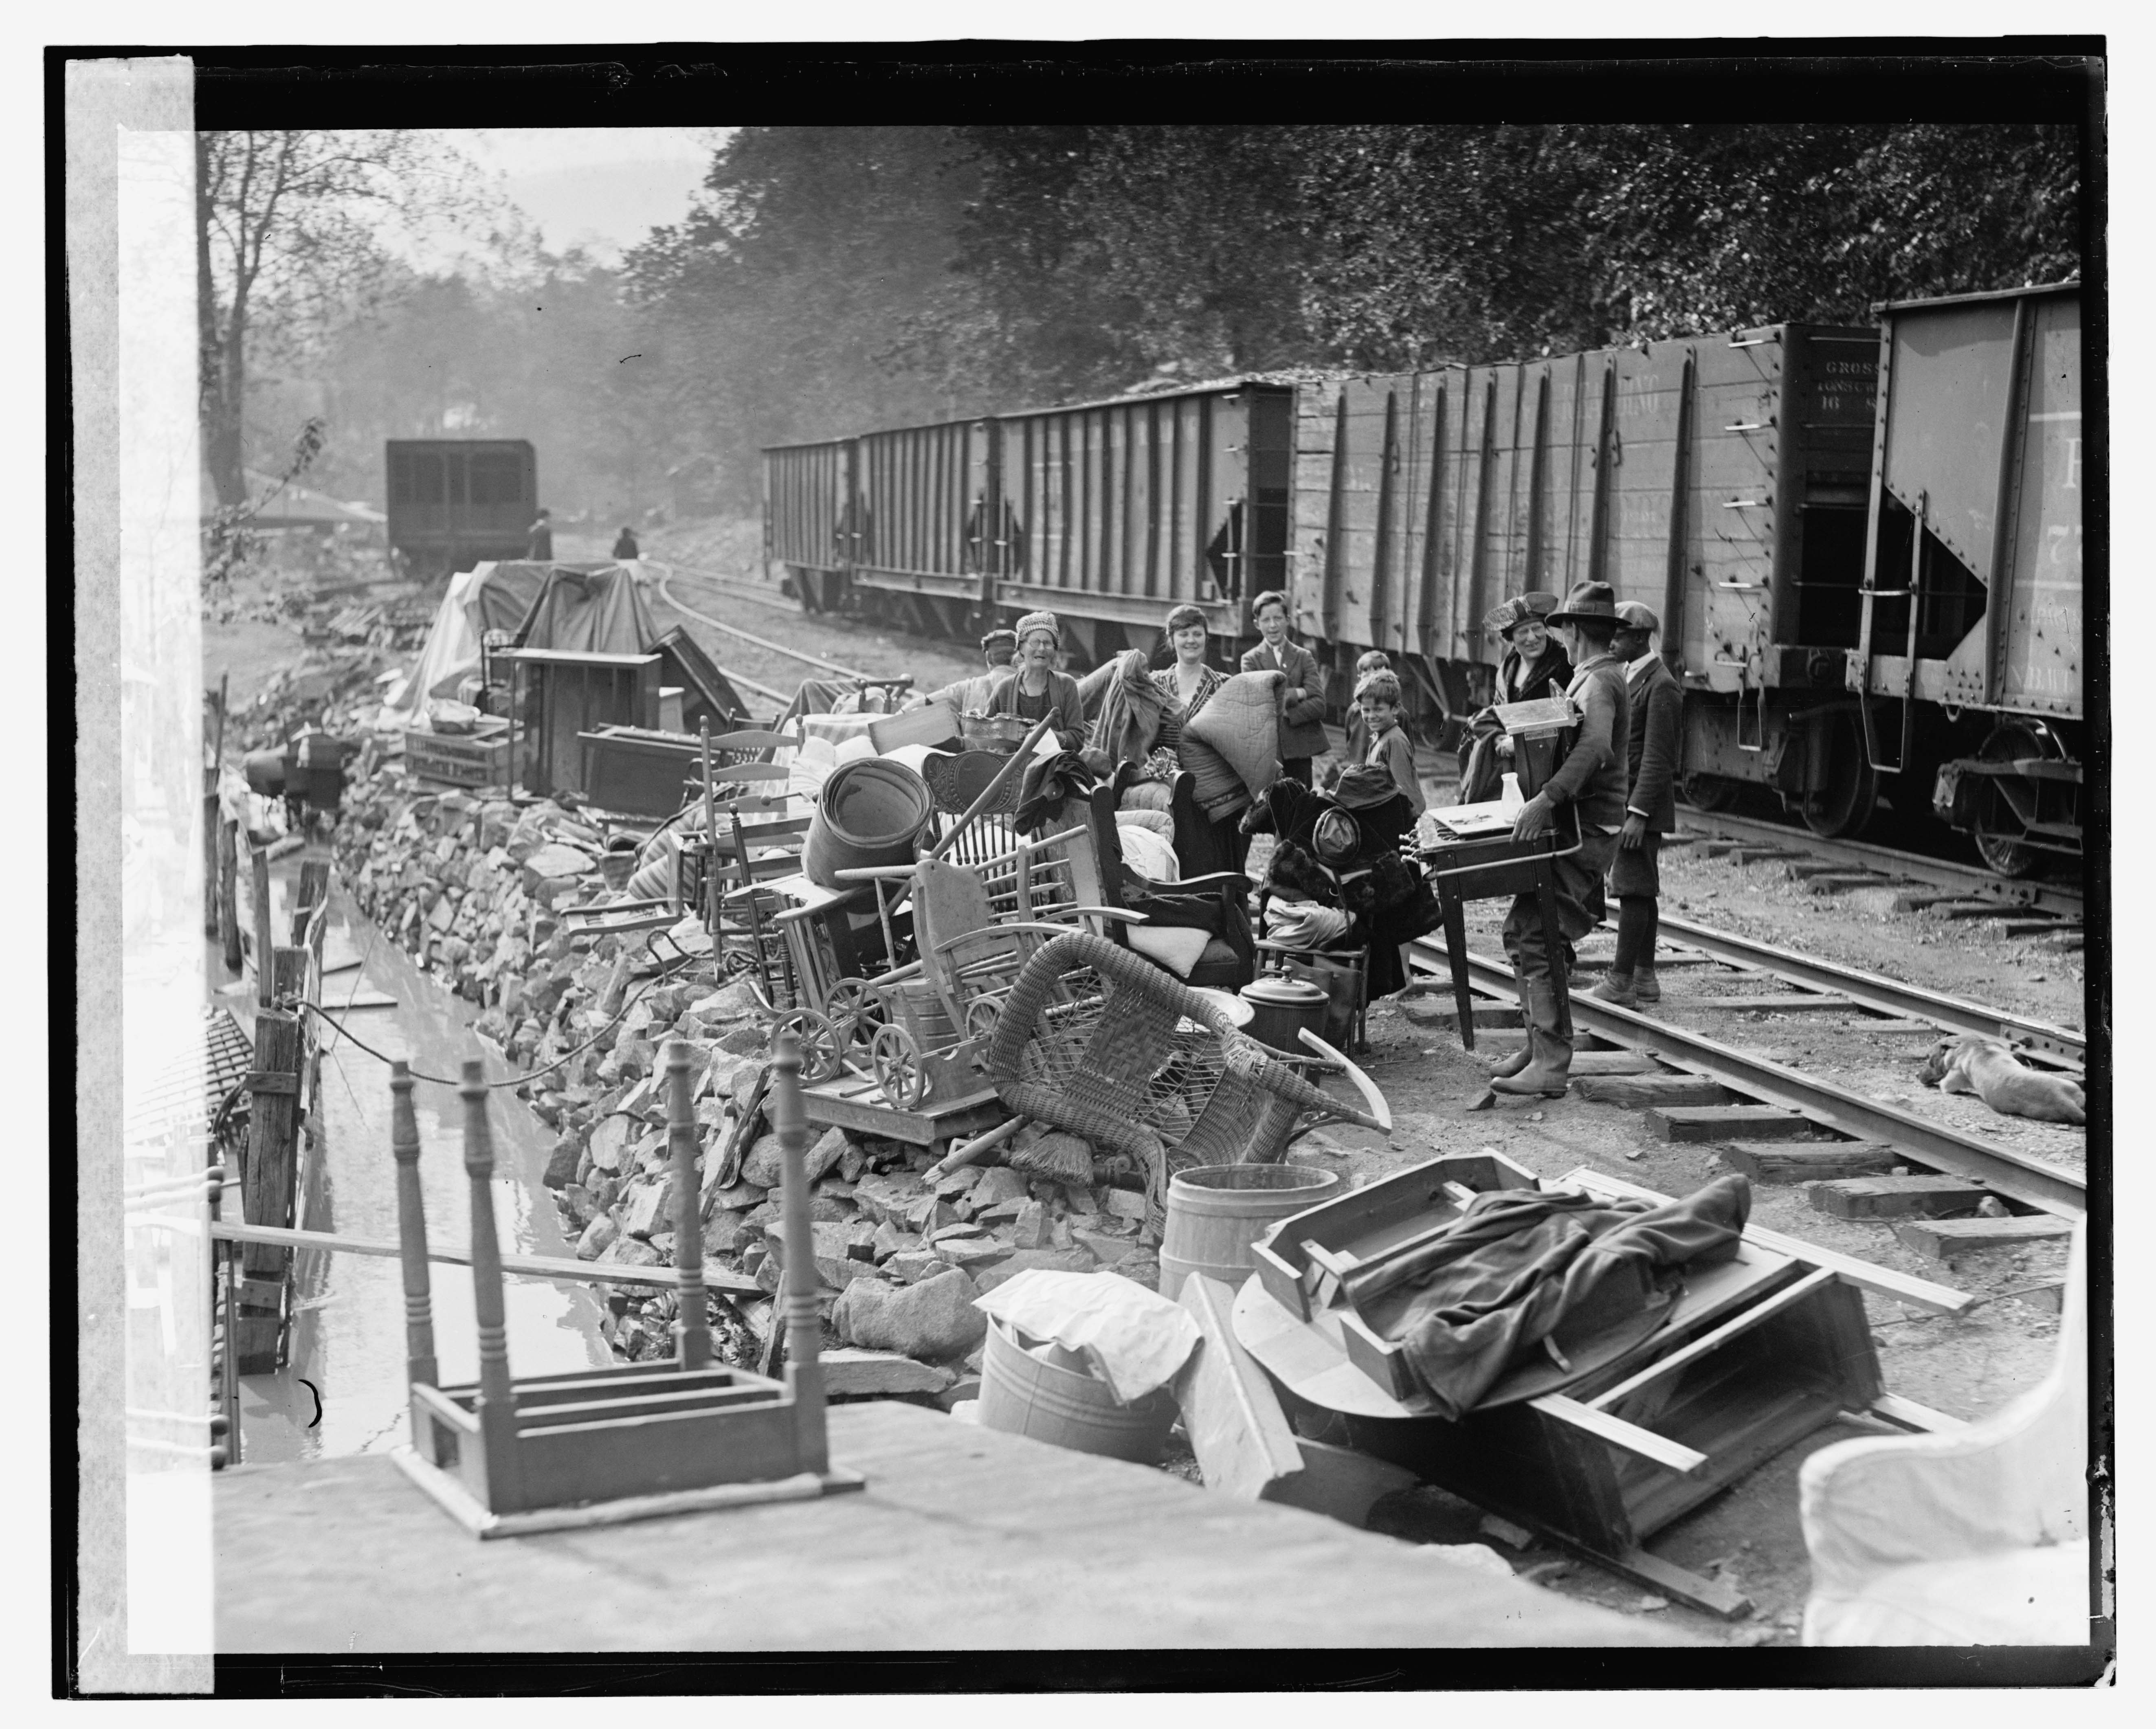
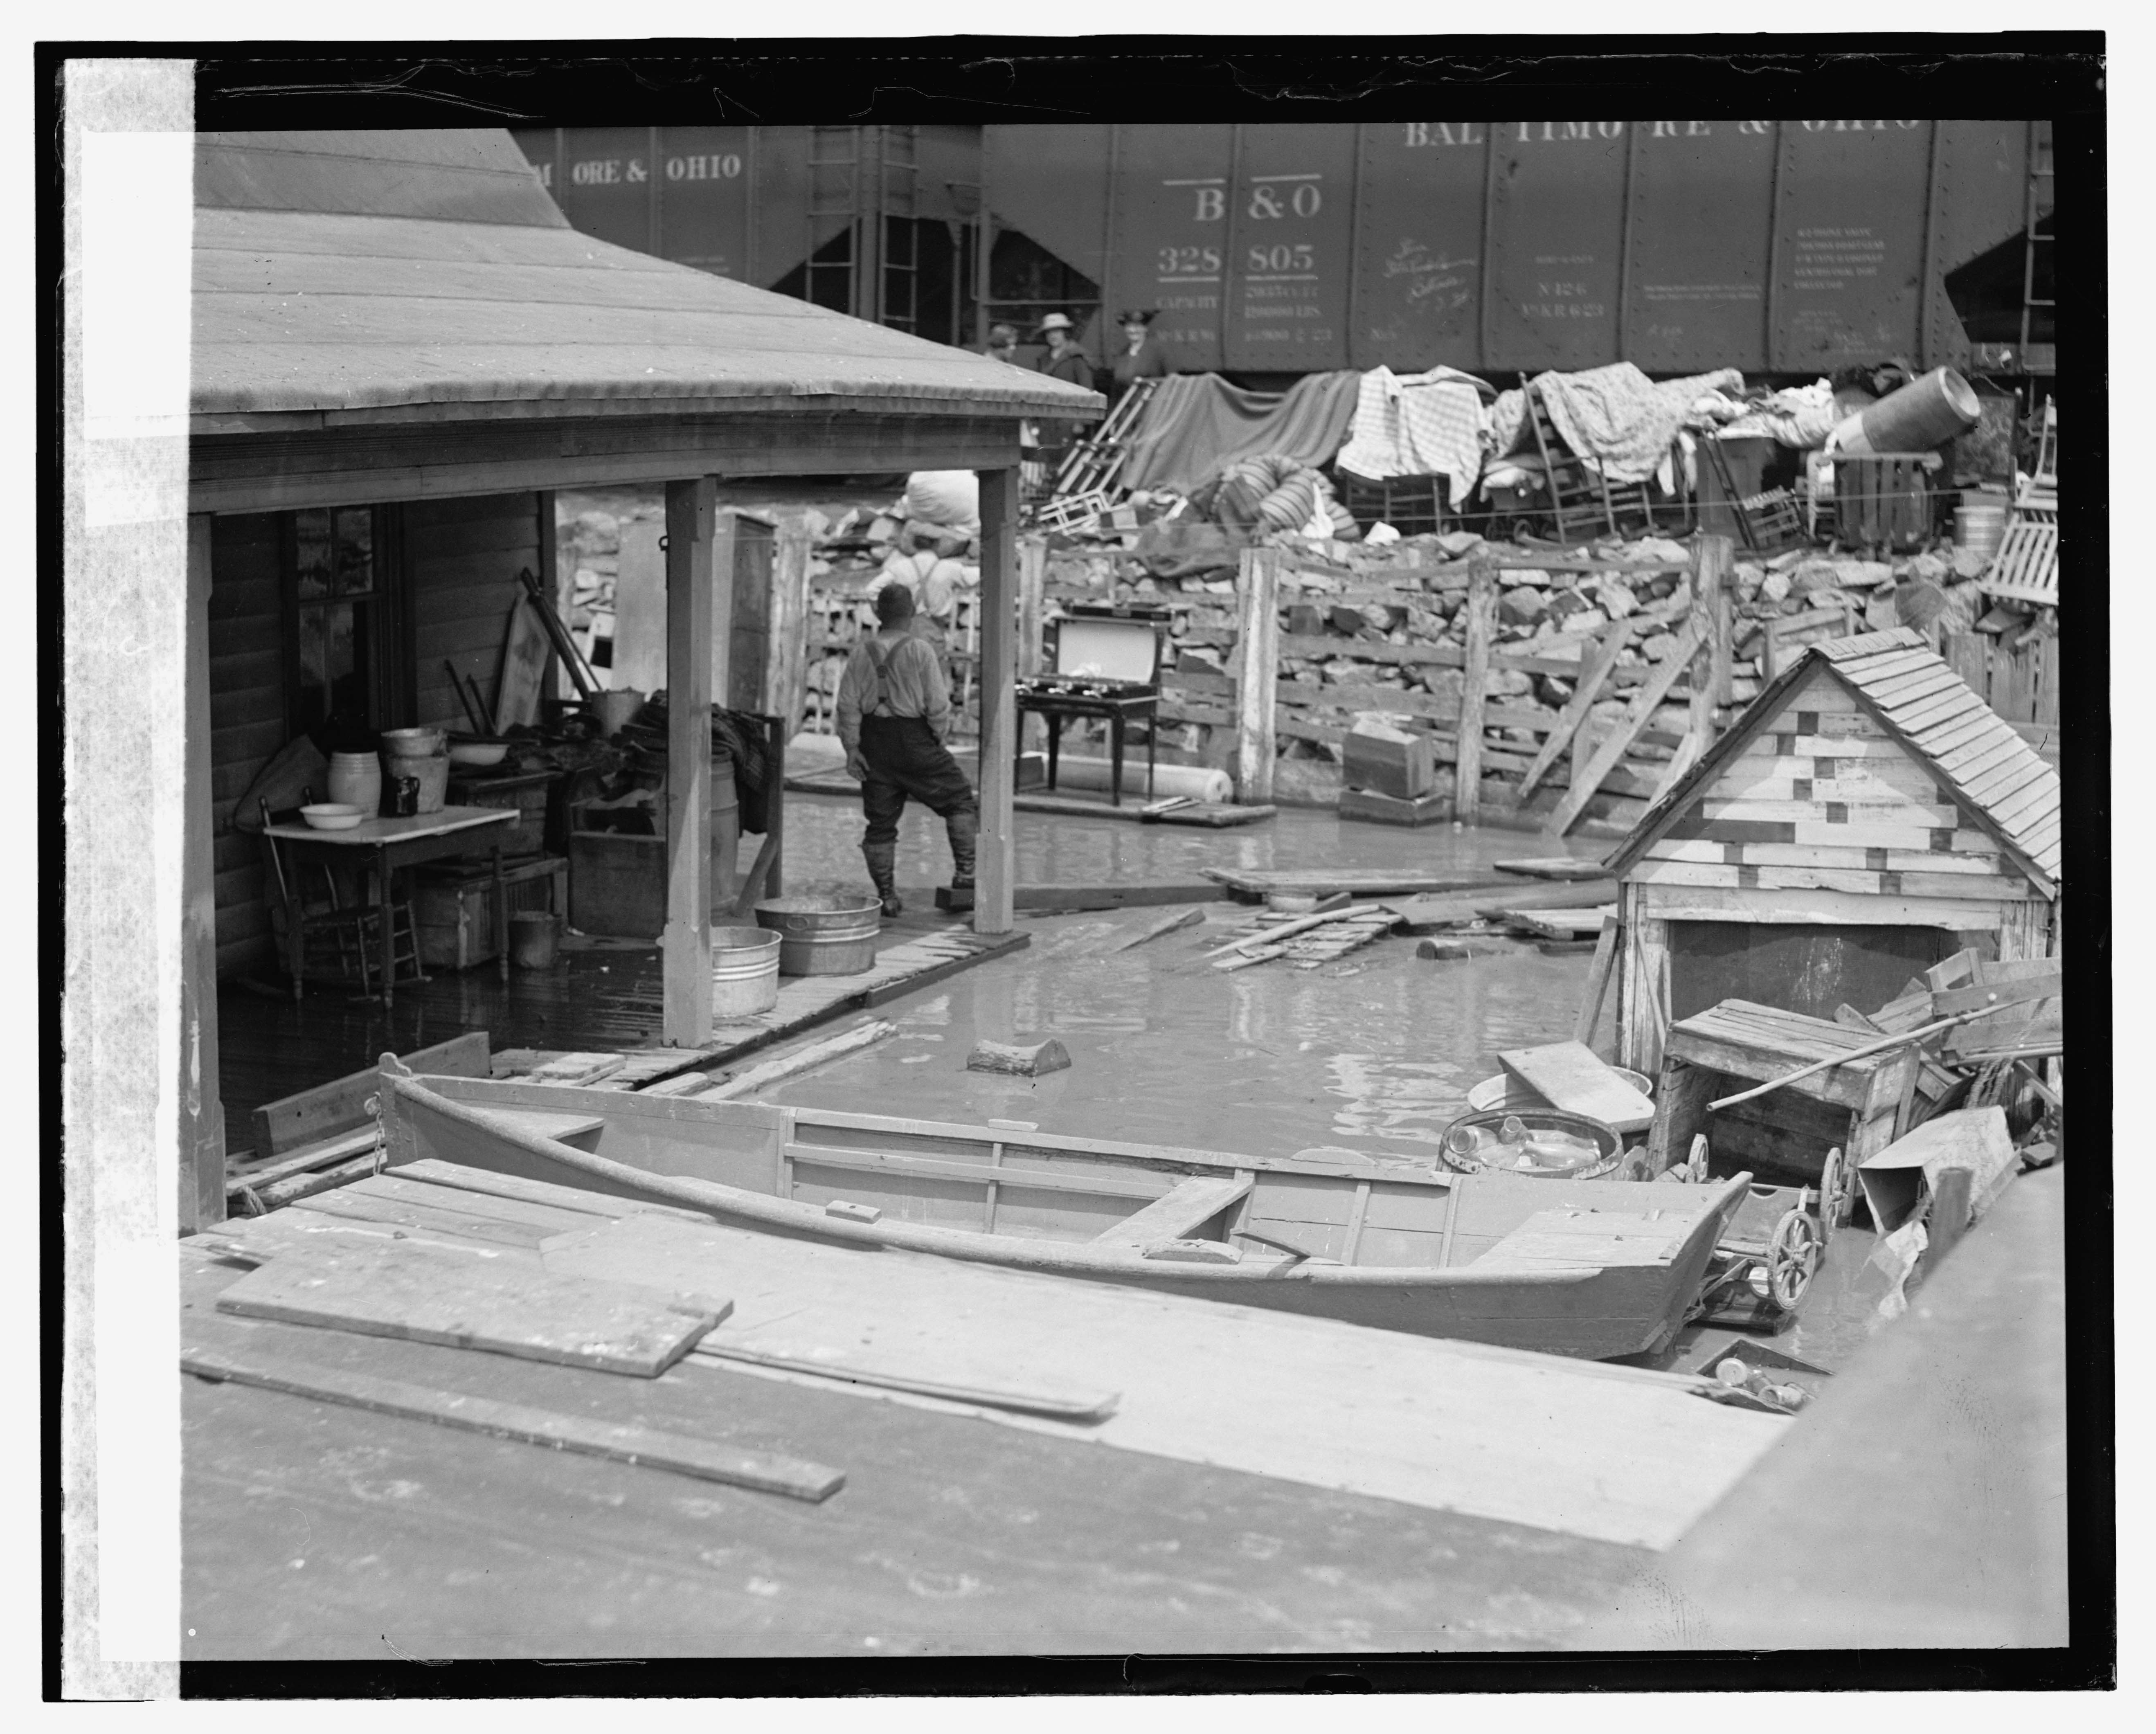
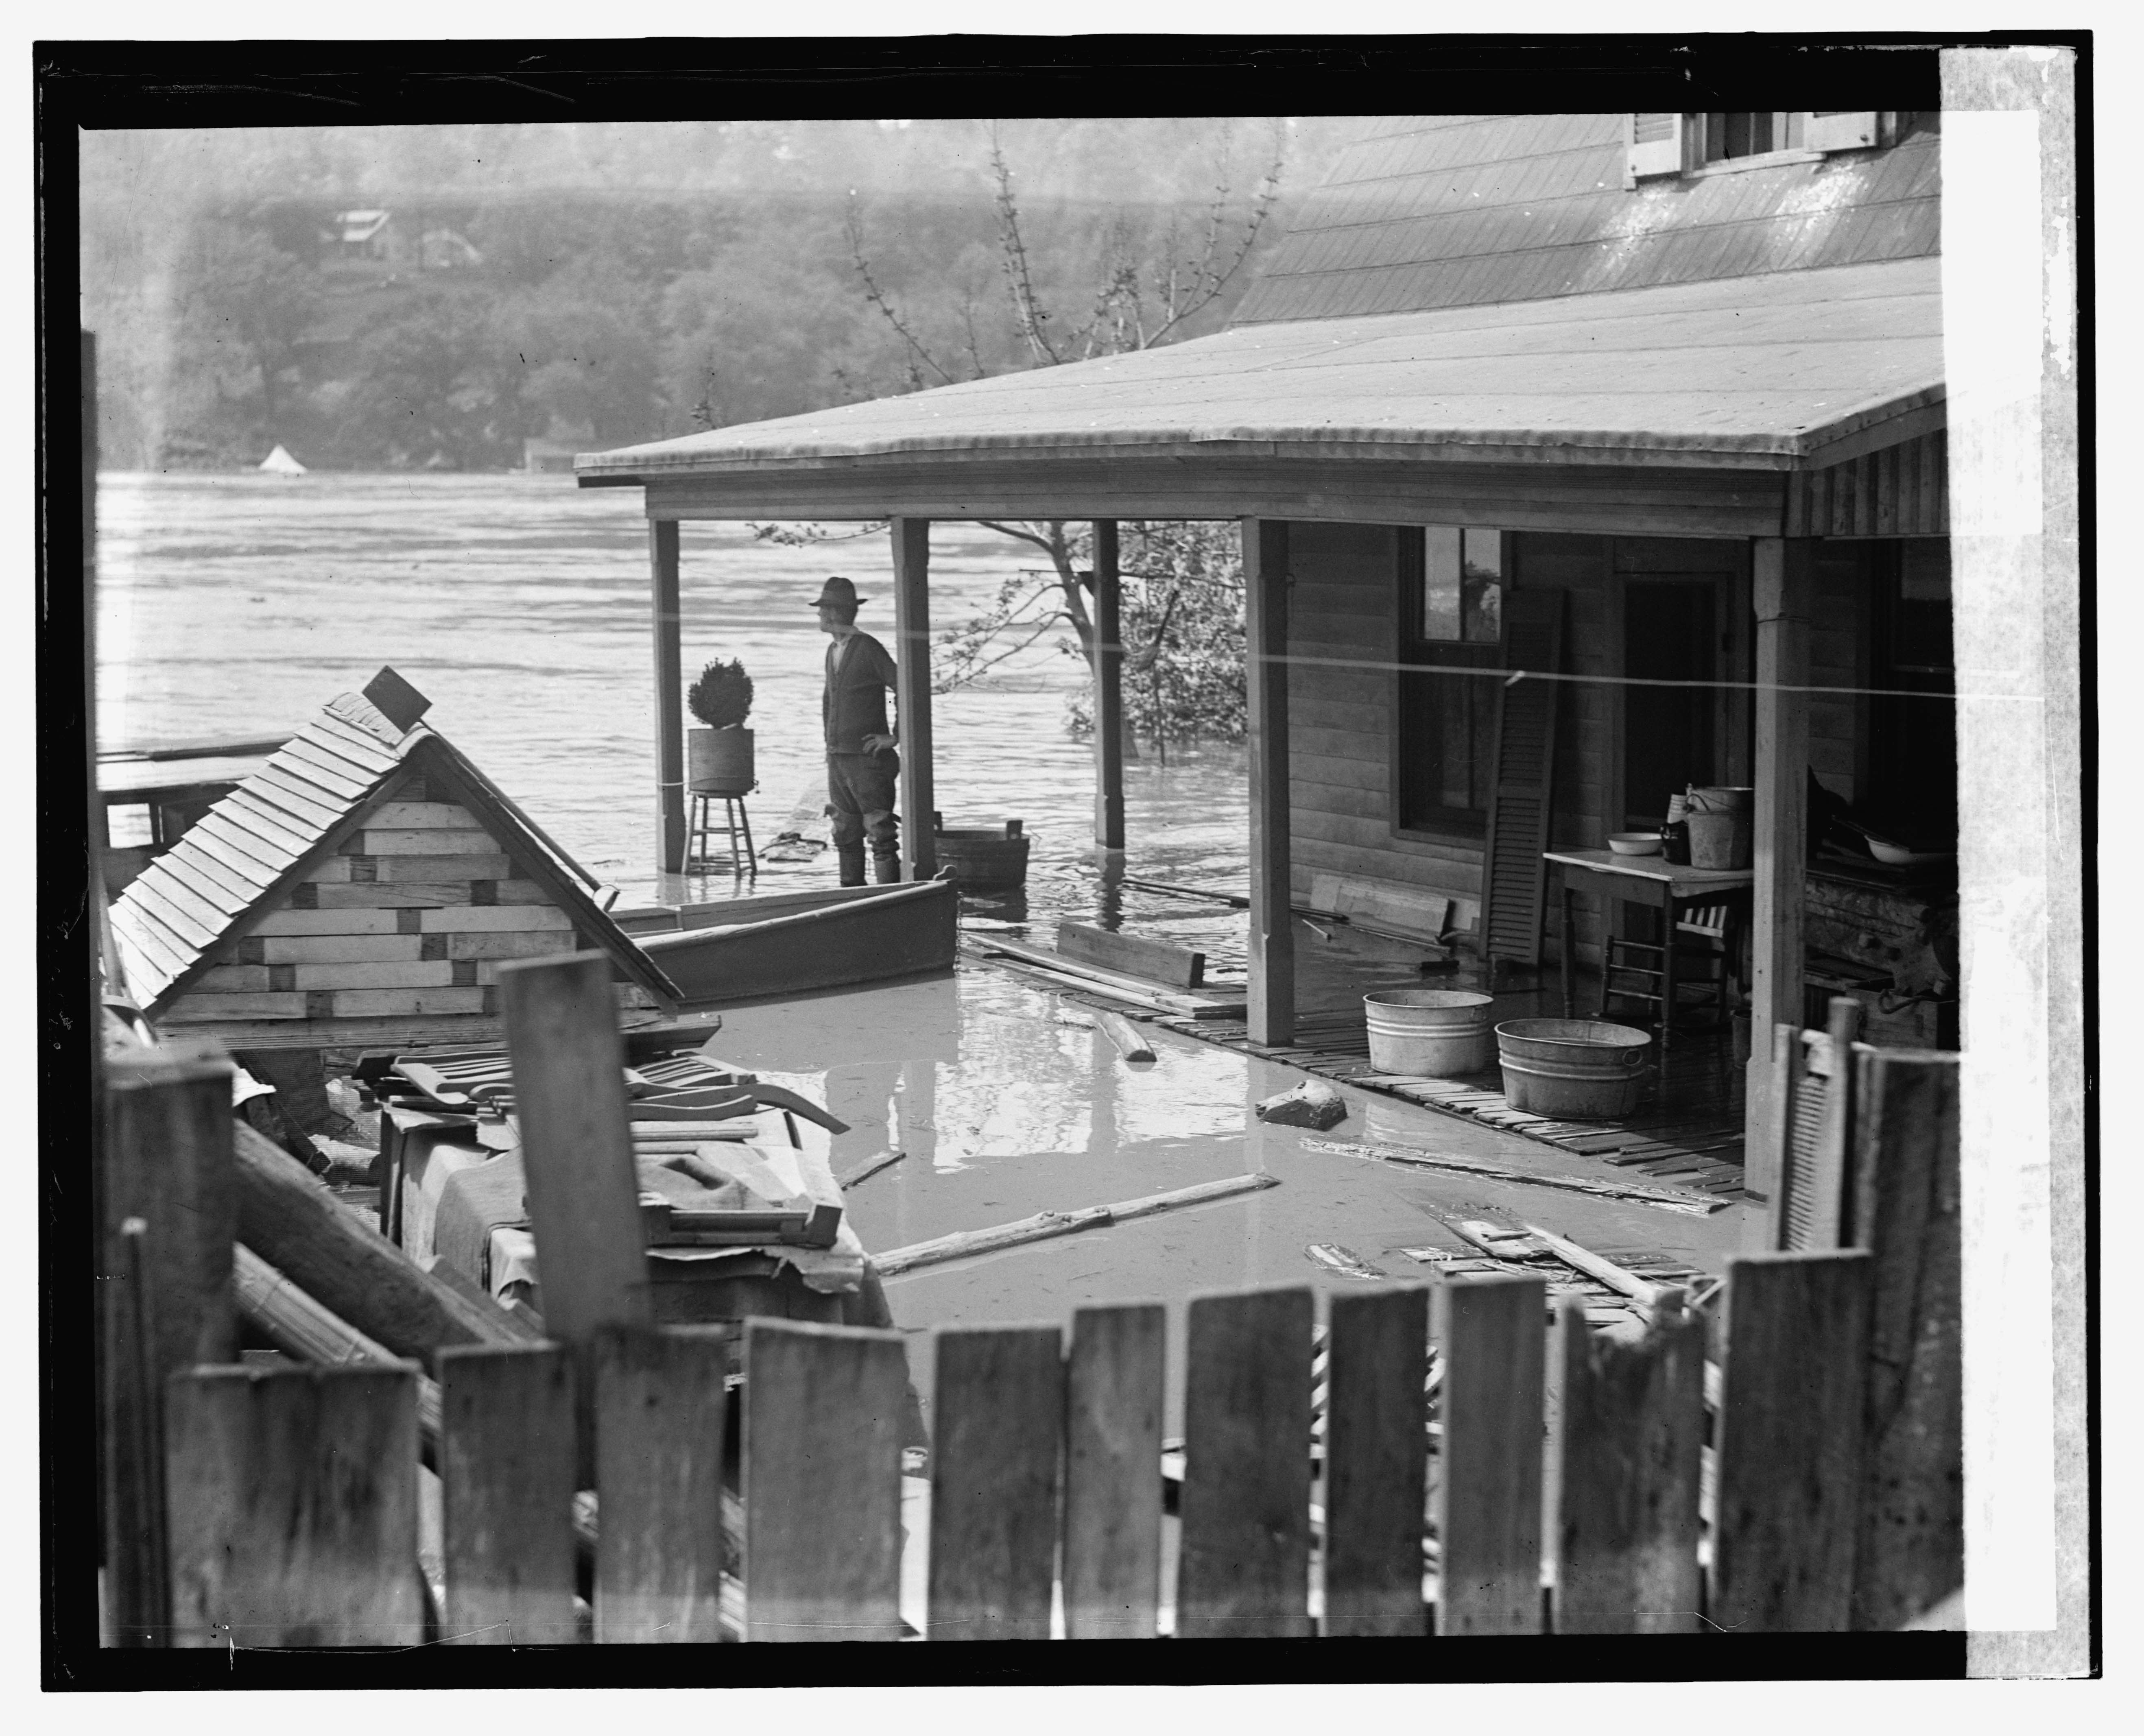
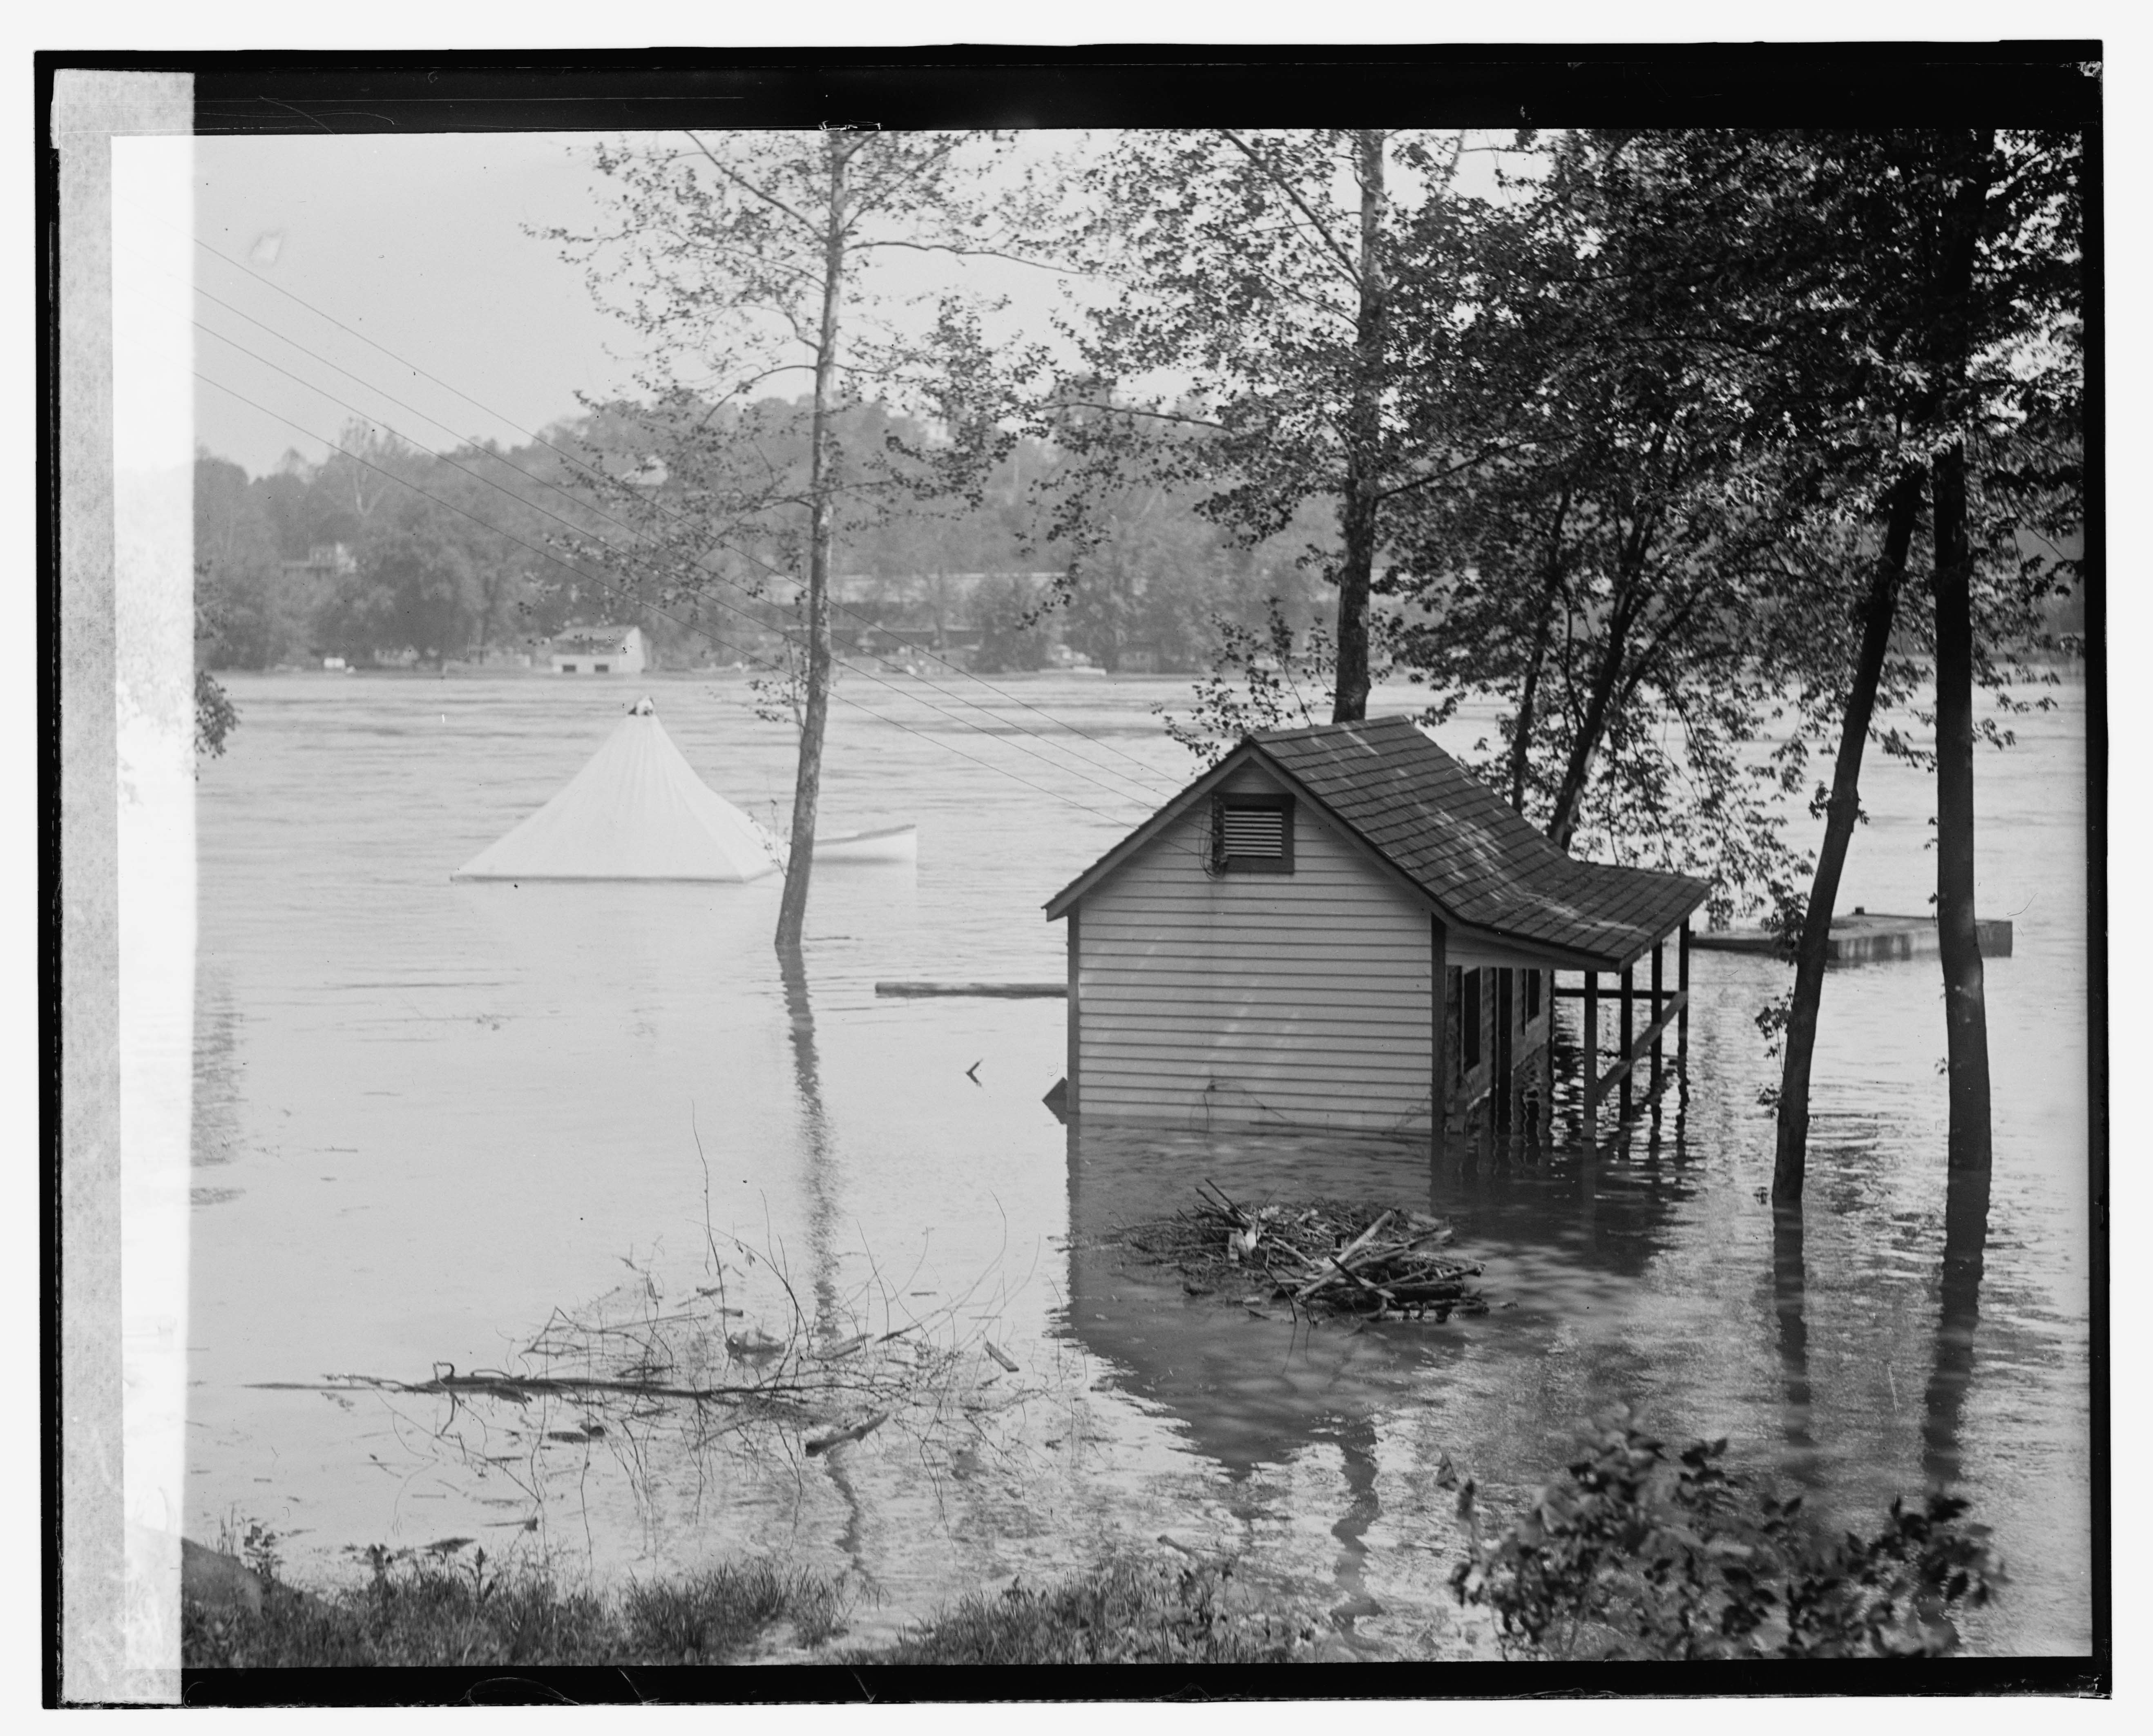
B&O Hopper 135925 is a class W-1 (135000-135999) 2511 cu/ft capacity, blt 1910. A bit further down the line, just past the boathouses and at the west end of the long passing siding, we come to another string of hoppers and some folks who have rescued their belongings from the floodwaters. The shoreline of the Potomac was absolutely littered with small shacks and cabins that folks had to escape the downtown hustle-and-bustle. Stretching all the way up to Chain Bridge, these shacks were a fascinating part of the history of Georgetown.
Flood. , 1924. Photograph. https://www.loc.gov/item/2016837488/.
Attempting to ID the freight cars, it looks like from the right to left we have:
- 1: Philadelphia & Reading 77xxx – 34′ 55-ton arch bar trucks, 1880 cu.ft. capacity hopper, class HTh (nos 74500 – 78999), built 1916-17 by Standard Steel Car. Approx. 4495 on the roster in 1924. Detailed roster info from RT&HS. Builders photo from Kinkaid collection here and here.
- 2: Philadelphia & Reading 30′ 40-ton, 1485 cu.ft. capacity hopper, class HTk (nos 61000 – 61863), being rebuilt in 1921 from HTb (blt 1902) series 60000-60999 by AC&F. Note unusual Fox Pressed Steel Trucks. In 1924 there were 854 on the roster. Detailed roster info from RT&HS Pic from Kinkaid collection.
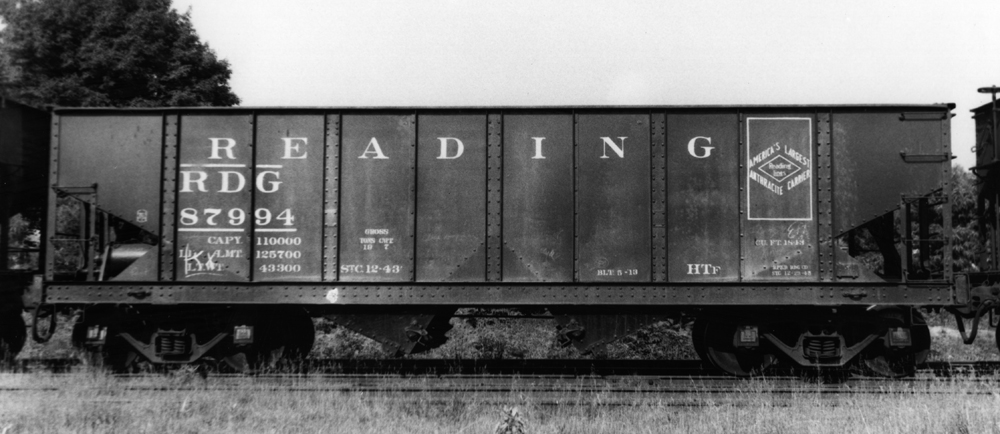
- 3 & 4: Based on the distinctive side sills, these appear to also be Philadelphia & Reading class HTf hoppers, but slightly modified from as-built images I found. The HTf (86000-89999) was a 34′, 55 ton, 1843 cu.ft. capacity car with arch bar trucks. They were built in four batches from 1910-11 and again in 1913. In 1924 there were 3970 on the rails. Likely after shopping they received grab irons on the sides as well as some sort of bracket/brace above each bolster on the side sill. Early photos do not show these brackets. Here are some builders photos from the Kincaid collection one two three. Here is a photo of one with the brackets from Shamokin Div website. Detailed roster info from RT&HS.
- 5 & 6 These cars are just too far off for me to get a read on what they are.
I believe the cars are actually being moved. Why? Because in this next photo, which is of the same subjects, there are different cars in view:
Flood. , 1924. Photograph. https://www.loc.gov/item/2016837496/.
Two B&O Hoppers in view:
- 1: BO 328805, class N-12g (327000-331999) (4998 cars) 1800 cu.ft capacity, blt 1923.
- 2: BO ? – appears to possibly be another N-12 class.
Flood. , 1924. Photograph. https://www.loc.gov/item/2016837486/.
Flood. , 1924. Photograph. https://www.loc.gov/item/2016837494/.
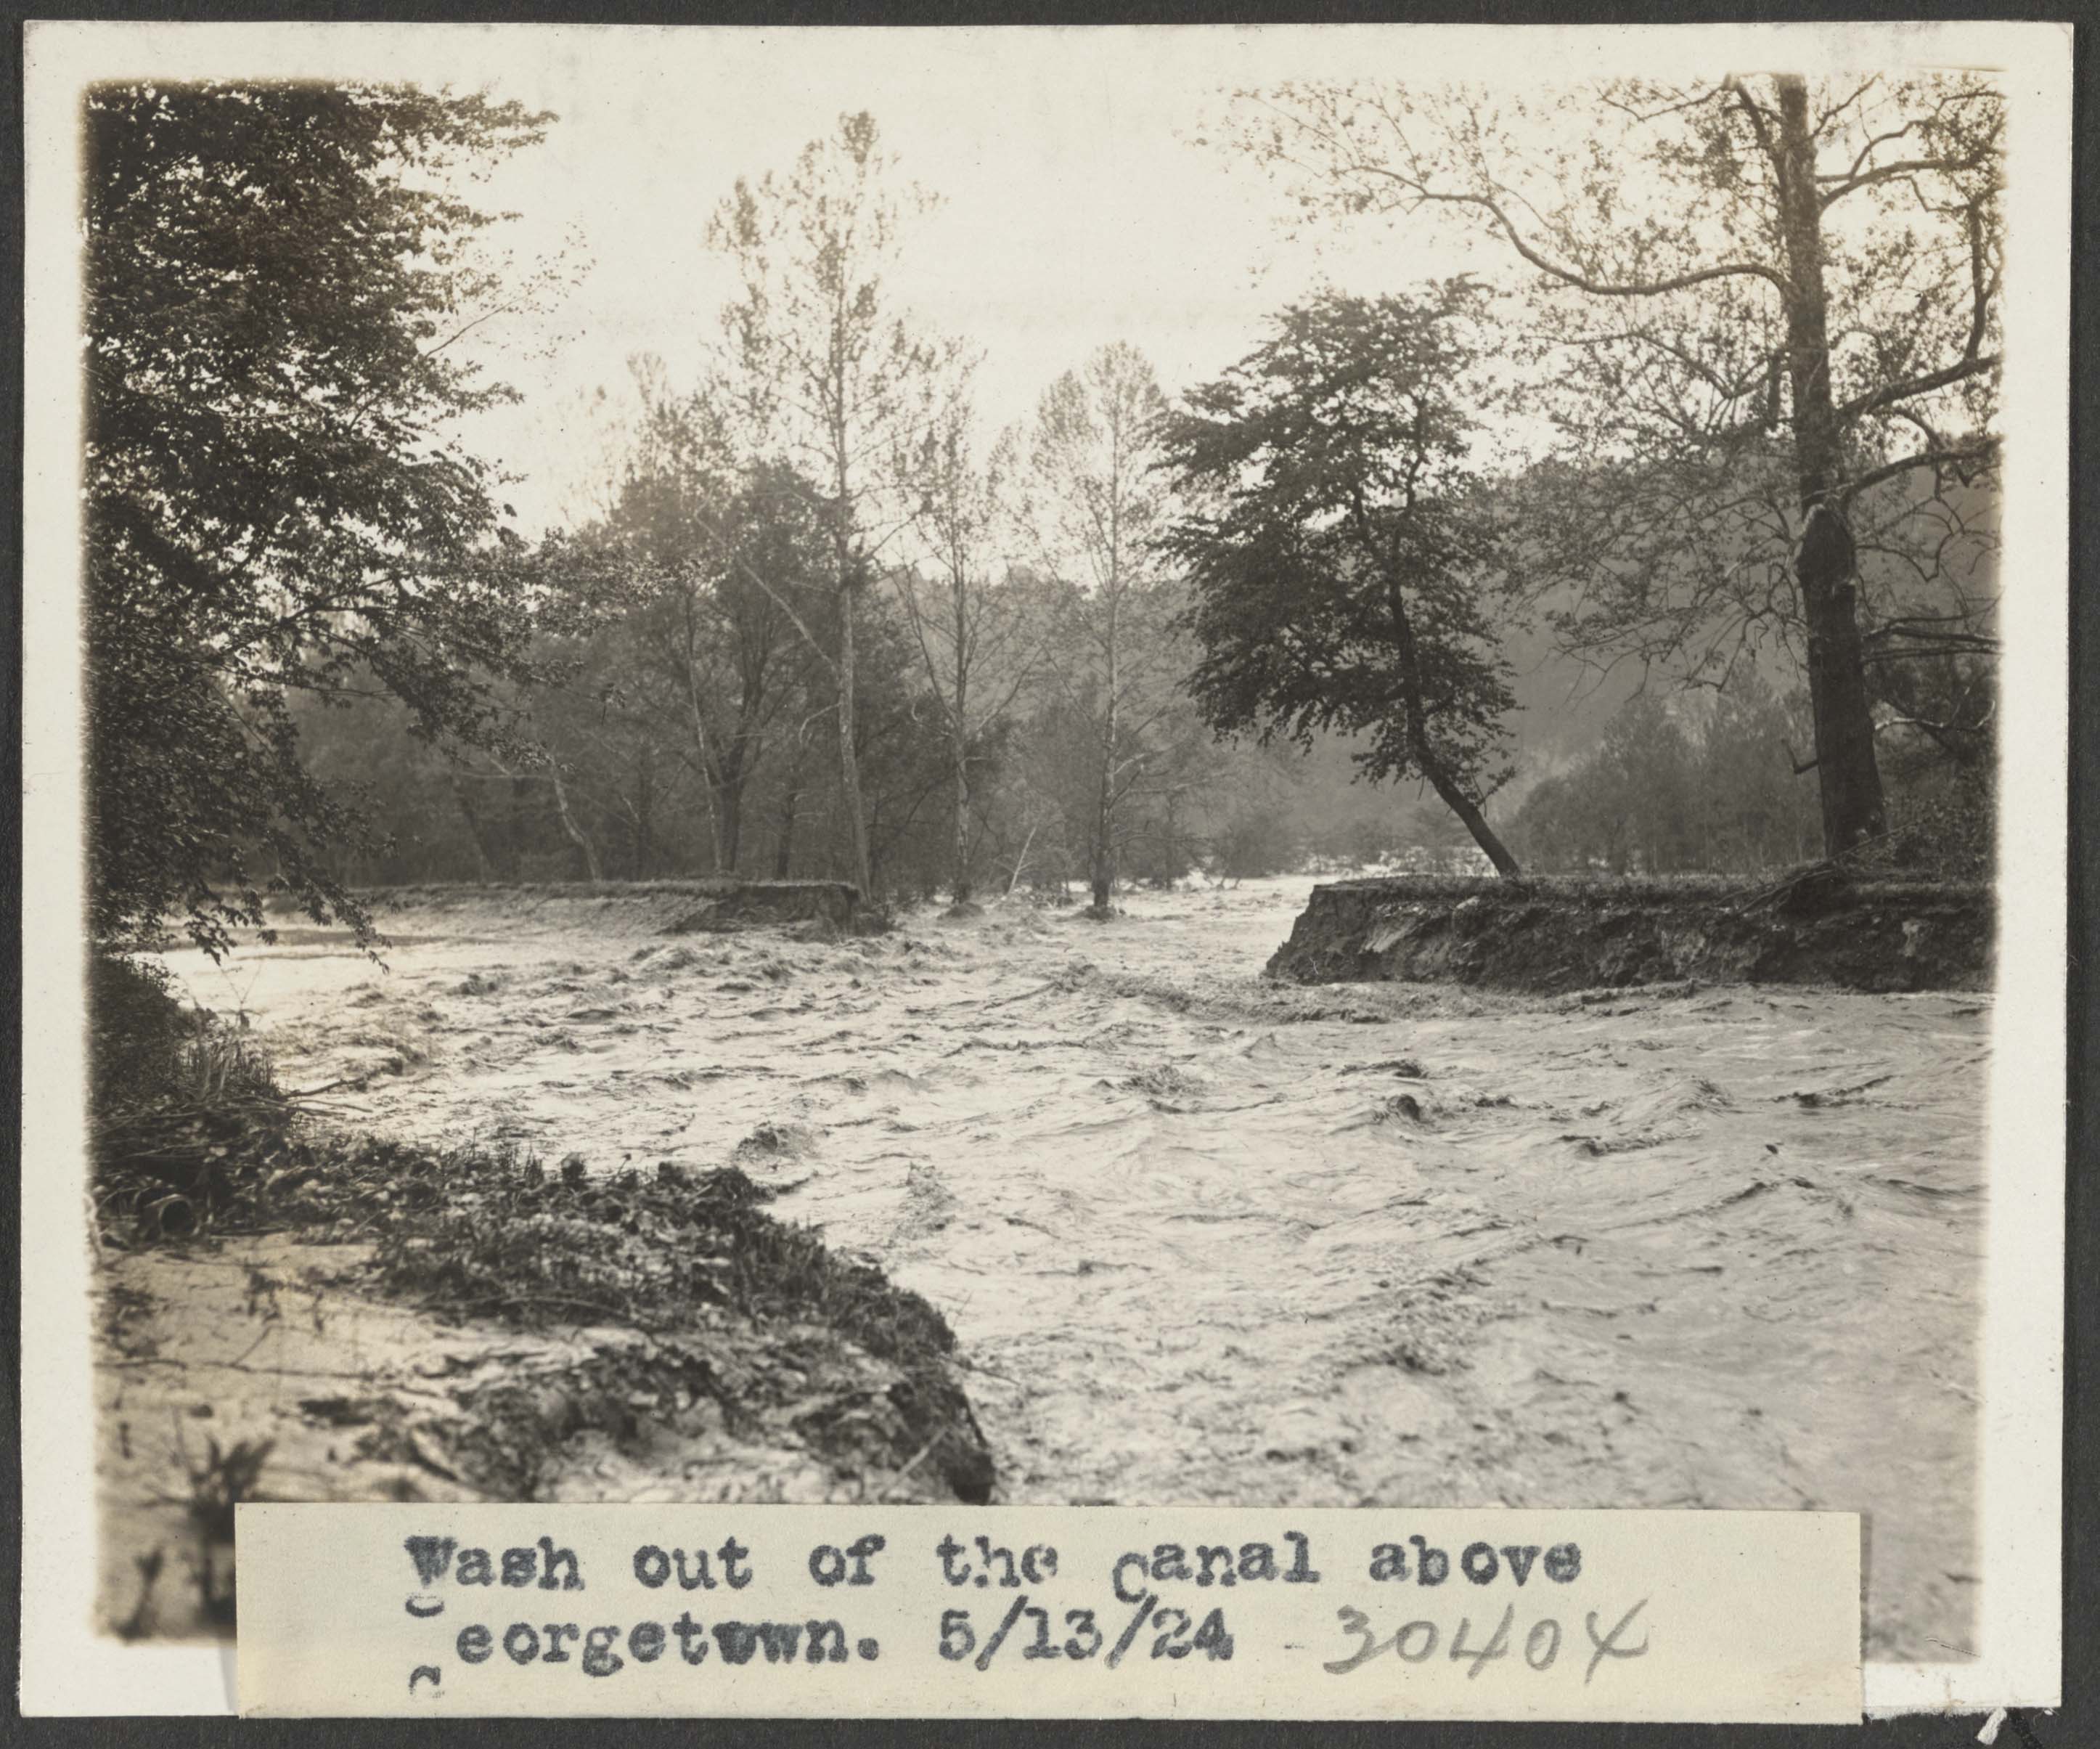
The B&O RR had gained a controlling stake in the C&O Canal, in 1890 it was put into receivership. The B&O wanted to prevent other railroads from purchasing the right of way. A history of damaging floods and maintenance headaches meant that the canal was holding on for dear life but thanks to many unusual years of relatively minor flood issues, the canal soldiered on. The B&O had to maintain it just enough to keep it in service, which they did. That is until 1924.
The first flood of 1924 came in March but it was largely focused on Northern sections of the Canal. Repairs were not too overwhelming and were undertaken by contractors for the B&O. The flood that occurred two months later in May was another story, and proved to be too much for the Canal to survive in the long run. By August of that year, the Canal had largely been shut down save for some sections kept open for various contract obligations.
Flood. , 1924. Photograph. https://www.loc.gov/item/2016837498/.
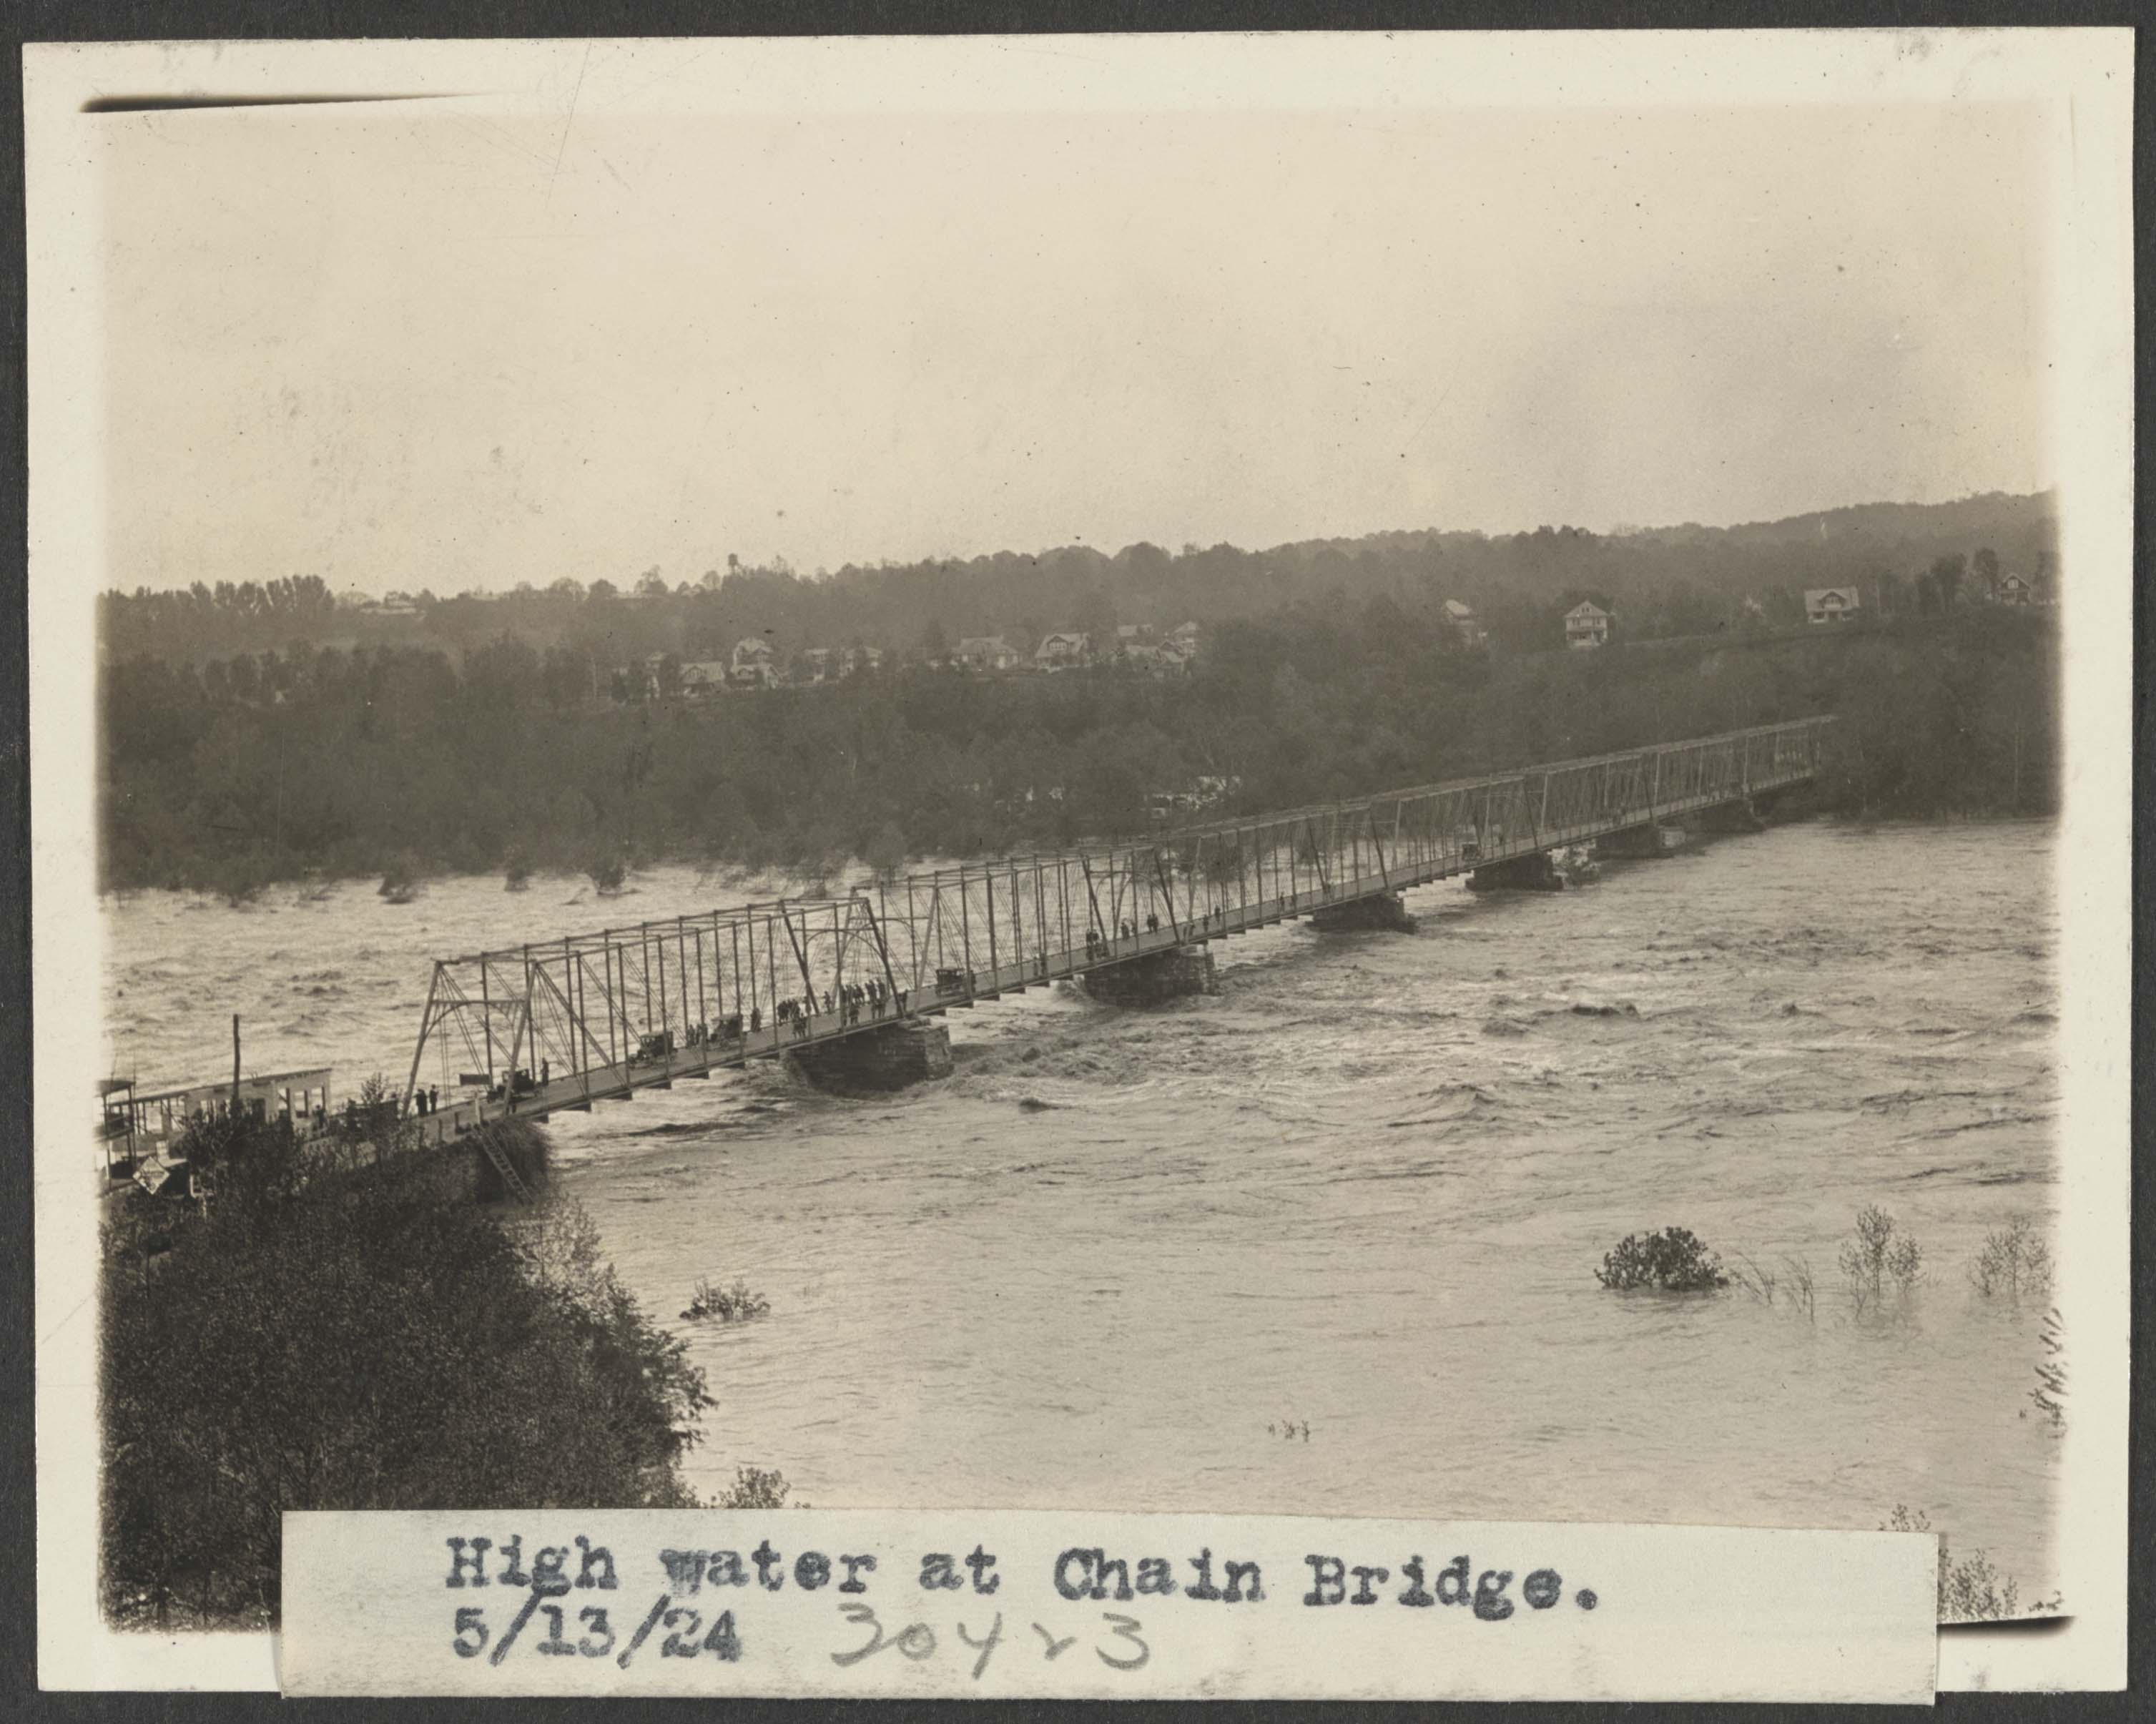
There were many historic floods on the Potomac, and many which affected operations on the Georgetown Branch. In fact, in many instances, the flooding dictated the survival of the line – remember famously the engine that was stranded in Georgetown after the devastating flooding from Hurricane Agnes, which toppled the Rock Creek trestle and damaged many waterfront industries. The 1924 flood, in particular, was interesting because afterwards the B&O was finally able to neglect the waterway, performing only minor maintenance on it until selling to the National Park Service in the late 1930s.
More LoC photos here: https://www.loc.gov/search/?in=&q=11200+flood&new=true
A fantastic history of the C&O Canal and flooding, published by the National Park Servicehttps://www.nps.gov/parkhistory/online_books/choh/trouble.pdf
Rock Creek Trestle Test Run
Sometimes you just gotta run some trains…
Just a quick test run. 🙂
Freight Cars in Georgetown, March 1949
The National Archives has a magnificent set of photos from the construction of the Whitehurst Freeway. Naturally, there are some wonderful trains caught in the shots and I’d like to document them here.
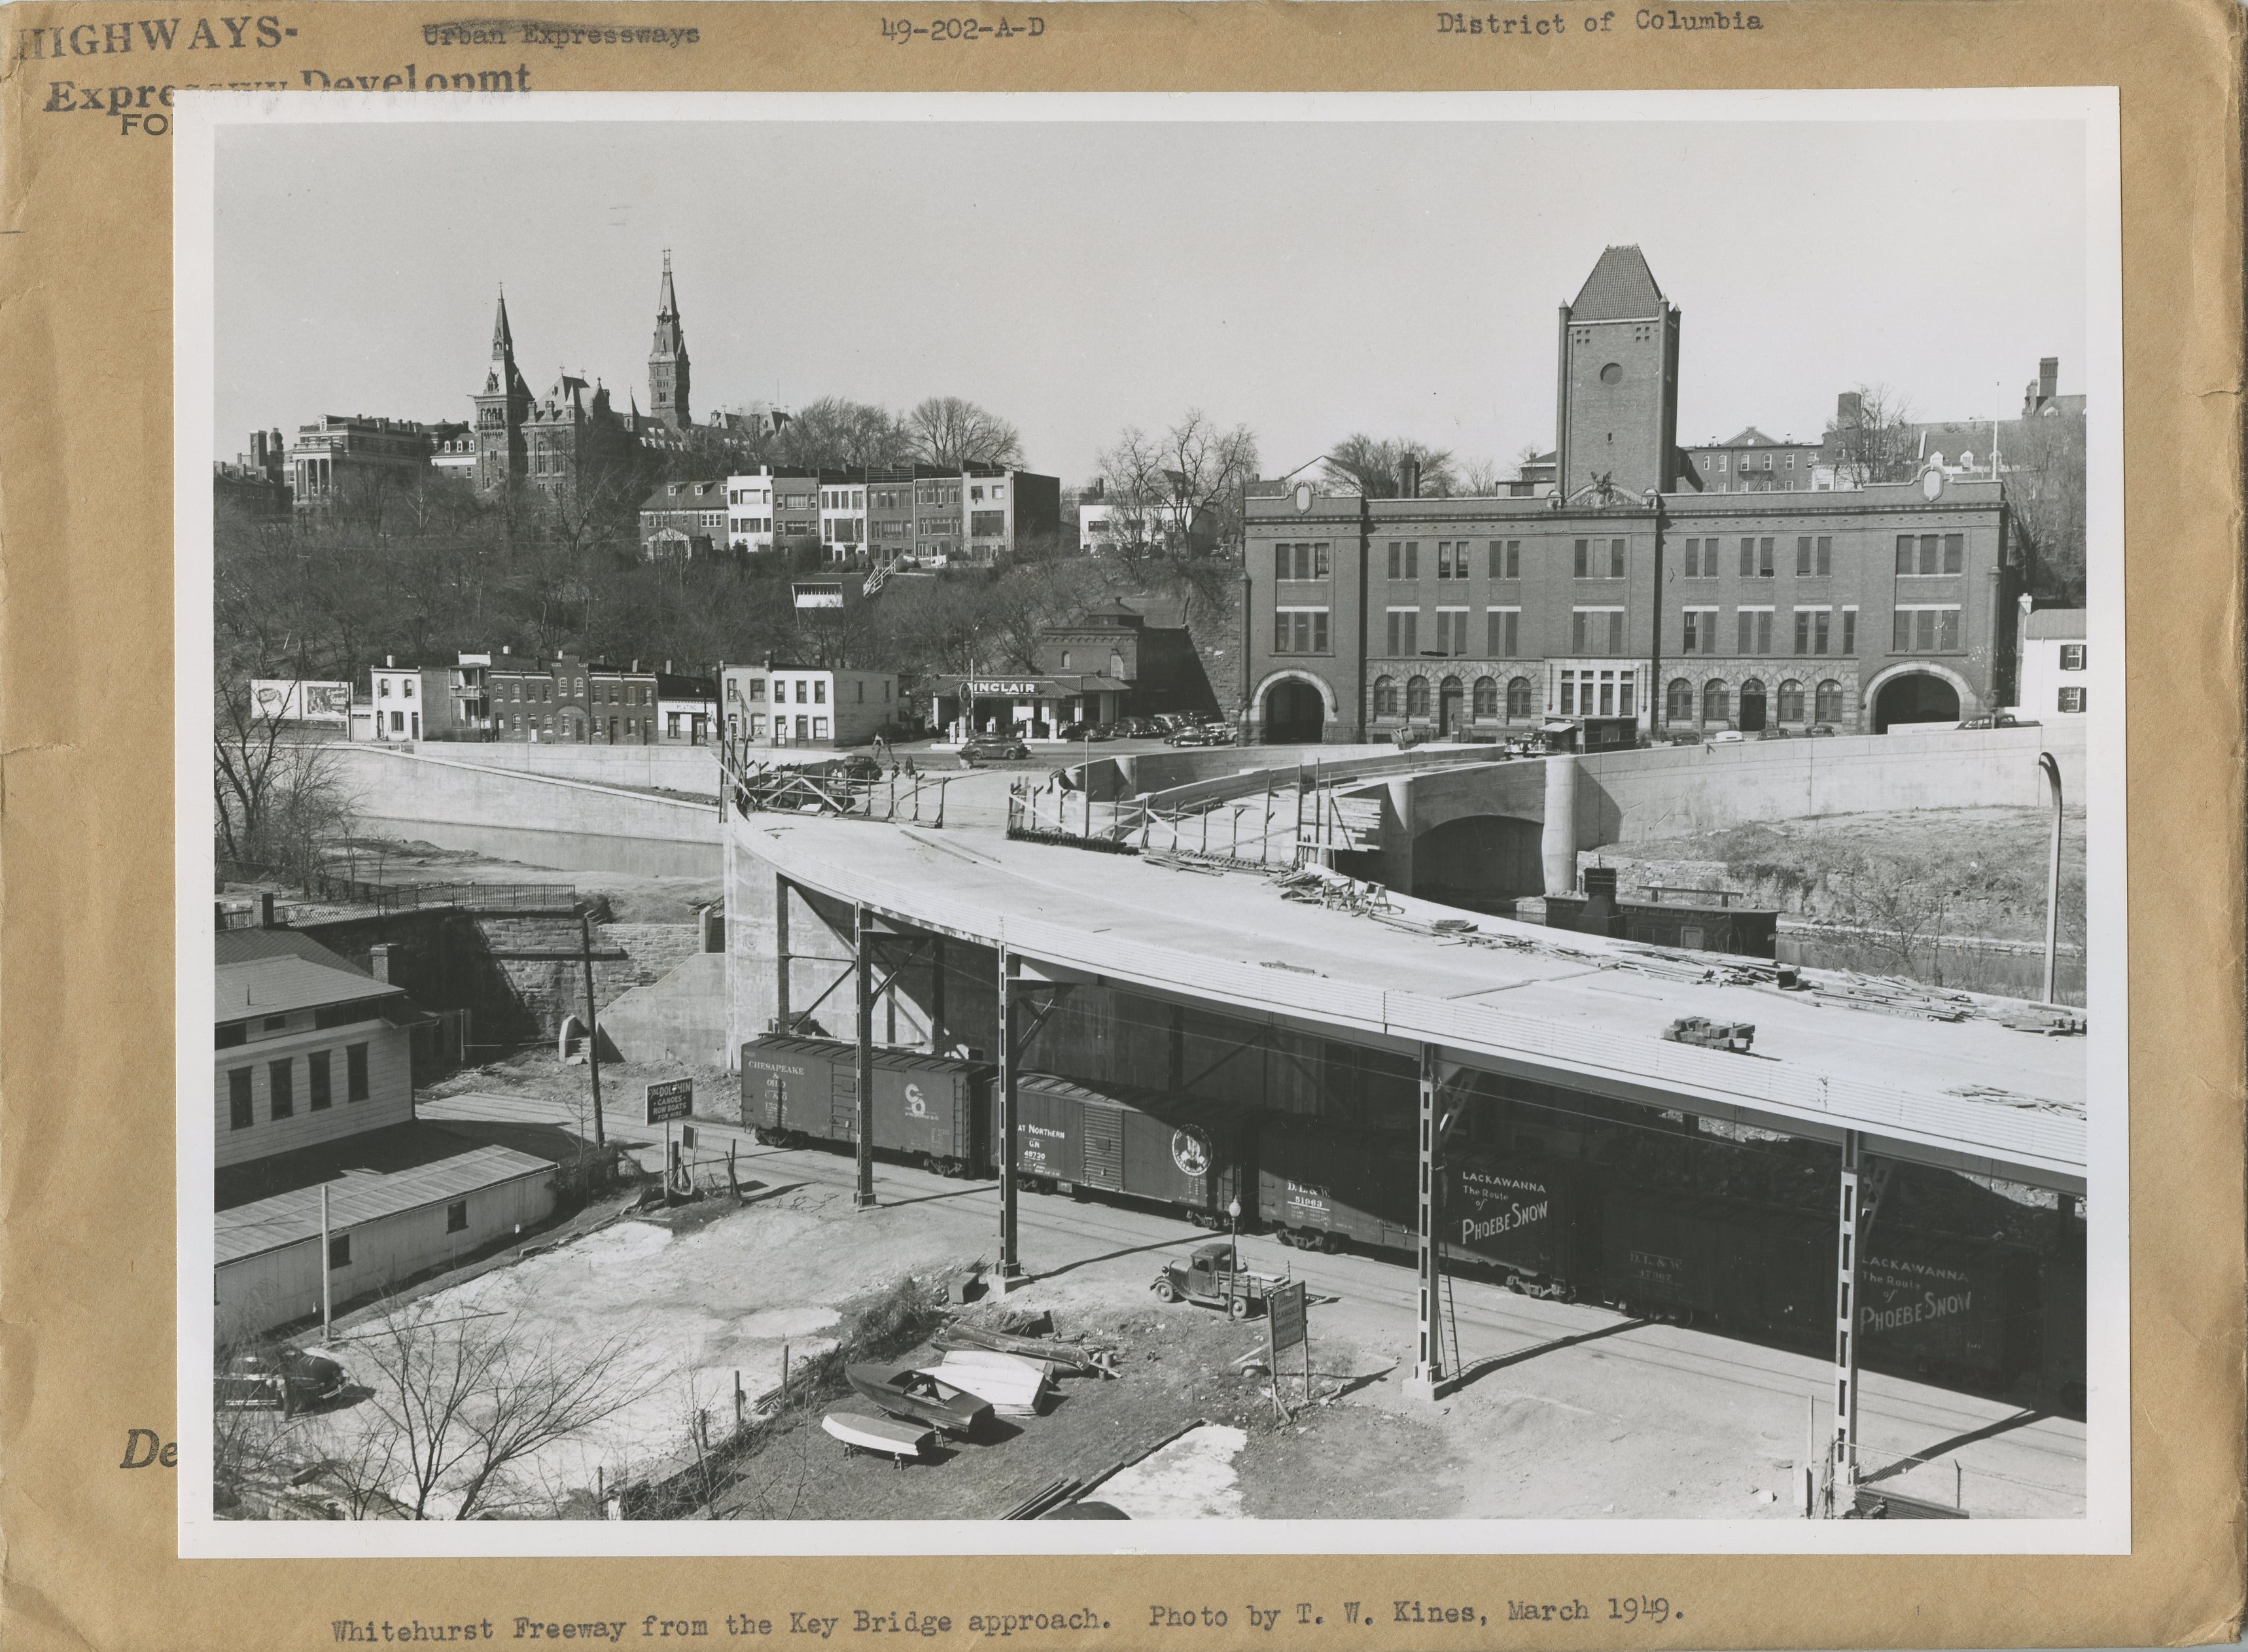
First up is this shot from March, 1949. There are actually a couple prints from this day, showing these and some other freight cars. I imagine the Georgetown switcher was hard at work preparing the train for the Georgetown Turn or perhaps receiving some new cars into the yard. Regardless, it’s a pretty special photo. Before we go on, a huge shout out to the Steam Era Freight Cars group for car data and other info, as well as the various manufacturer pages linked below. Let’s dive in.
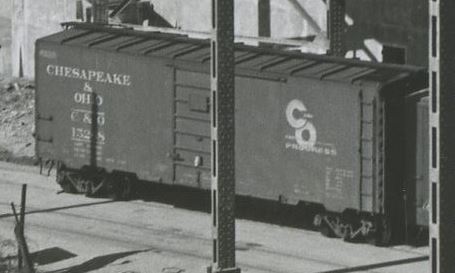
Chesapeake & Ohio 152×8
This is a Pullman-Standard Co. built 40′ PS-1 boxcar, lot 5886, C&O series 15000-15999 (1,000 cars), built in Feb 1948. It has 6′, 7-panel Superior doors (evenly spaced, placard mounted to stiffener), Ajax hand brake, Apex Tri-Lok running boards, A3 trucks, 12-panel sides.
Kadee produced a similar model of this car in HO scale, #5023.
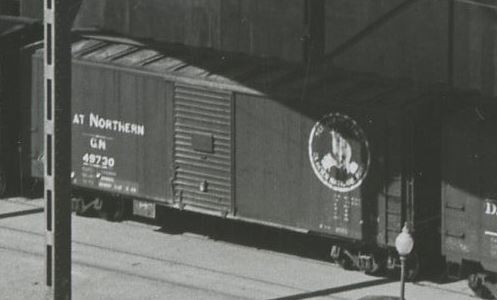
Great Northern 49730
In 1940-41 GN received 3,000 cars of this type, built by Pullman Standard, American Car & Foundry and others. This car was built by Pullman-Standard Co. in 1941 in a lot of 500 cars. This 40’6″ car features a 6′ Youngstown door, steel frame, steel ends, wood sheathing. Note that this car has a rare front-facing goat logo, with the slogan: “SEE AMERICA FIRST, GLACIER NATIONAL PARK.” GN specified boxcar red sides with a black roof, ends and underframe.
Resin Car Works produced a similar model of this car in HO scale, Kit 11.01.
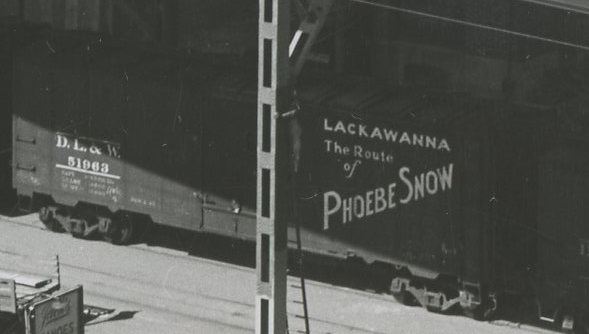
Delaware Lackawanna & Western 51963
This car is an AAR 1937 design boxcar from DL&W series 51750-51999, built Dec 1944 by Magor Car Co. lot W708, a total of 250 cars. The car features 10′ IH, 6′ seven-panel Superior doors, 10-panel riveted sides, 4/5 Dreadnaught ends with round corners and no push-pole sockets. Murphy raised-panel roof, Ajax handbrake, wood running boards, T-Z brake step, 7/7 ladders, double-truss, spring plankless trucks with cast iron wheels. These cars were built between Dec 1944 and Feb 1945.
Rapido Trains has just announced a run of AAR 1937 cars and feature this paint scheme in a slightly different series. SKU 181002A. Atlas offers an entry-level version of the AAR 1937 boxcar as well. From what I can tell, the Intermountain 1937 AAR boxcar has square corners only and is not ideal. They do offer a DL&W paint scheme on the square corner car.
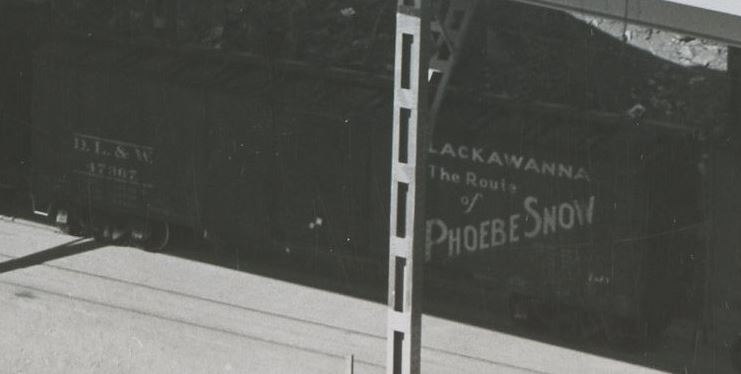
Delaware Lackawanna & Western 47367
Between Nov 1929 and Feb 1930 DL&W took delivery of 1,000 of these unusual cars were derived from the USRA standard design. These all-steel boxcars were from series 47000-47699, 700 cars, built by American Car & Foundry, Lot 998, delivered Nov 1929 – Jan 1930. (The other 300 cars, 47700-47999, were produced by Magor Car Co. Lot P-7072, delivered Jan-Feb 1930.) Cars had an insight height of 8’7″, Hutchins Dry Lading roofs and Youngstown doors. After 1940 when cars were outshopped and AB brakes added, many were outfitted with Murphy panel roofs, steel running boards and Superior panel five-panel doors. Cars were delivered in DL&W freight car brown, with standard white freight lettering. Repaints began in 1942 and included the addition of the “Phoebe Snow” slogan design. In 1955 many of these cars were repainted a second time and received the large” “Billboard” road name stenciled and moved to the left side. (Special thanks to Brian Carlson from the Steam Era Freight Car group and Protocraft for some of this info!)
Ozark Miniatures produces a decal set for these cars in HO scale. Tichy also offers three decal sets for variants of this car. (one, two, three.) As does K4. Decals for O scale cars produced by Protocraft. Apparently the Broadway Limited NYC 40′ Steel Boxcar is a close match to the DL&W prototype, but lacks the correct ends. It can be kitbashed into a stand-in.
I hope you’ve enjoyed this dive into some freight car specifics. I know that I’ll be hunting some models of these cars for my roster!
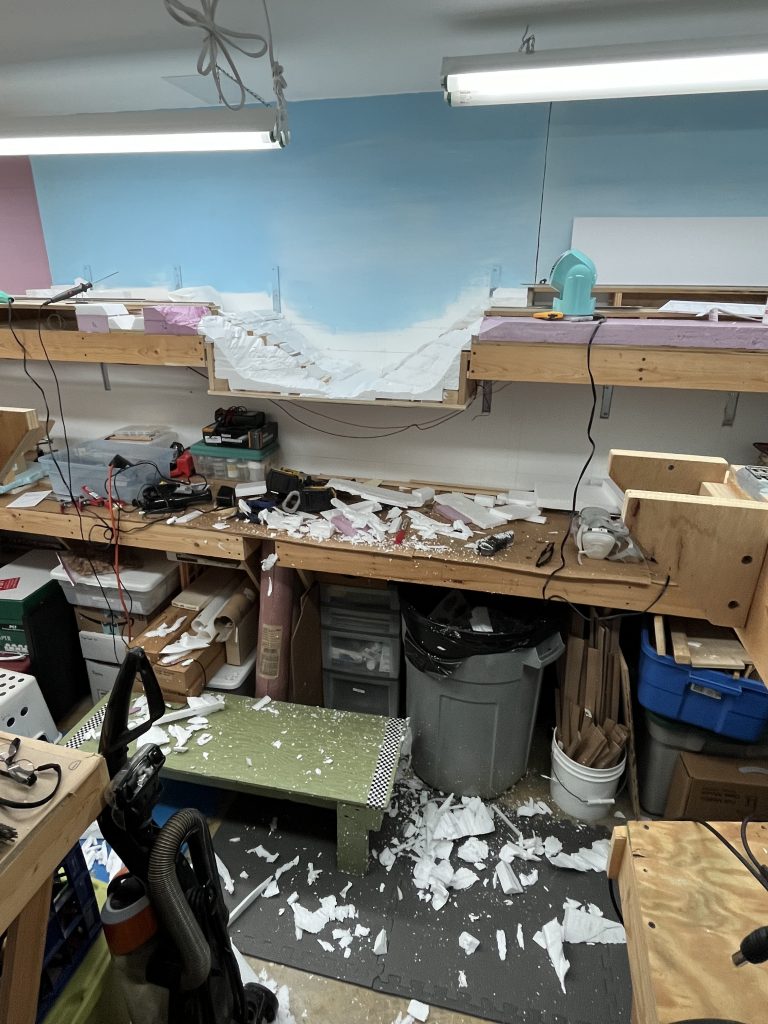
August 2023: Progress Update: Rock Creek Trestle & More
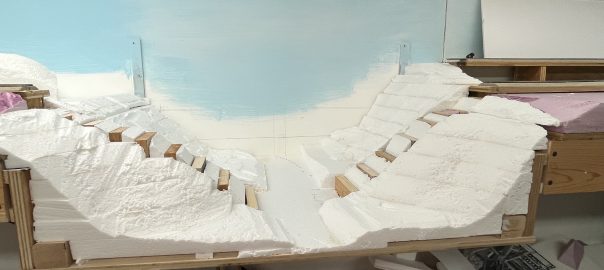
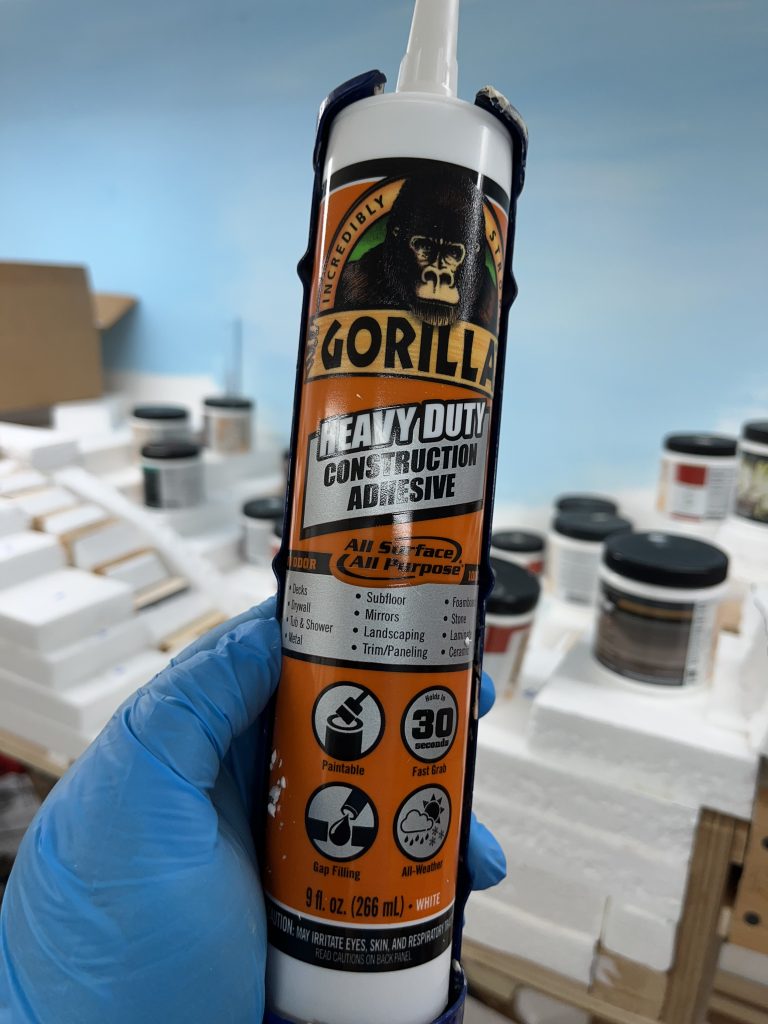
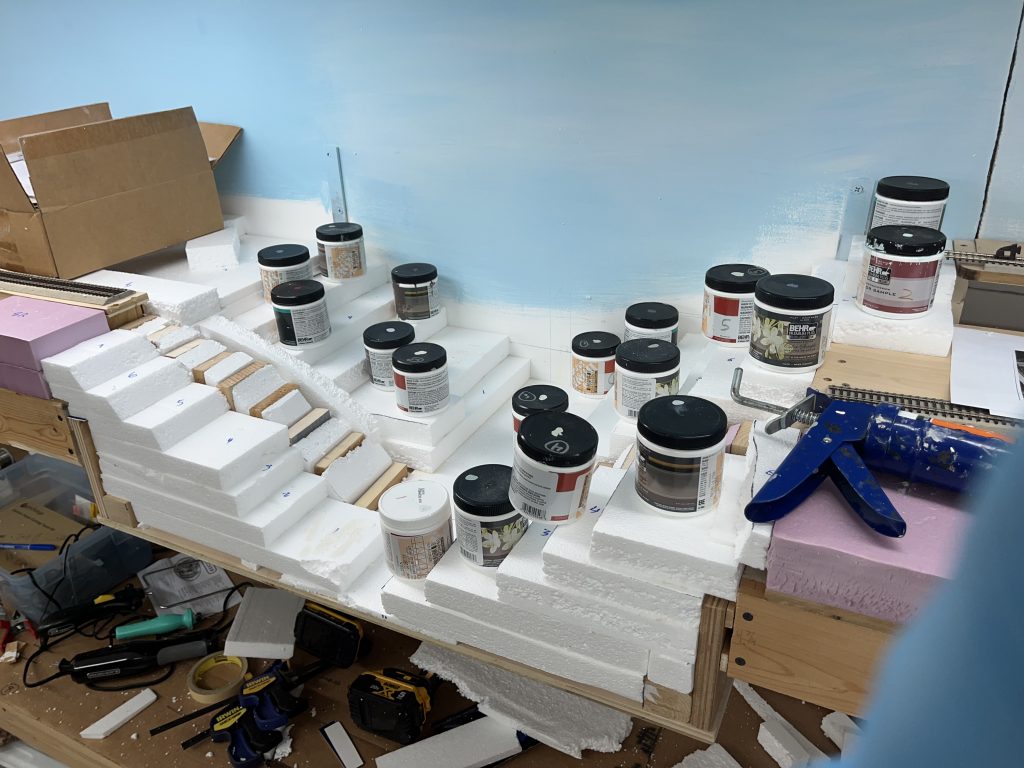
So are you sick of me posting “updates” on the Rock Creek trestle yet? Yeah, me too! 🙂 Anyway, onward. Made a bit of progress on the Rock Creek trestle scene. First up, some terraforming. That requires gluing all the foam I cut in an earlier work session. After some research, I settled on this stuff:
Worked a treat for gluing all the foam together.
Next up came the actual carving with foam cutting tools, knives and a rasp. I wore a respirator mask, had a fan on, and a powerful extraction fan running while working with the foam cutting tools. The fumes are nasty!
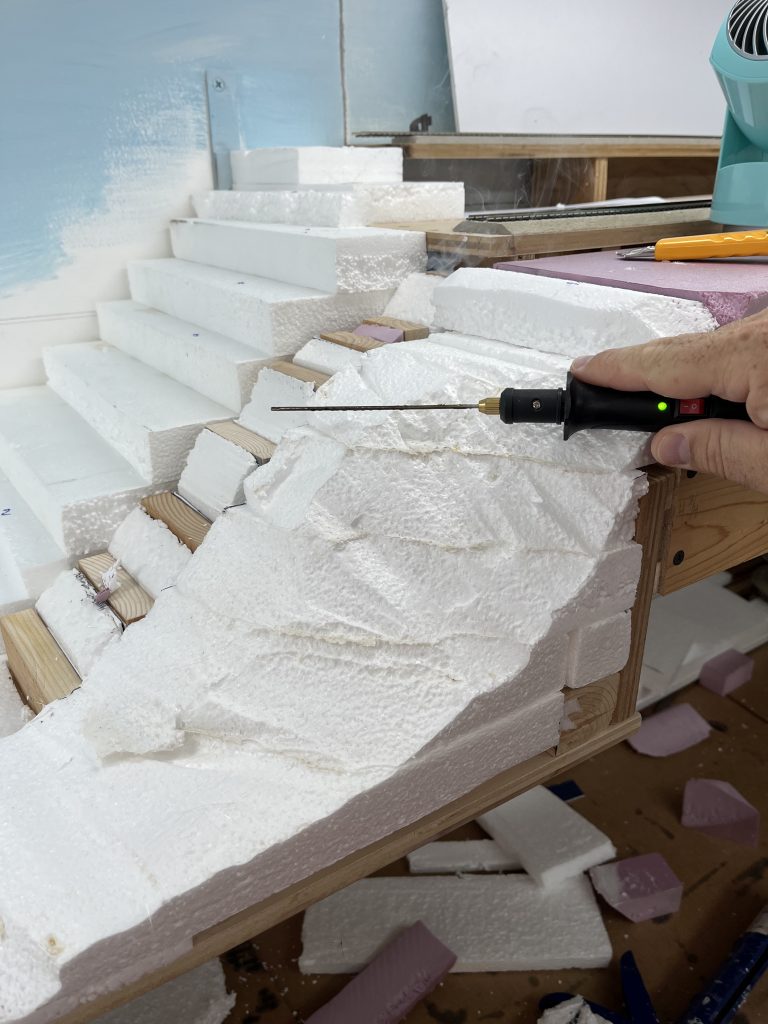
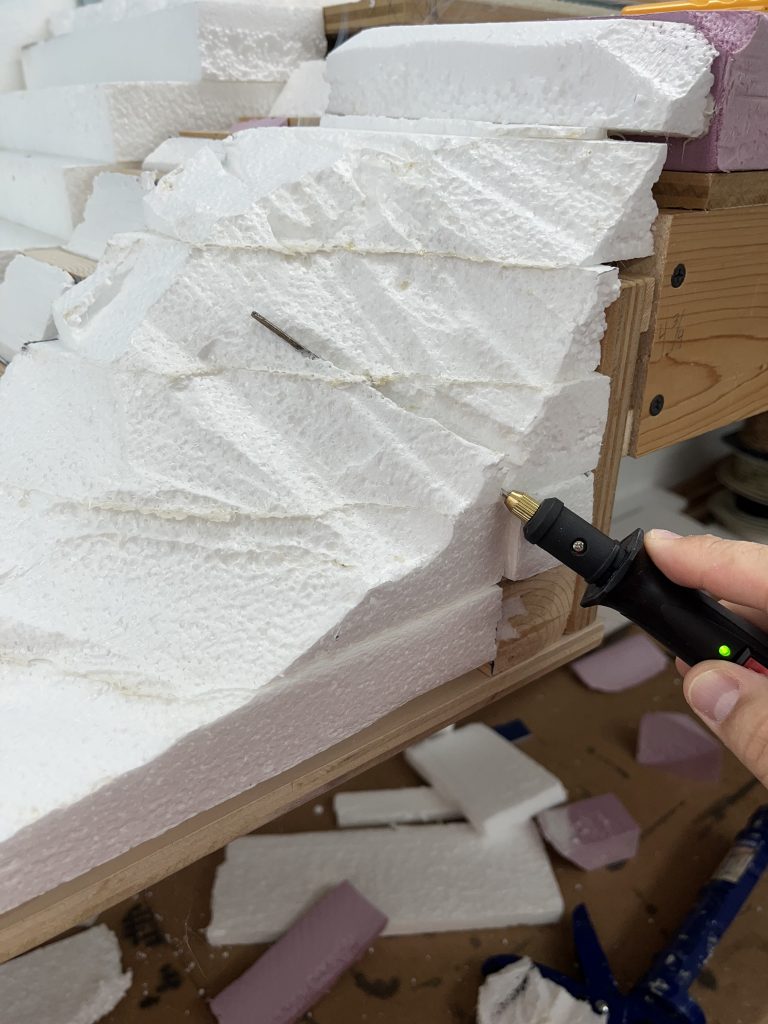
After all was done, things are starting to come together
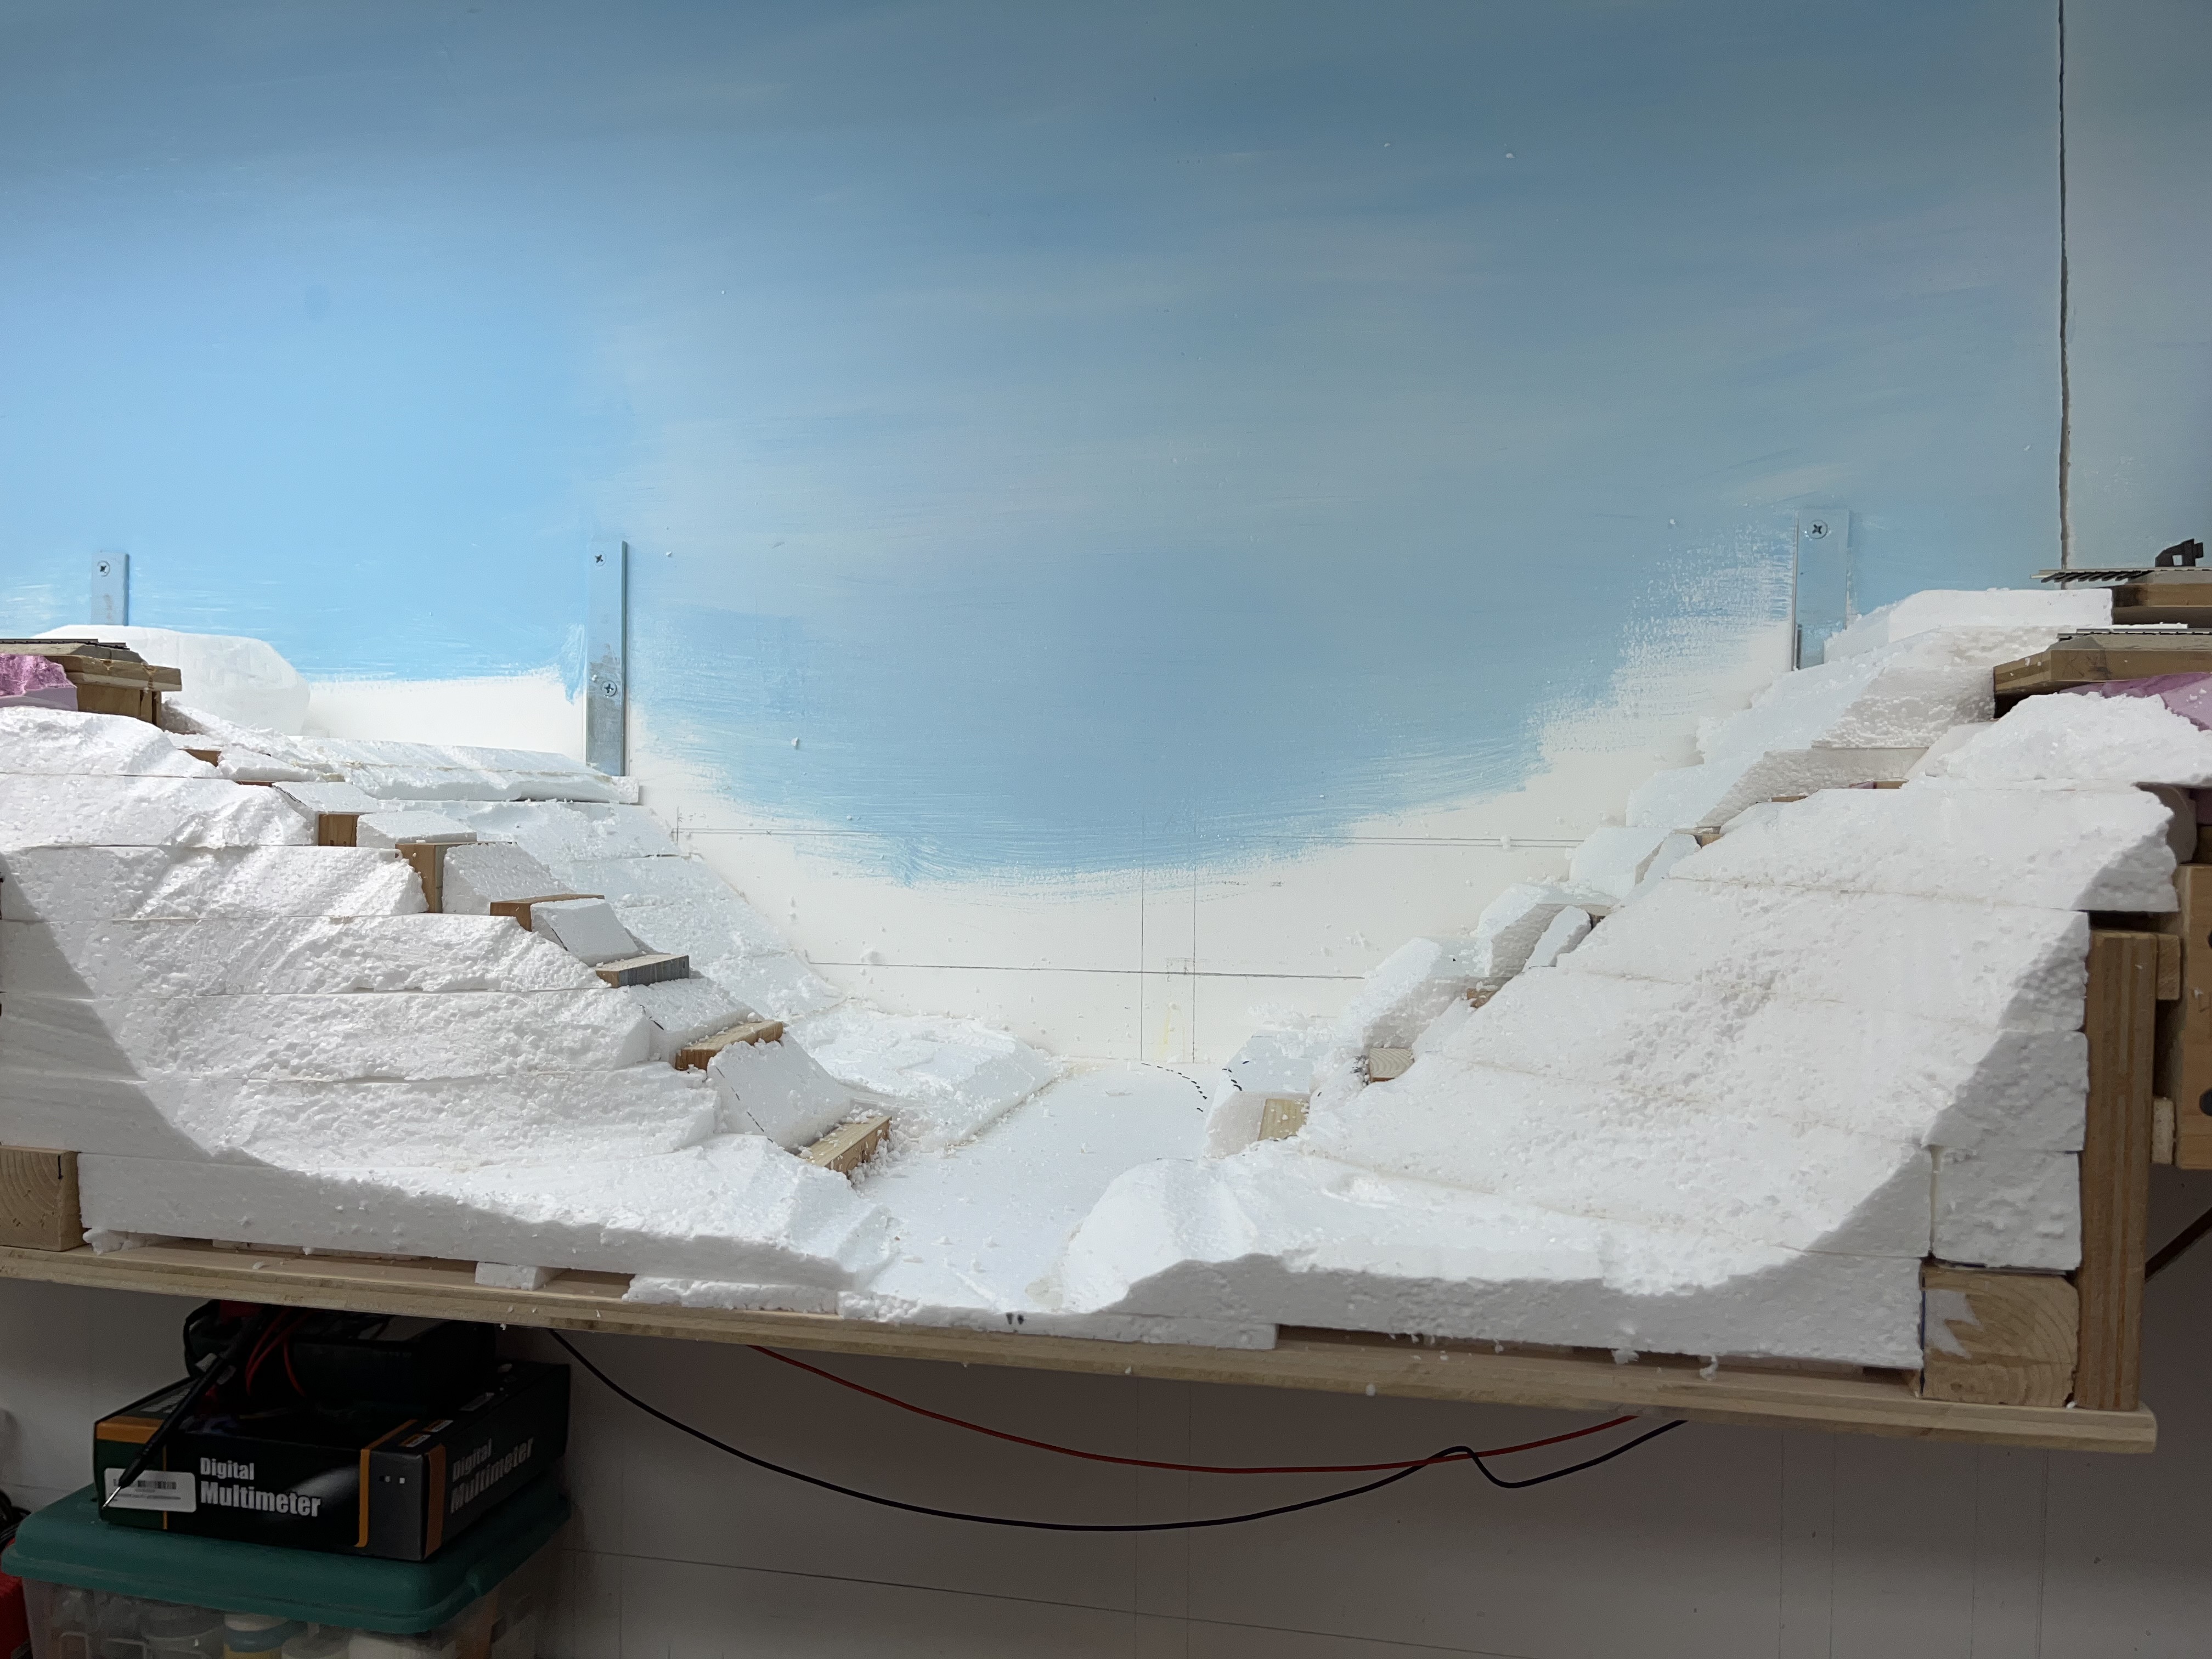
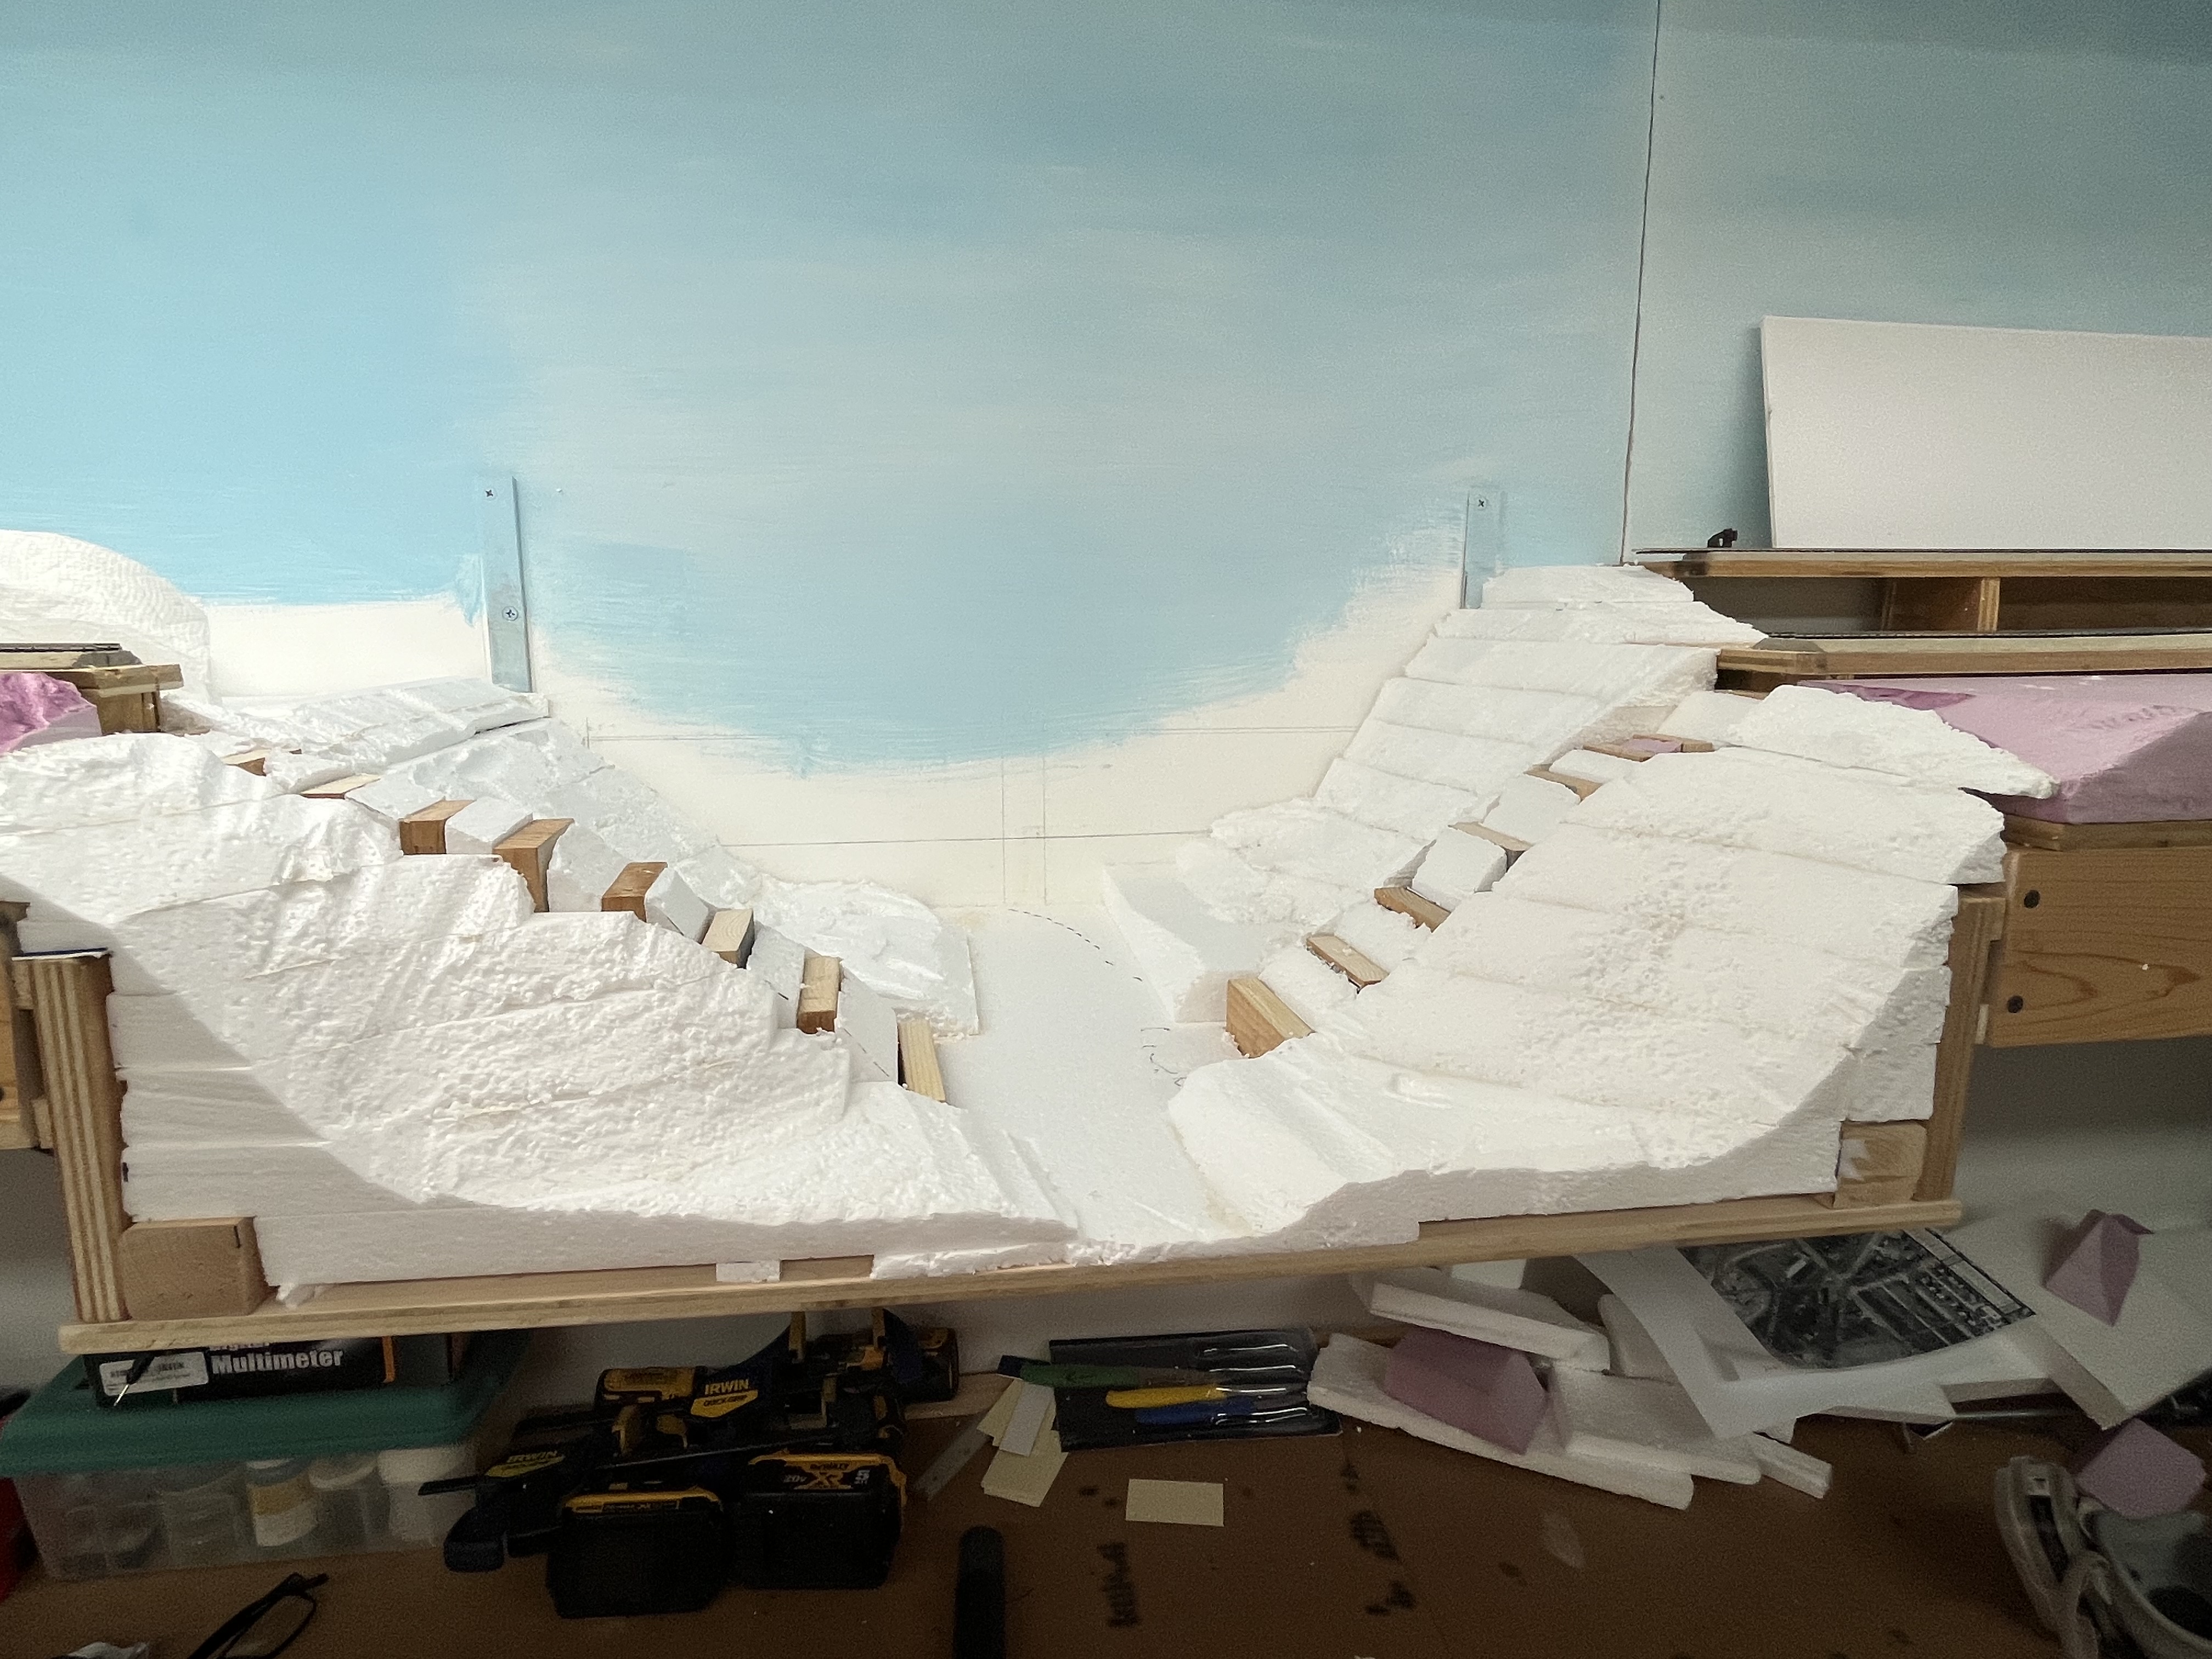
All of this will be covered with a layer of Sculptamold.
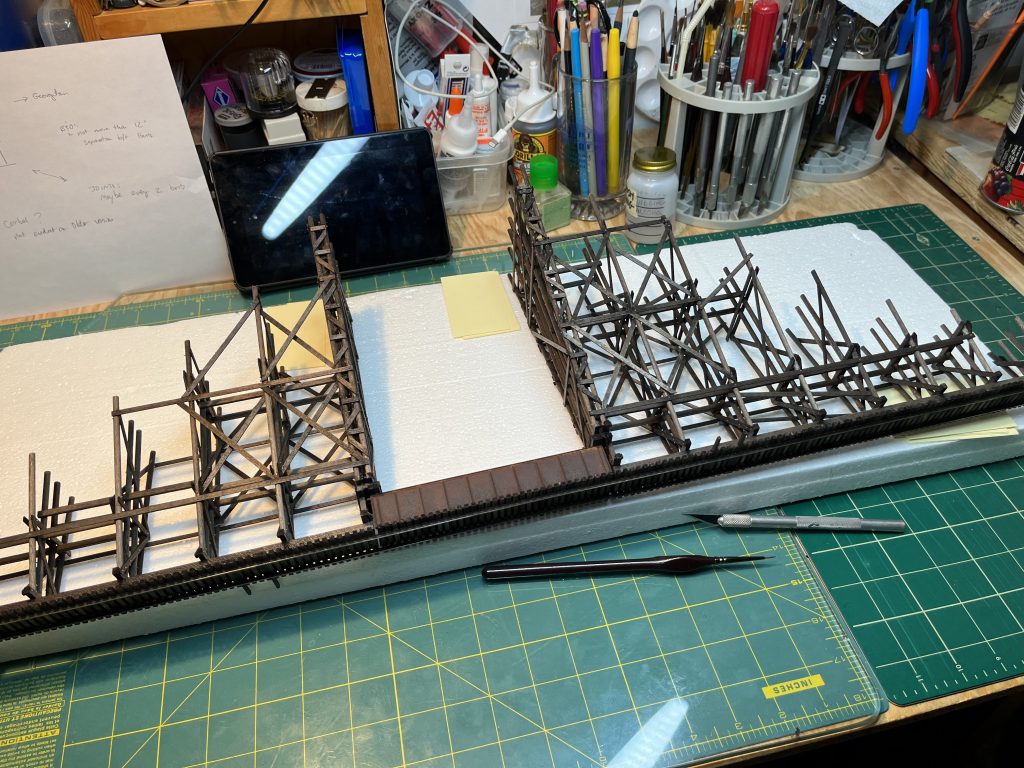
I also started on the final to-do’s on the trestle itself. I scribed lines in the sides of the stringers simulating the beams. I now will install NBW’s at each joint and above each bent. I need to put the stringers on the top of the trestle as well as build the little escape platforms. That will be last, as they stand proud of the top. After that, a little weathering and it will be time to install the trestle. Here’s a few more shots:
Other than this, not a lot going on last couple months. Saw my son off to college this week and work is busy! I picked up several new freight cars and have been doing research and planning on getting my fleet more rounded out – I realized this week that I am severely deficient in decent B&O 2-bay hopper cars.
I scored a copy of the wonderful Merchant’s Despatch book by Roger Hinman from Signature Press. I’ve had my eye on this for years and the price via the usual used book joints always dissuaded me. A random search turned up new copies for sale at Arizona Hobbies for $35! This is an excellent price and if you’re looking for this book, jump on it! I read the whole book when it arrived and enjoyed it tremendously.
Probably the biggest thing was I FINALLY was able to purchase the needed DCC Concepts Cobalt IP Digital turnout motors – these babies have been like hen’s teeth for the last several months due to manufacturer shortages. Iron Planet Hobbies stocked a few 12-pack cases and I picked up a couple, so now I am all set for turnout motors! (Side note, as of this writing Iron Planet Hobbies is again out of stock for the 12 and 6 packs. They have 17 single units in stock. They have had the BEST prices of any place I have found, so I highly recommend!) Need to figure out what I’m going to do for track in Georgetown (to hand-lay, or not to hand-lay!) but that’s a discussion for another day.
Oh, and one more thing. Here’s a sneak peek at something Kelly is cooking up: