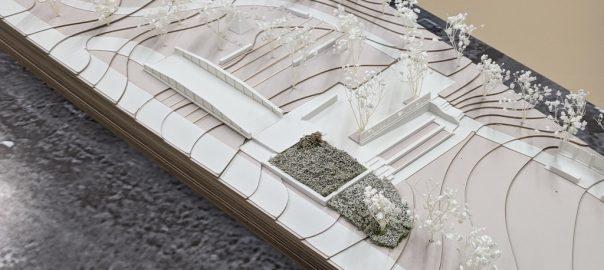
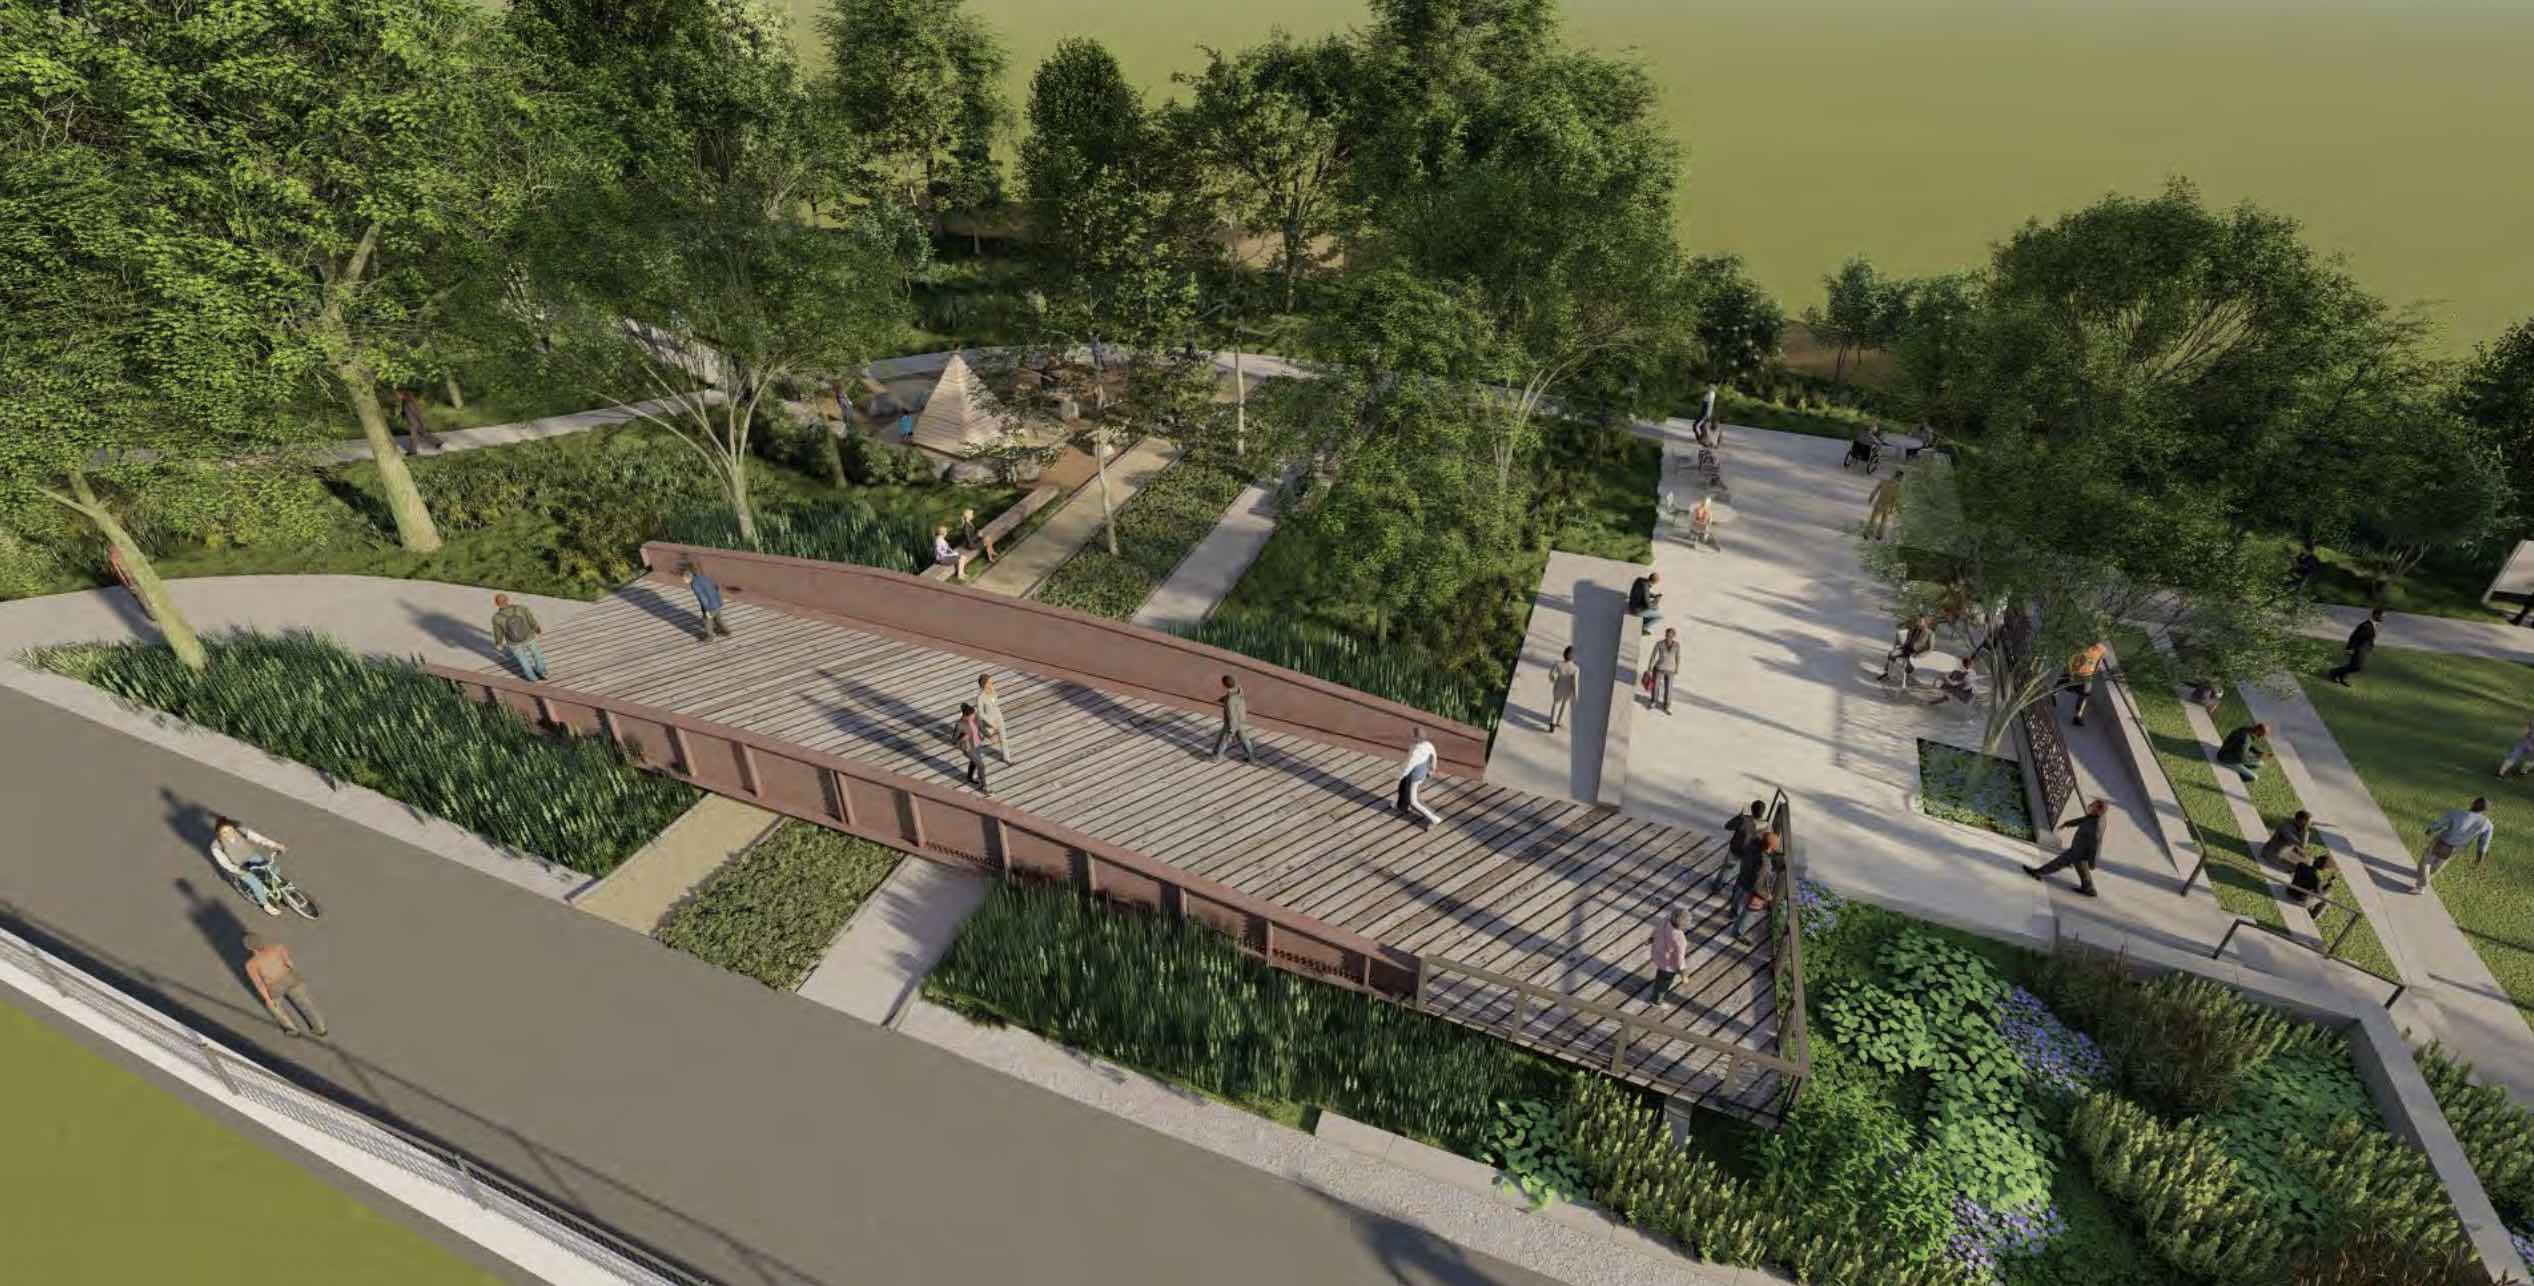
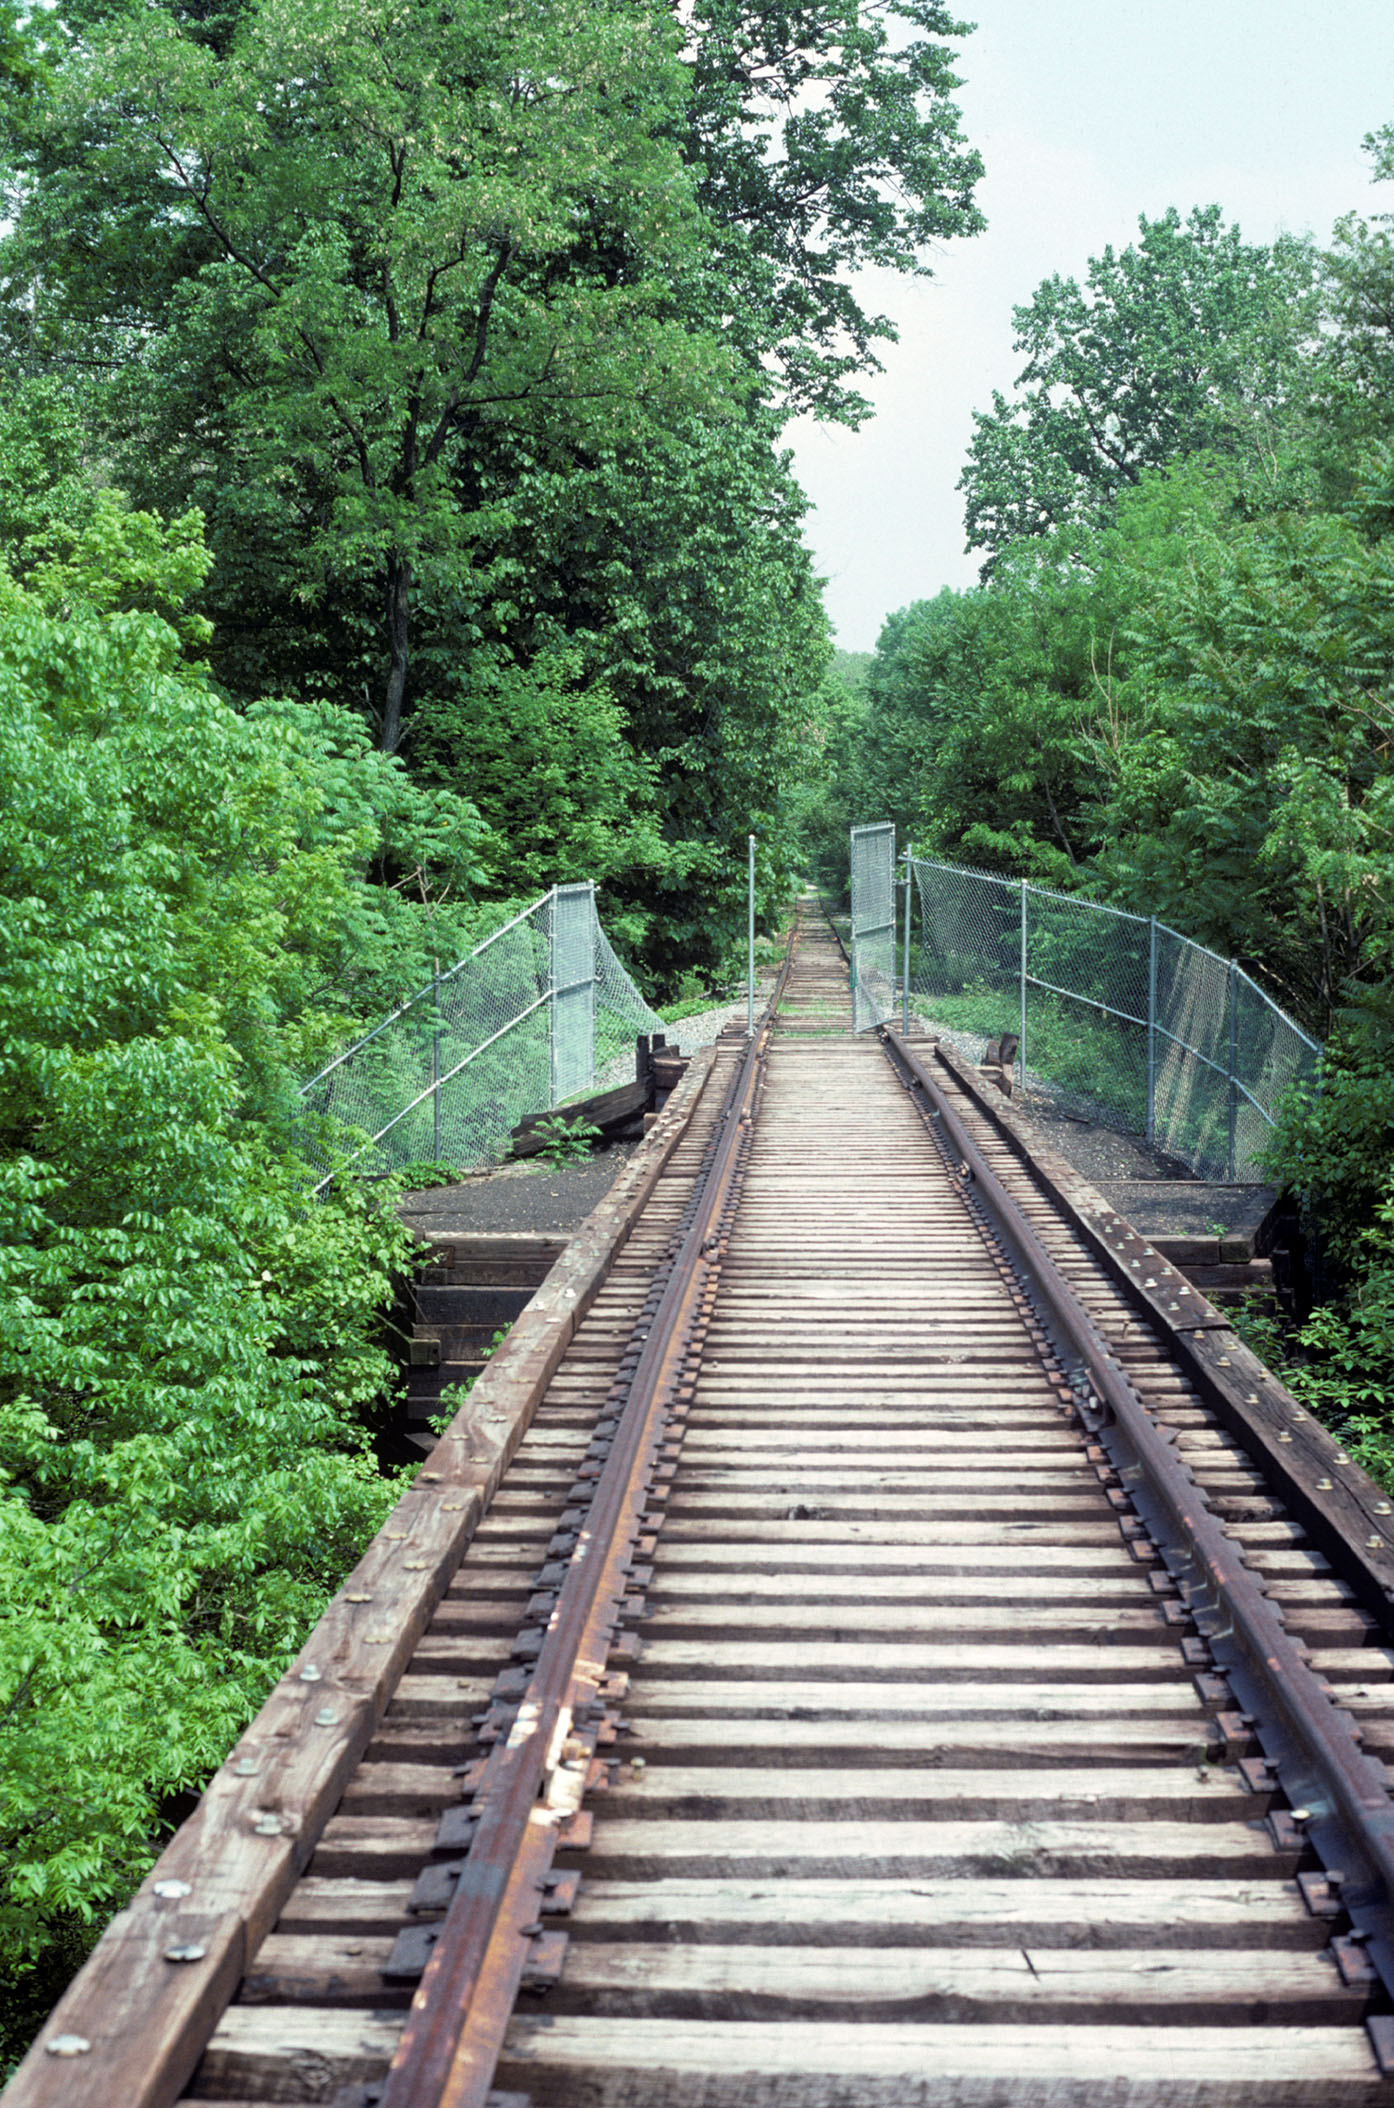
One of the great things from all of the Purple Line destruction/construction is the preservation of the historic Talbot Ave bridge that once spanned the Metropolitan Branch at Georgetown Junction. As you may recall, back in 2019 the bridge was removed in preparation for the installation of the additional two tracks and a new overpass. The County planned to save the bridge for a future installation in a park, and we finally have some renderings of what it may look like.
Lyttonsville Park rendering with the Talbot Ave bridge feature
At the Lyttonsville Park community meeting, a slide presentation outlined the current designs and status. Link to the slide presentation: https://montgomeryparks.org/wp-content/uploads/2020/11/Lyttonsville-community-3-2023-0330-web-r.pdf
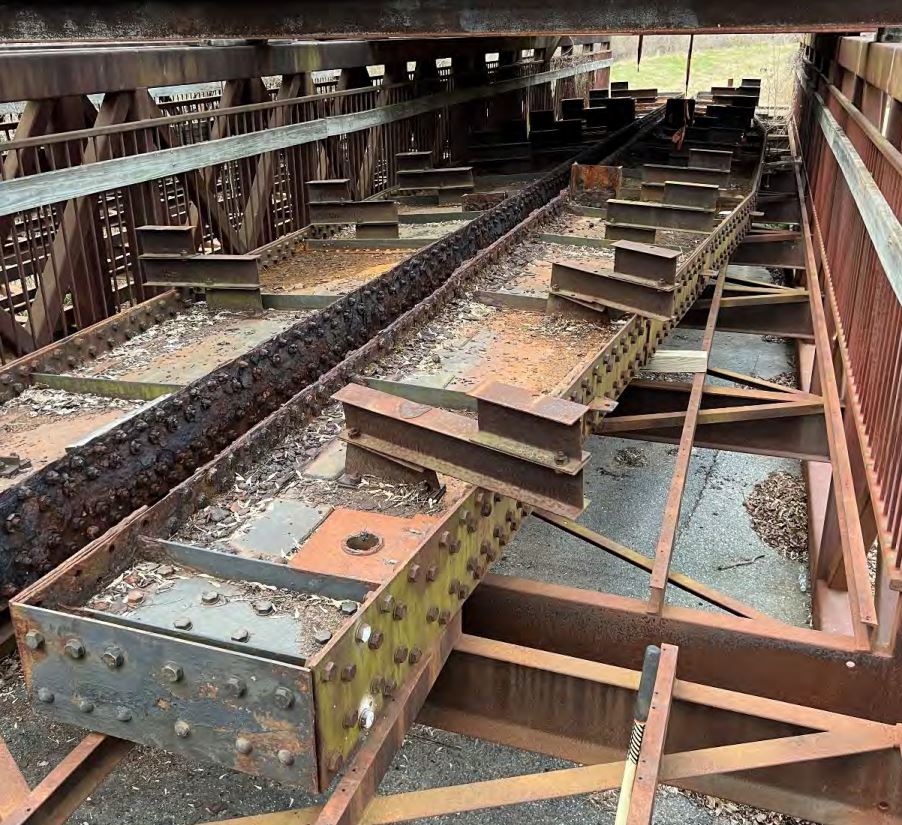
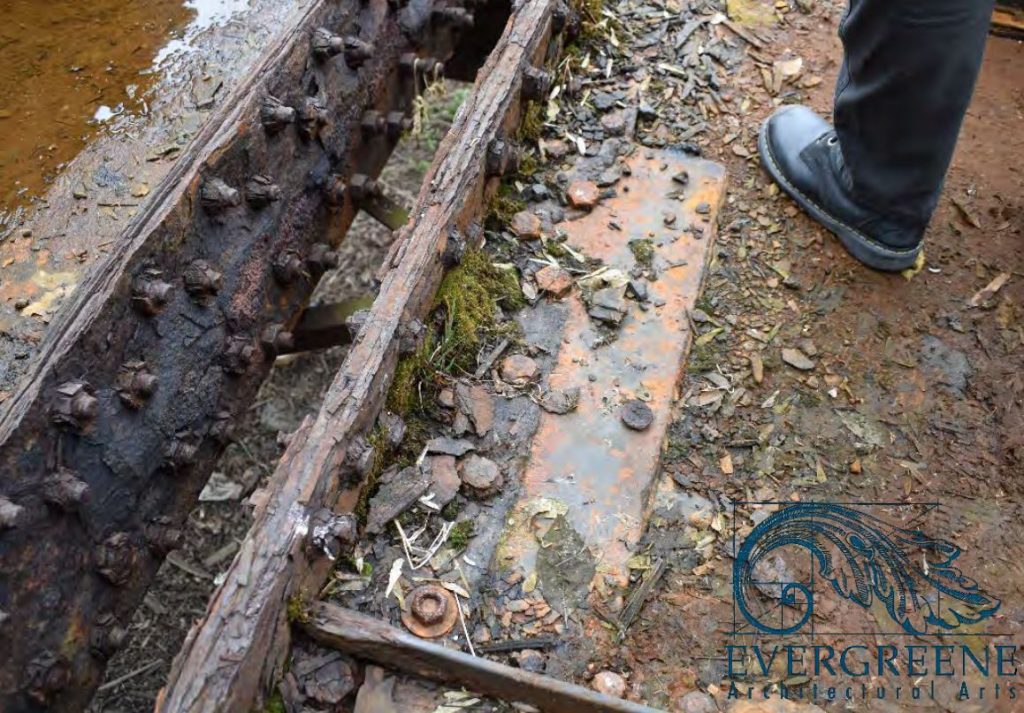
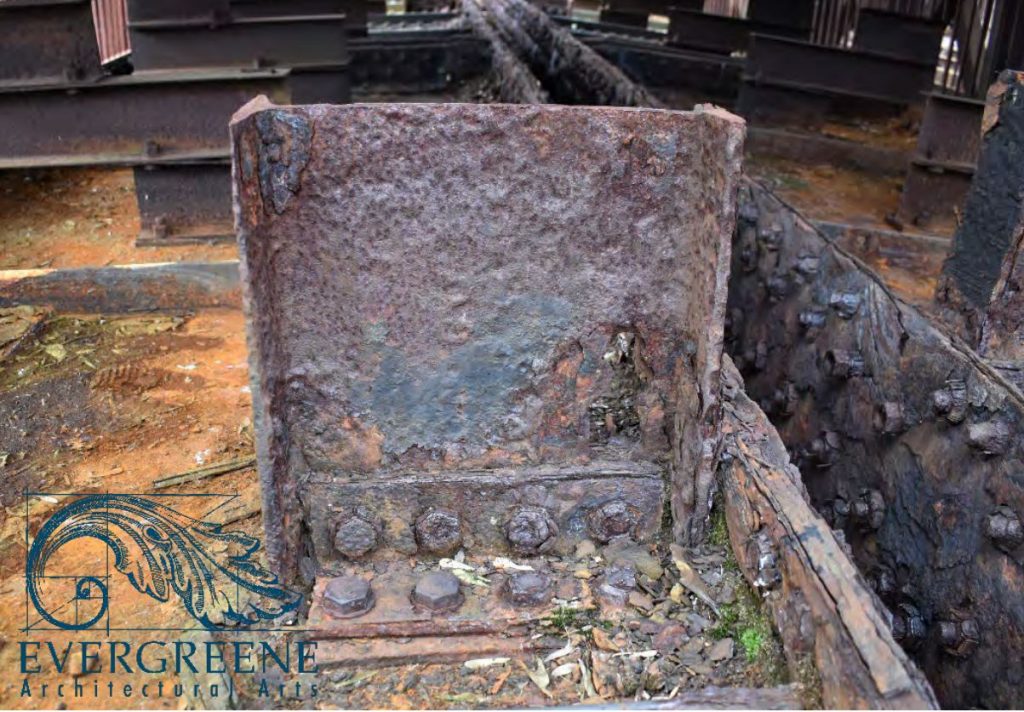
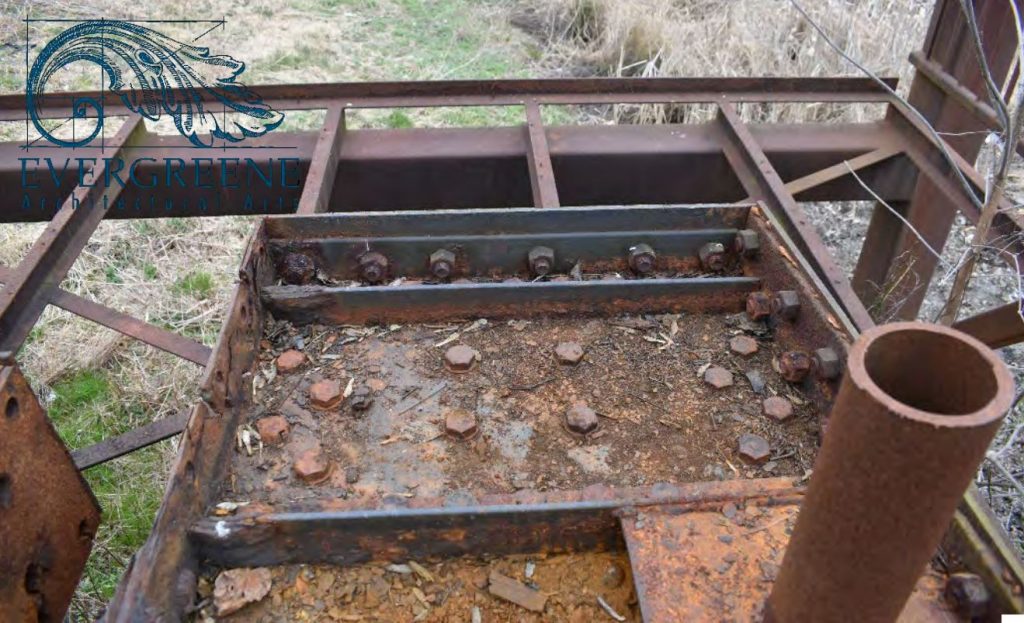
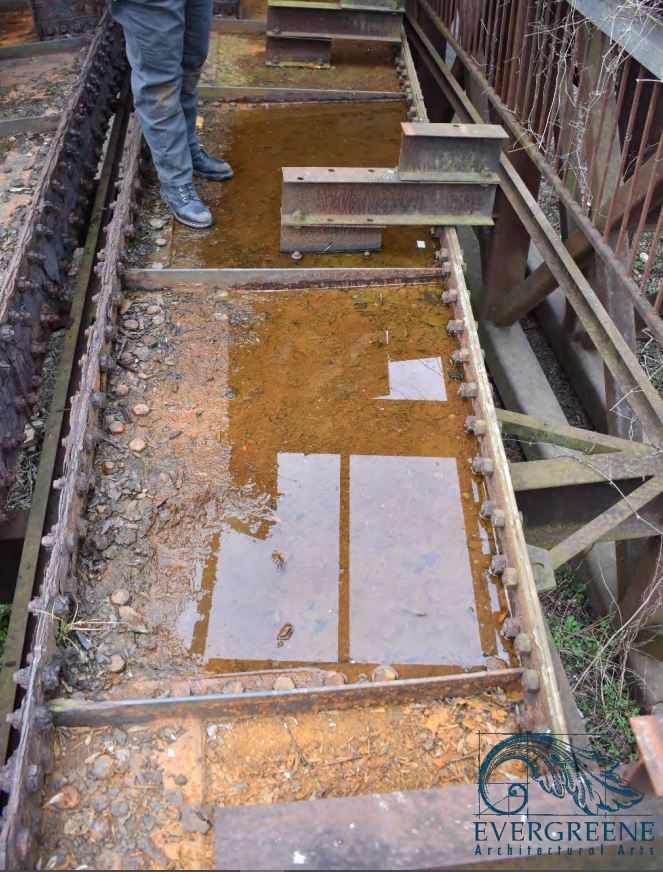
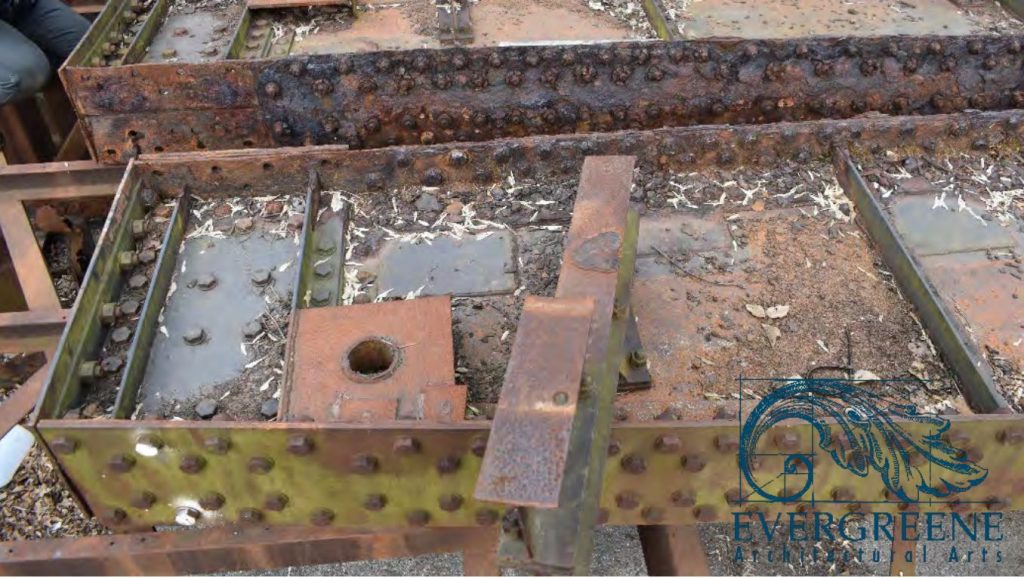
In the presentation are several really neat photos of the current state of the bridge. The girders, one of the only parts of the original 1916 construction, are preserved, sitting atop the pedestrian bridge sections that once topped the Rock Creek trestle. Not sure of the current location; probably in a Purple Line storage yard.
A hundred years of weather, deferred maintenance and punishment has not been kind to the old steel, and it shows. I’m so grateful it will be refurbished and preserved; a small piece of railroad history that will continue to be enjoyed for generations to come. I’ll take it. Plus, I can actually go and get more measurements if I need them! 🙂
Well, this was a special project that I can finally share with everyone. A few months back I was contacted by a Georgetown University graduate student who was putting together a brief documentary on the Georgetown Branch; specifically its history and transformation into a rail trail. We initially shared stories and historic reference material and eventually I was interviewed on-camera at home. I think the project turned out brilliantly and my hats off to Evan, the director, producer, writer – well, everything! He did an awesome job capturing the entire story of the Branch. I hope you enjoy!
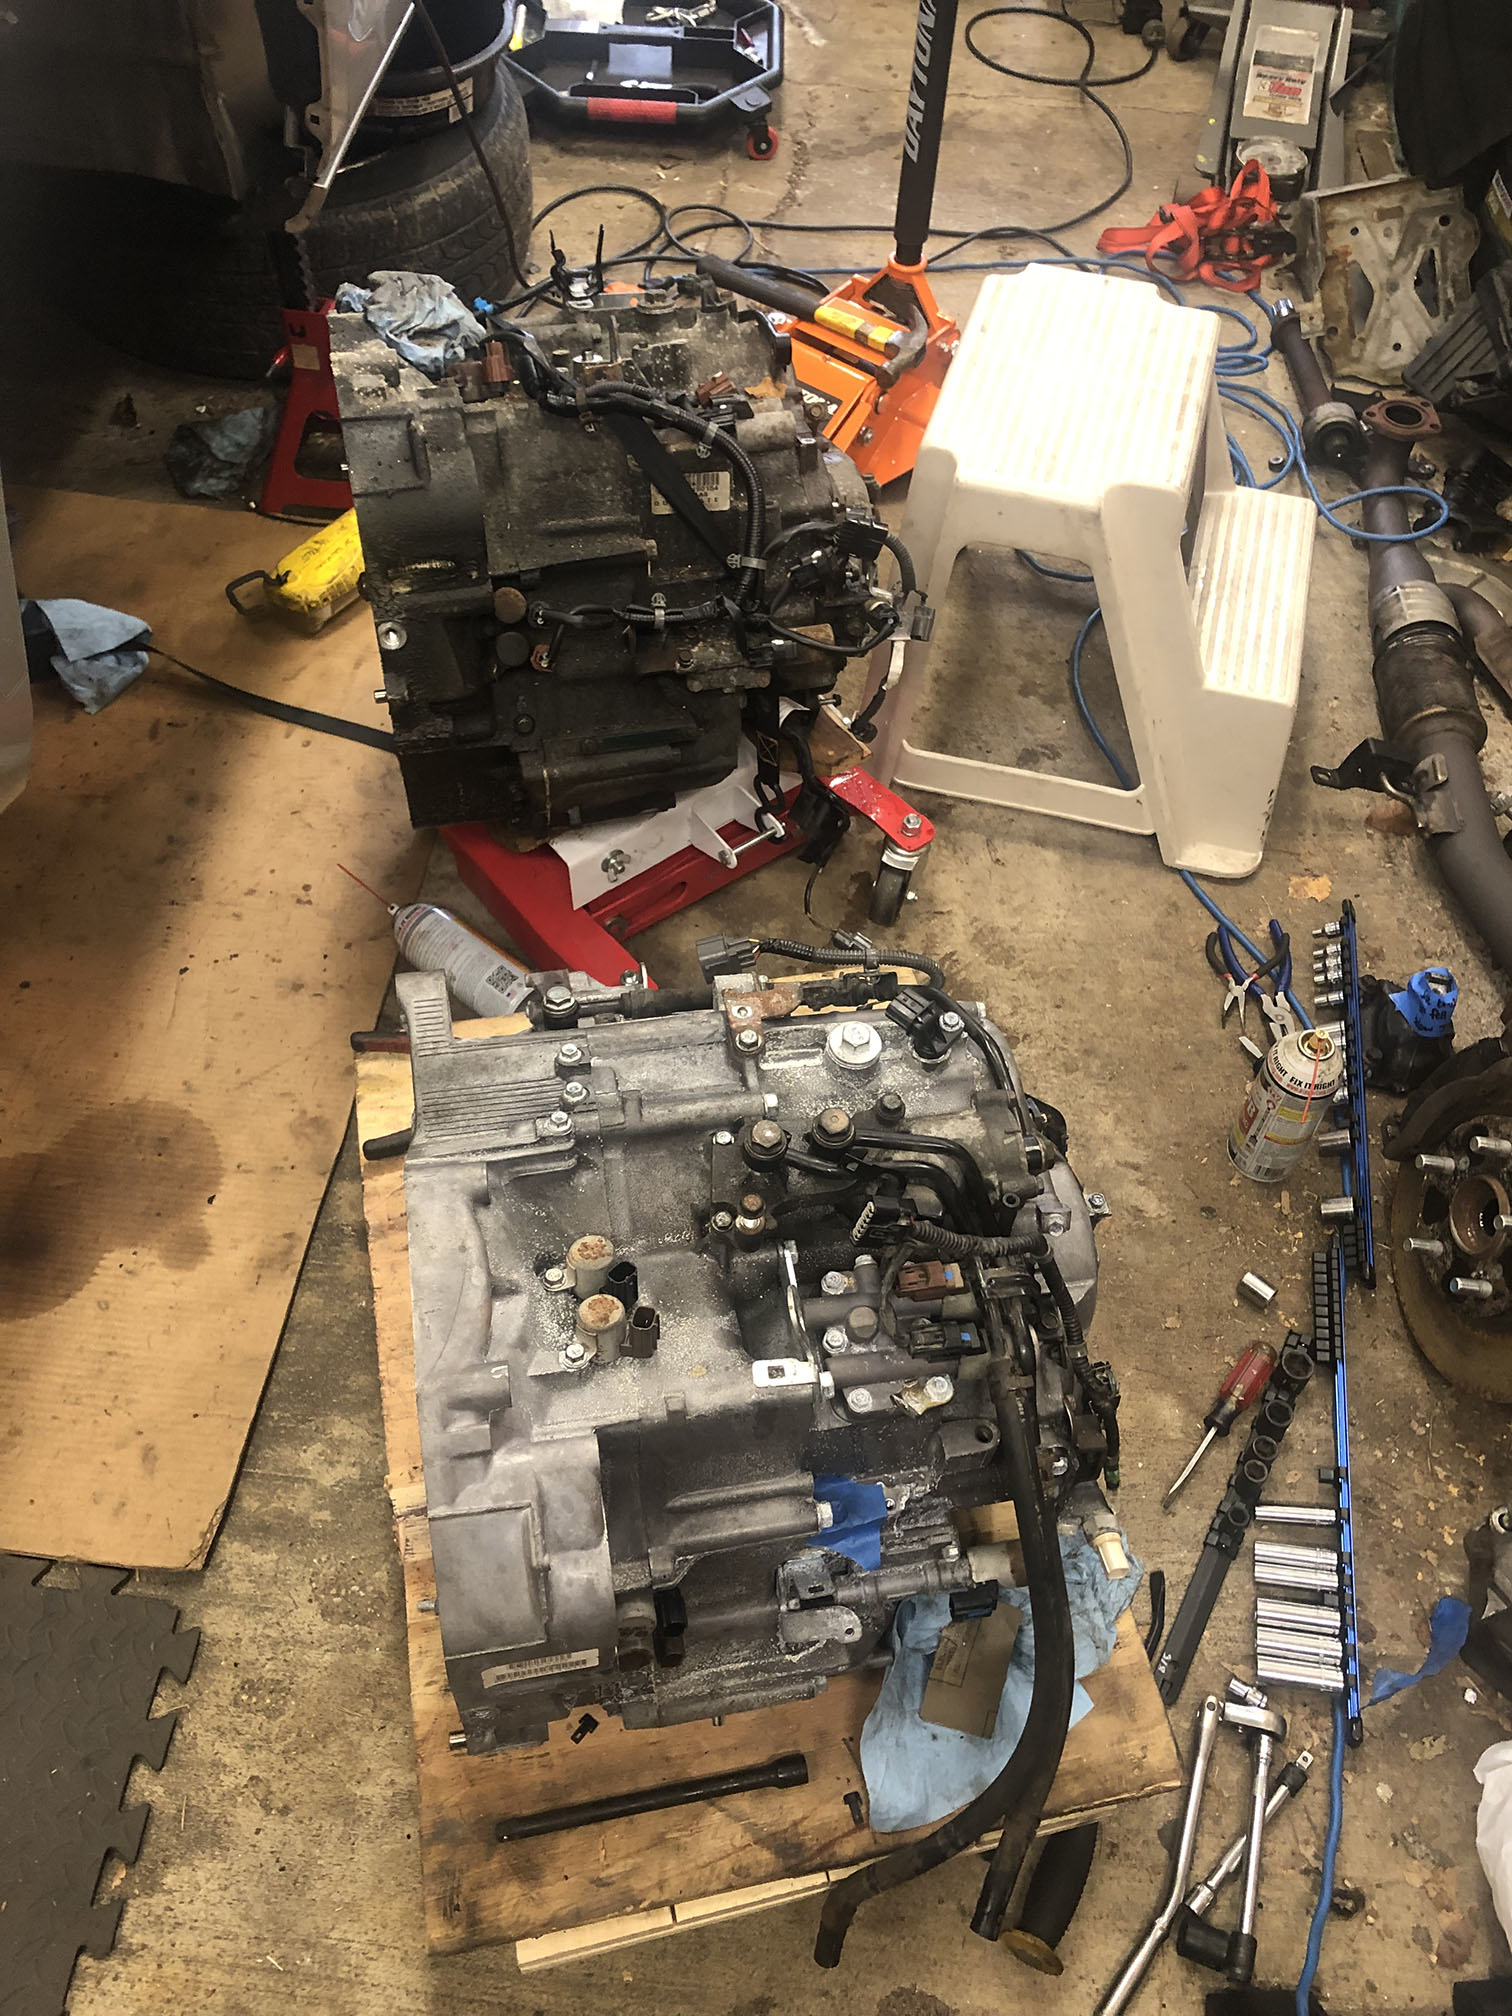
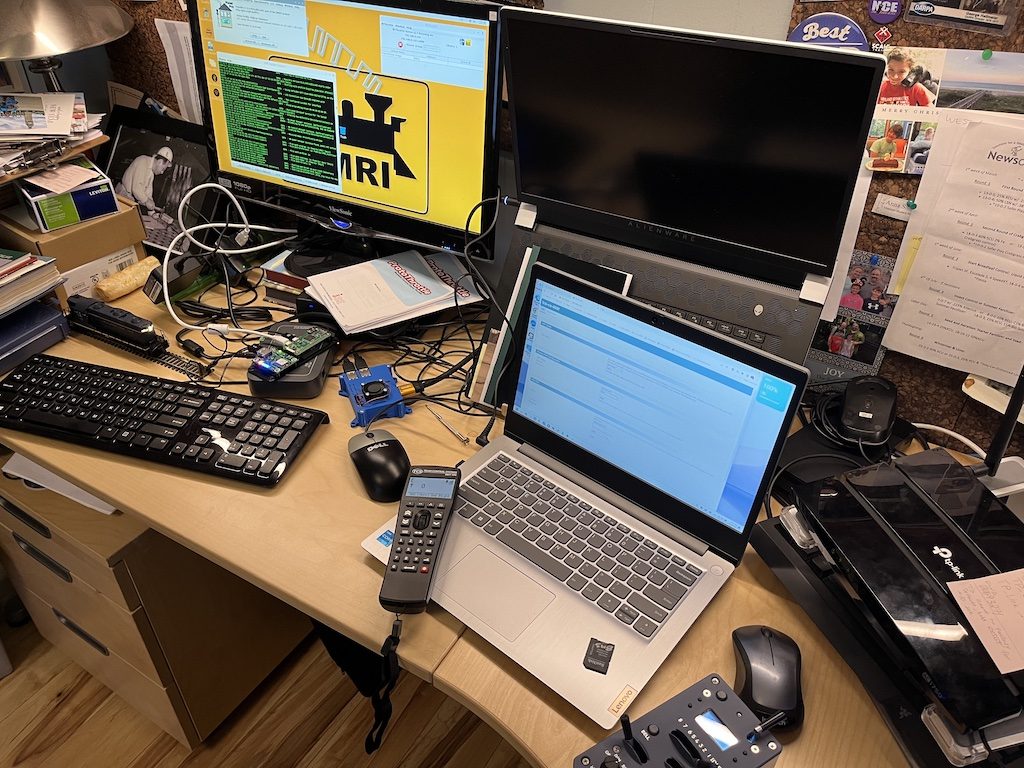
A quick update to share a few snapshots of some progress and talk about what has been going on since the Winter. Well, first up, between December and January I took on a massive project; replacing the transmission in my 2006 Honda Odyssey. The task was no small feat and I did nearly all of the work myself. As a result, I have a functioning car again, and have likely permanently damaged an already questionable right shoulder. (A recent MRI revealed the reality that surgery is likely in my future.)
Out with the old, in with the old. I purchased a replacement JDM (Japanese Domestic Market) transmission on eBay from a local vendor. The job took me a couple weeks of evenings/weekends to complete and was an absolute bear.
But I digress. I showed you the Rock Creek trestle mocked up in place. Now let’s take a look at how I got there. I made the decision that building the trestle would be my priority. First up was to start mocking up the terrain to be sure it would work with the existing design. So I used some masking tape to outline the land forms.
Red highlights indicate where the benchwork interferes with gentle slope on each side of the approaches to the trestle.
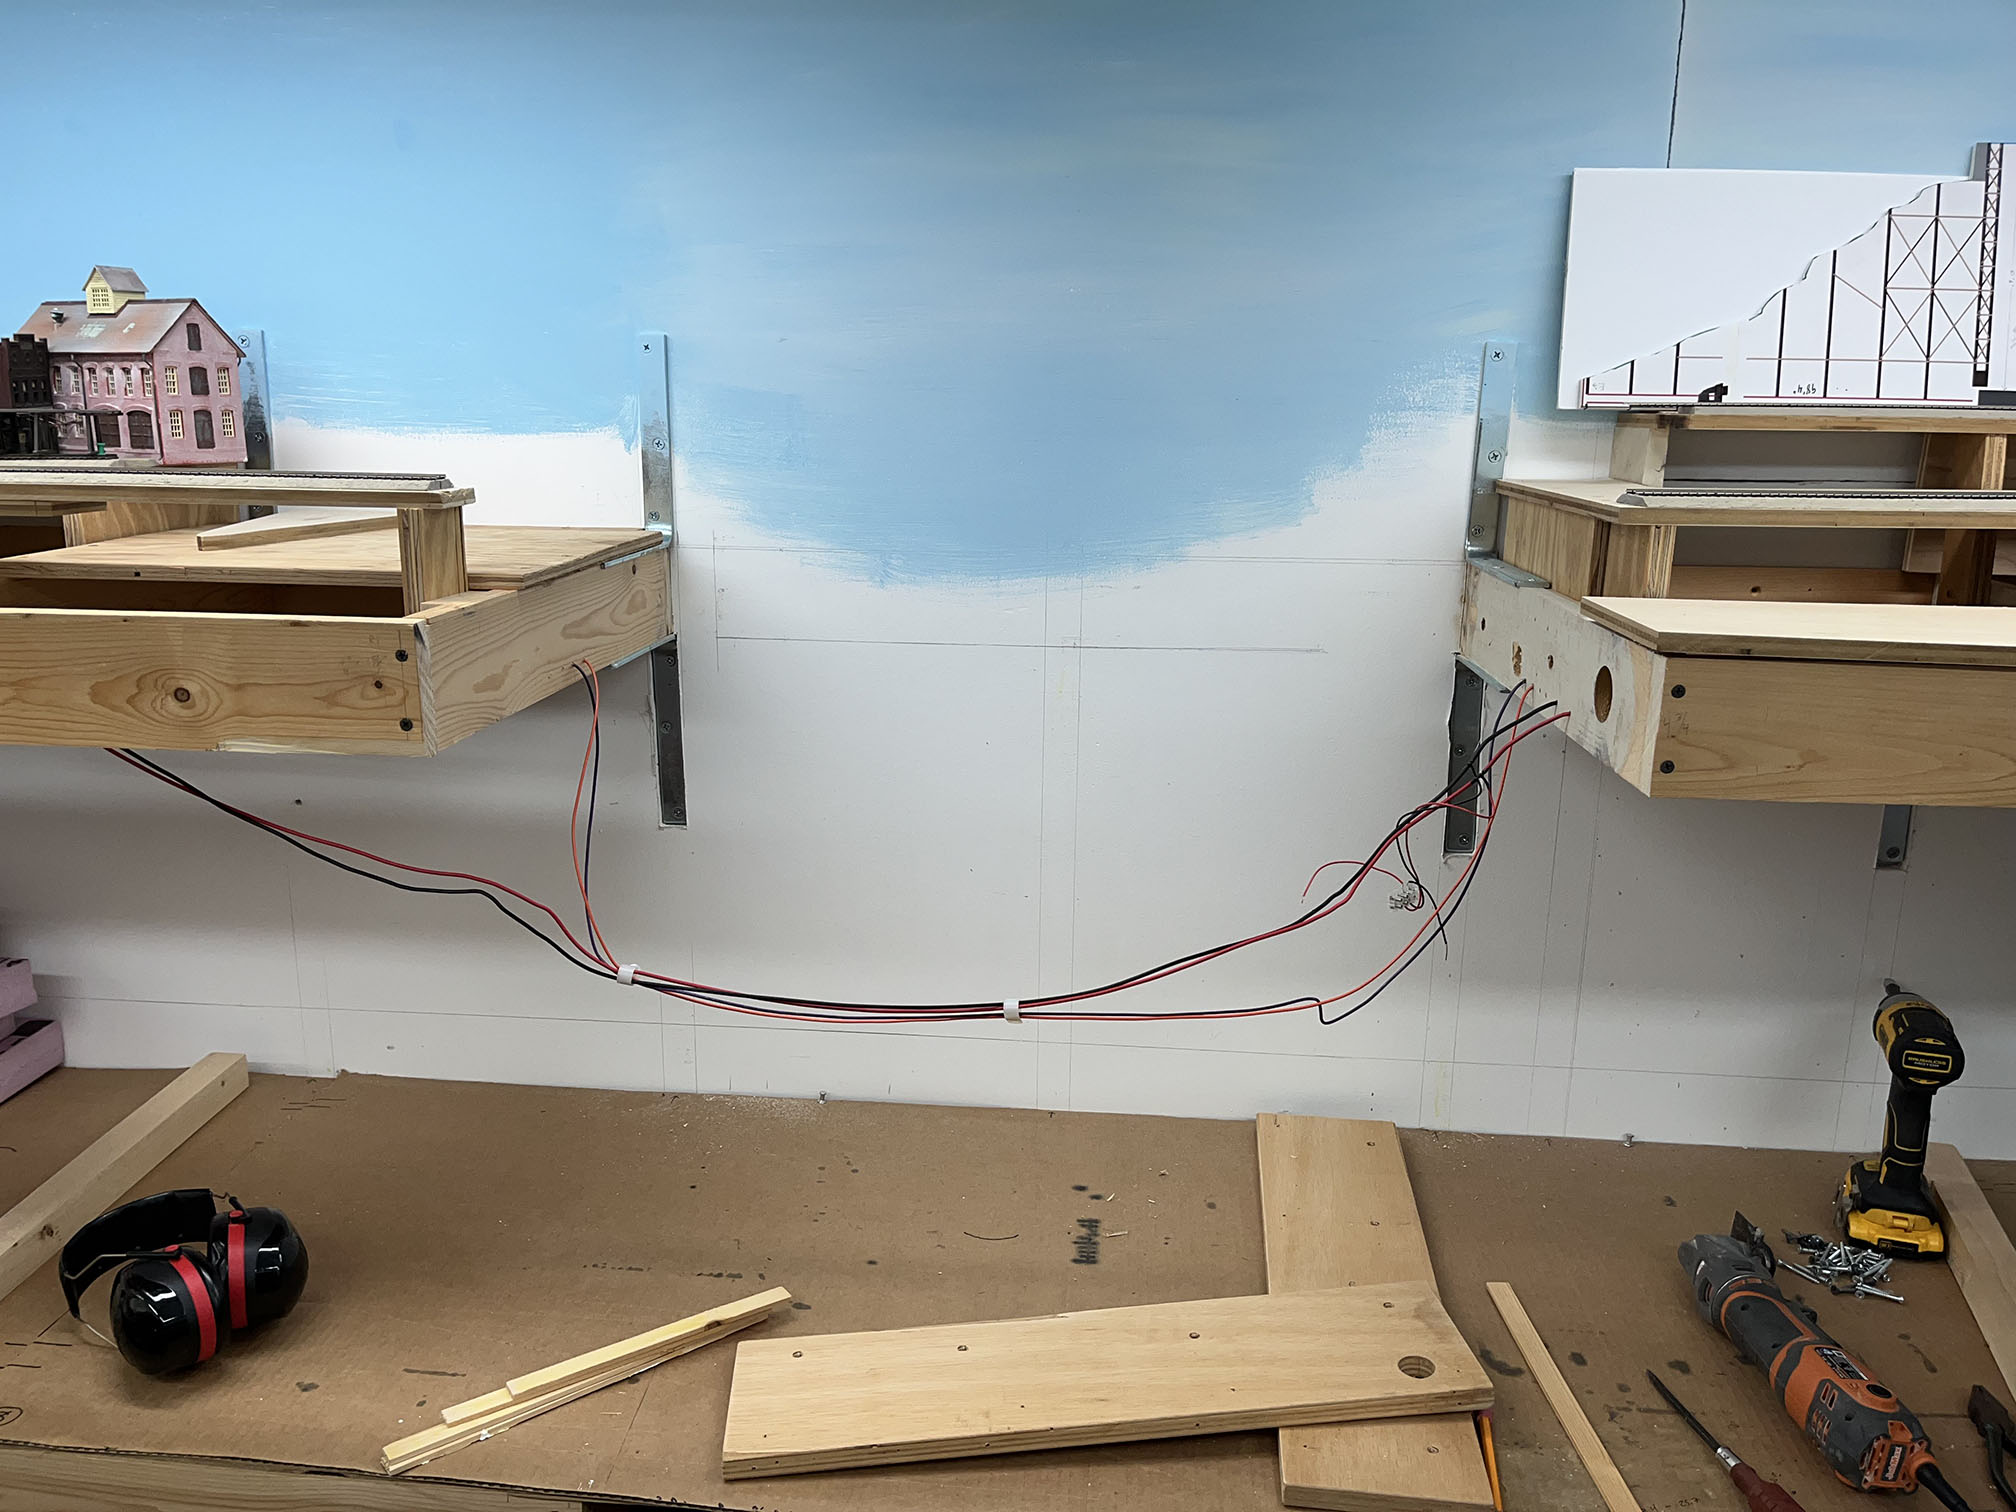
What became apparent was that the angle required for the long fill the trestle approaches sat on would not work with the existing benchwork. I also had the idea that it would be nice to be able to remove the trestle should I want to transport/save it from the layout room in the future. This required completely rebuilding this section of the layout, by essentially widening this dropdown area.
After removing some benchwork on the right and left side, widening the gap for the new dropdown section. Thankfully there was enough slack in the wiring to simply slide the new pieces in.
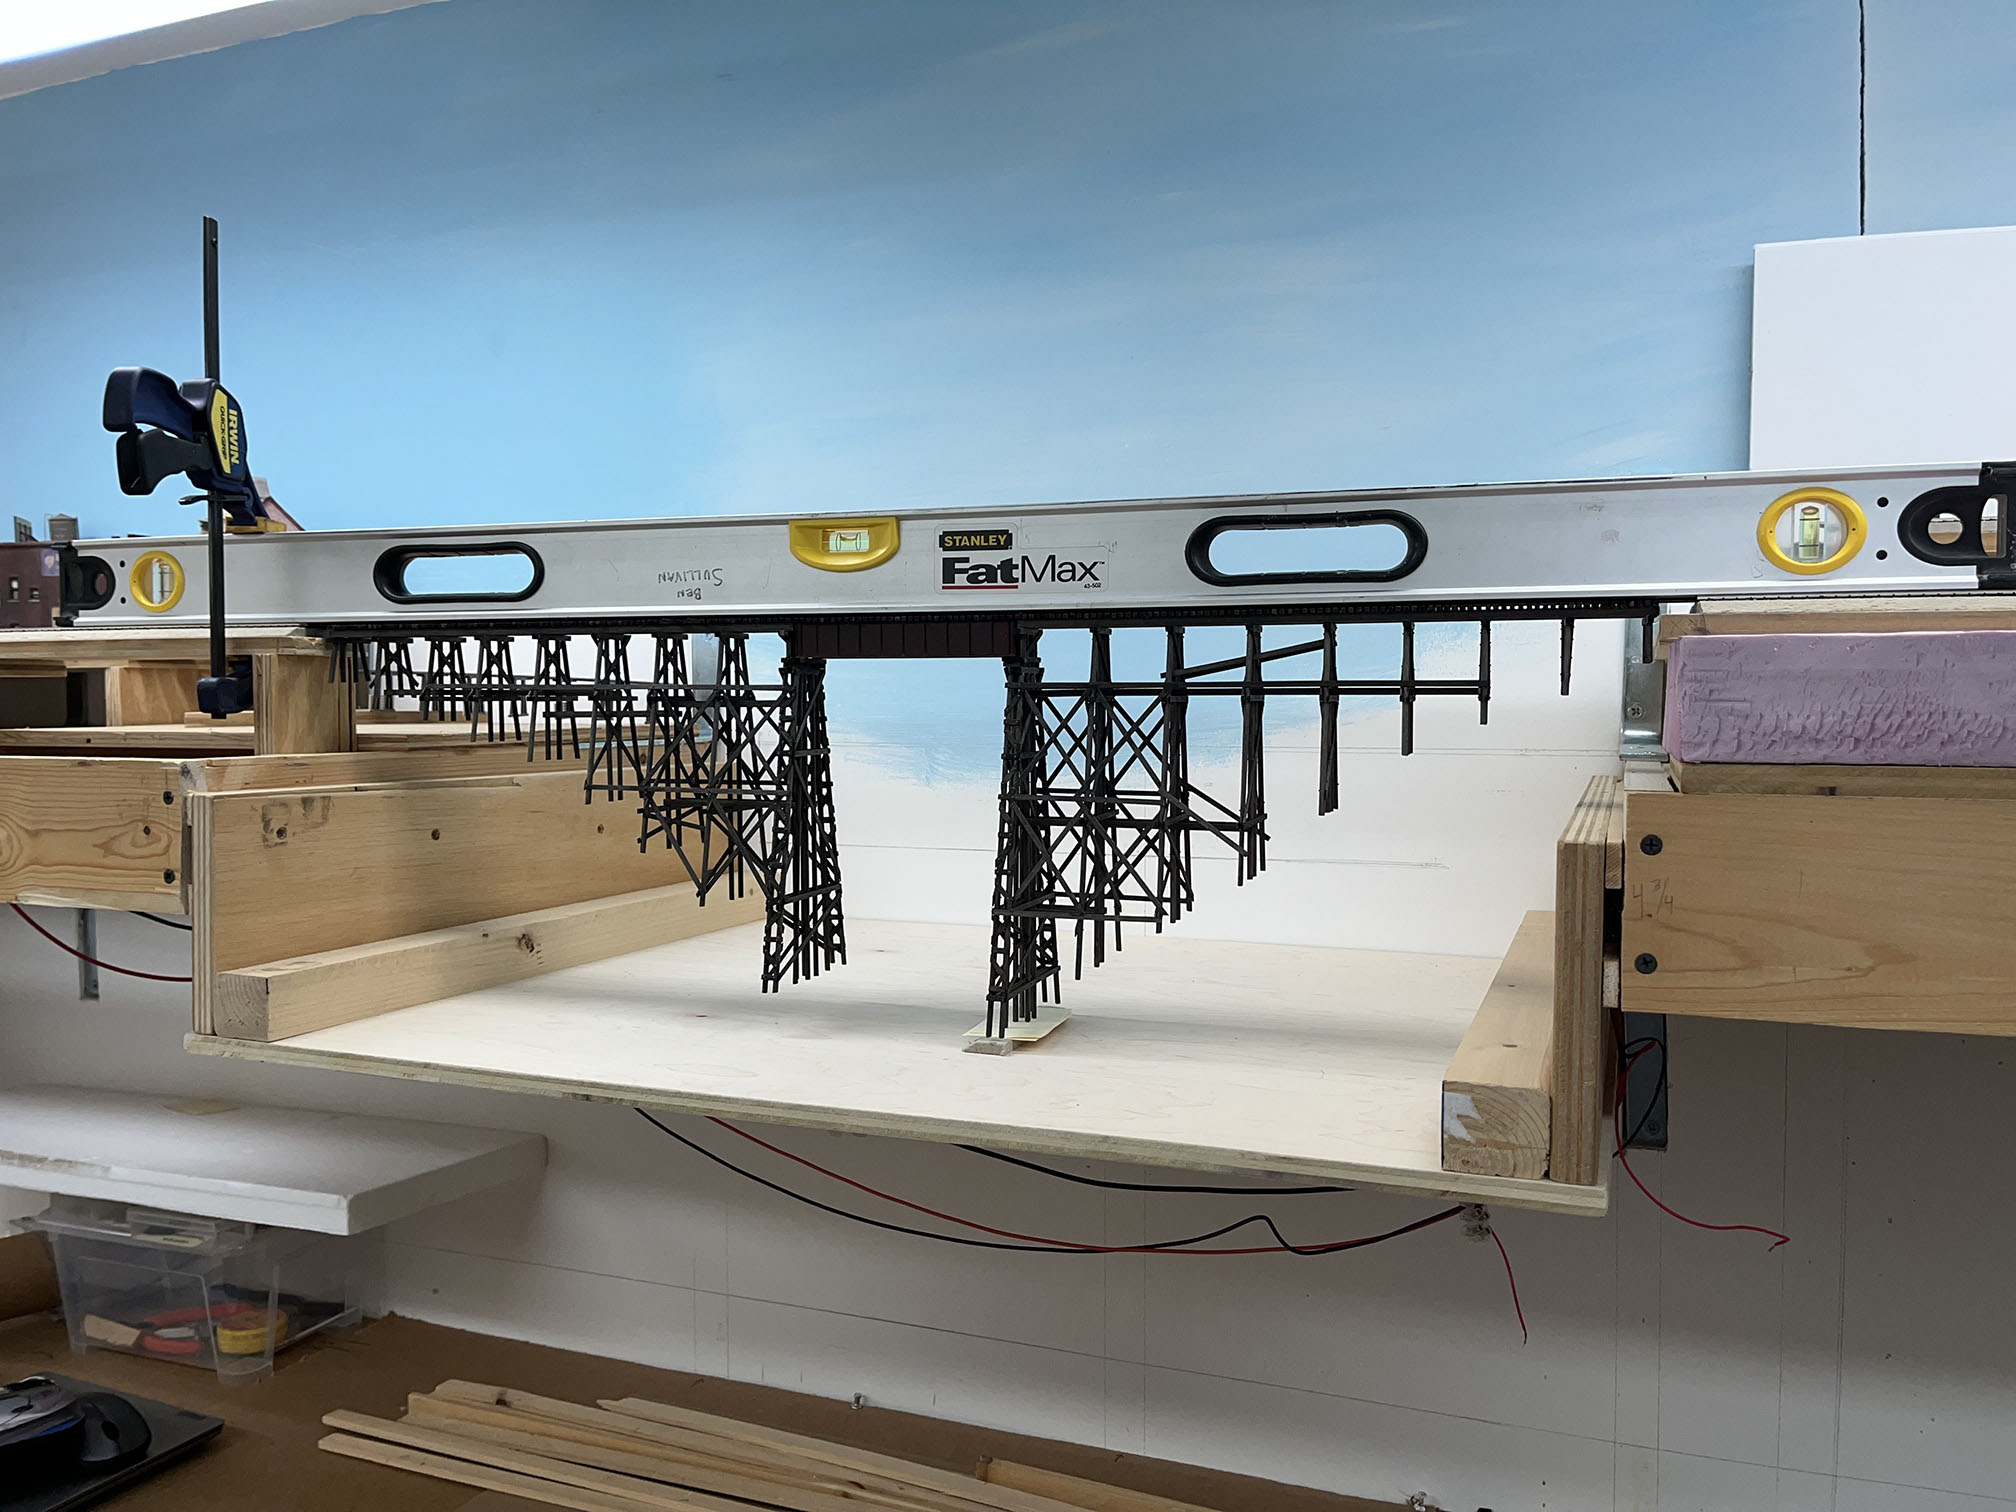
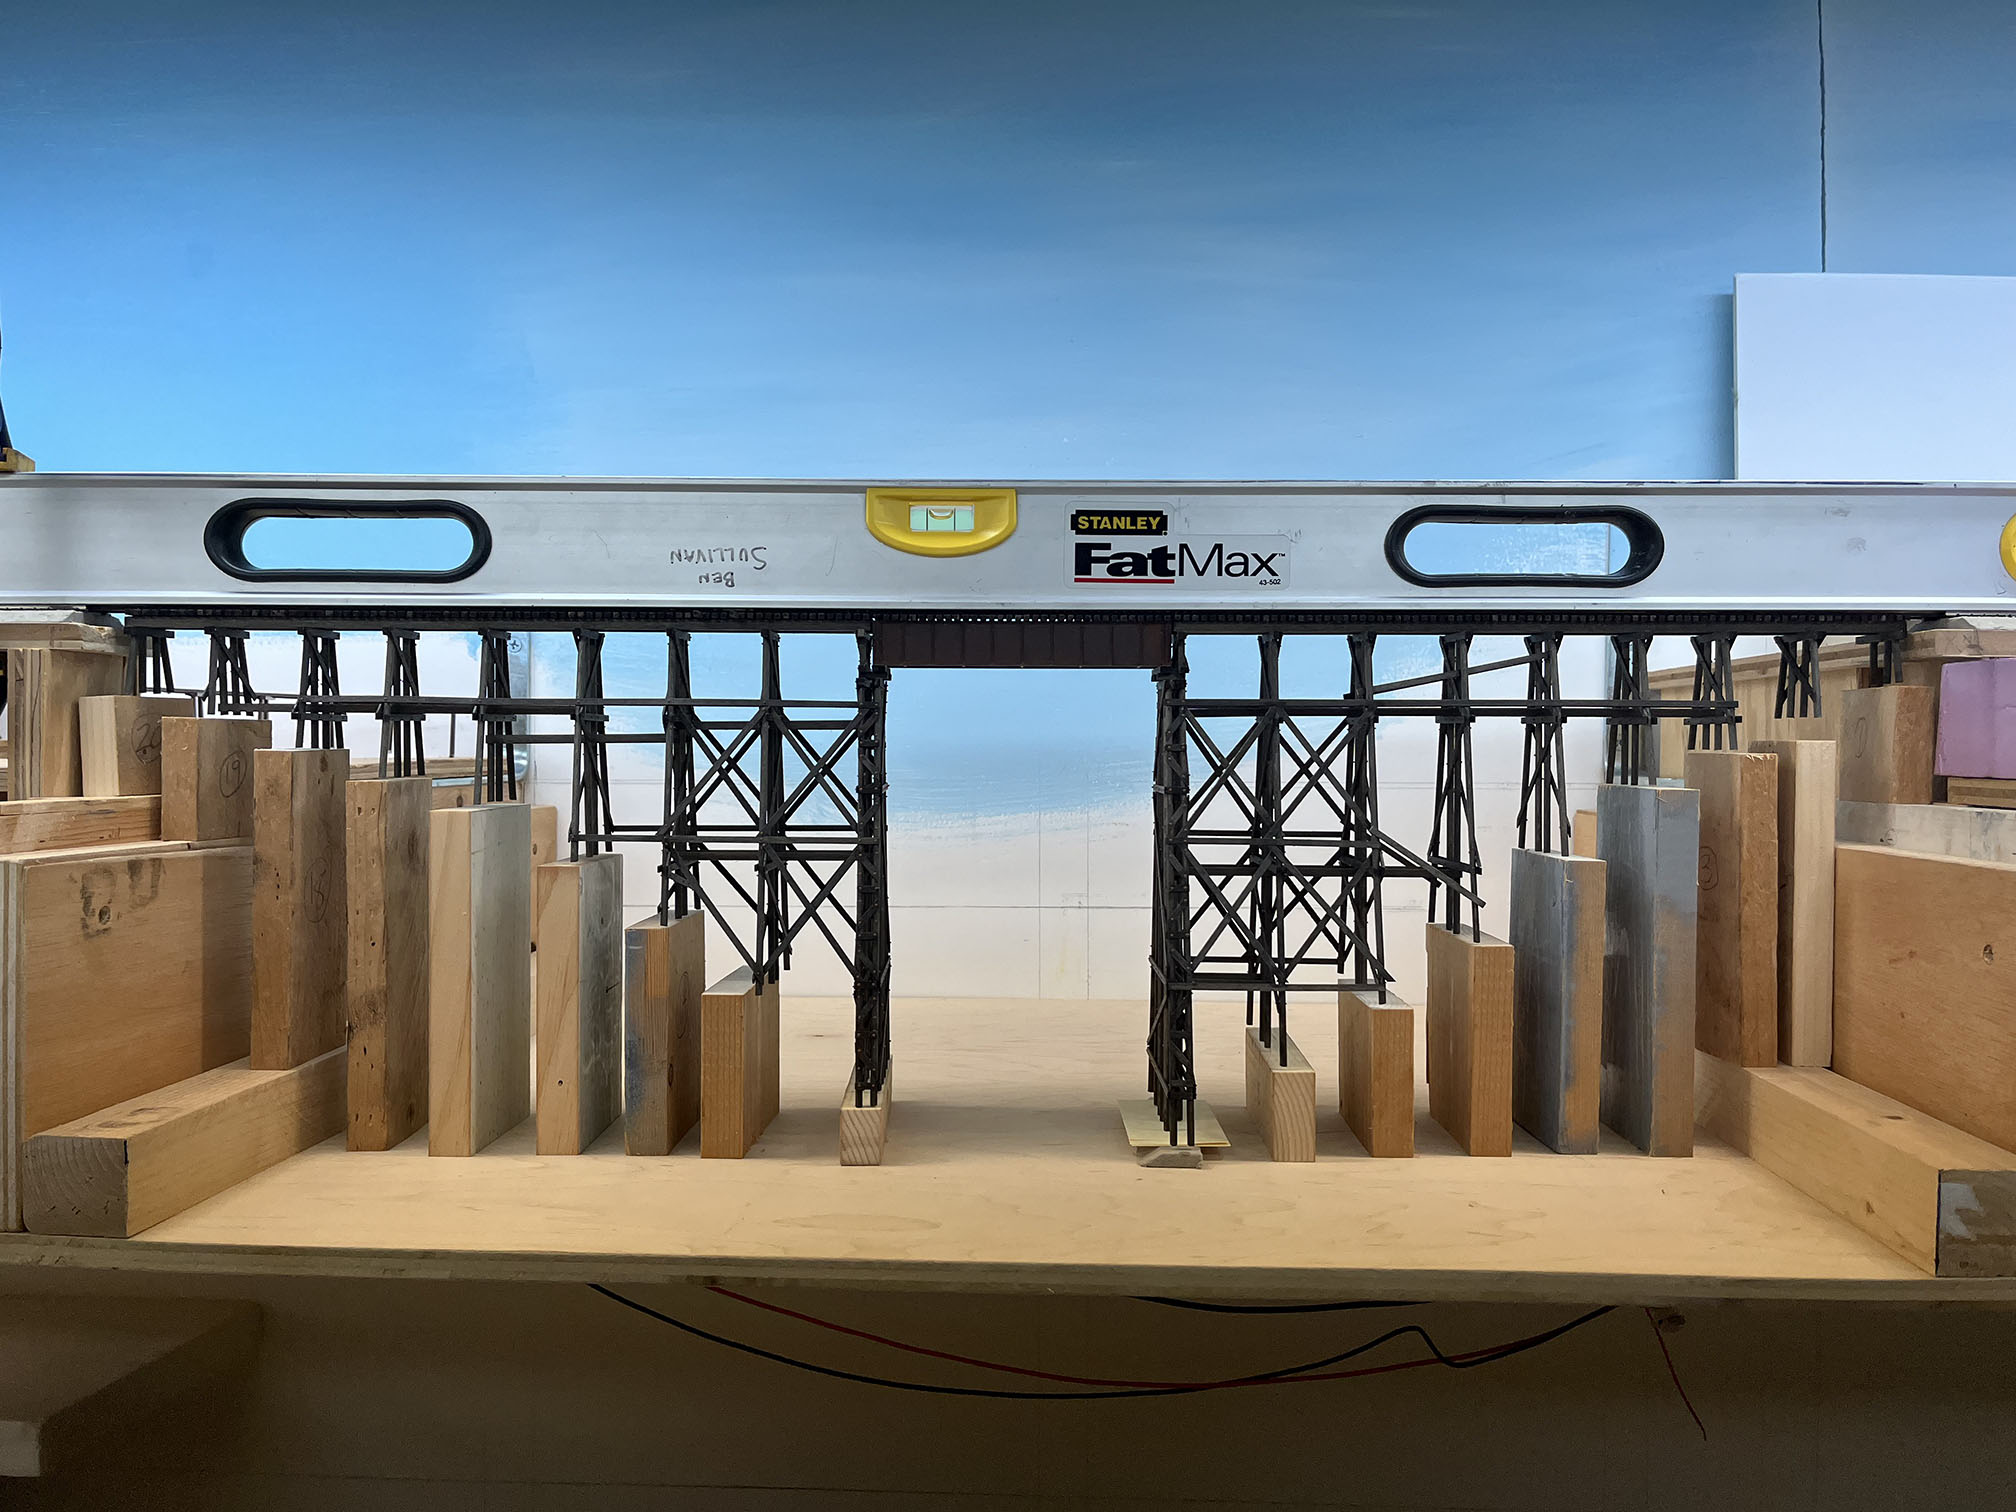
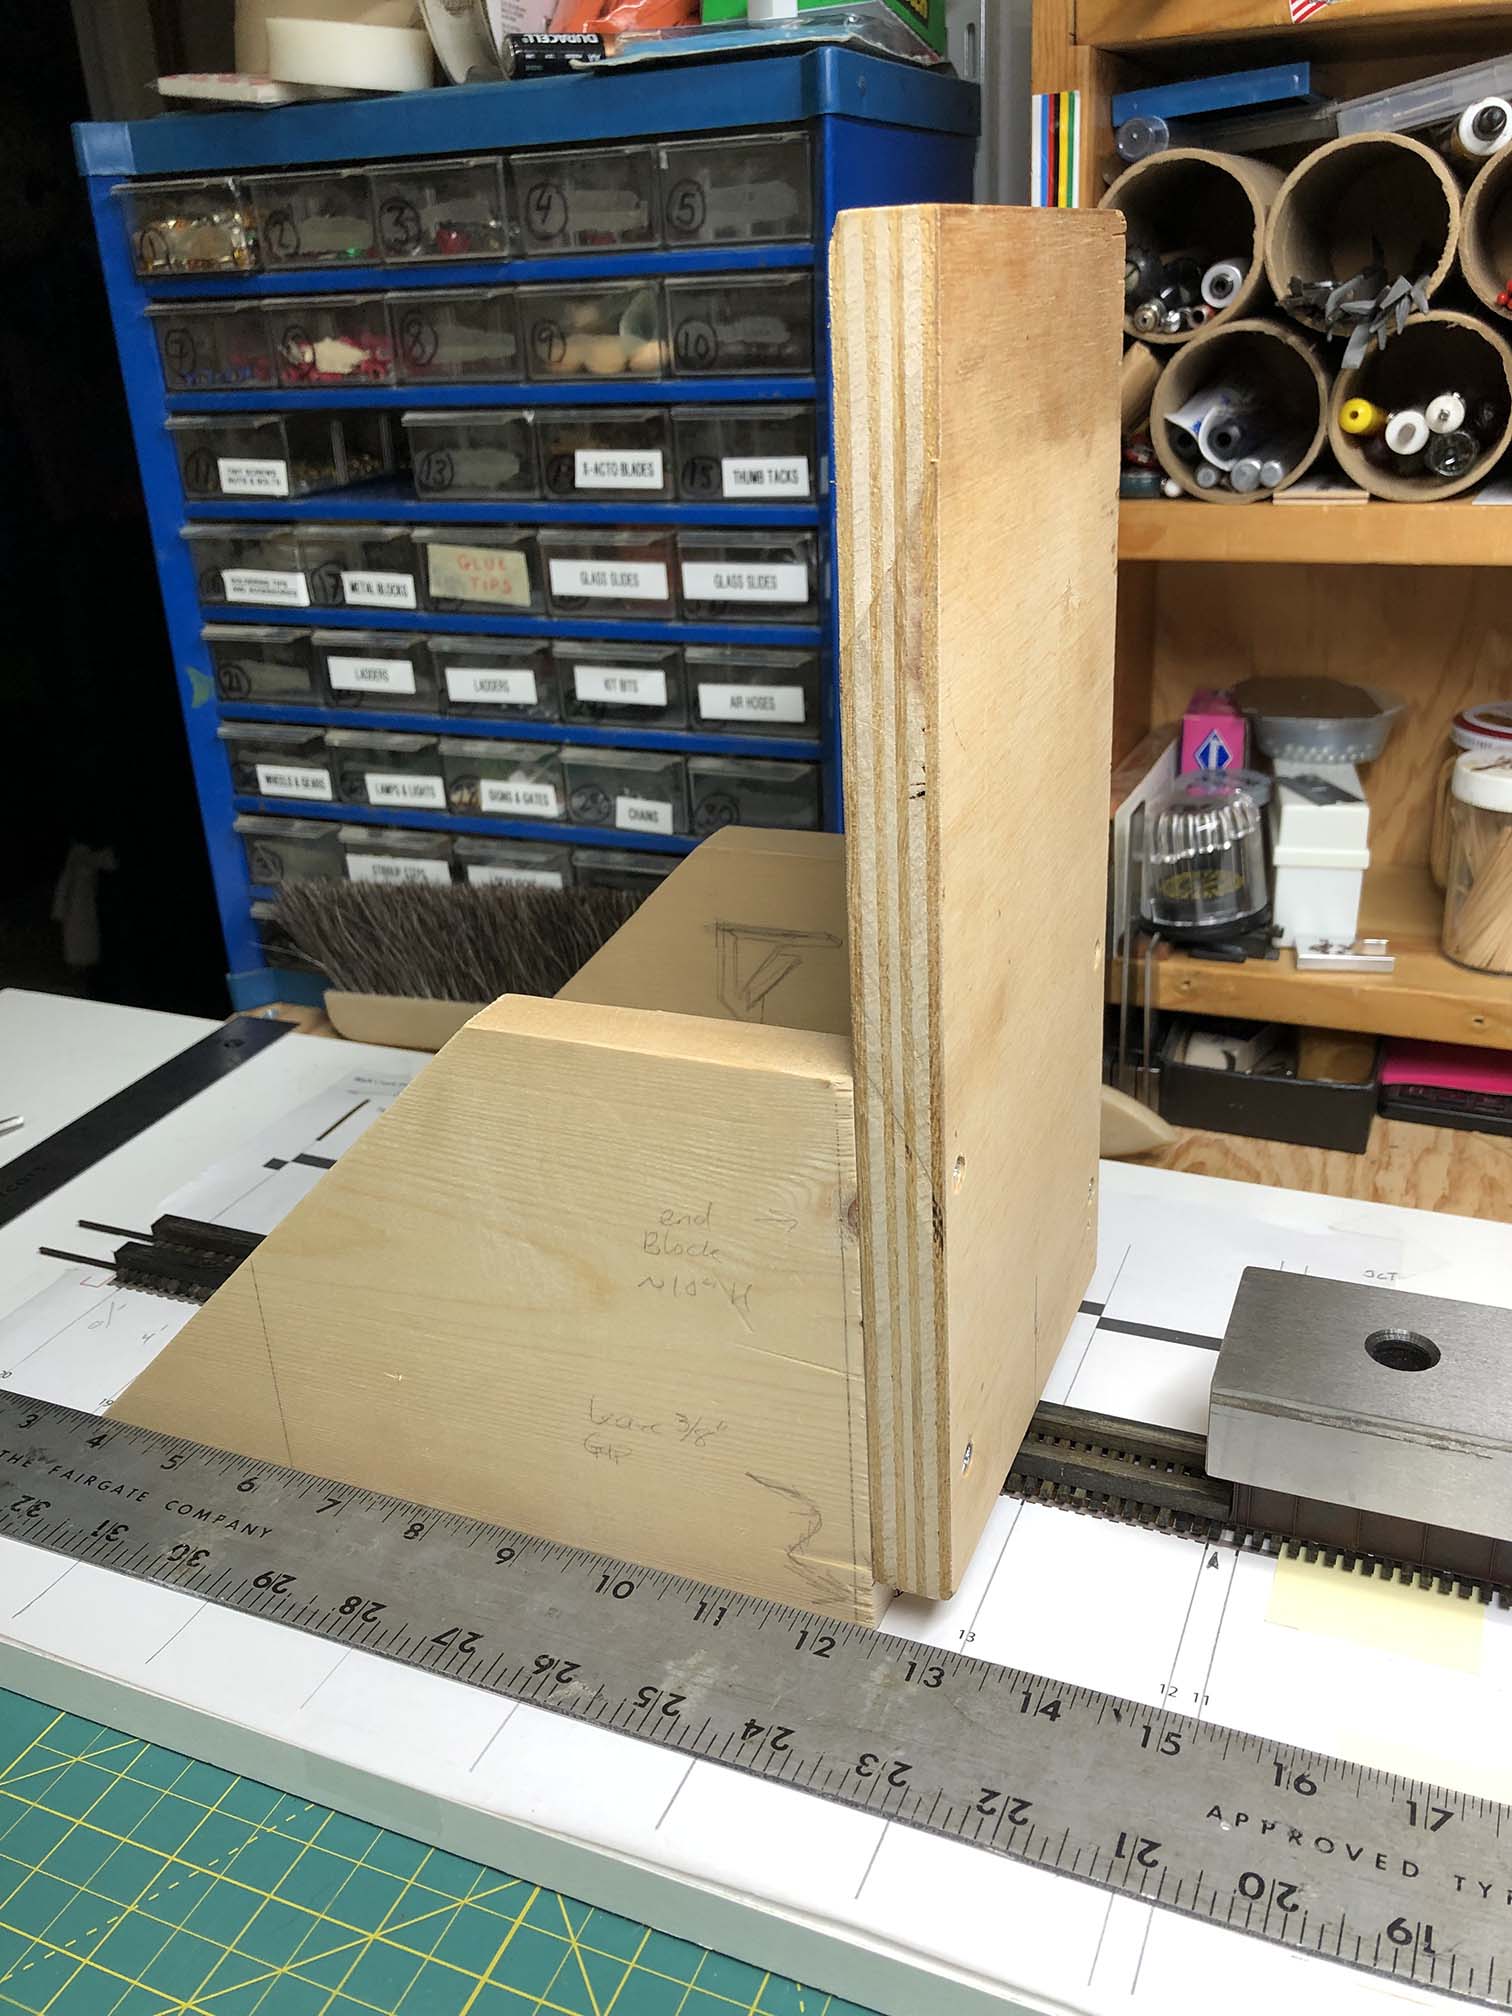
I then needed to install the trestle and shim it to sit flush and level with the track, so I could measure the height of each riser.
Bridge is in the new, wider dropdown benchwork and shimmed to be flush up against the level which is gently clamped to the railhead.
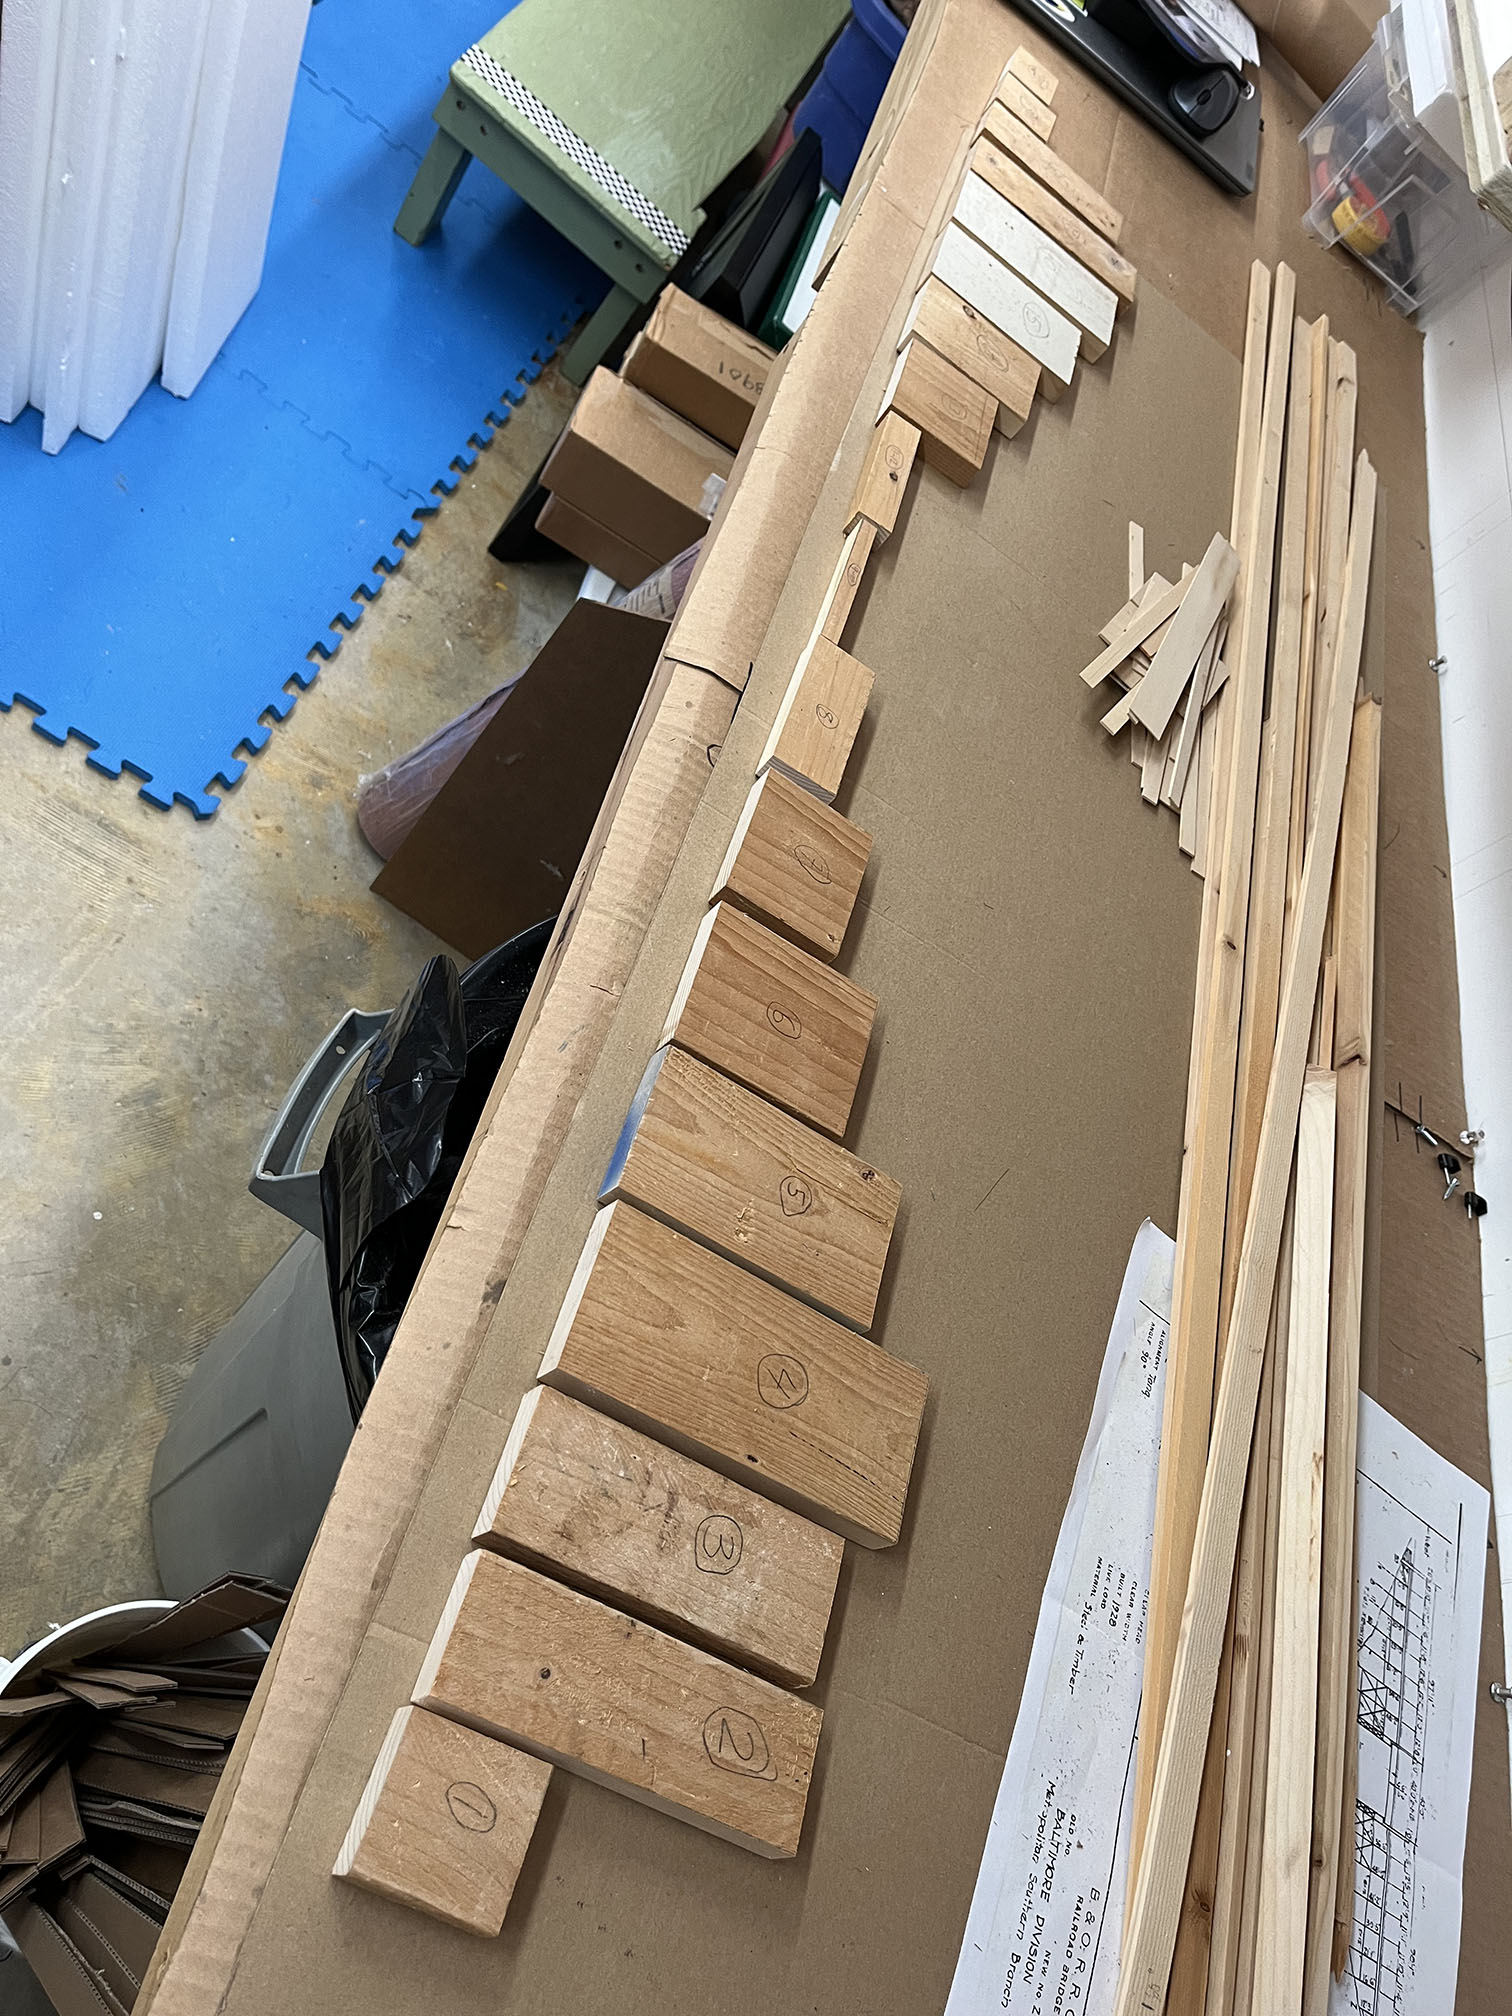
I measured the height from the base to the lowest pile in each bent. I subtracted about 1/16″ and fashioned risers from 1×4’s and other boards.
Risers, laid out in order.
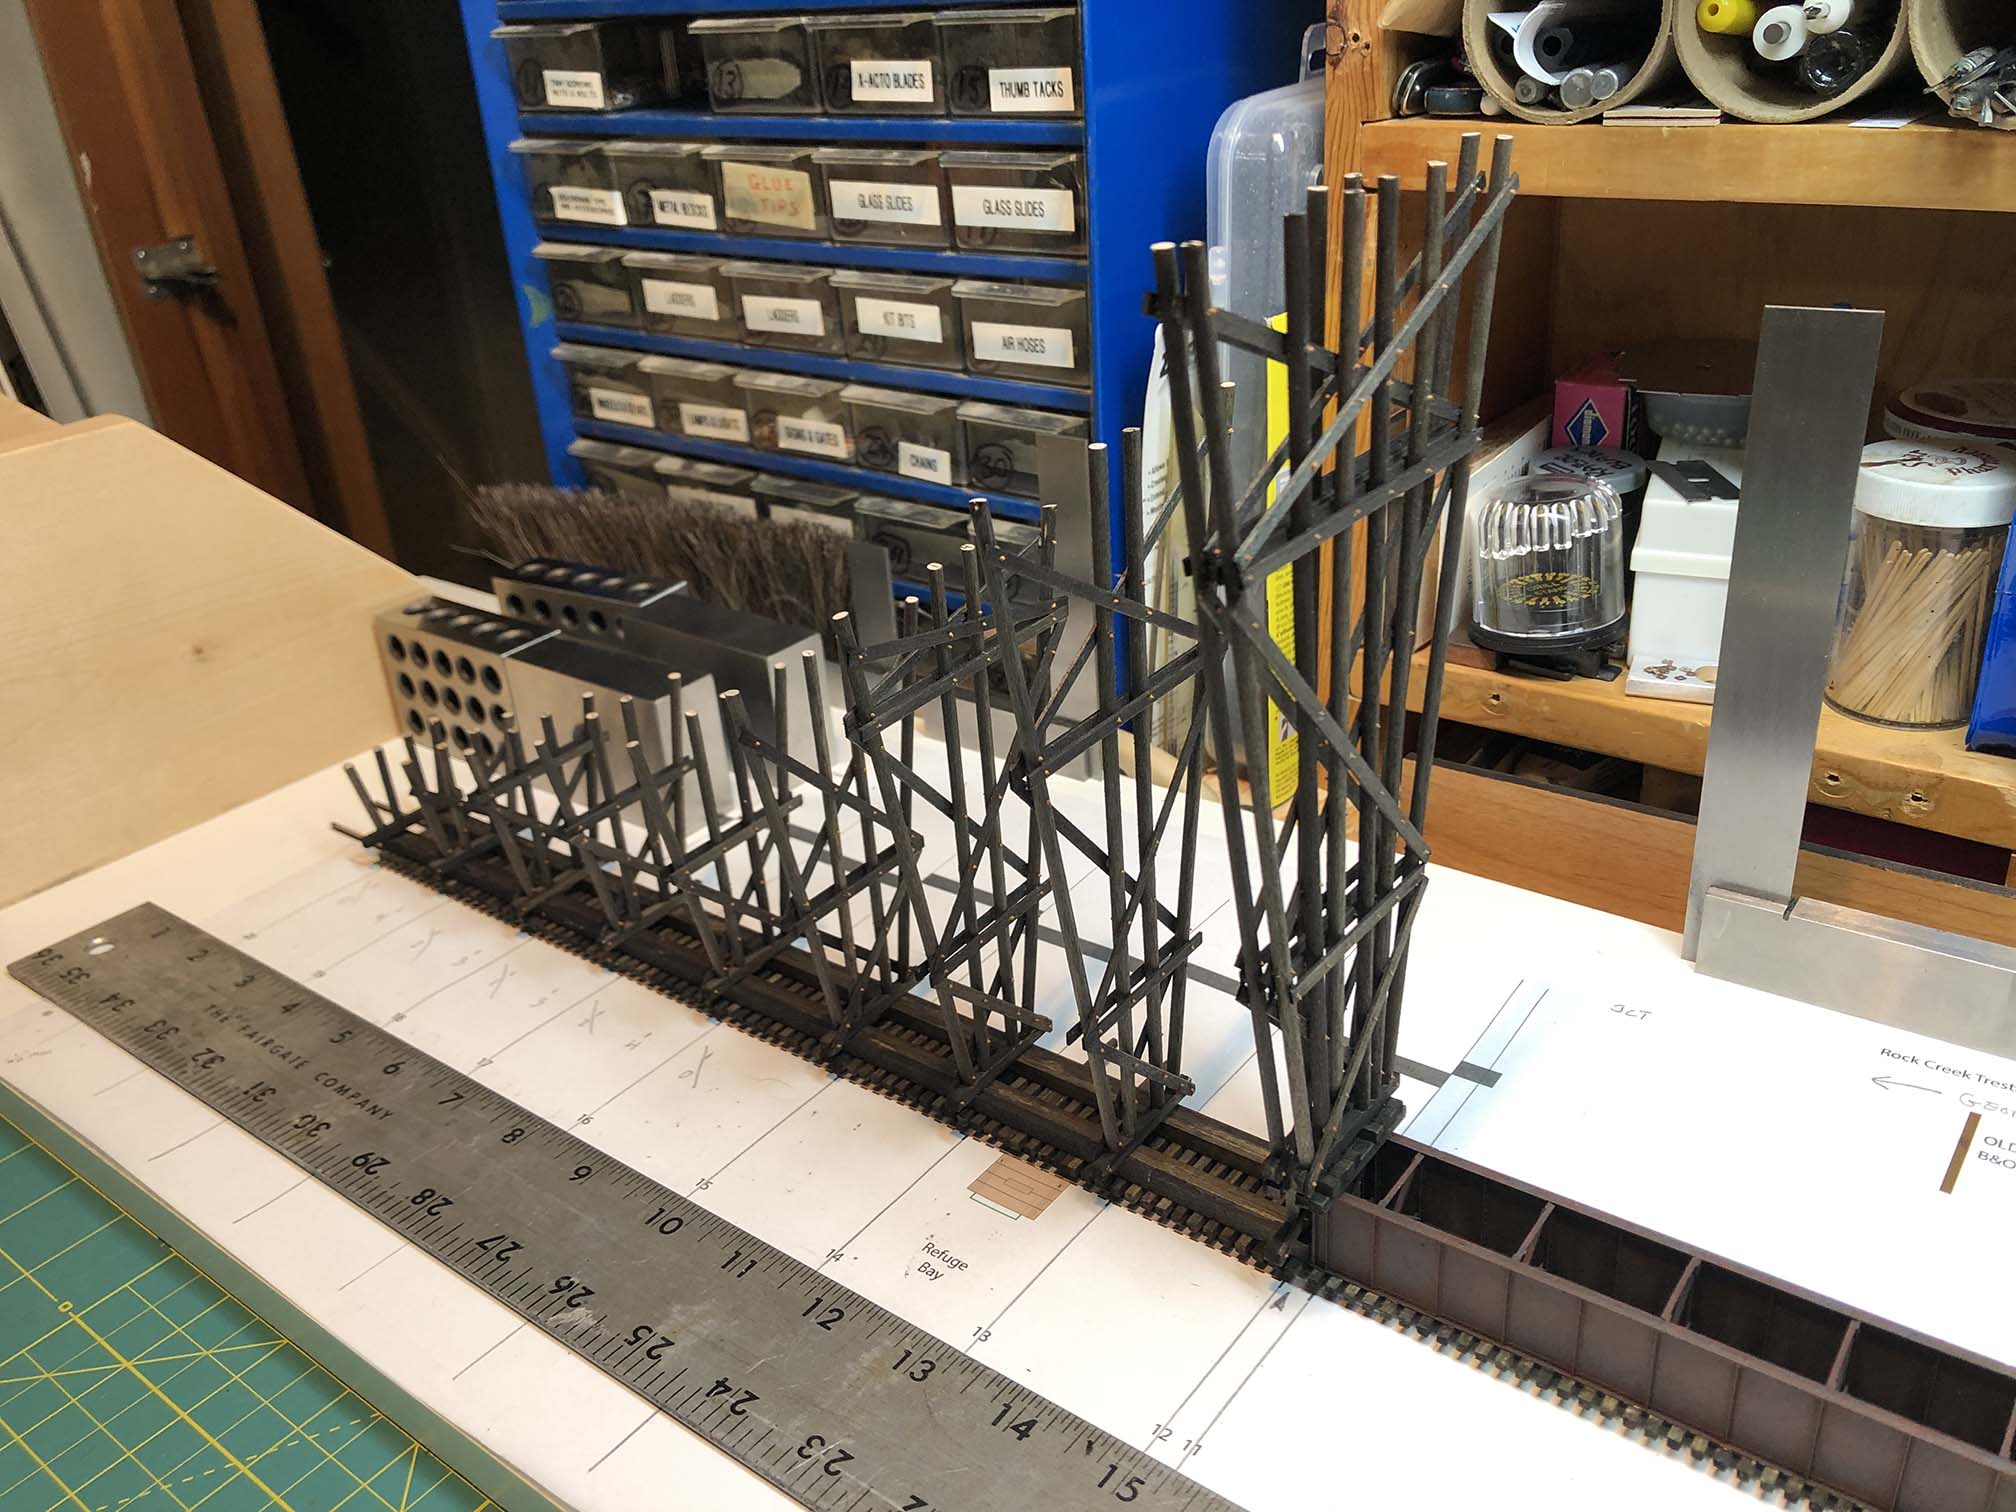
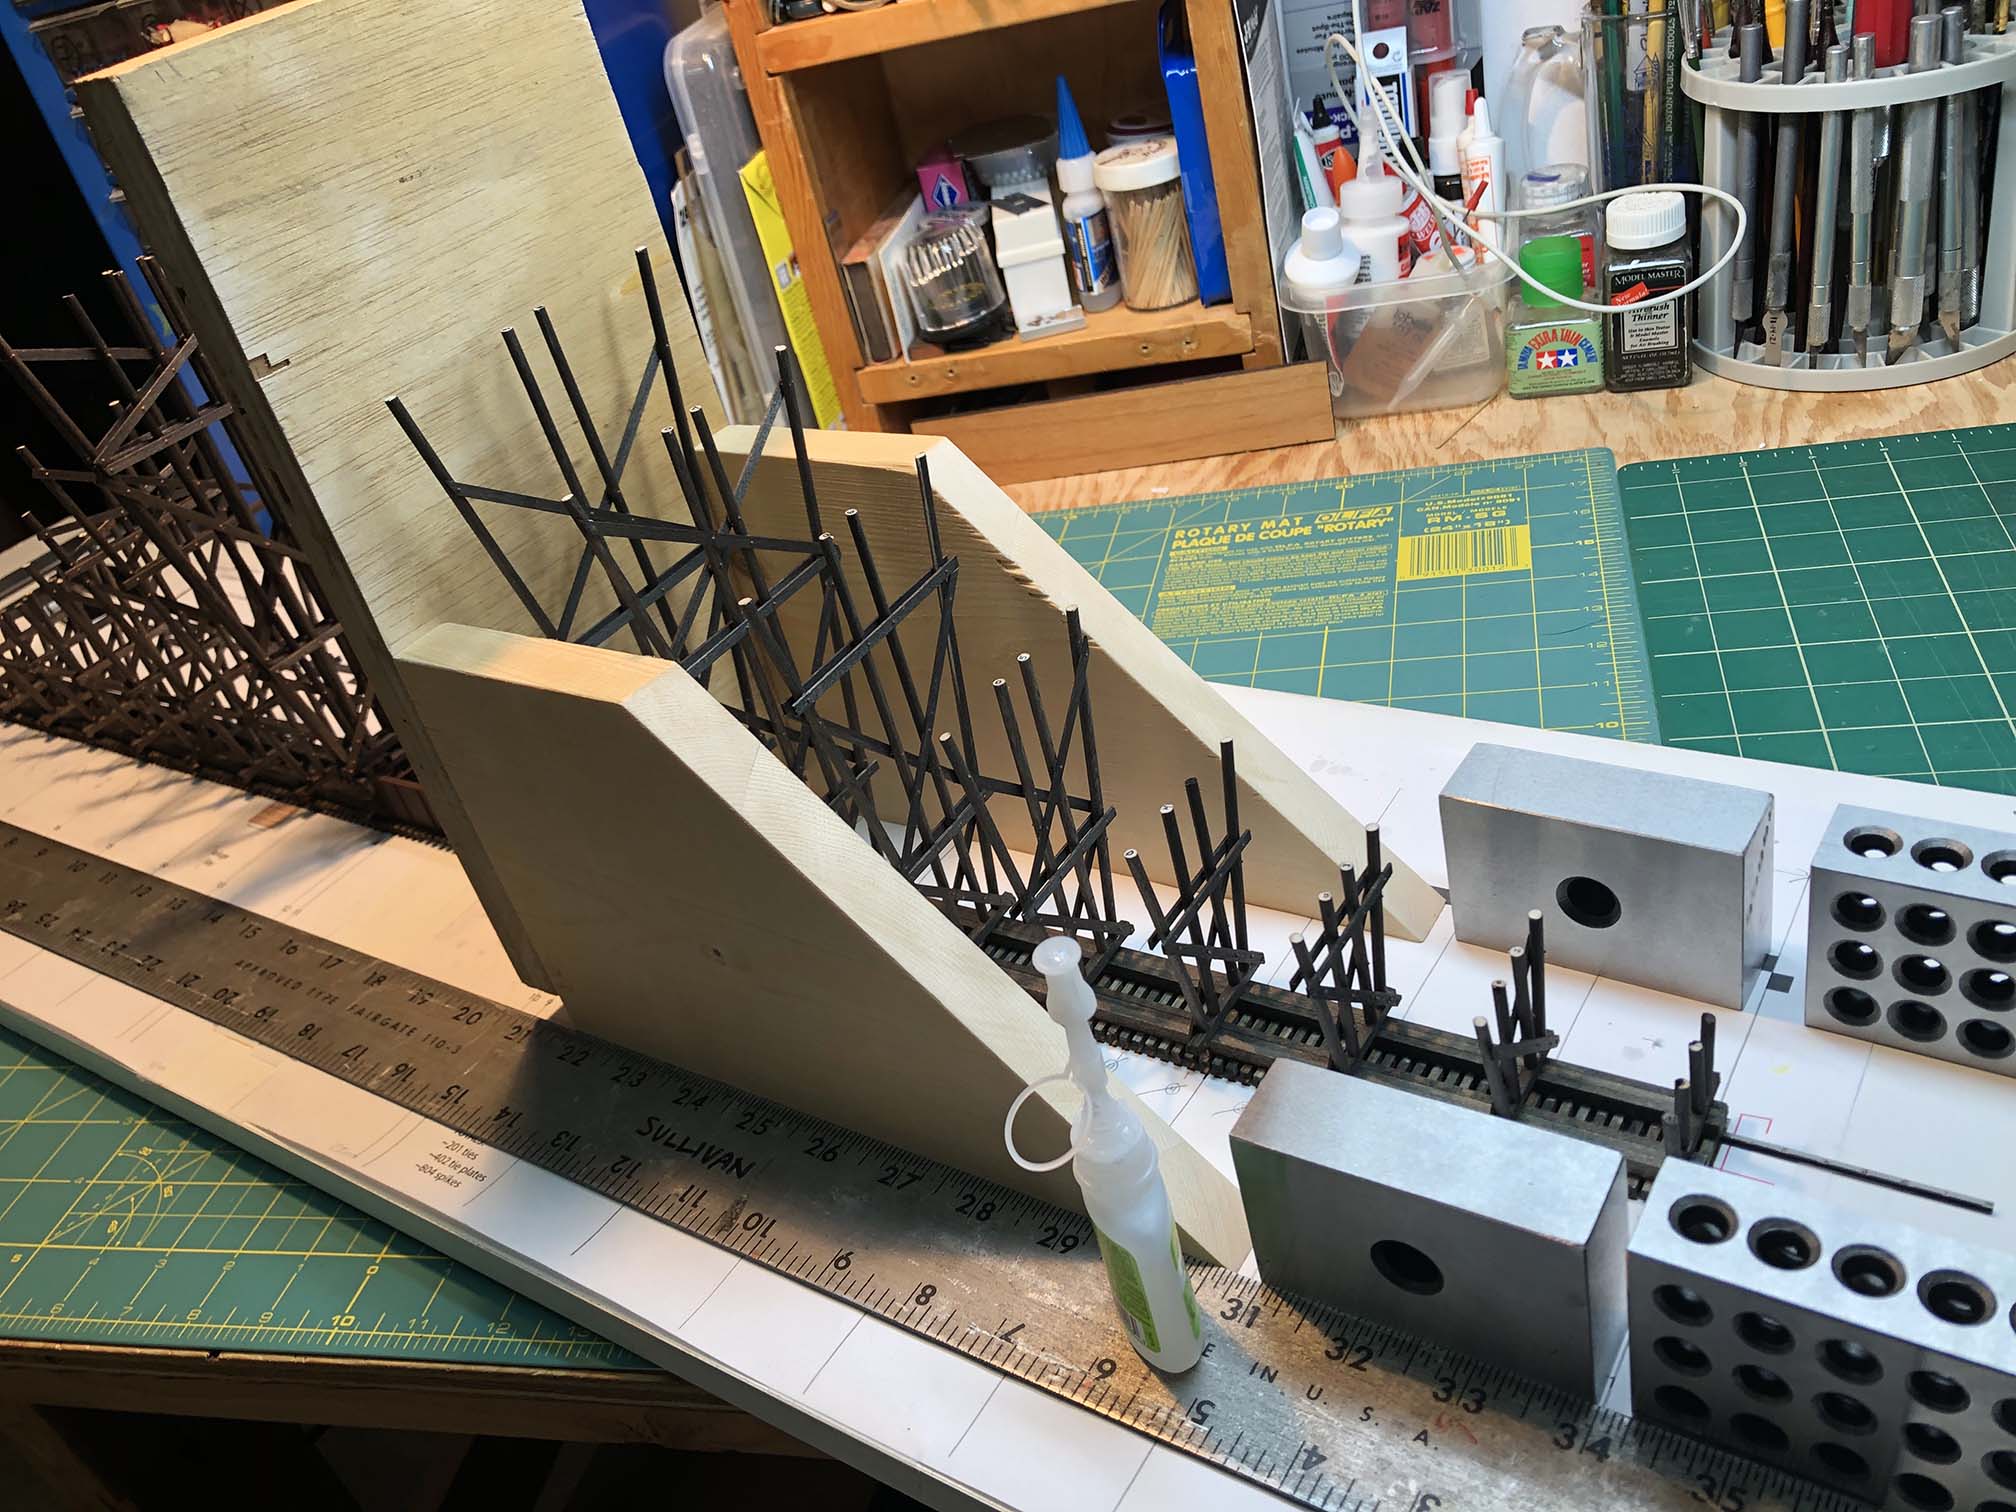
I installed the risers so the bent sits just on the edge. I will shim up to the height of each pile, since they are uneven. Risers were glued in place with wood glue.
Risers installed, bridge in place. Need to shim up to each piling. The risers all installed. Note the new, wider dropdown for the bridge. This allows for the approaches to be nicely contoured similar to the prototype.
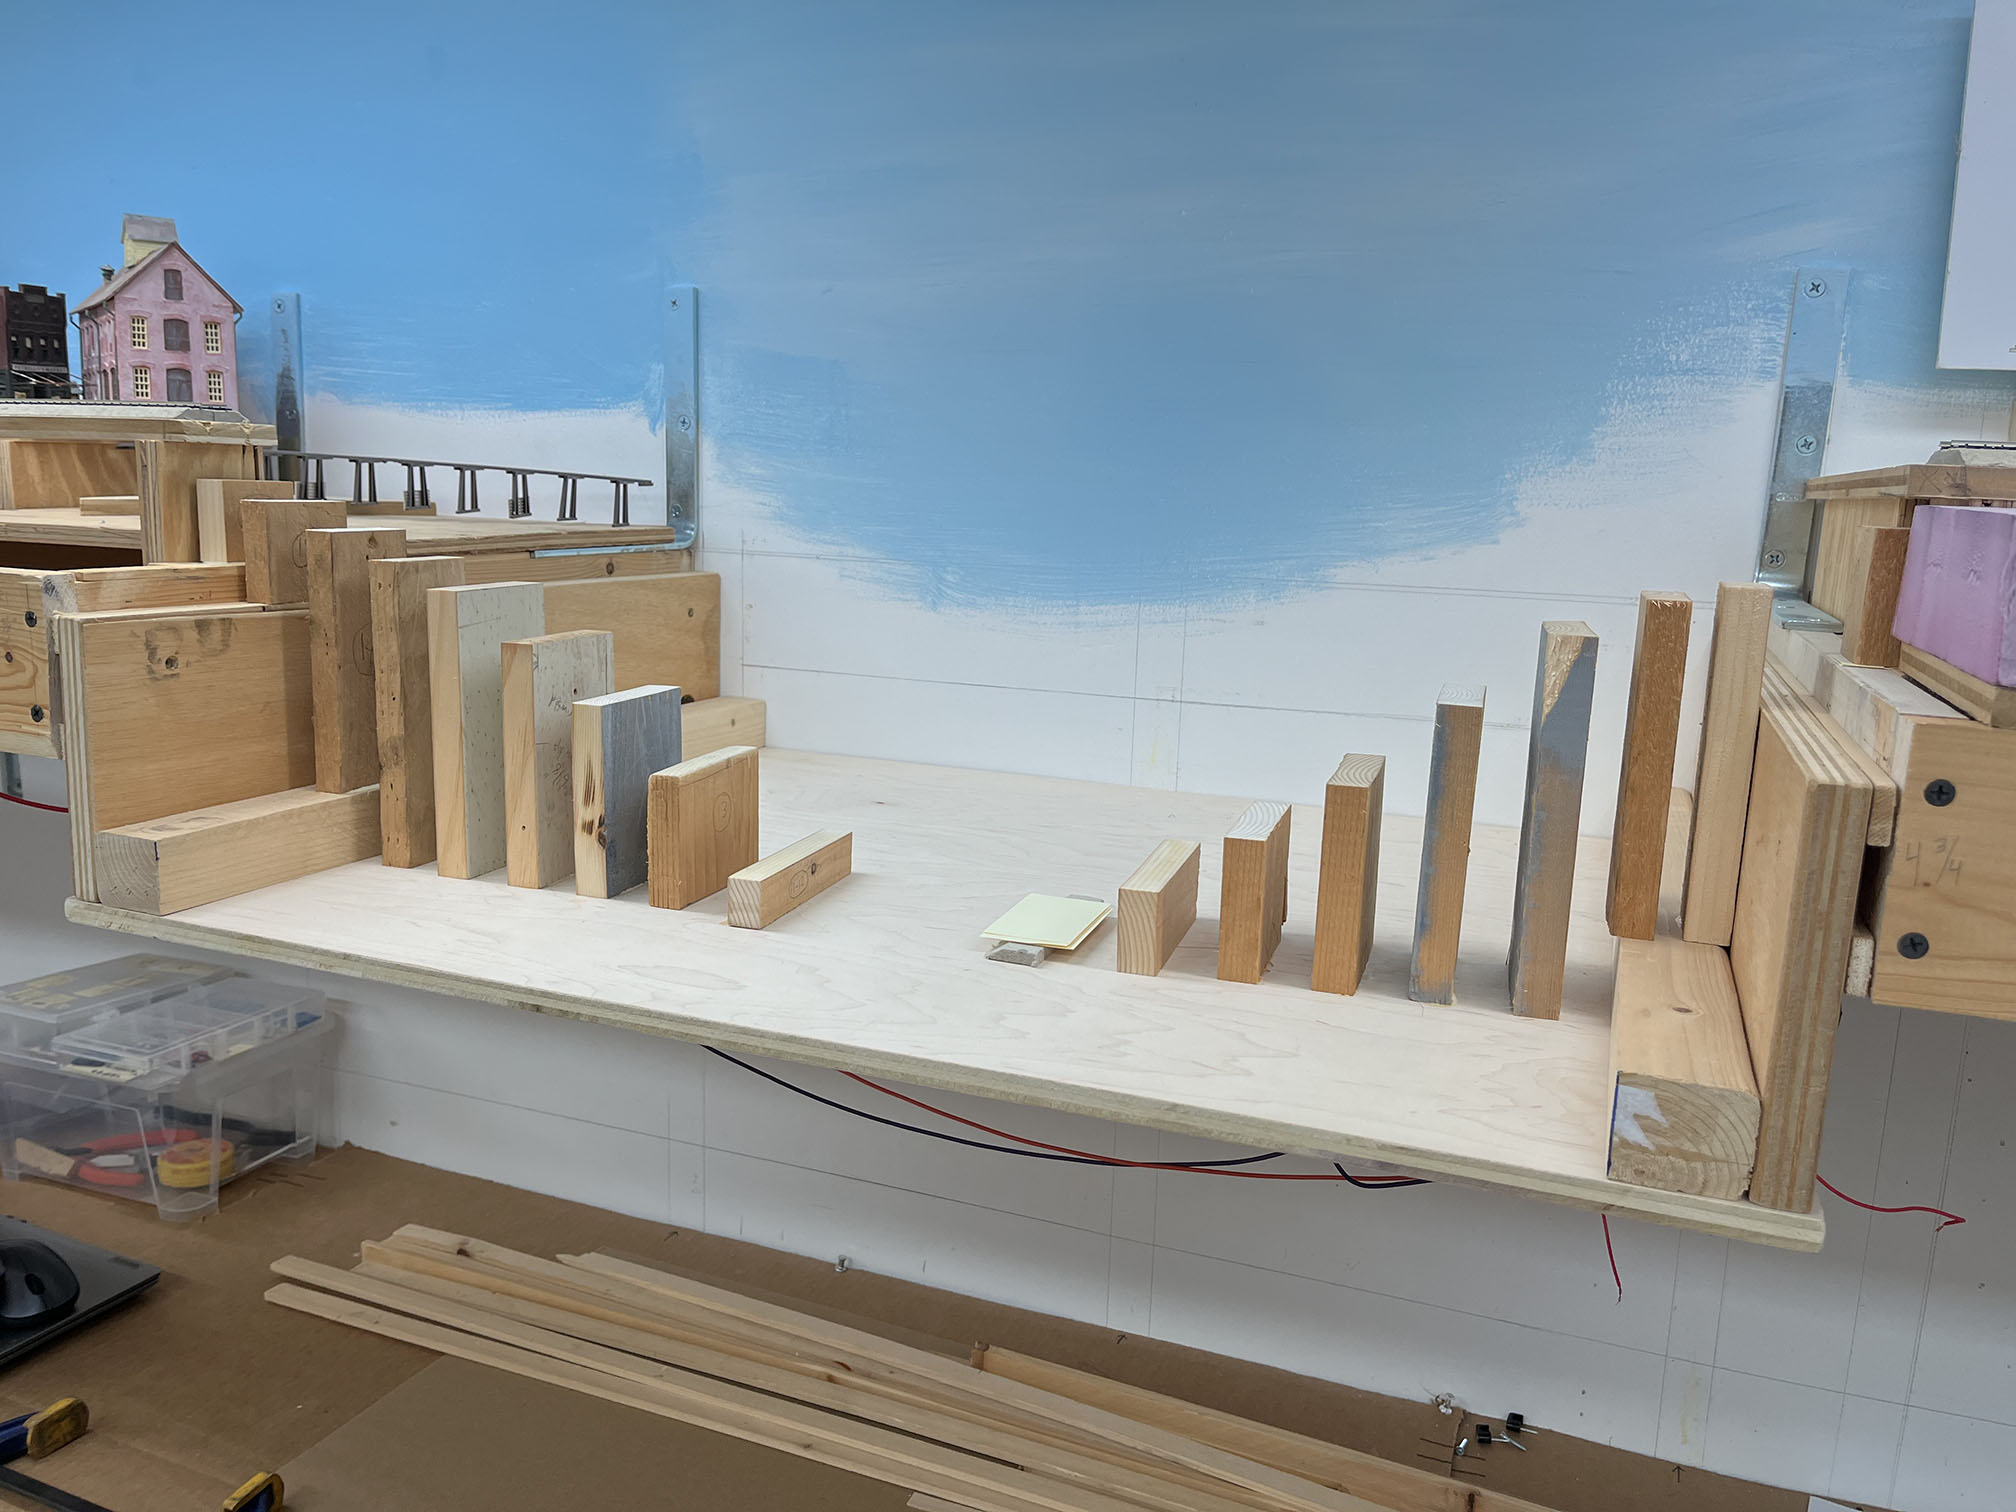
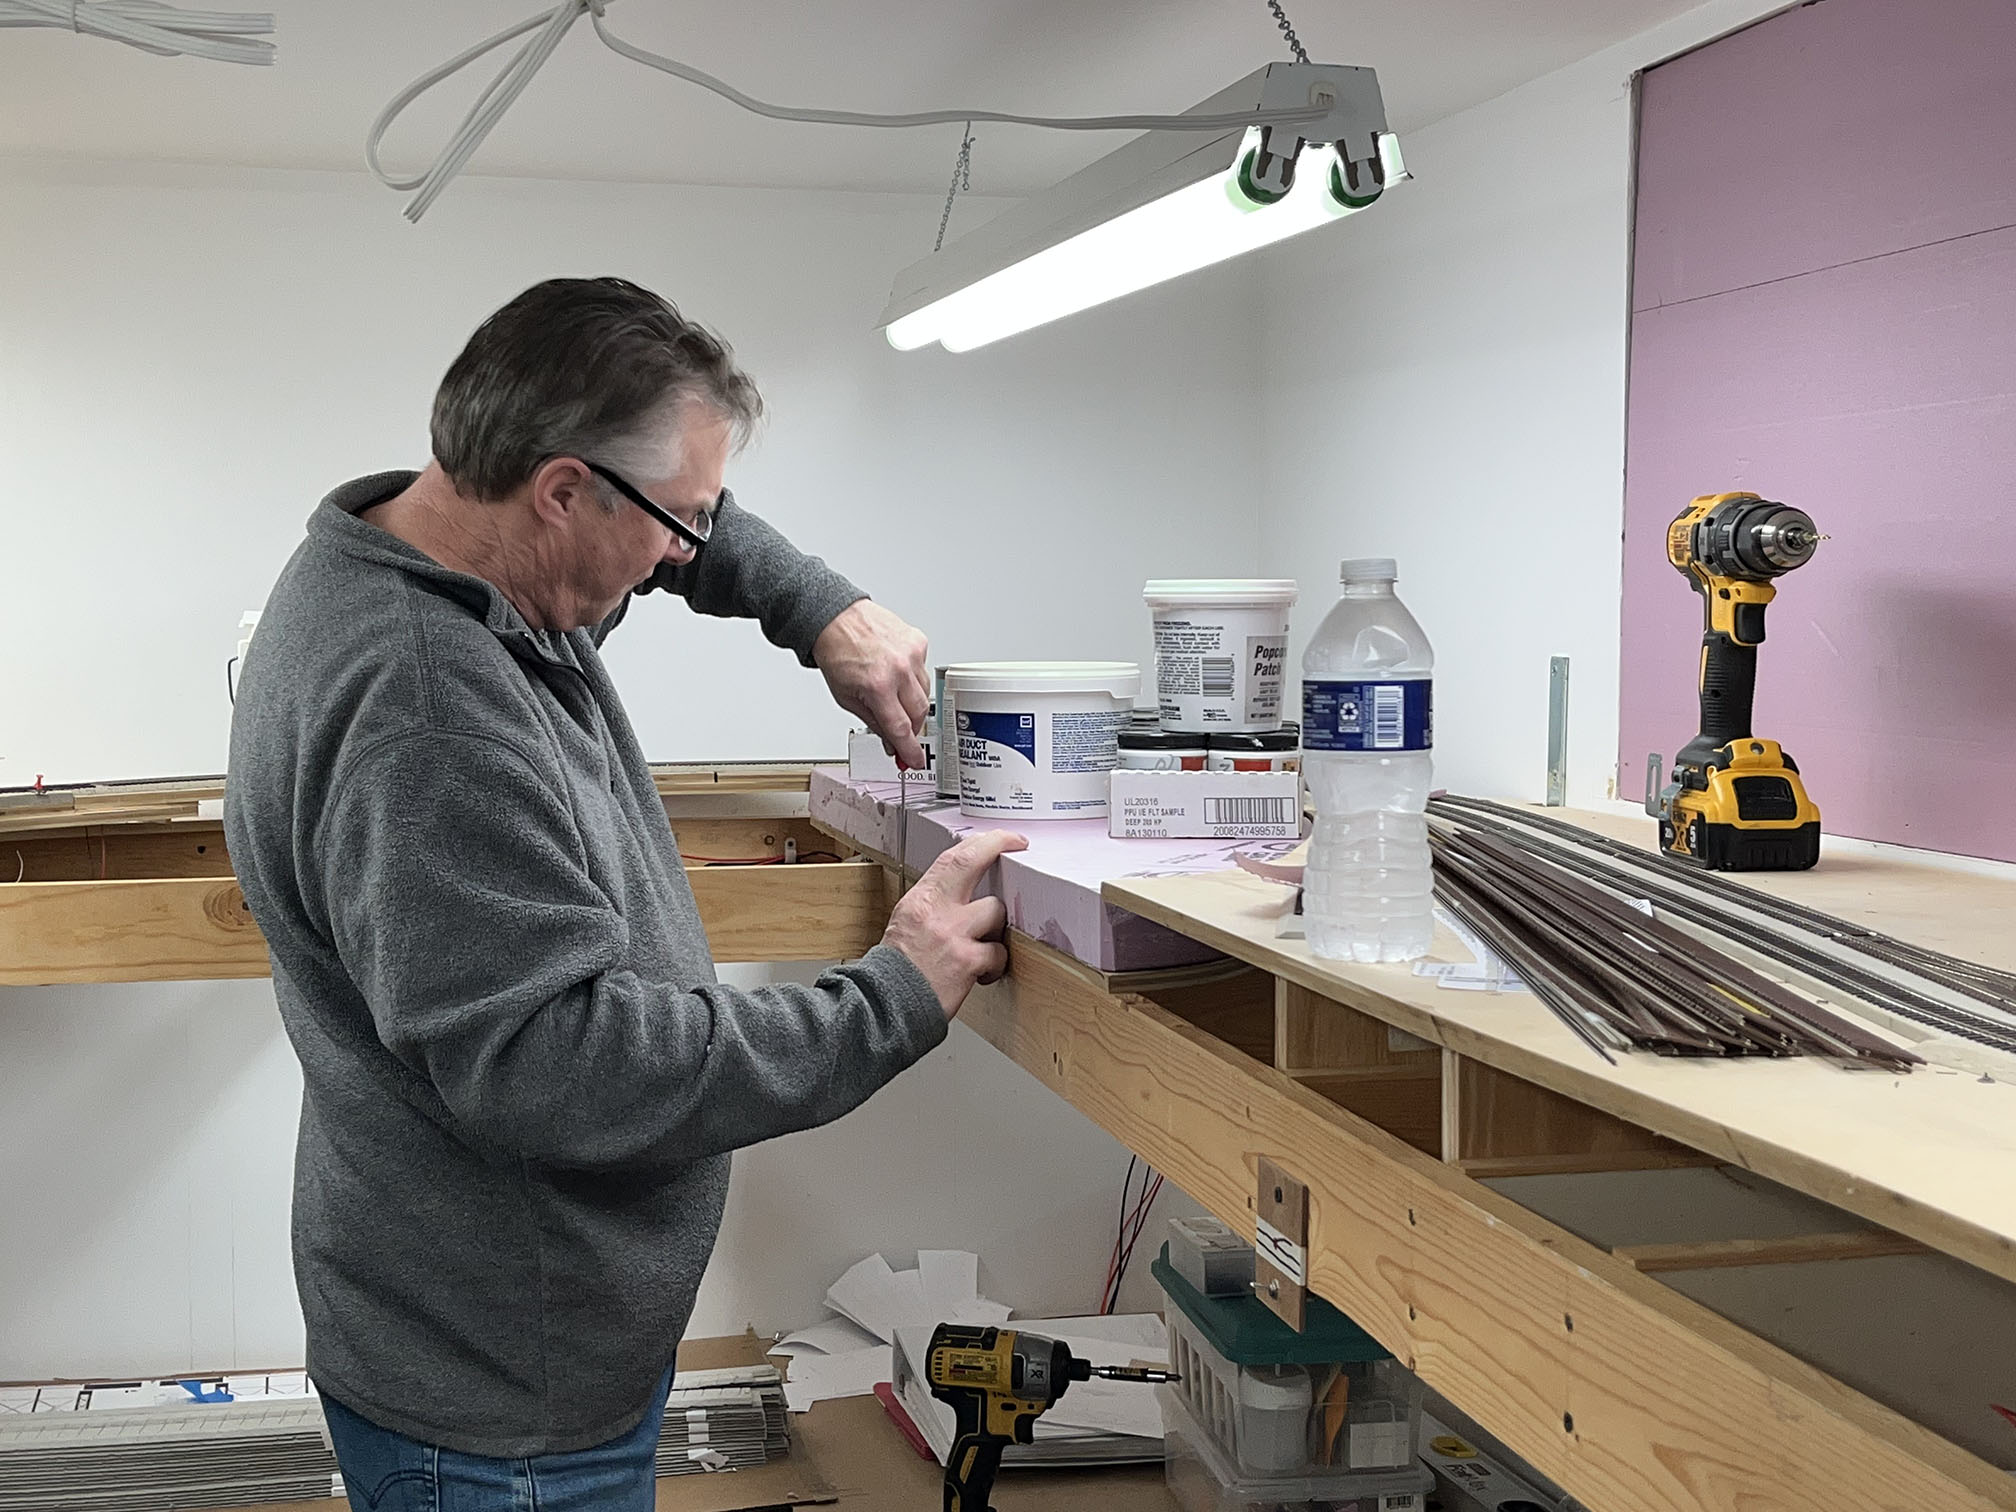
Now that the risers are in place, I can begin building the landforms, including the creek itself. I’ve still got a bit of work to be done on the bridge; namely the stringers on the top deck and some other details, but otherwise I’m nearly done. The same day I worked on the new benchwork, Kelly came over and helped me figure out and install the new benchwork as well as some foam at Chevy Chase and at Georgetown Jct. Progress!
Making sure the edge is flush. This is Chevy Chase. That area will have the golf course, part of the swimming pool and some other terrain.
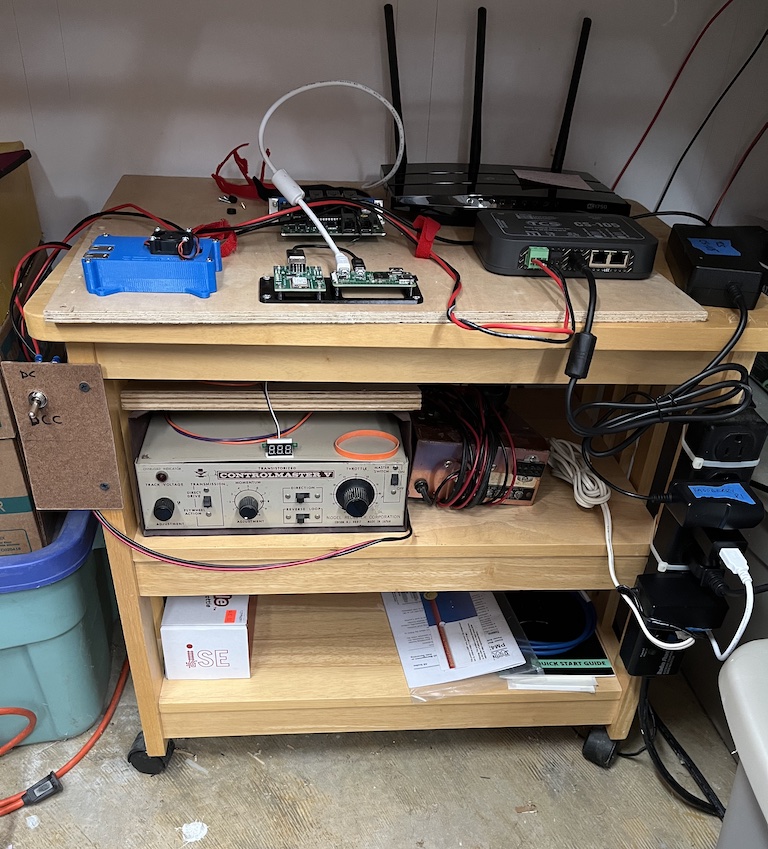
A few other command system and lighting improvements: I deaccessioned myself from the old Digitrax Empire Builder II system and picked up a new TCS CS-105 unit.
After a weekend of setup, it is functioning beautifully.
With the addition of my trusty RasPi/JMRI, the ProtoThrottle is working well, too.
I also installed LED strip lights beneath the upper deck on half of the layout.
This is very much a work in progress as I attempt to best engineer how to get the most out of them, but I am really pleased with the initial setup. More to come on this later.
This is with the room lights off.
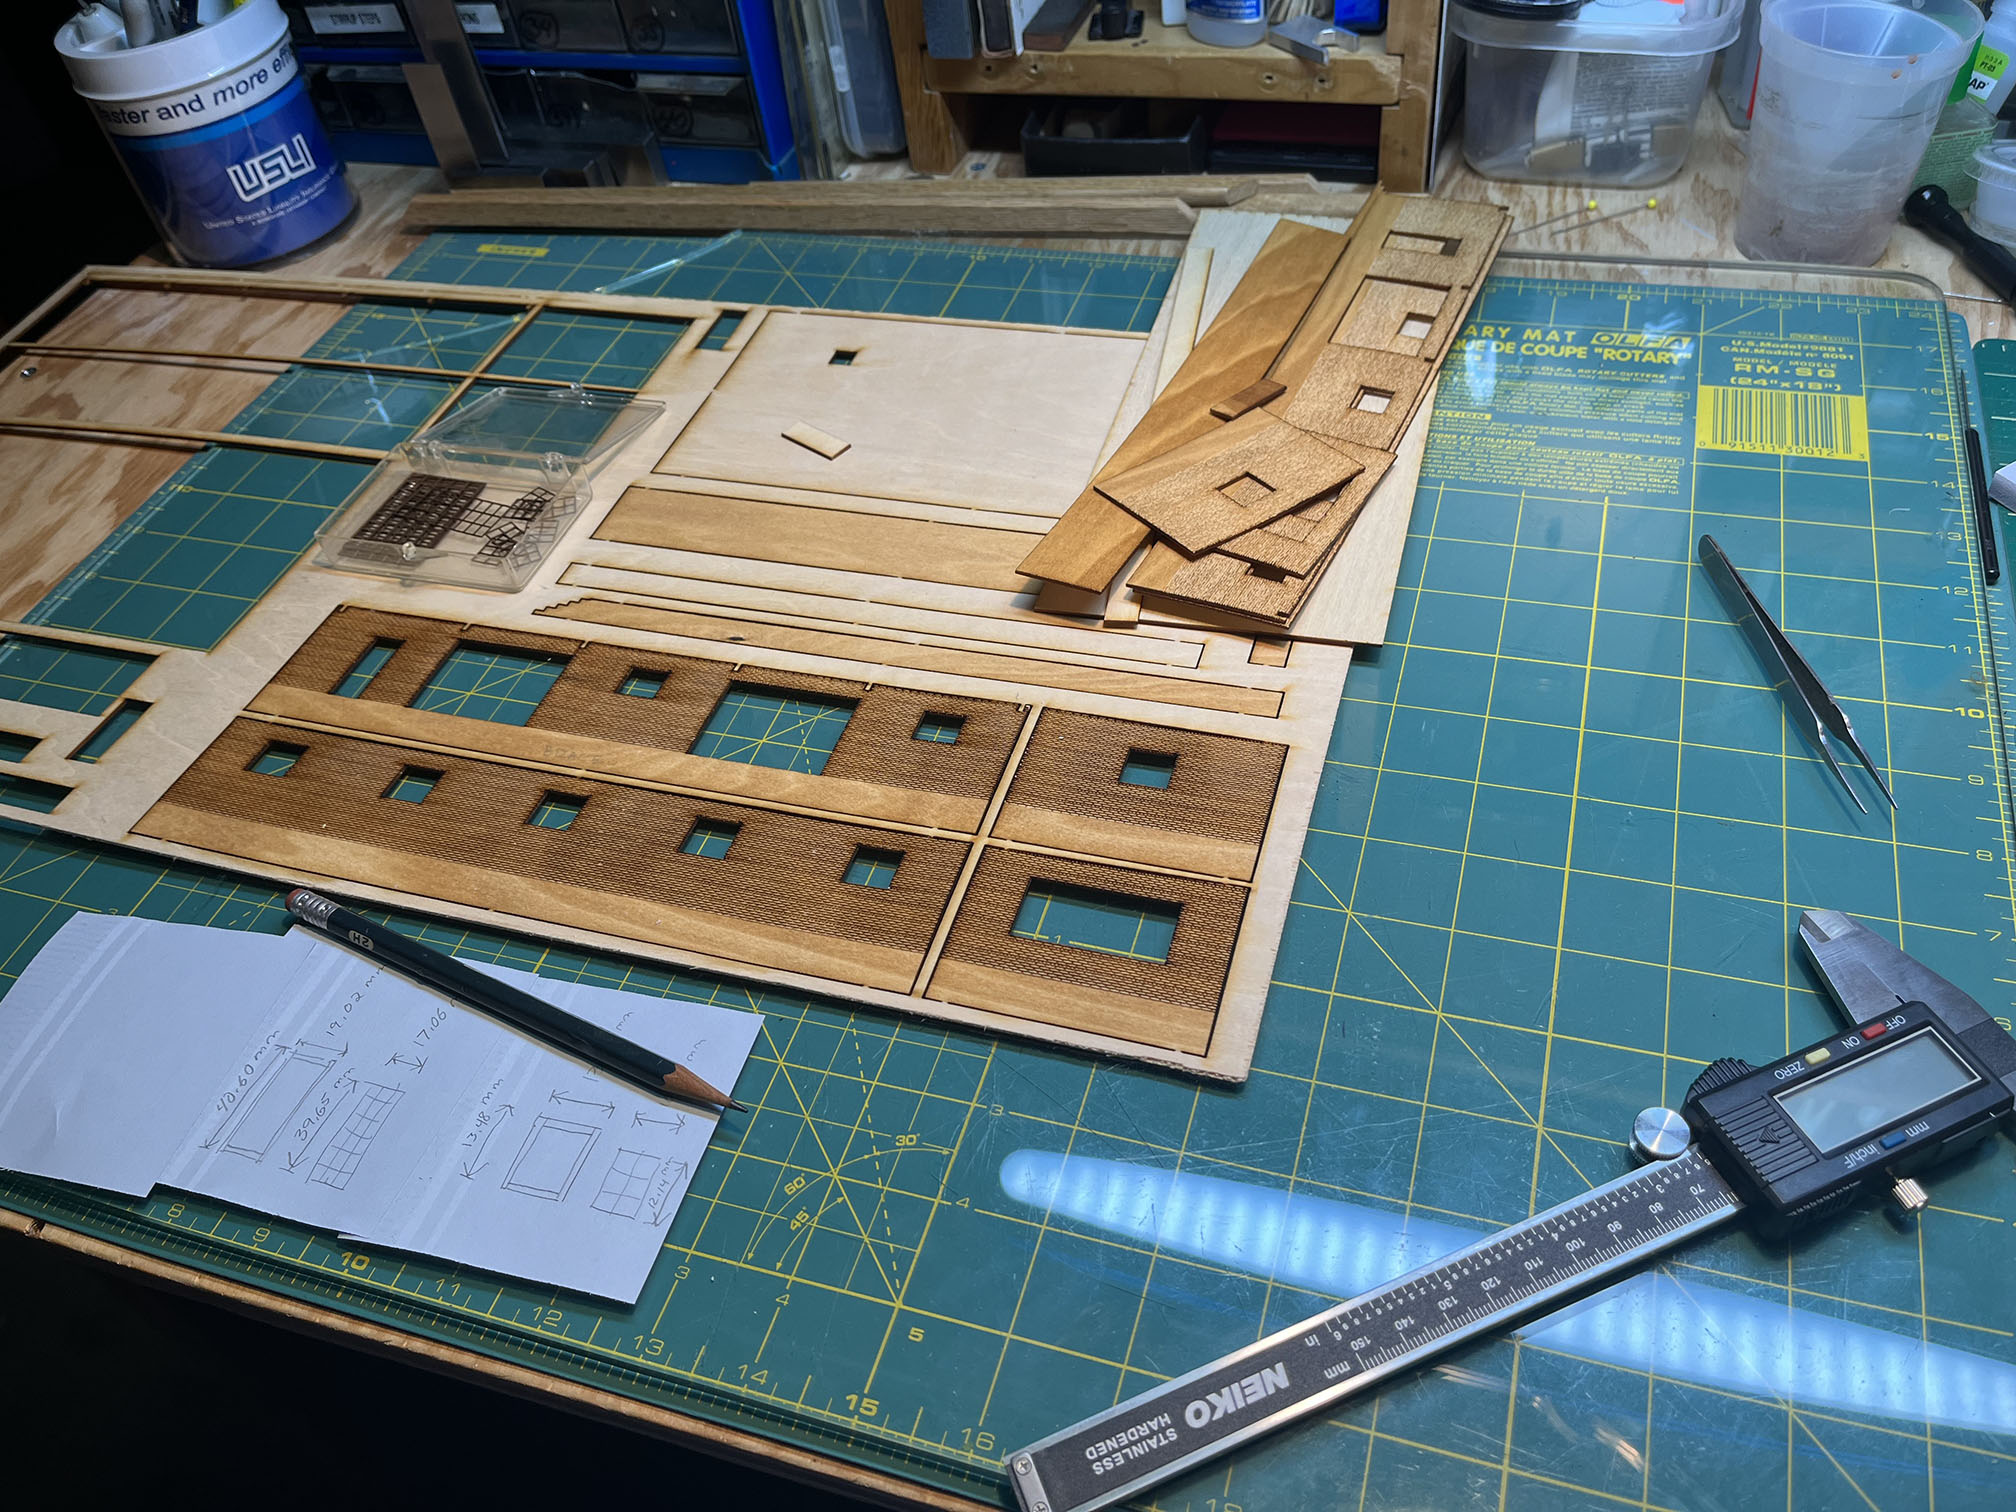
I’ve also been giving some thought to completing my model of the Bethesda Freight House. If you recall, a few years back I designed and laser-cut parts for my model of the station, but hadn’t assembled it. I spoke with Greg C. who is a master at building structures, about how to proceed and he gave me some great tips. I need to figure out the inserts for some of the moulding around various windows and engineer how I will install the garage doors, and get building.
Well, that’s all for now. Life is quite busy at the moment; my kids are wrapping up the school year, lots of sports activities, road trips, and other commitments. I’m taking a week off to host my cousin and we are planning on hitting several regional railfan spots, hobby shops and working on my layout. Hopefully more progress reports soon!
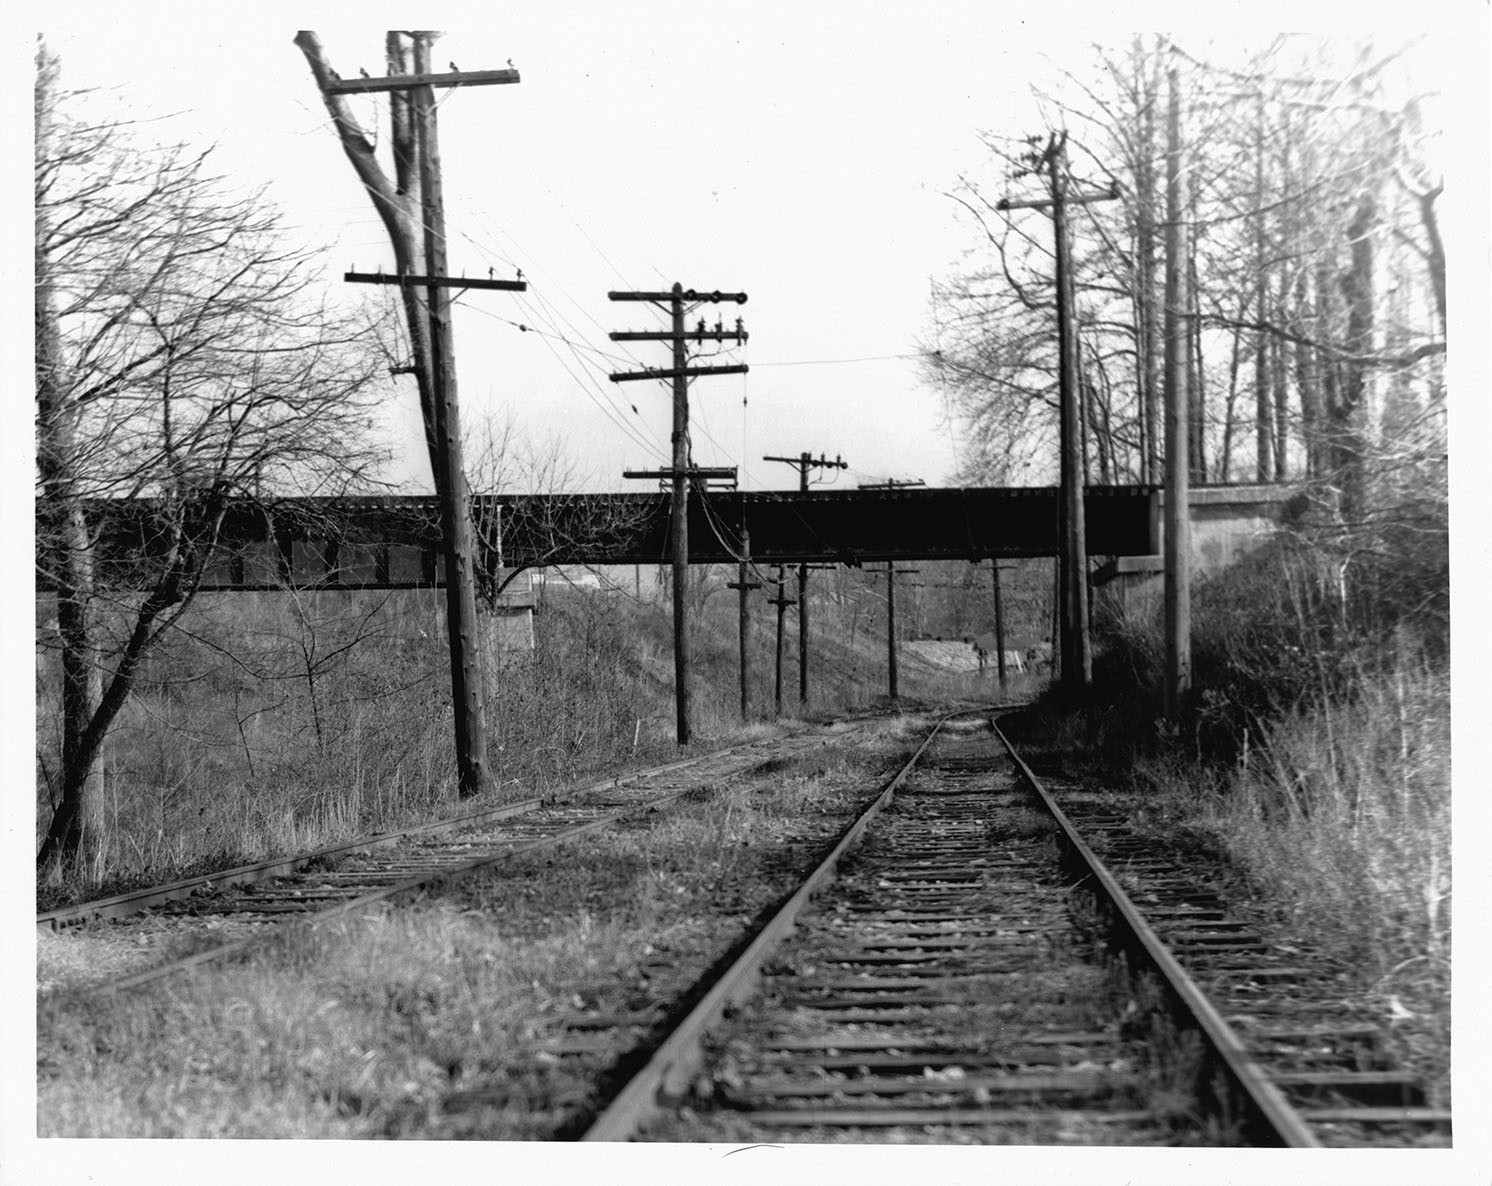
I found this print on eBay recently and am quite pleased to add it to the Georgetown Branch collection. The caption on the back of the 8×10 print reads: “1/59 Washington, DC – Line #20 – B&O RR trestle – crossing over Cabin John line.” The photo was taken from the west side of the trestle, facing to the east.
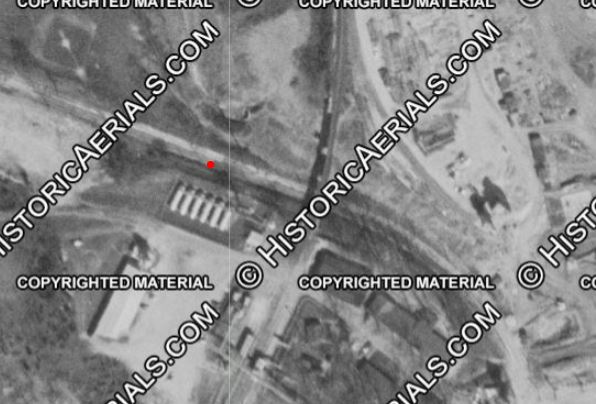
Jan 1959 – B&O trestle crossing Cabin John trolley line. Photographer unknown. Personal collection.Approximate location of the photographer, facing East. Historic Aerials.
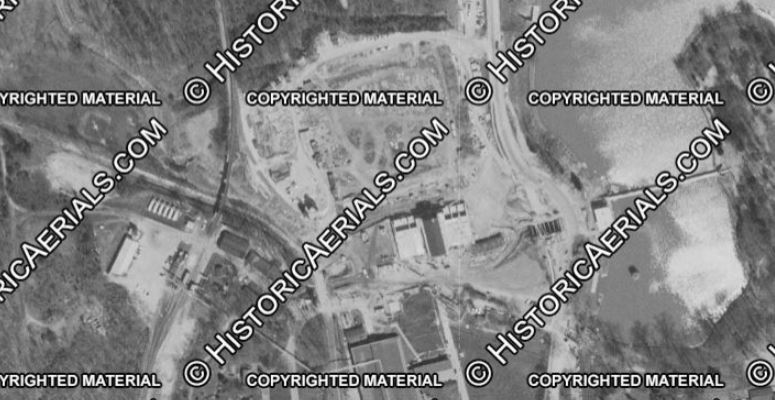
At the time, the Dalecarlia Reservoir was undergoing a massive expansion project. Aerial photos from 1949 and 1957 show the scale of the expansion.
1949. Historic Aerials.1957. Historic Aerials.
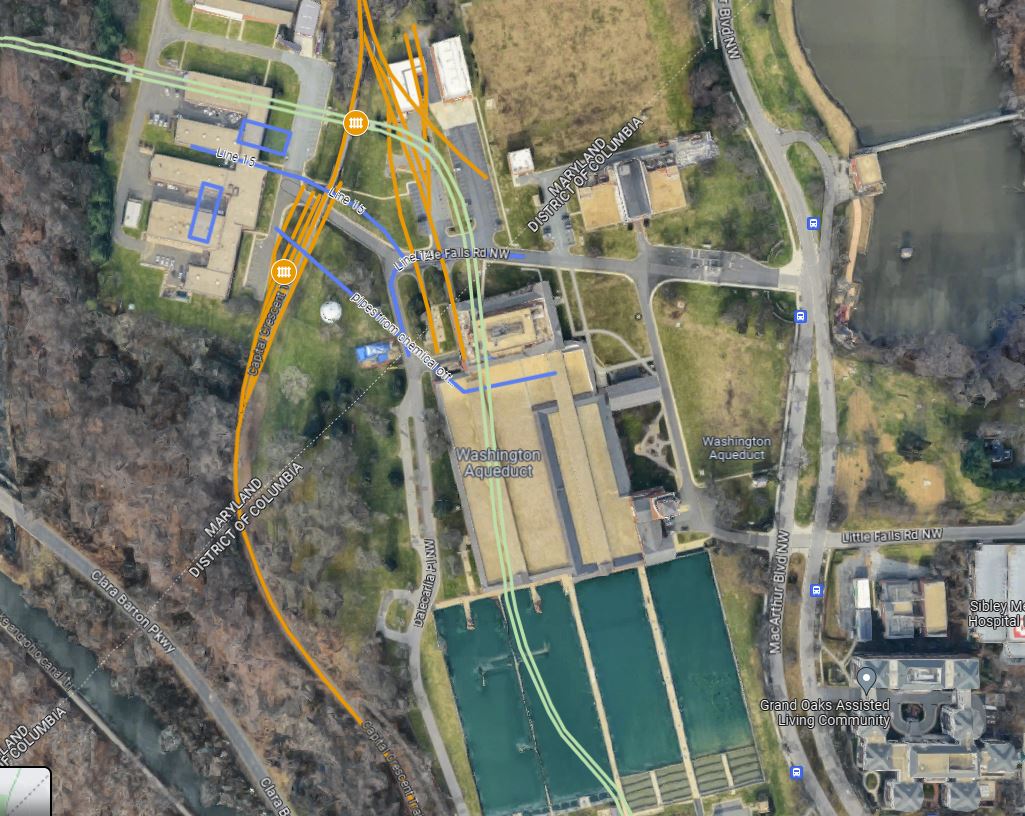
The last trolley on the Cabin John Line was on Jan 3, 1960, and the entire system was fully closed in 1962. Congress revoked its charter in 1956, so likely seeing the writing on the wall, the Dalecarlia reservoir began expansion in the mid 1950s. The right of way was repurposed and is where some major buildings and two of the settling ponds exist today.
The old Cabin John trolley line is outlined in light green on this map. You can see how much has been built on the old right of way.
I took the plunge and decided to rid myself of my twenty-some year old hand-me-down Digitrax Empire Builder II starter set for something a bit more cutting edge. I really like what TCS is doing these days with their new systems and was able to finally see one in action at Springfield last winter. A new CS-105 is on hand and will be installed soon.
I also picked up a handful of LED light strips and a power supply. These will be used to illuminate the lower deck. Hope to do a full write up on this once installed. Need so cut some 1/8″ strips to mount the lights to.
2026 UPDATE: On 10/20/2024 I gave a virtual presentation to the Potomac Division of the NMRA on upgrading the Proto 2000 GP7/9 three different ways. I go over this installation method as well as a couple other ideas. Check it out!
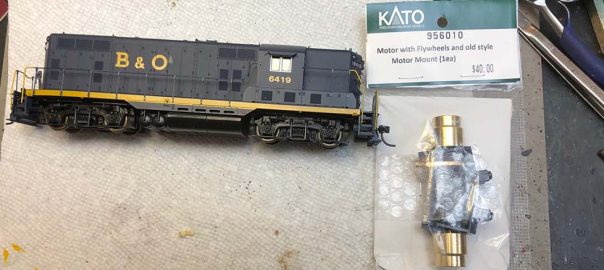
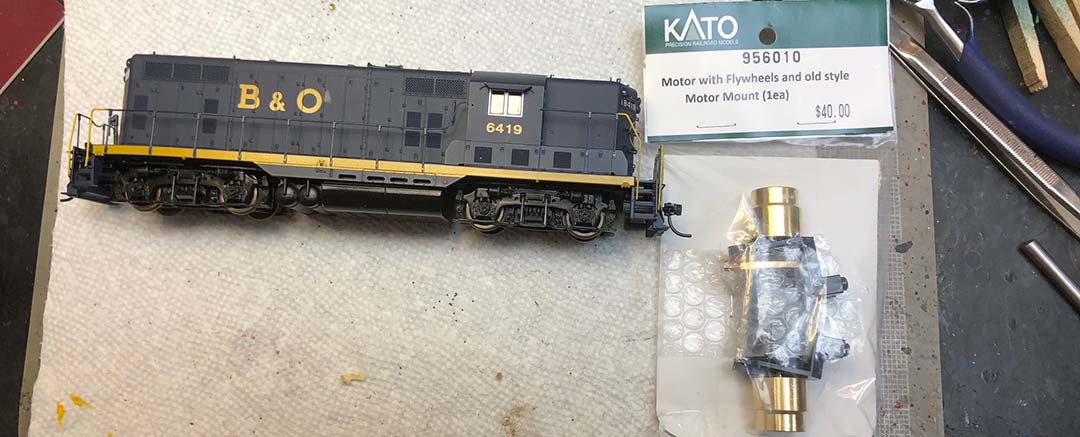
My friend, Tom Matty, who models the Thomas Sub of the Western Maryland Ry, a very skilled and talented modeler, offered to do a writeup of how he re-motors an old Proto2000 GP7/GP9 with a much higher quality Kato drive. It involves milling the frame, fitting the motor, linkages and worm gears and then installing your favorite flavor of DCC/sound. (we won’t cover the DCC installation here today). Tom gave me permission to post his process on the blog so I figured I’d share it with everyone who may be interested in this fantastic upgrade.
Parts needed:
1x Kato 956010 Motor with Flywheels and old style Motor Mount (1ea)
1x Athearn ATH90116 HO Dog Bone .805” F7A/B/FP7 Rear, 6 per pack
2x Athearn ATH34128 HO Worm Assembly, High Performance, 1 per pack
Photo from 2018. Not much has changed with it since then.
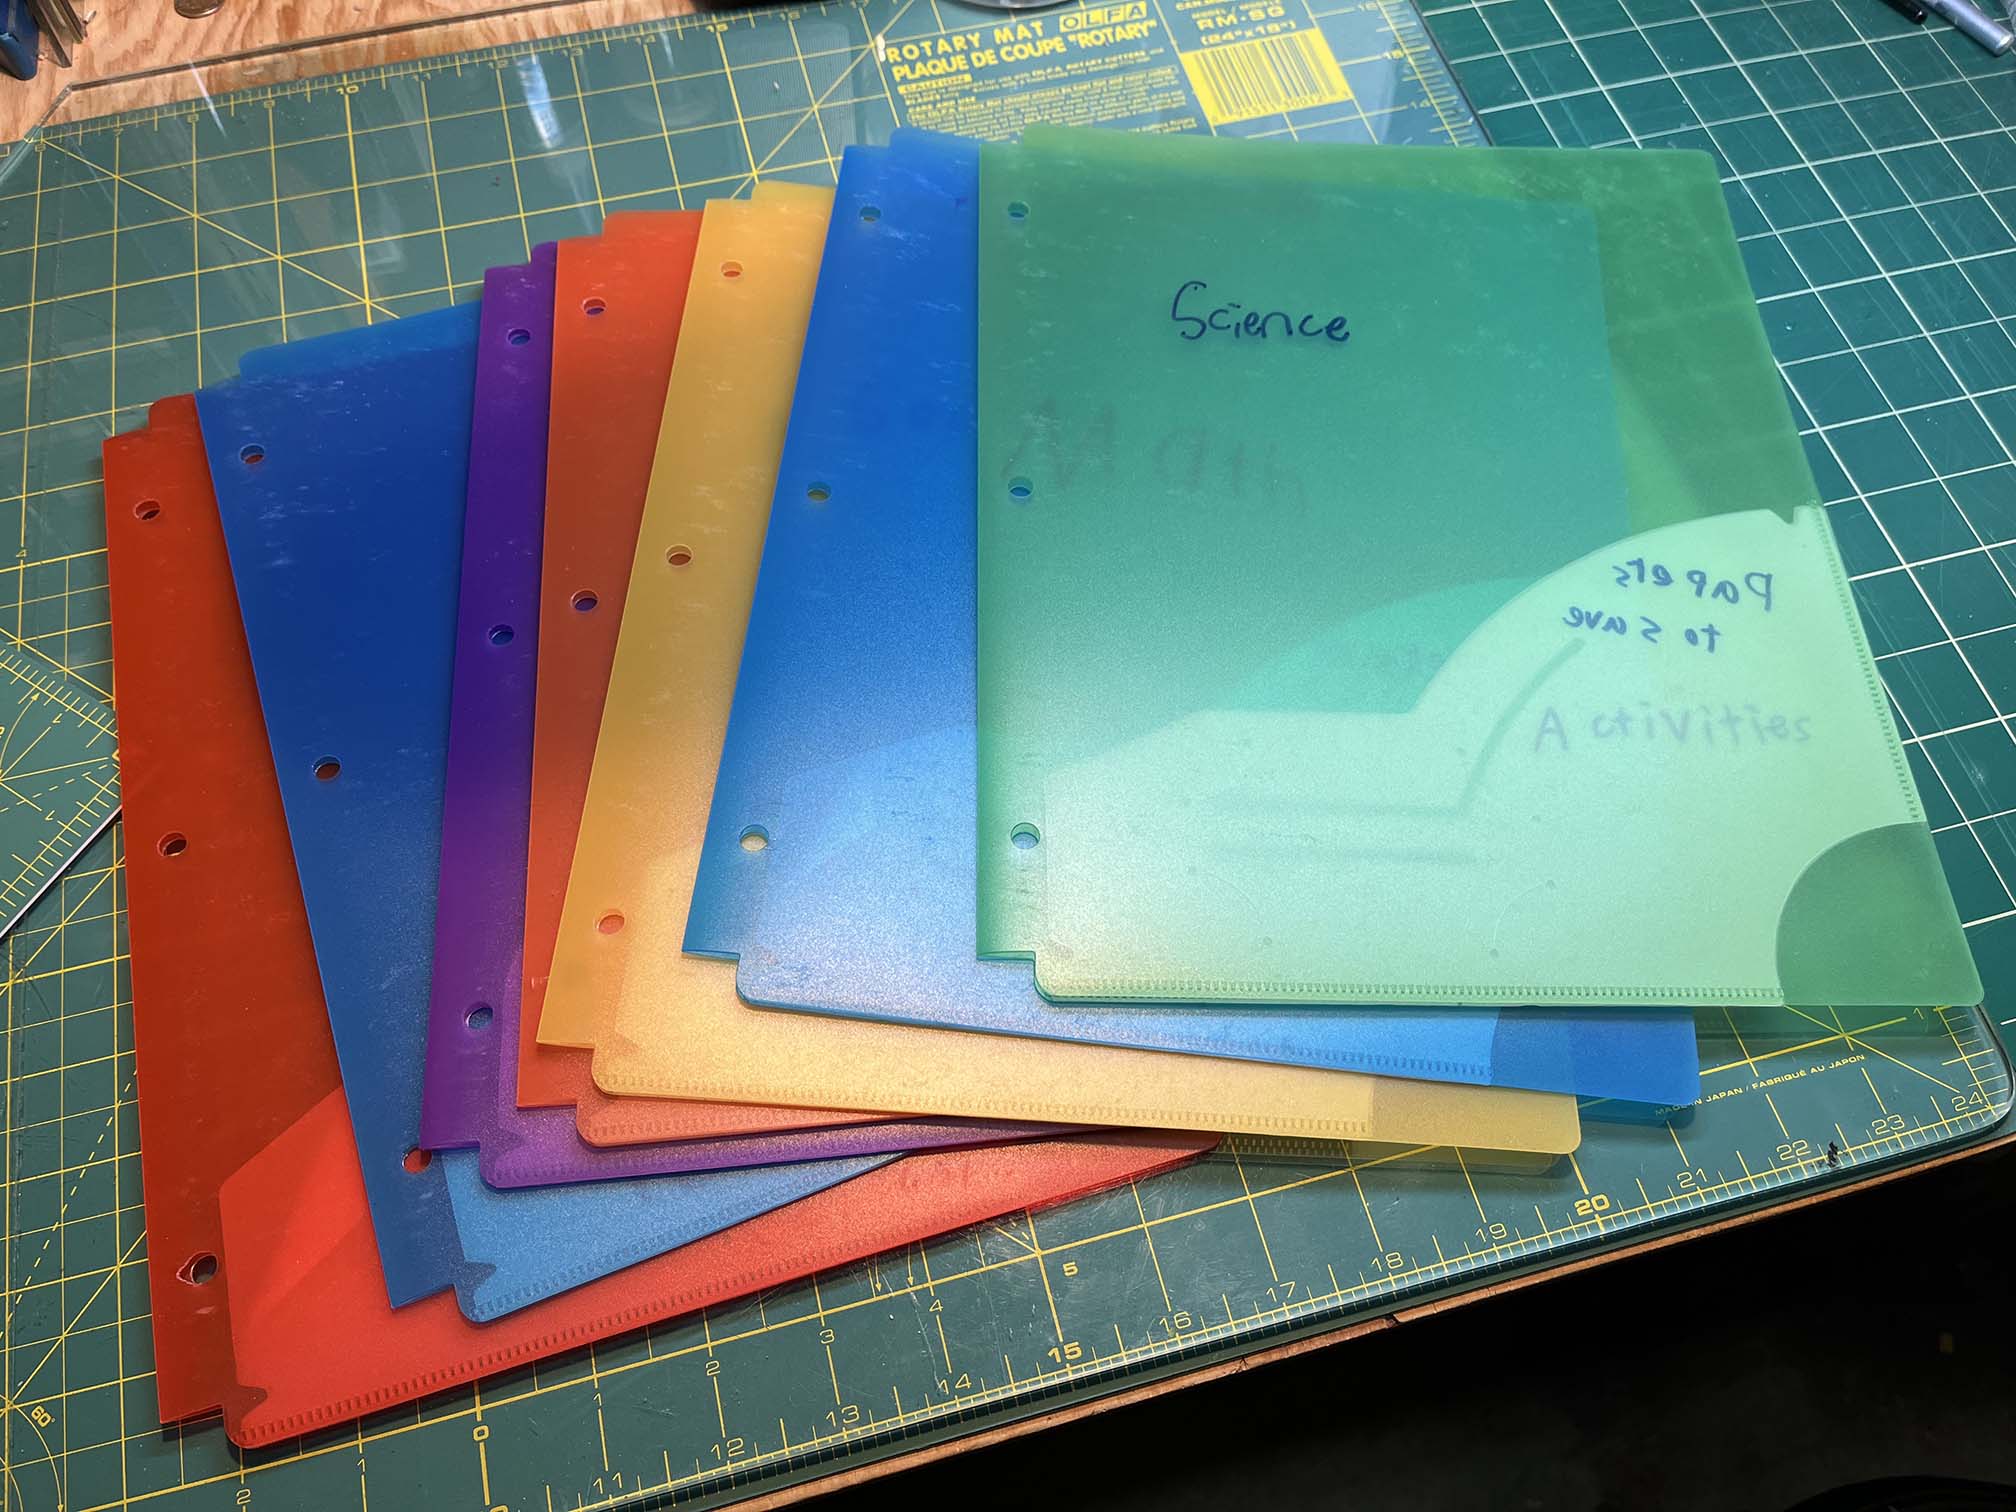
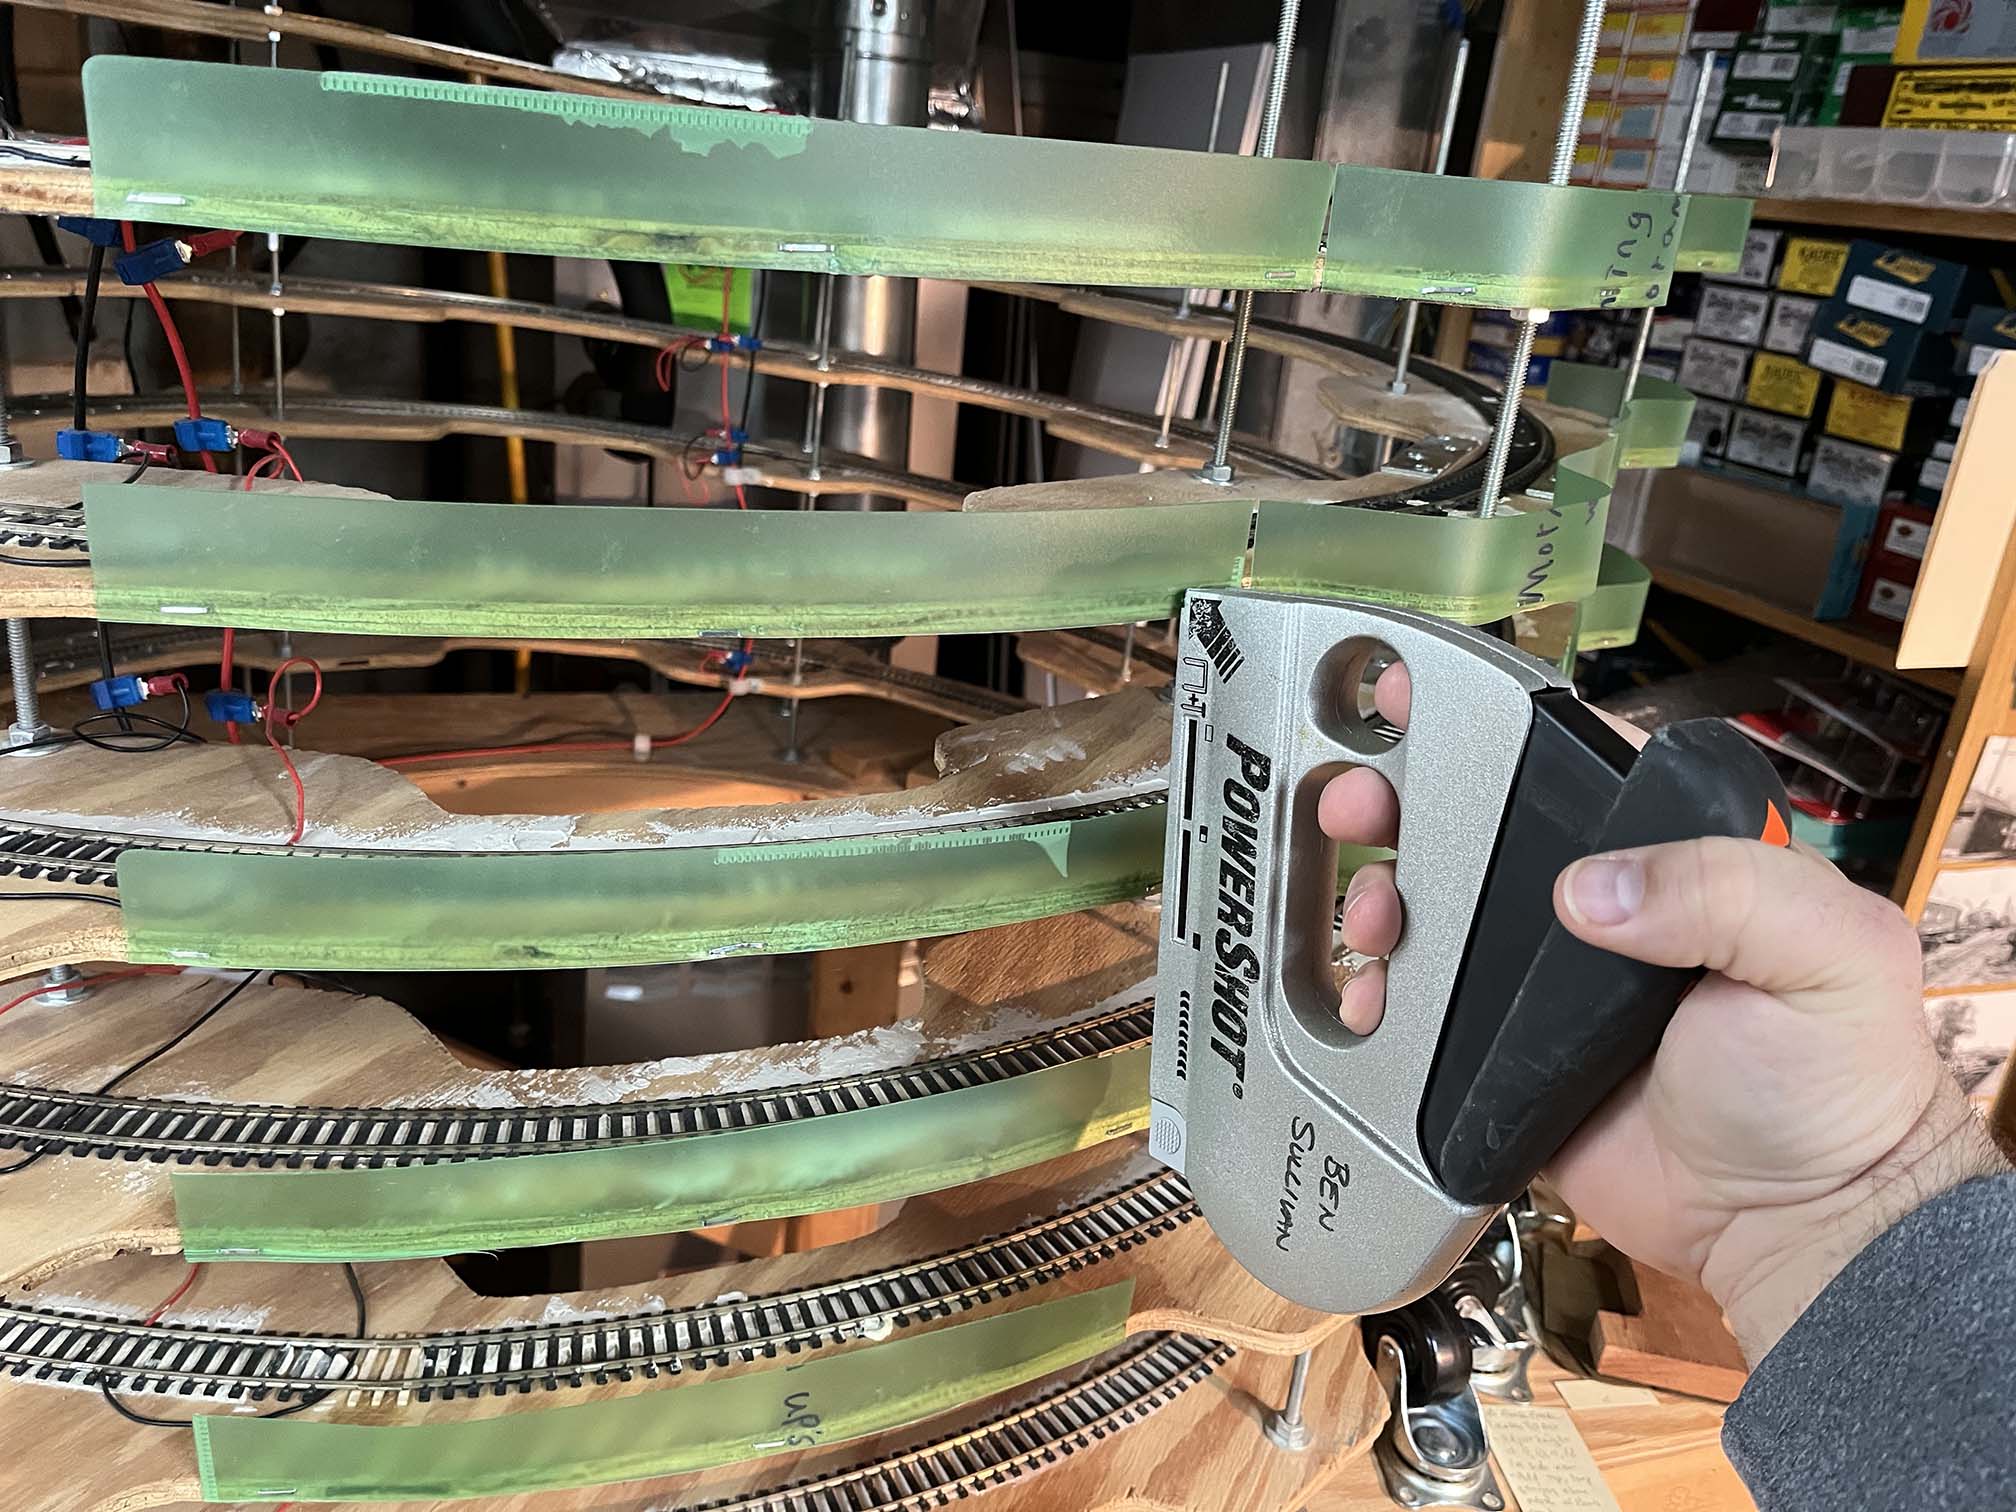
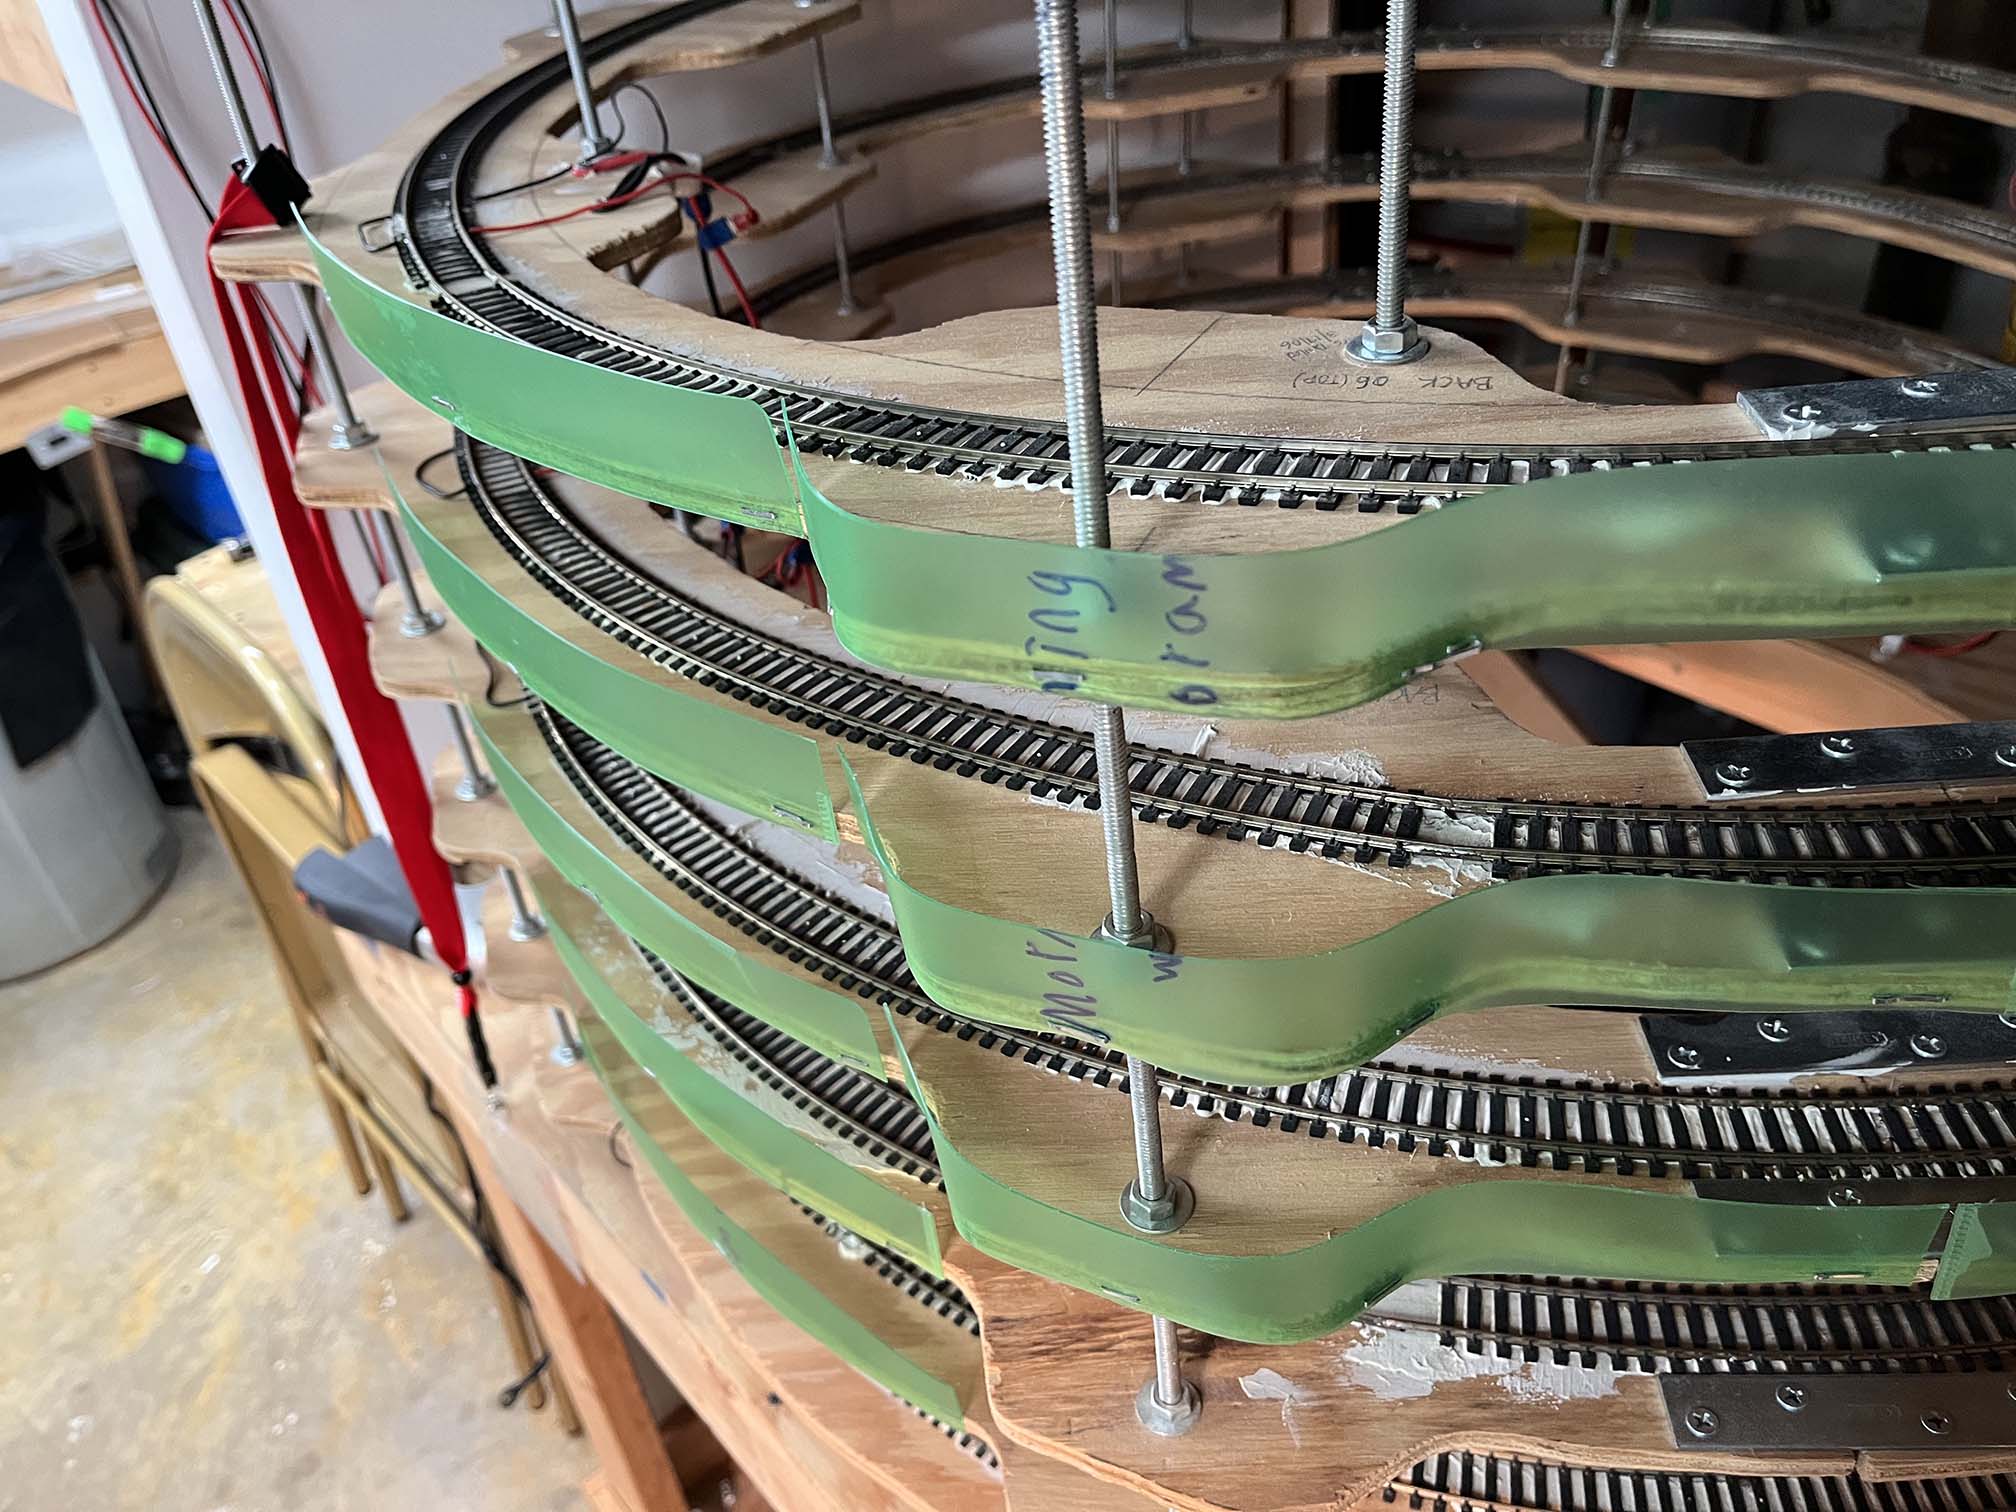
As you may or may not know, I have a helix to connect the upper and lower decks of my Georgetown Branch layout. I built the helix ages ago, back in 2003 for my previous layout. It was designed to fit below a set of stairs and as such is relatively tight, with 19.5″ radius curves and a 2.9% grade. (yikes!) Thankfully I mostly run small B+B locomotives! One thing that is lacking is any sort of protection for the trains as they traverse the helix from falling off the edge and cascading to the floor. I thought about cardboard or mat board strips but decided against them as I didn’t like the idea that they would crease or break if I had to reach in to re-rail a train. I have been kicking this idea around for ages and recently had the idea of using polypropylene folders. These are the flexible-yet-stiff plastic folders you find in a lot of school binders. When I was cleaning out a supply cabinet, I found a stash of old folders from my son’s grade school days. Perfect. So I got around to testing this out.
A nice stash of folders to slice up. I’ve got the entire outside and inside of the helix to wrap, so I will need several.
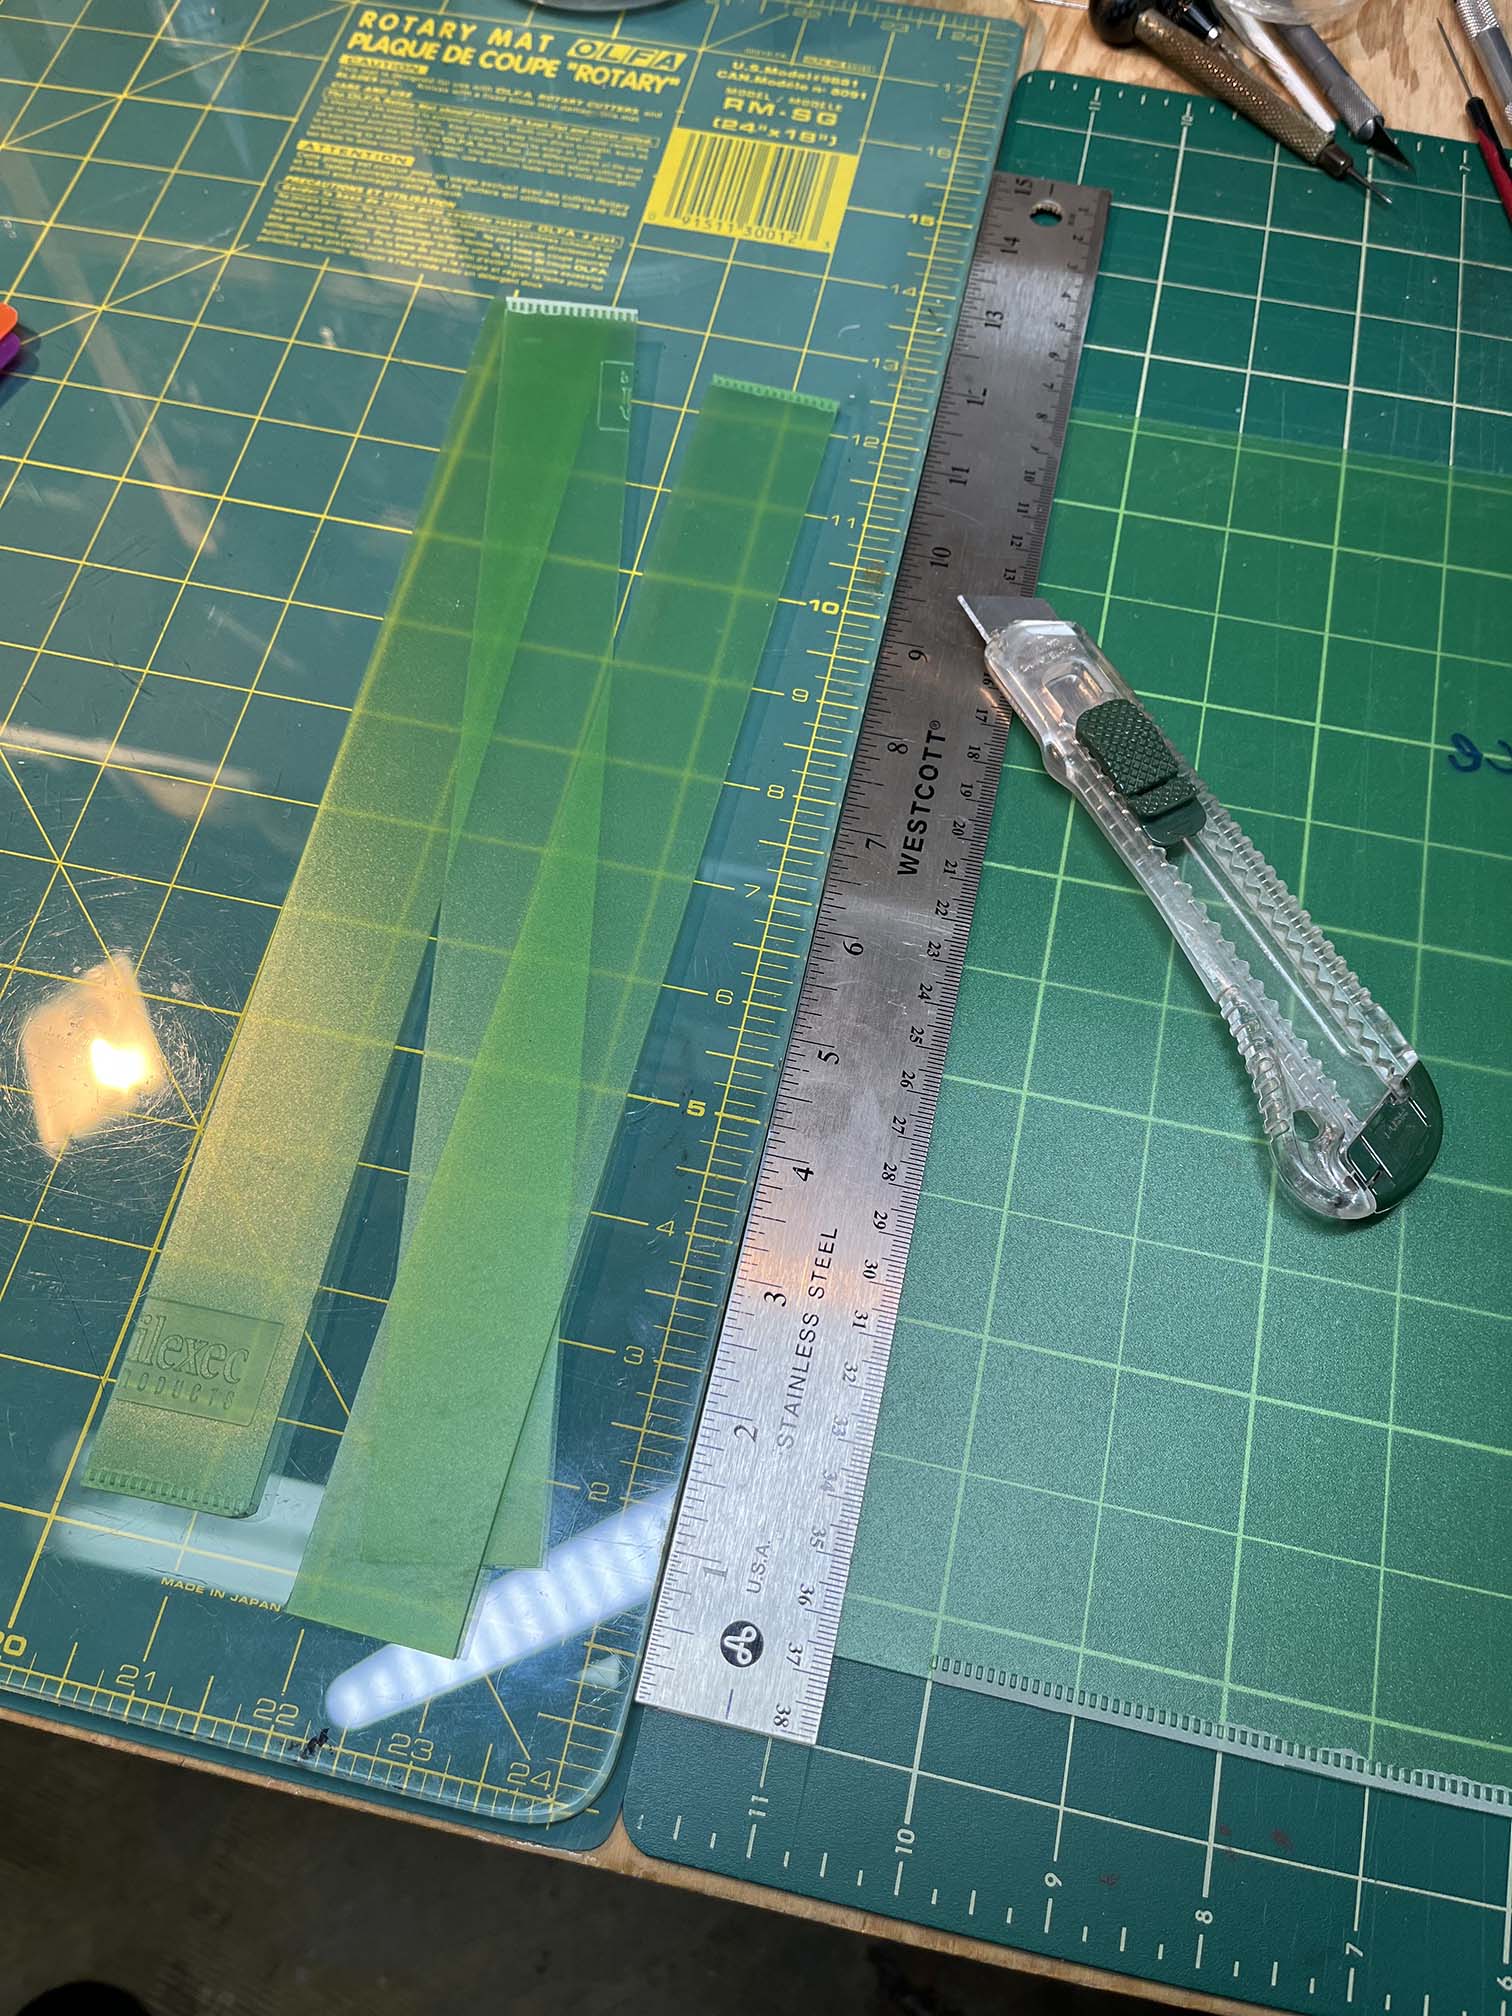
I first remove the inner folder piece (seen in the photo above as a lighter green) and then set the edge of the folder against a sheet of glass and lay my steel ruler down atop it. I then score until the sheet is cut through.
Next, lay the strips on the side of the roadbed, keeping it parallel to the bottom, and use a staple gun to fasten to the plywood.
Some of the staples will not go in all the way and I tapped them in with a hammer. Occasionally I would miss and have to remove the staple with a screwdriver and try again. I really like the way this is turning out.
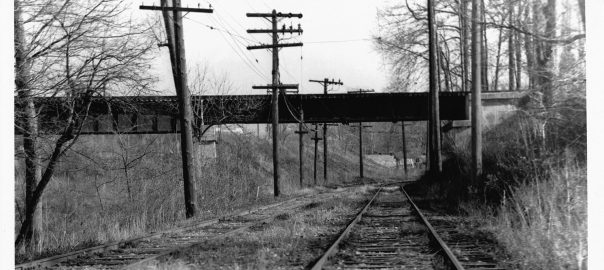
Purple Line construction on the Rock Creek bridges. View is west, and in the distance you can see the new tunnels beneath Jones Mill Rd. Previously, the railroad crossed at grade. In 2019, after demolishing the trestle, they lowered the right of way and began construction of two new bridges across the Creek. From Facebook.This view from the 1990s and part of the Coalition For The Capital Crescent Trail collection, is a similar view from the years when the railroad was out of service.
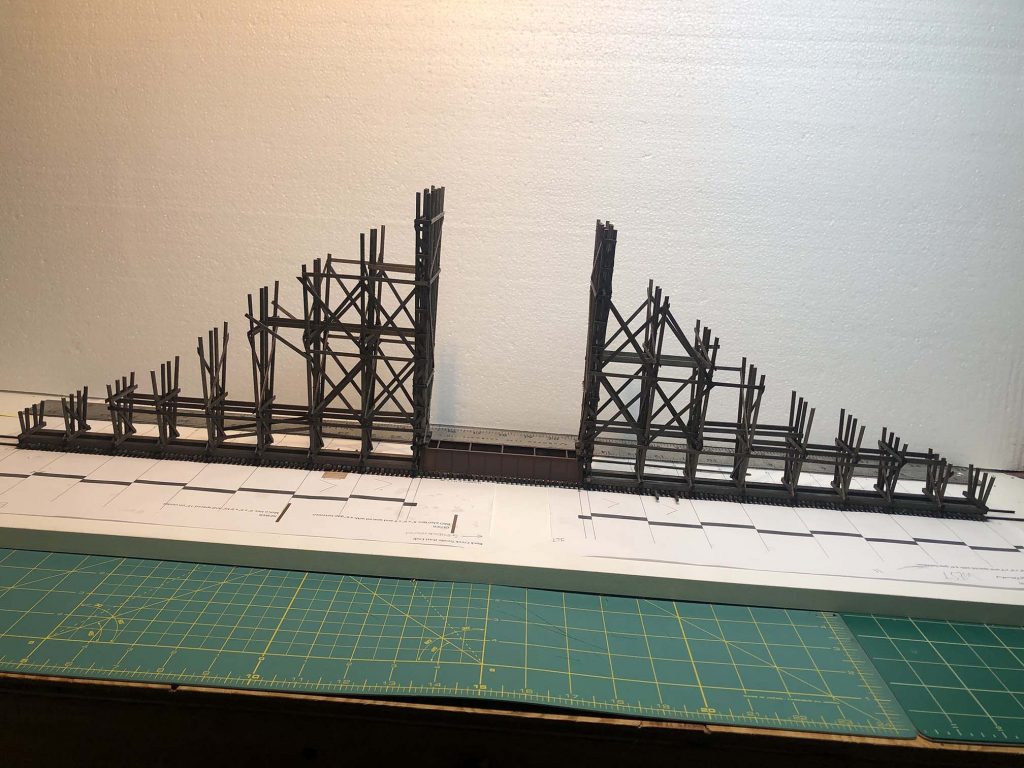
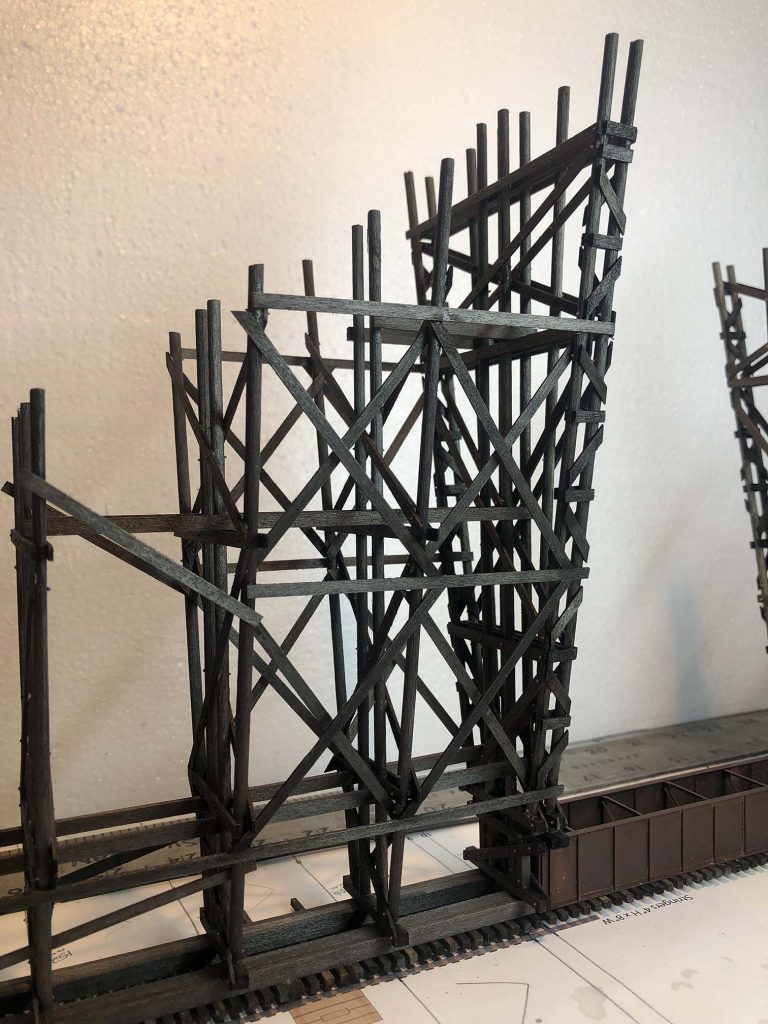
The last several weeks proved to be some of the busiest for me at work and as such progress has slowed. Today, however, I tackled another milestone – completing all of the assembly for the trestle structure itself. I tacked on the final bracing, stringers and girts to complete the lower section. Here’s a few photos of what it’s looking like:
This means that the to-do list is getting shorter and shorter. Here are a few highlights of what’s left:
NBW castings on the side-facing stringers and beams. This will take a good amount of time as I will have to drill and install each one. Much like what I did on the bents, but a bit fewer. I’m not going to install NBW castings on the inner facing beams due to the difficulty in placing them in such tight spaces.
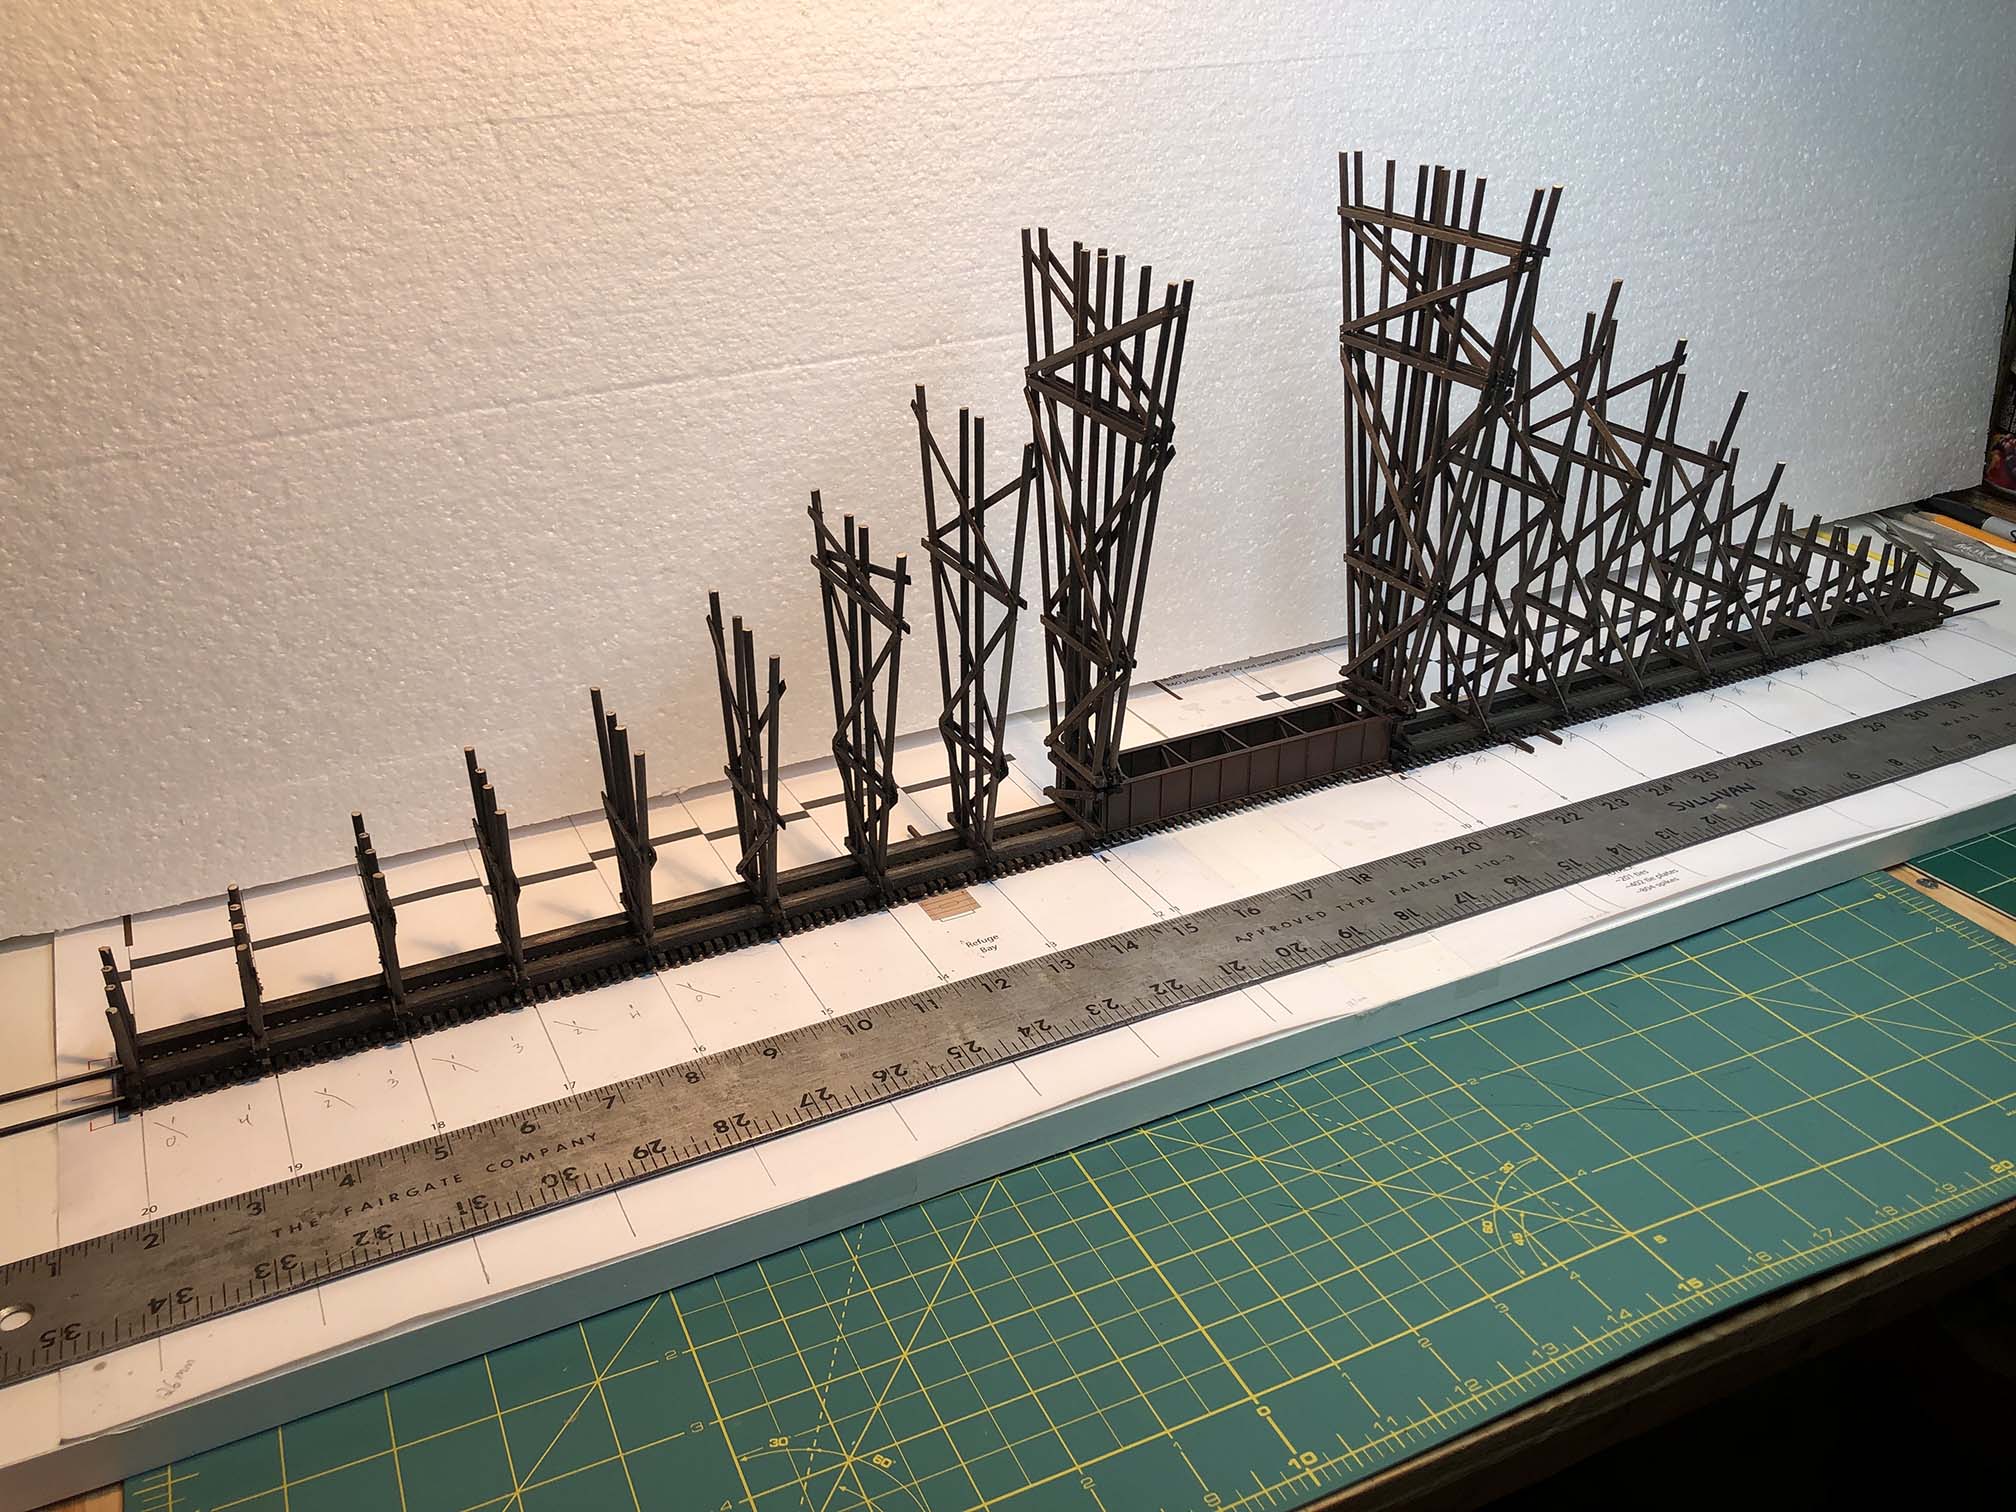
Attach a brace to the bottom of the middle two bents. This will serve as support when the model is turned upright.
Build a sort of cradle to hold the bridge when upright.
Remove bridge from base and flip upright onto cradle/steps.
Build two emergency platforms on the top side.
Install the two beams that run atop the deck parallel to the track, install NBW castings.
Install bracing/walkways that run along top of bents.
Weather and install on layout.
Build and install bracing around lower center bents and cribbing for the ends.
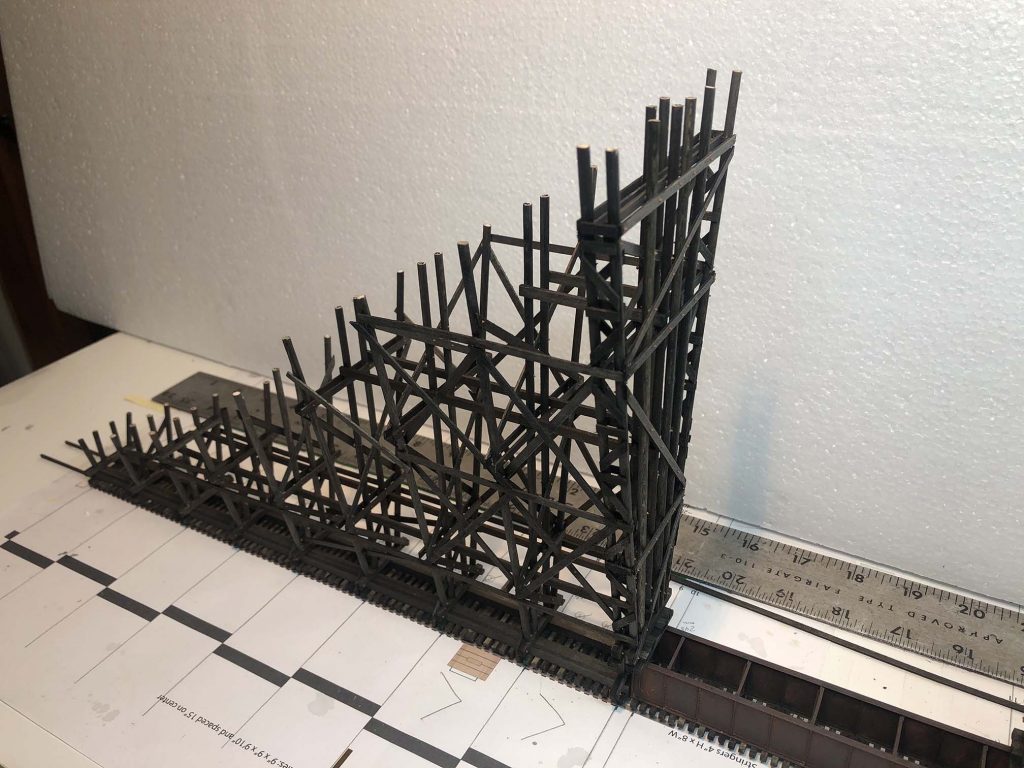
Exactly one month since my last update and I’ve made some great progress on the Rock Creek trestle model that I’d like to share.
All bents are installed and the model is ready for bracing and stringers to be installed.
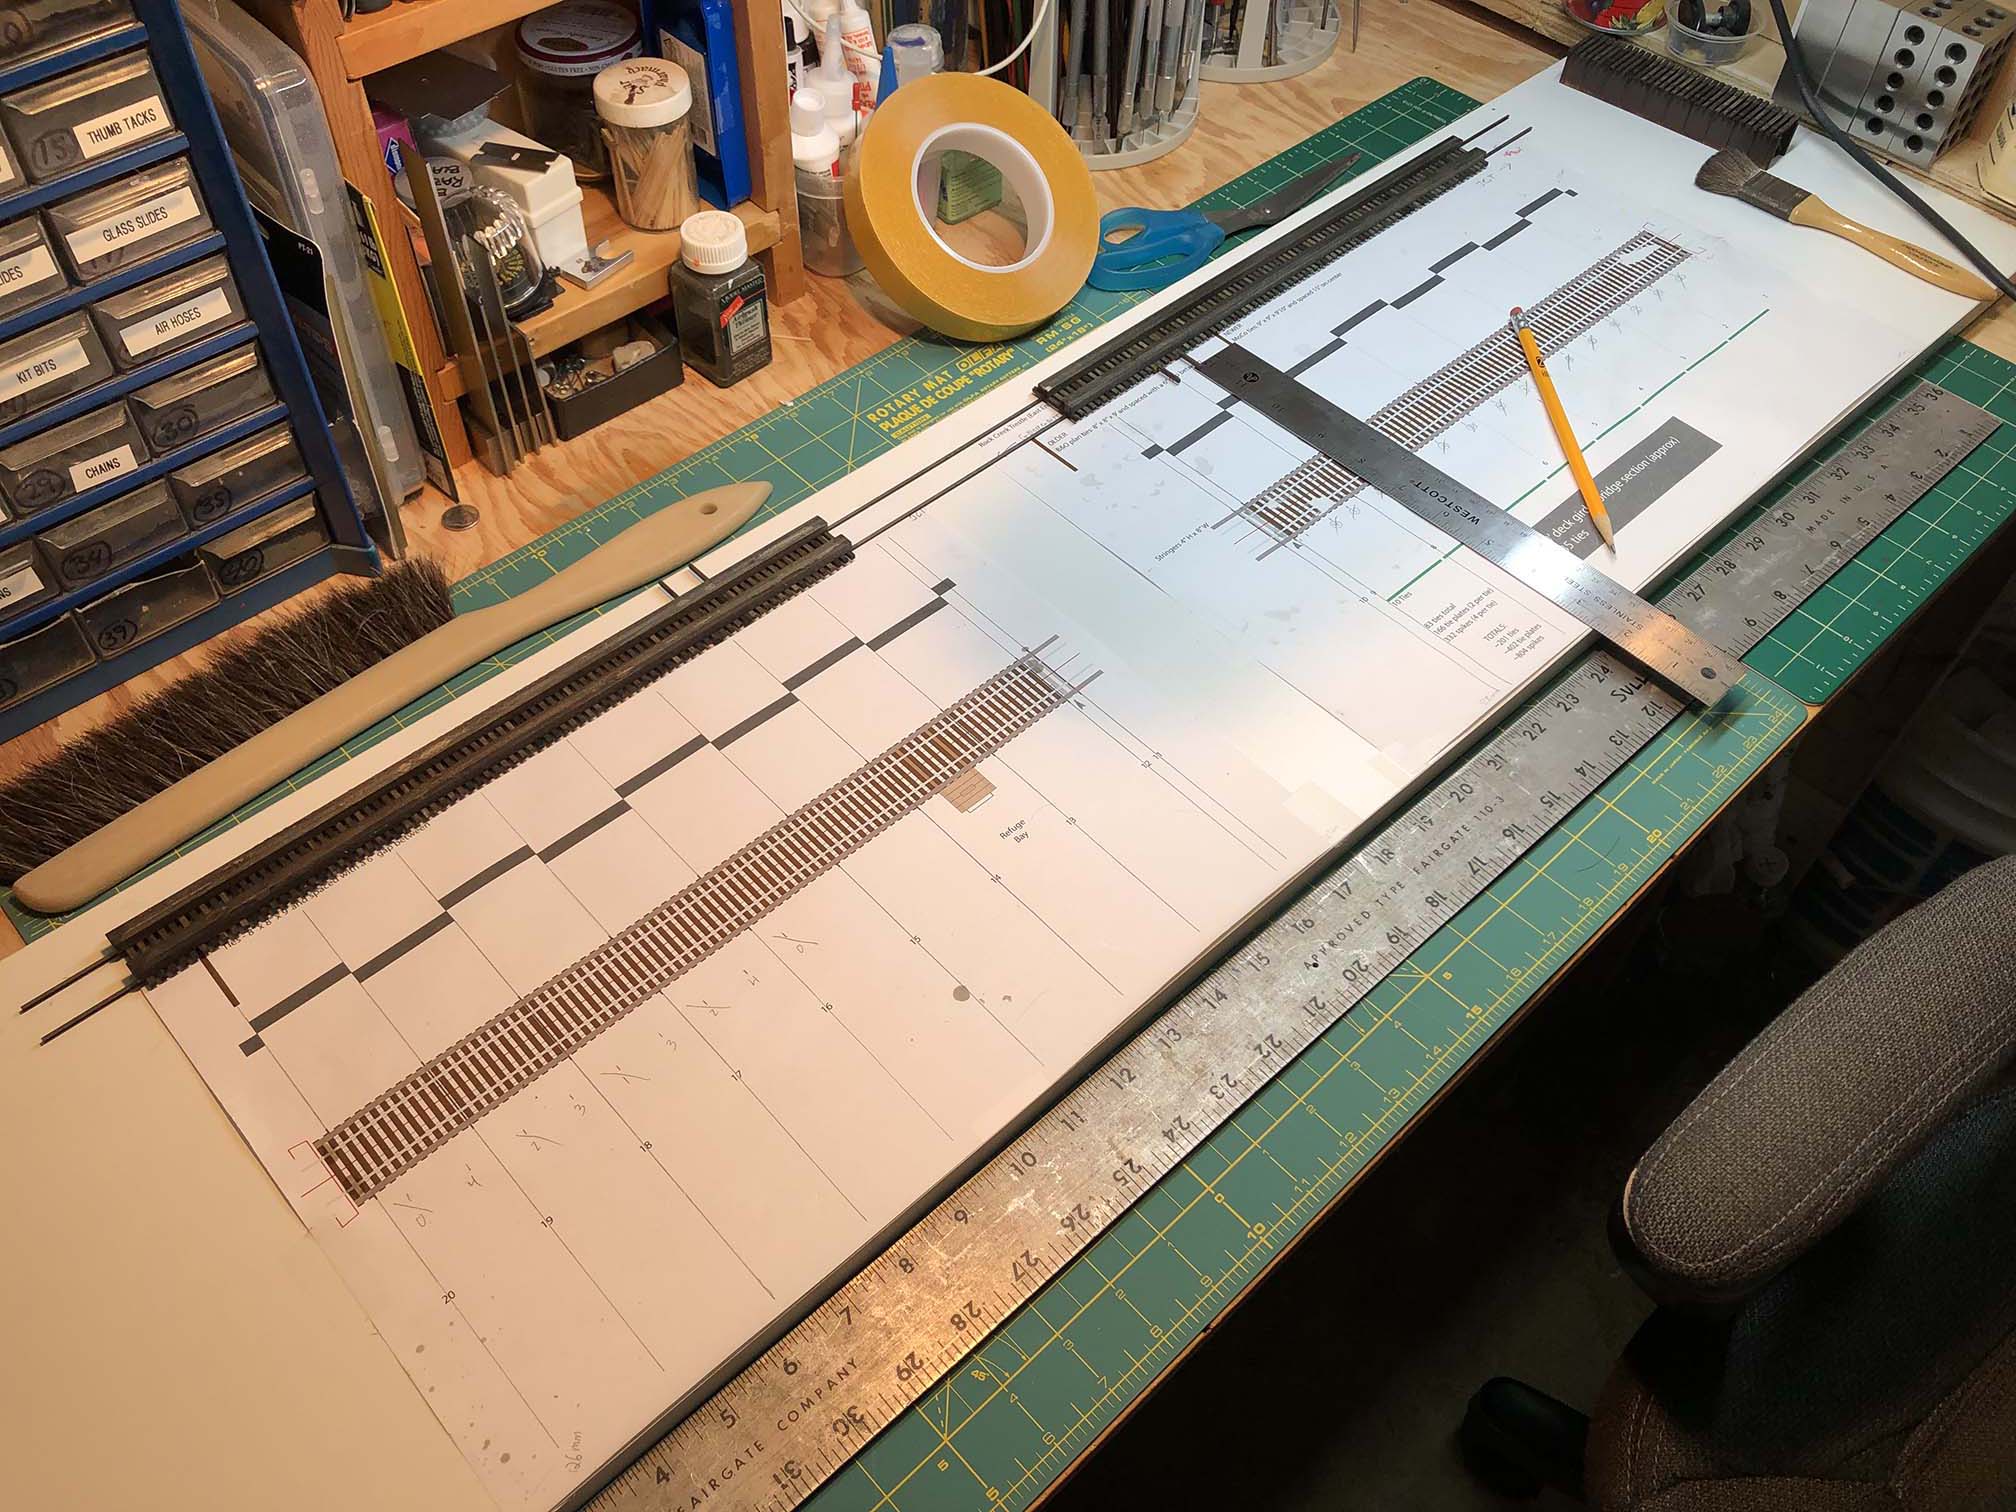
On Friday I built a sled/jig thing to facilitate installing the bents perpendicular and square. More on this in a moment. First up, I needed to flip the top of the bridge over, as it was mounted with track side up. I then took the opportunity to extend the lines that indicated where the bents would be installed, as this would guide my sled/jig later. I also measured where I wanted the straight edge to be and installed it with double-sided tape.
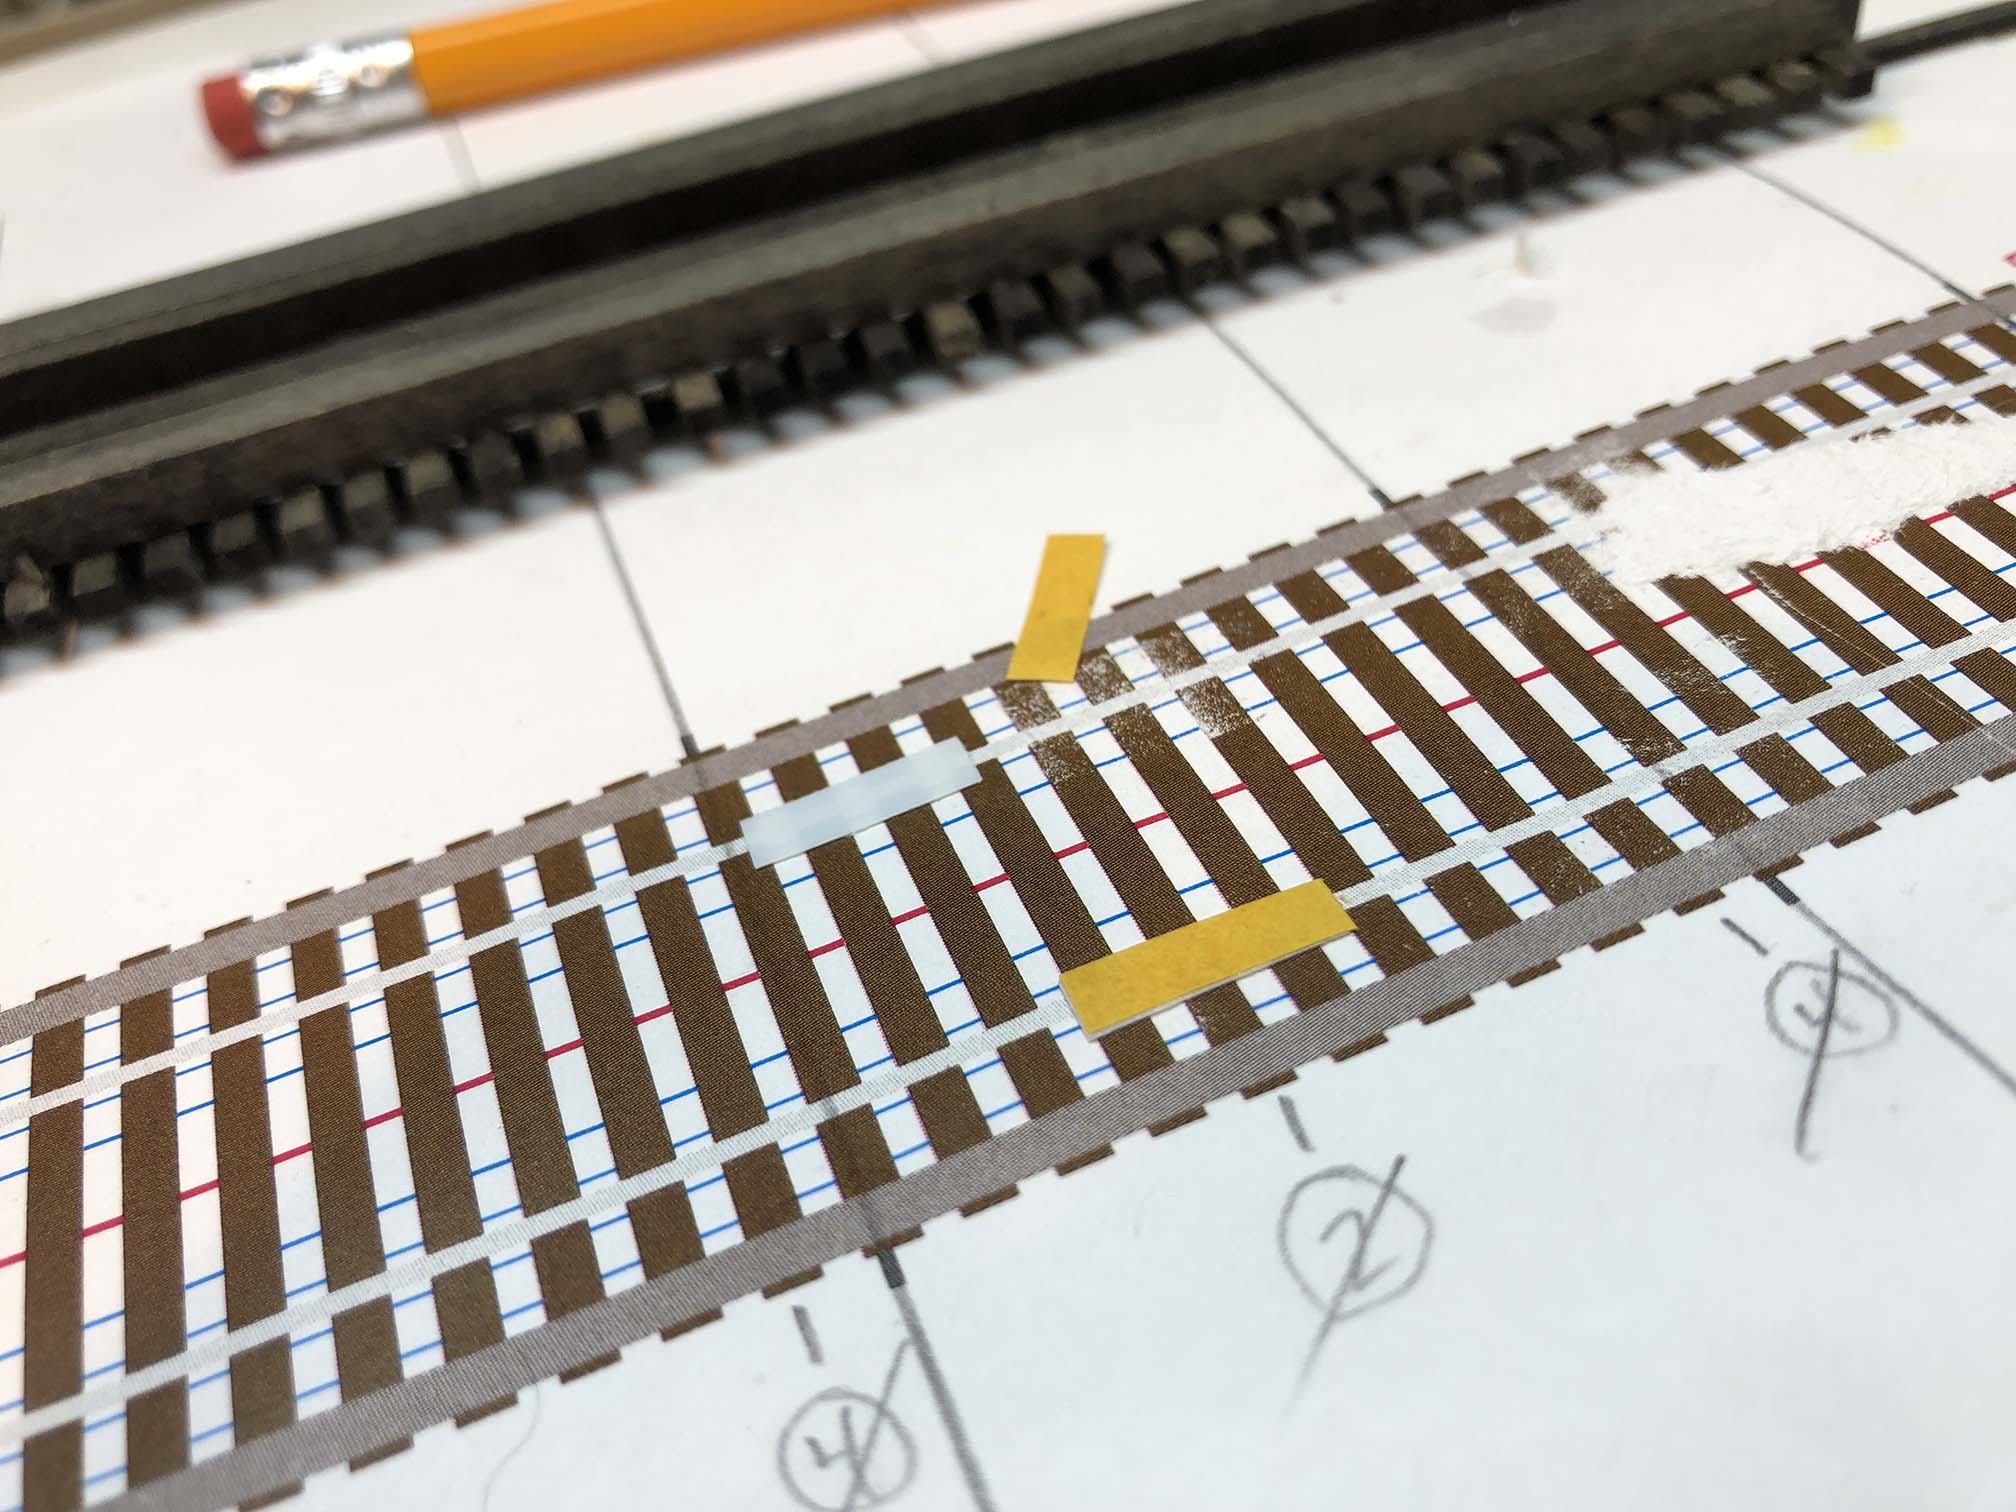
I placed small rectangles of double-sided tape where the rails would lay. Aligned the rails to the plans and pressed gently to set in place over the plans.
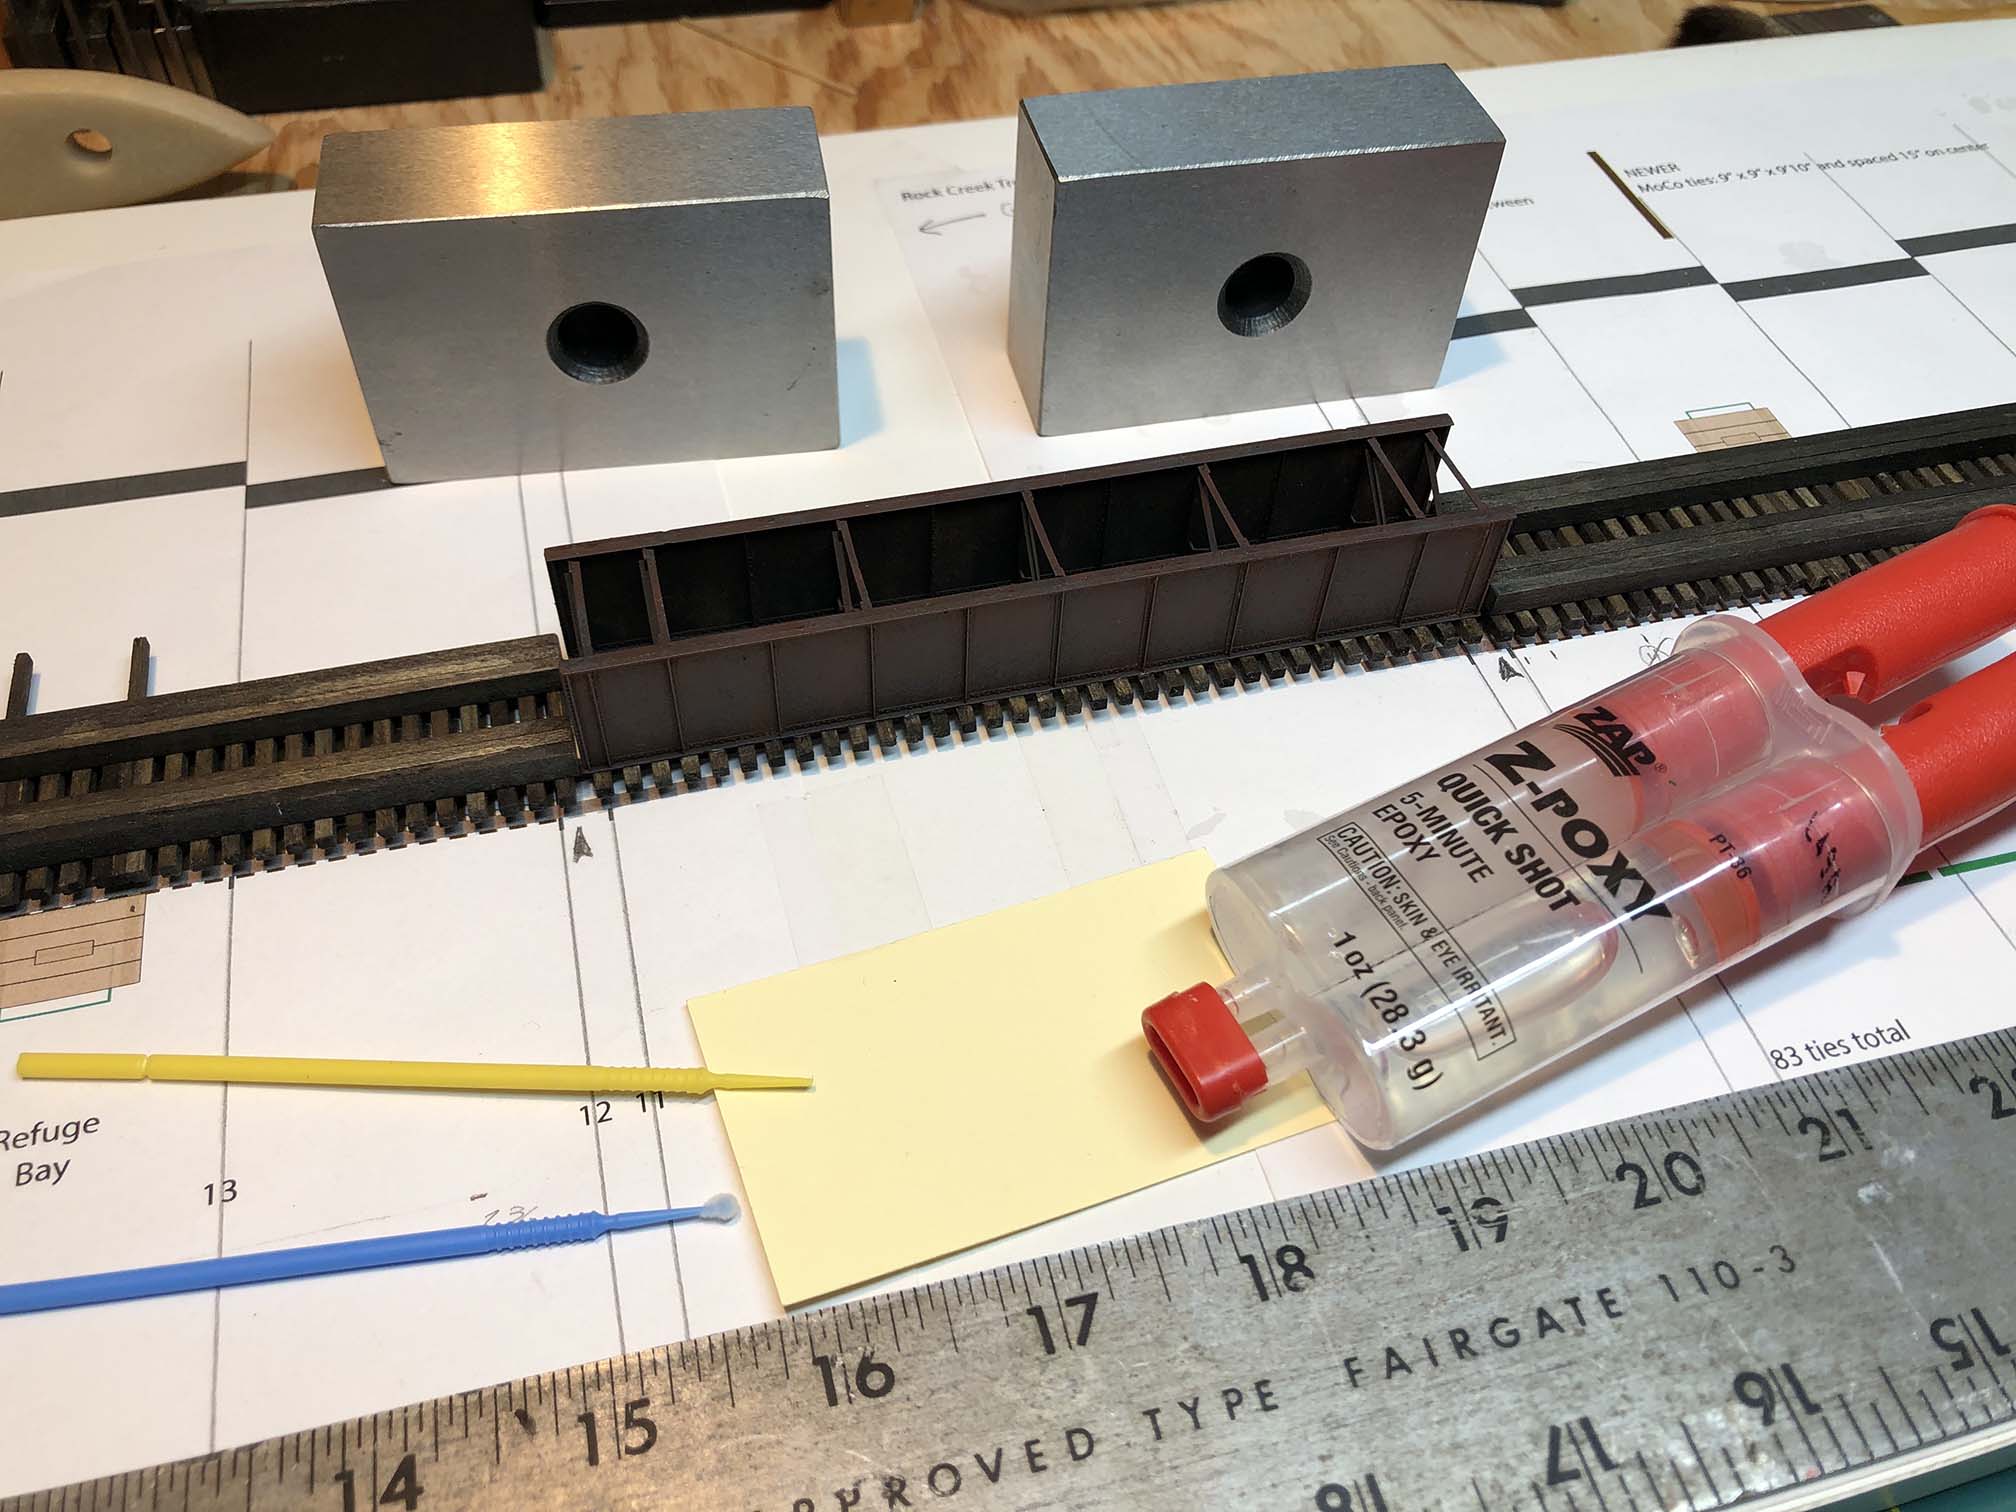
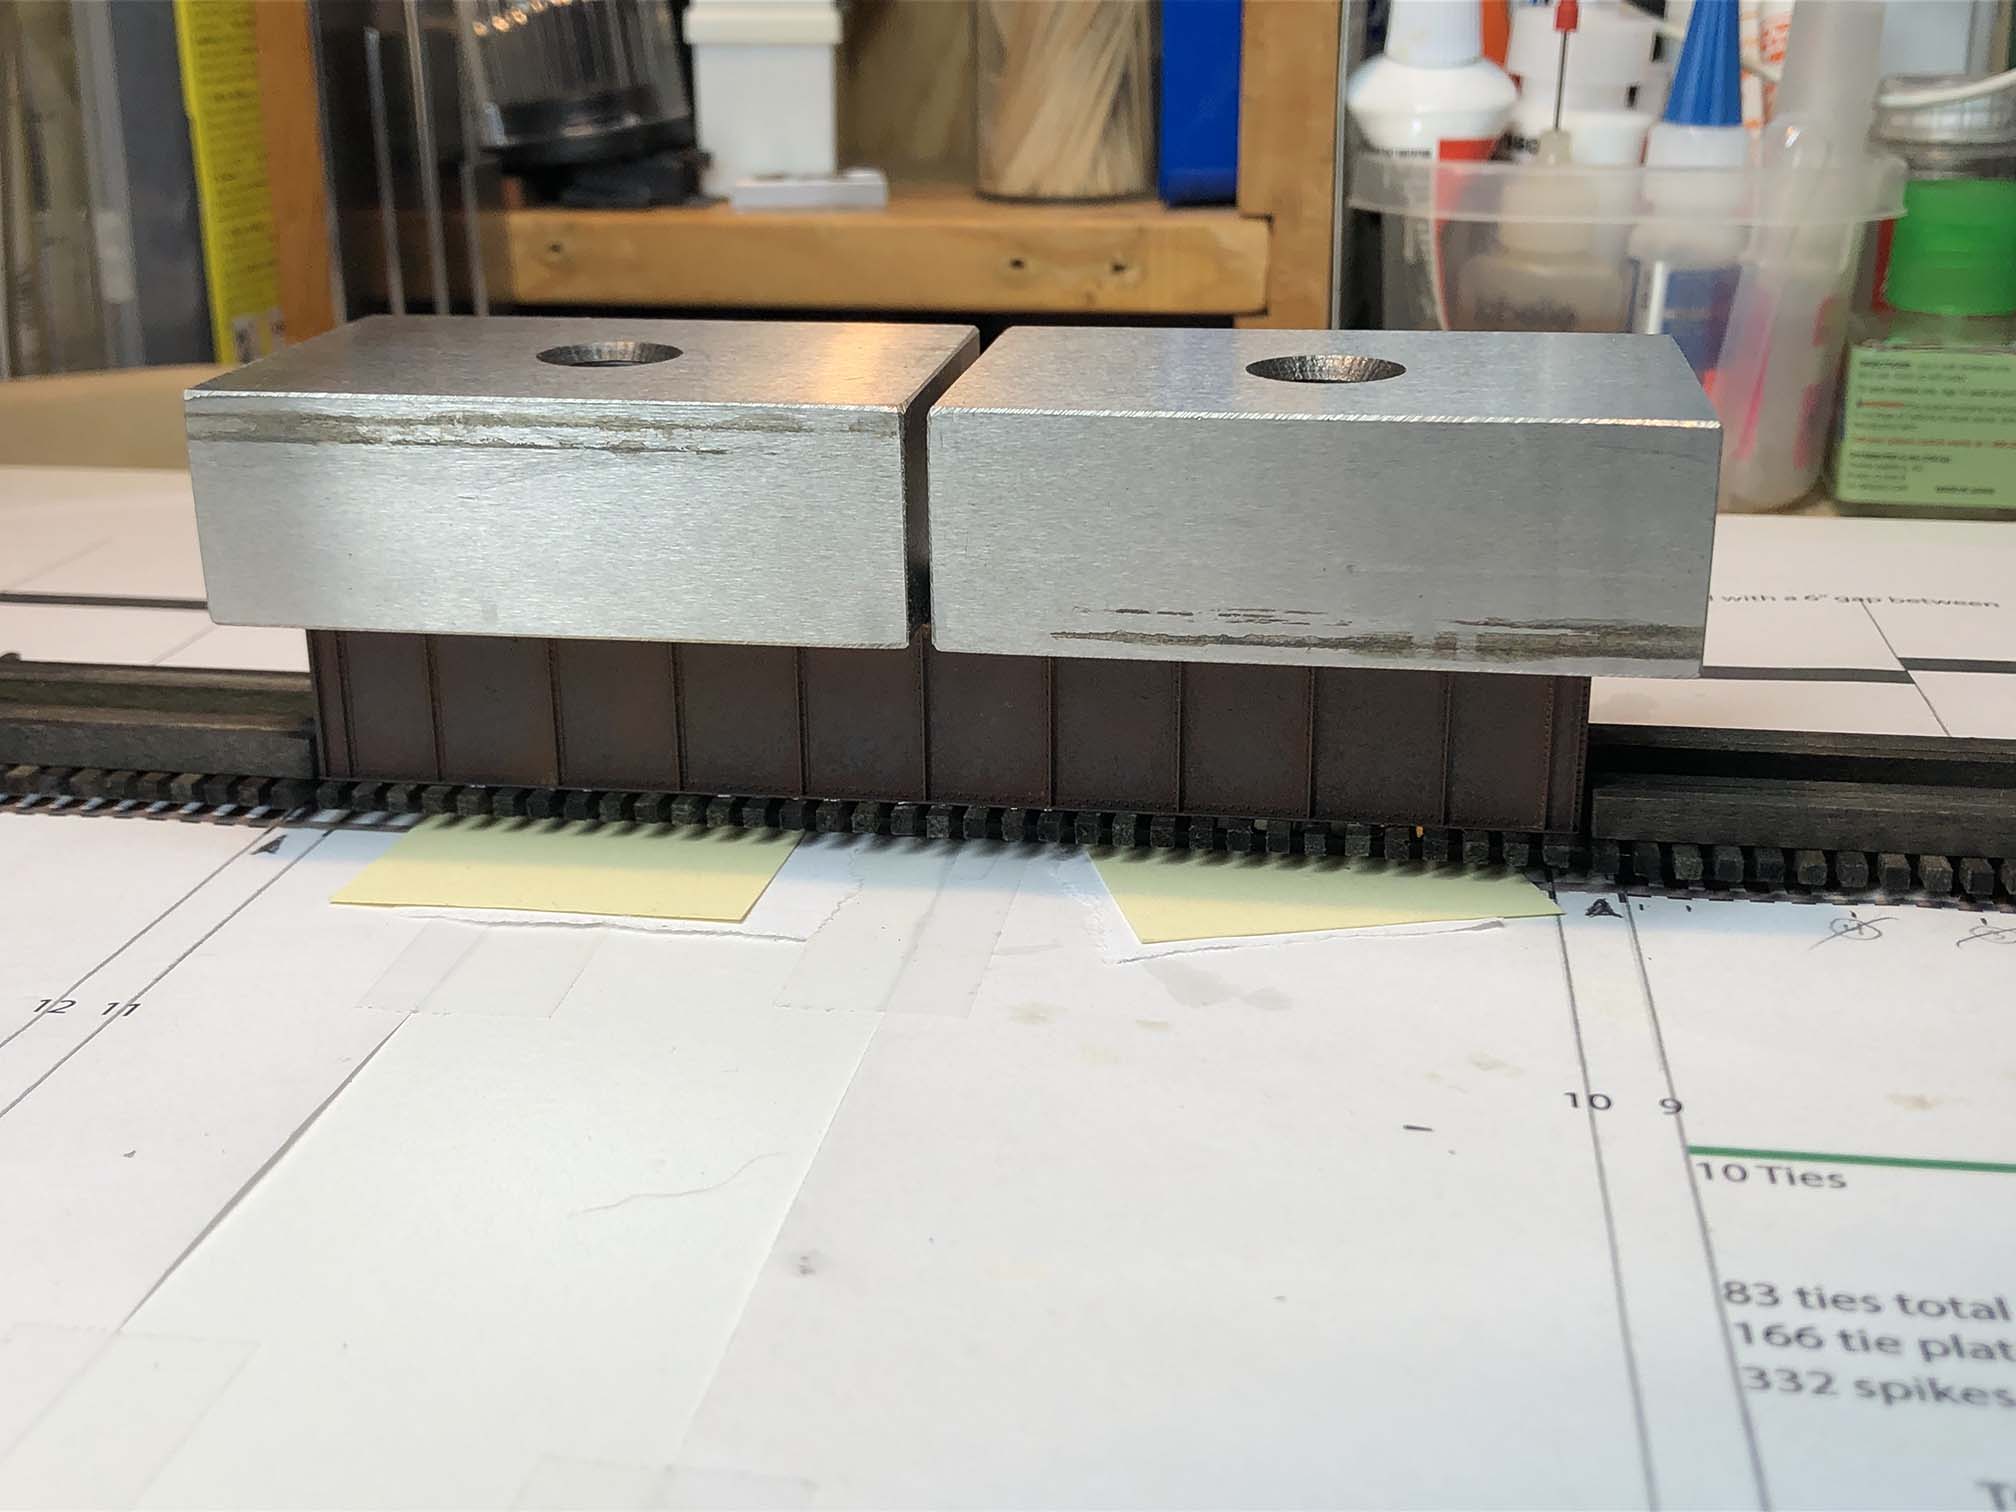
Next it was time to install the center deck girder section (which I had previously built, painted, weathered and installed ties and tie plates). I prepared some 5-min epoxy and lightly brushed it to the back side of the rails. I carefully positioned the bridge in place and weighed it down while the glue dried.
Getting ready to fasten deck girder to rails with epoxy.Weights holding deck girder center section down on the rails while glue dries.
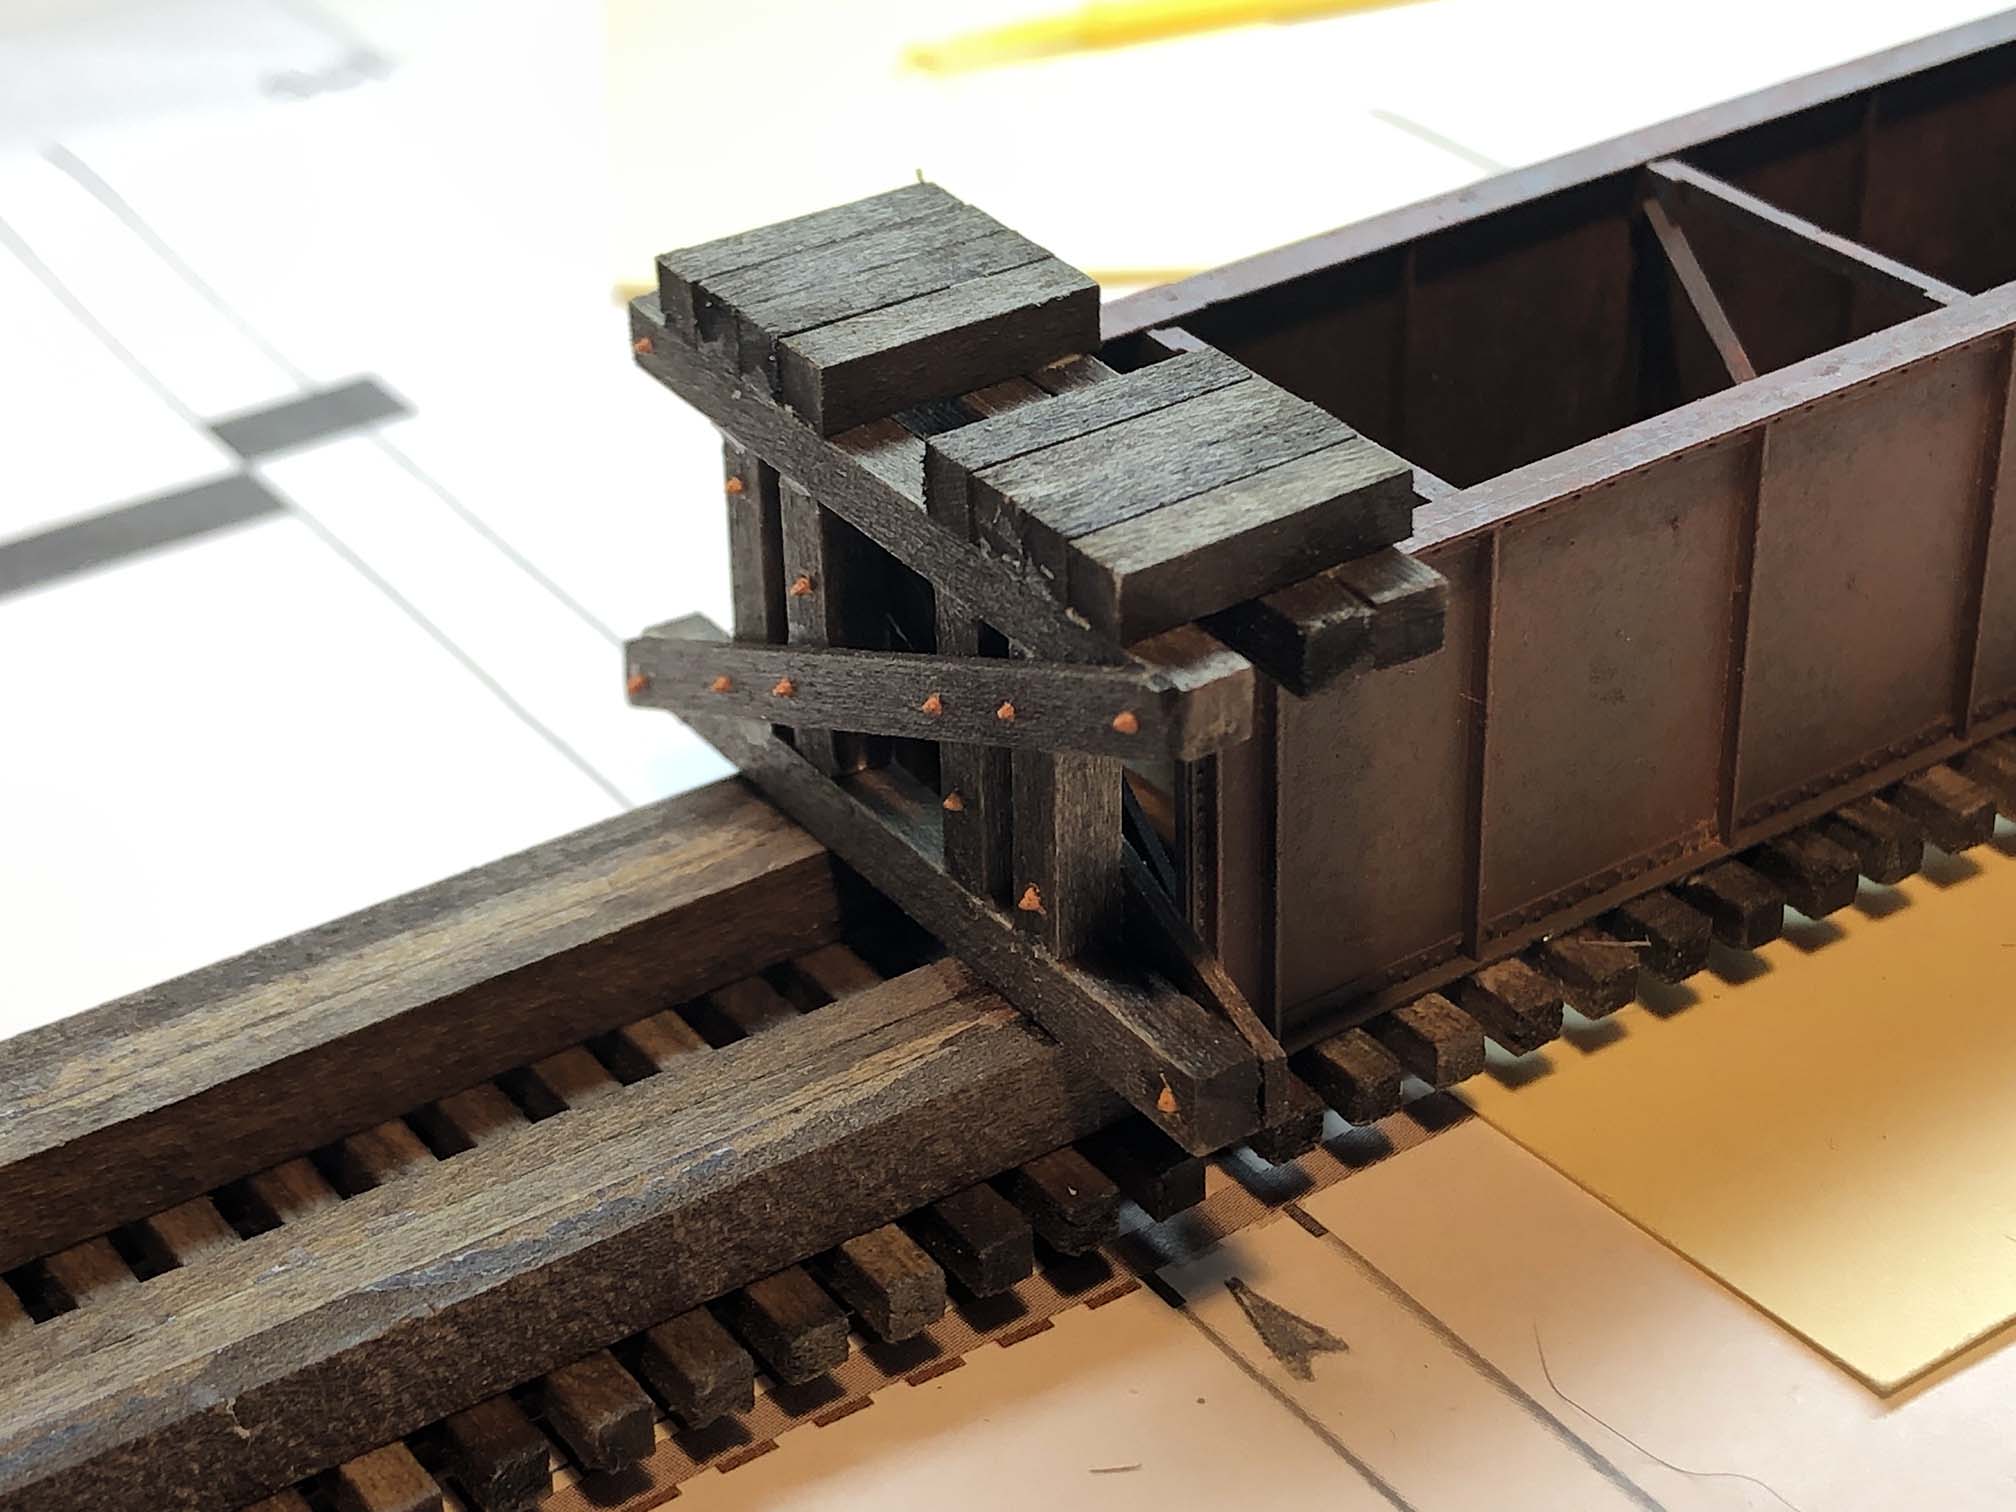
I then completed the blocking around the deck girder.
Close up of the blocking around the deck girder bridge section.
The sled/jig allowed for me to install the bents perpendicular and square to the base. This took a bit of finagling to get set up properly but made the job go fast once the system was in place.
Sled for aligning bents. Rides along straight edge. Overall view of sled and plans. Sled in action, installing bents.
Halfway there!
Nearly done with the East end. When I reached the center, I flipped the sled around and faced the center section to install the two bents at the end.
And here we are with the completed bents. It’s looking pretty good!
If you flip over the photo you can sort of get a feel for what the completed model will look like.
Ok – that’s all for now. I’m very pleased with how this is coming along and up next I’ll be installing all of the stringers and girts to get this over the finish line! Stay tuned…