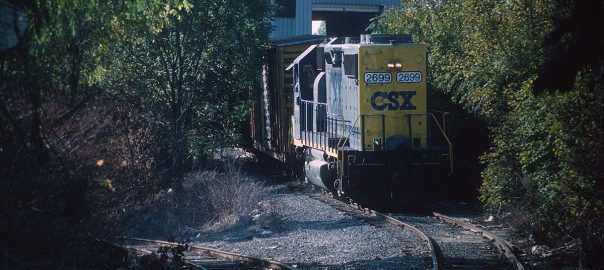
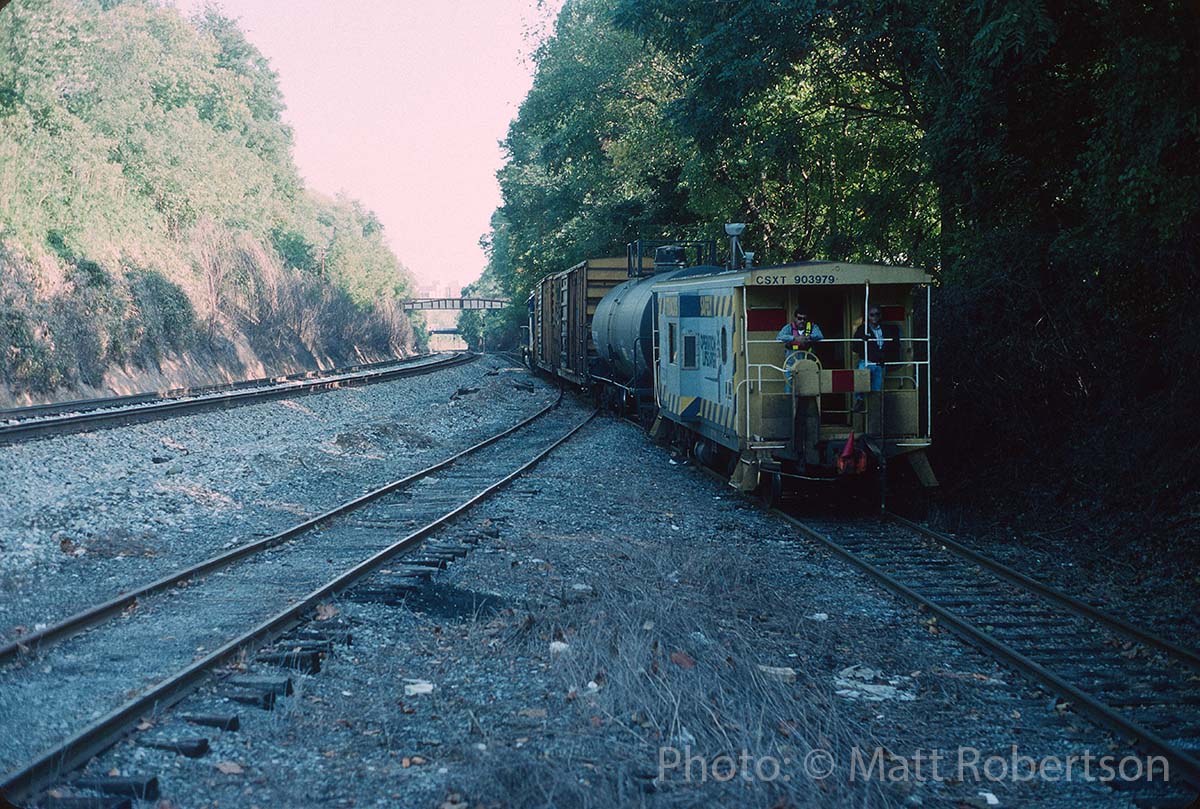
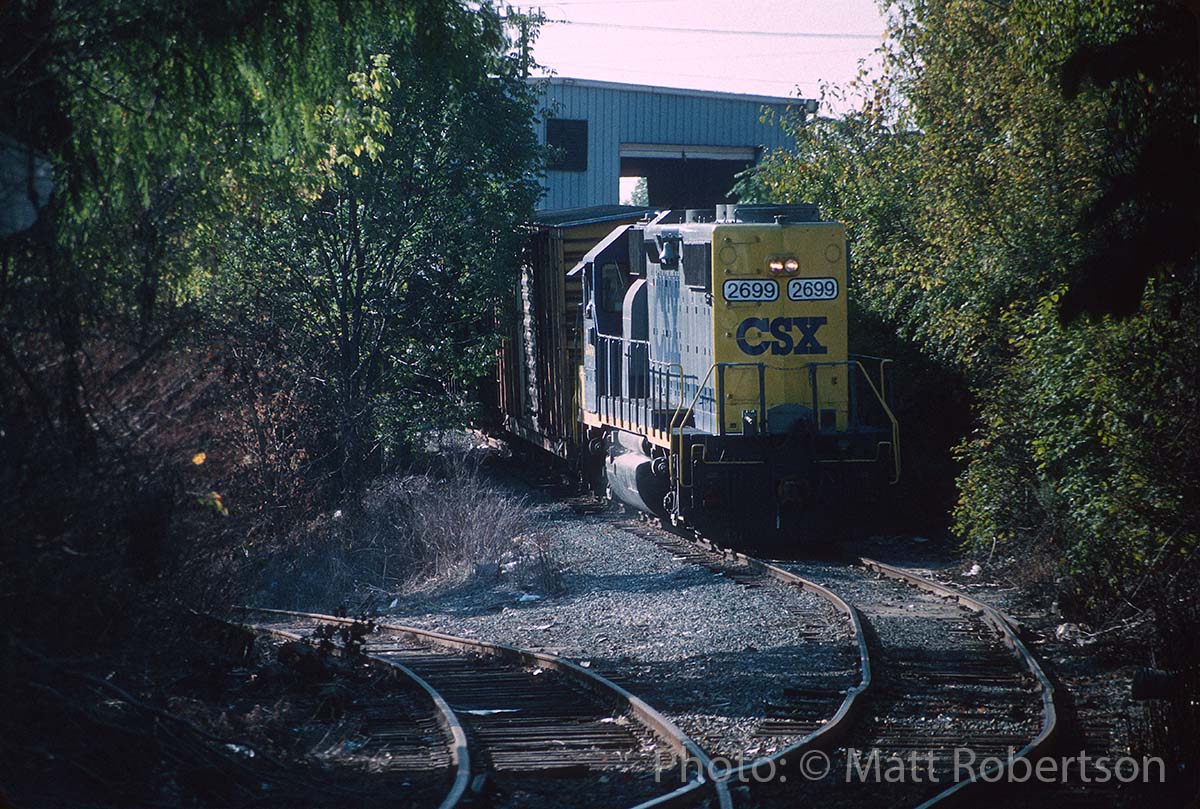
You read that right! Friend Matt Robertson shared two photos he shot himself back in October 1995 of local D782 (out of Jessup, MD by this time) working the Mason-Dixon Recycling plant, which of course used to be E.C. Keys; one of the oldest industries on the GB.
Matt writes: “Local is the D782 which operated out of Jessup on weekday afternoons. They worked industries on the Capital Sub and Metropolitan Sub as far west as Derwood in this era. Honestly I don’t know where the tank car came from. They are working the only place left on the GT branch by this time. I believe it loaded scrap paper and the two Railbox cars will be placed. I think maybe they pulled some cars out too but unfortunately these pics are the only two I took.”
Oct 9, 1995: Local D782 backs down the Georgetown Branch spur, headed toward the Mason Dixon Recycling plant. Photo by Matt Robertson. Oct 9, 1995: Local D782 working the Mason Dixon Recycling plant. EMD GP38-2 CSX 2699 (Blt 1979 as SCL 6048) is the power for the day. Photo by Matt Robertson.
Going back through my notes, to add some context to the Junction in the later years, I found a reference from the old Yahoo! Group where Christopher Parker wrote: “I first saw Georgetown Junction in 1981 and the coal trestle hadn’t been there for some time. It was an empty gravel lot, with only a concrete abutment and the bit of track that rested on solid ground. No switch. At that time the Mason-Dixon Recycling siding was gone too. It was Silver Spring Recycling then, and I remember seeing lots of Garden State Paper trucks up there. Sometime between 1982 and 1984 (?) the siding was relayed. The USGS topo map from 1971 shows the coal trestle, but that’s not terribly reliable.”
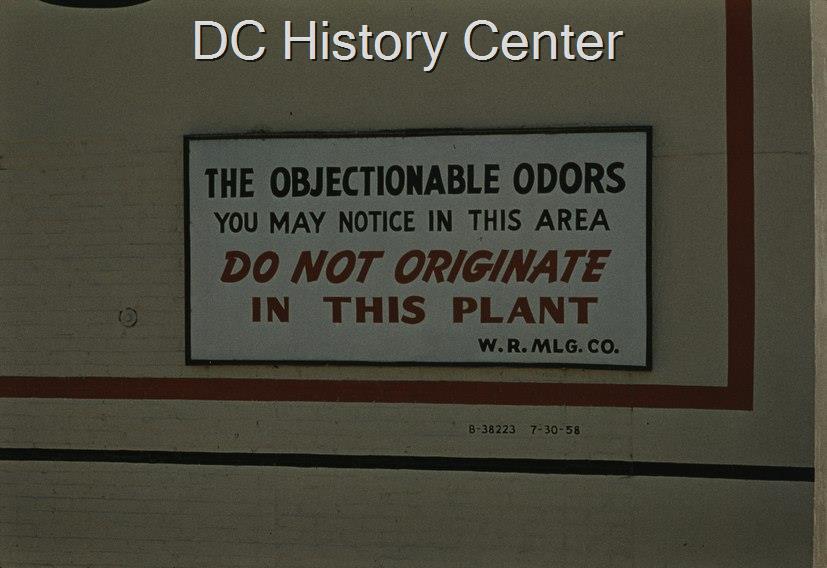
Wilkins Rogers Milling Co building sign. DC Historic Society. Emil A. Press slide collection. Item PR 0086A.
The Hopfenmaier rendering plant was a fixture on the Georgetown waterfront, producing constant odors of putrescence from 1873 to its demise in 1971. The Wilkins Rogers milling co across the street produced baking goods, receiving grains via rail and shipping out their mixes to local grocery stores and distributors via truck. In the 1950s and 1960s, as more and more of Georgetown became residential, folks were really starting to take notice of the incredible odors that permeated. Even when the plant wasn’t operating, on very hot days the caked-on slime and sludge from the plant would permeate the air along the waterfront. At some point around 1958, in protest, the Wilkins Rogers company had this sign created and mounted prominently on their mill where passing motorists on the Whitehurst Freeway could view it.
It read “THE OBJECTIONAL ODORS YOU MAY NOTICE IN THIS AREA, DO NOT ORIGINATE IN THIS PLANT. W.R.MLG. CO.”
In the late 1960s the government even used a sort of “smell-o-meter” to try to detect dangerous levels of chemicals. This failed, but eventually the Government “won” by buying out the Hopfenmaier company and razing it ca 1971.
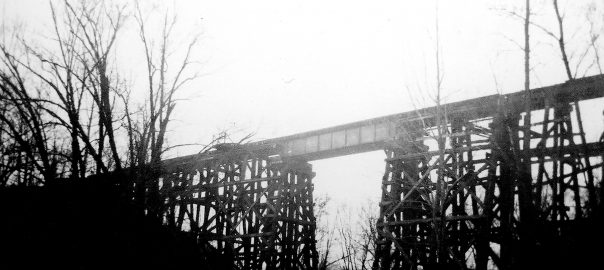
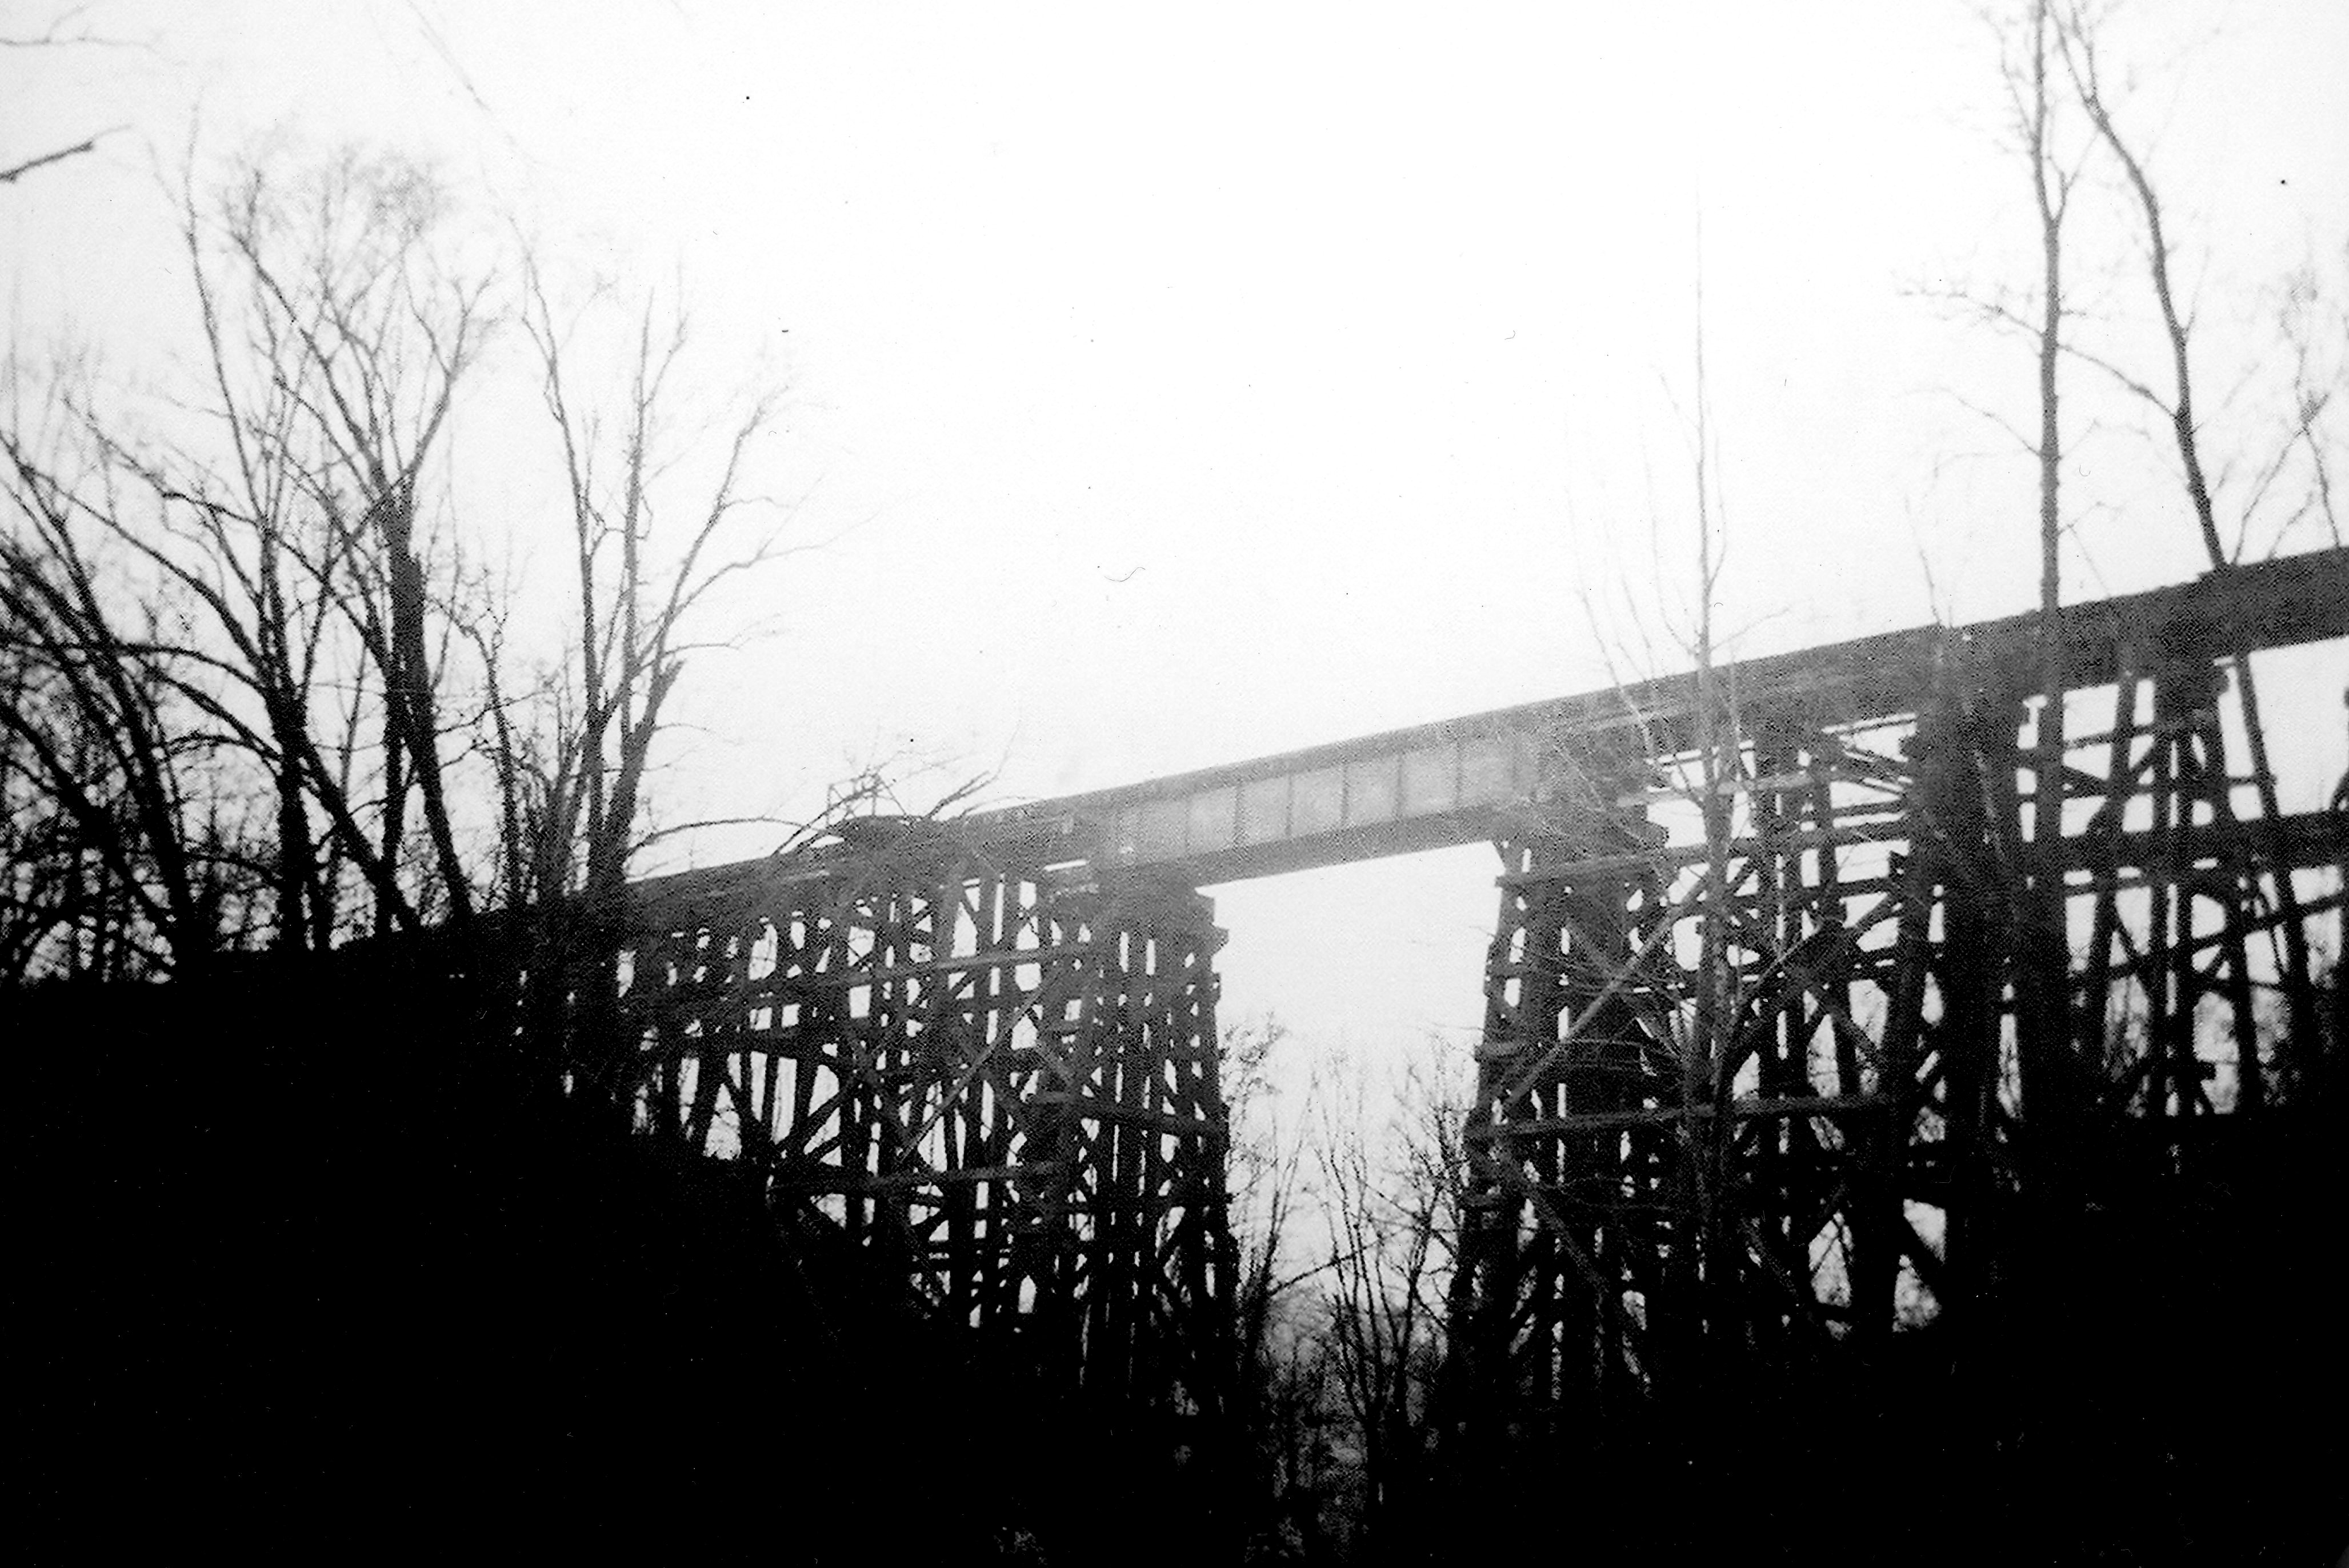
Earlier this week my model railroad club visited the historic B&O station in downtown Silver Spring, MD to assist in reassembling the model railroad there in the baggage room. The layout had recently been moved due to some HVAC work above. While there, the host gave me a tour of the building. As I entered the station master’s office, and was glancing around, a poster board with photos caught my eye. On it were a collection of images from the long time Silver Spring station agent, Robert Davis, taken in the late 1940s mostly depicting the railroad in the area; wrecks, maintenance work, etc. But there were two photos that jumped off the poster for me. First is this image of the Rock Creek Trestle:
“November 18, 1948. Looking West. B&O Trestle over Rock Creek, Georgetown Subdivision.” Photo by Robert Davis.
The reason this image is so special to me, is it is perhaps the best image I’ve seen that shows the trestle as it stood from the mid 1940’s until the Hurricane Agnes flood of 1972 when the west side of the trestle collapsed, forever changing the bridge. The trestle was demolished in 2019 to make way for the Purple Line. We are looking north in the photo, trains to Georgetown would be heading to the left.
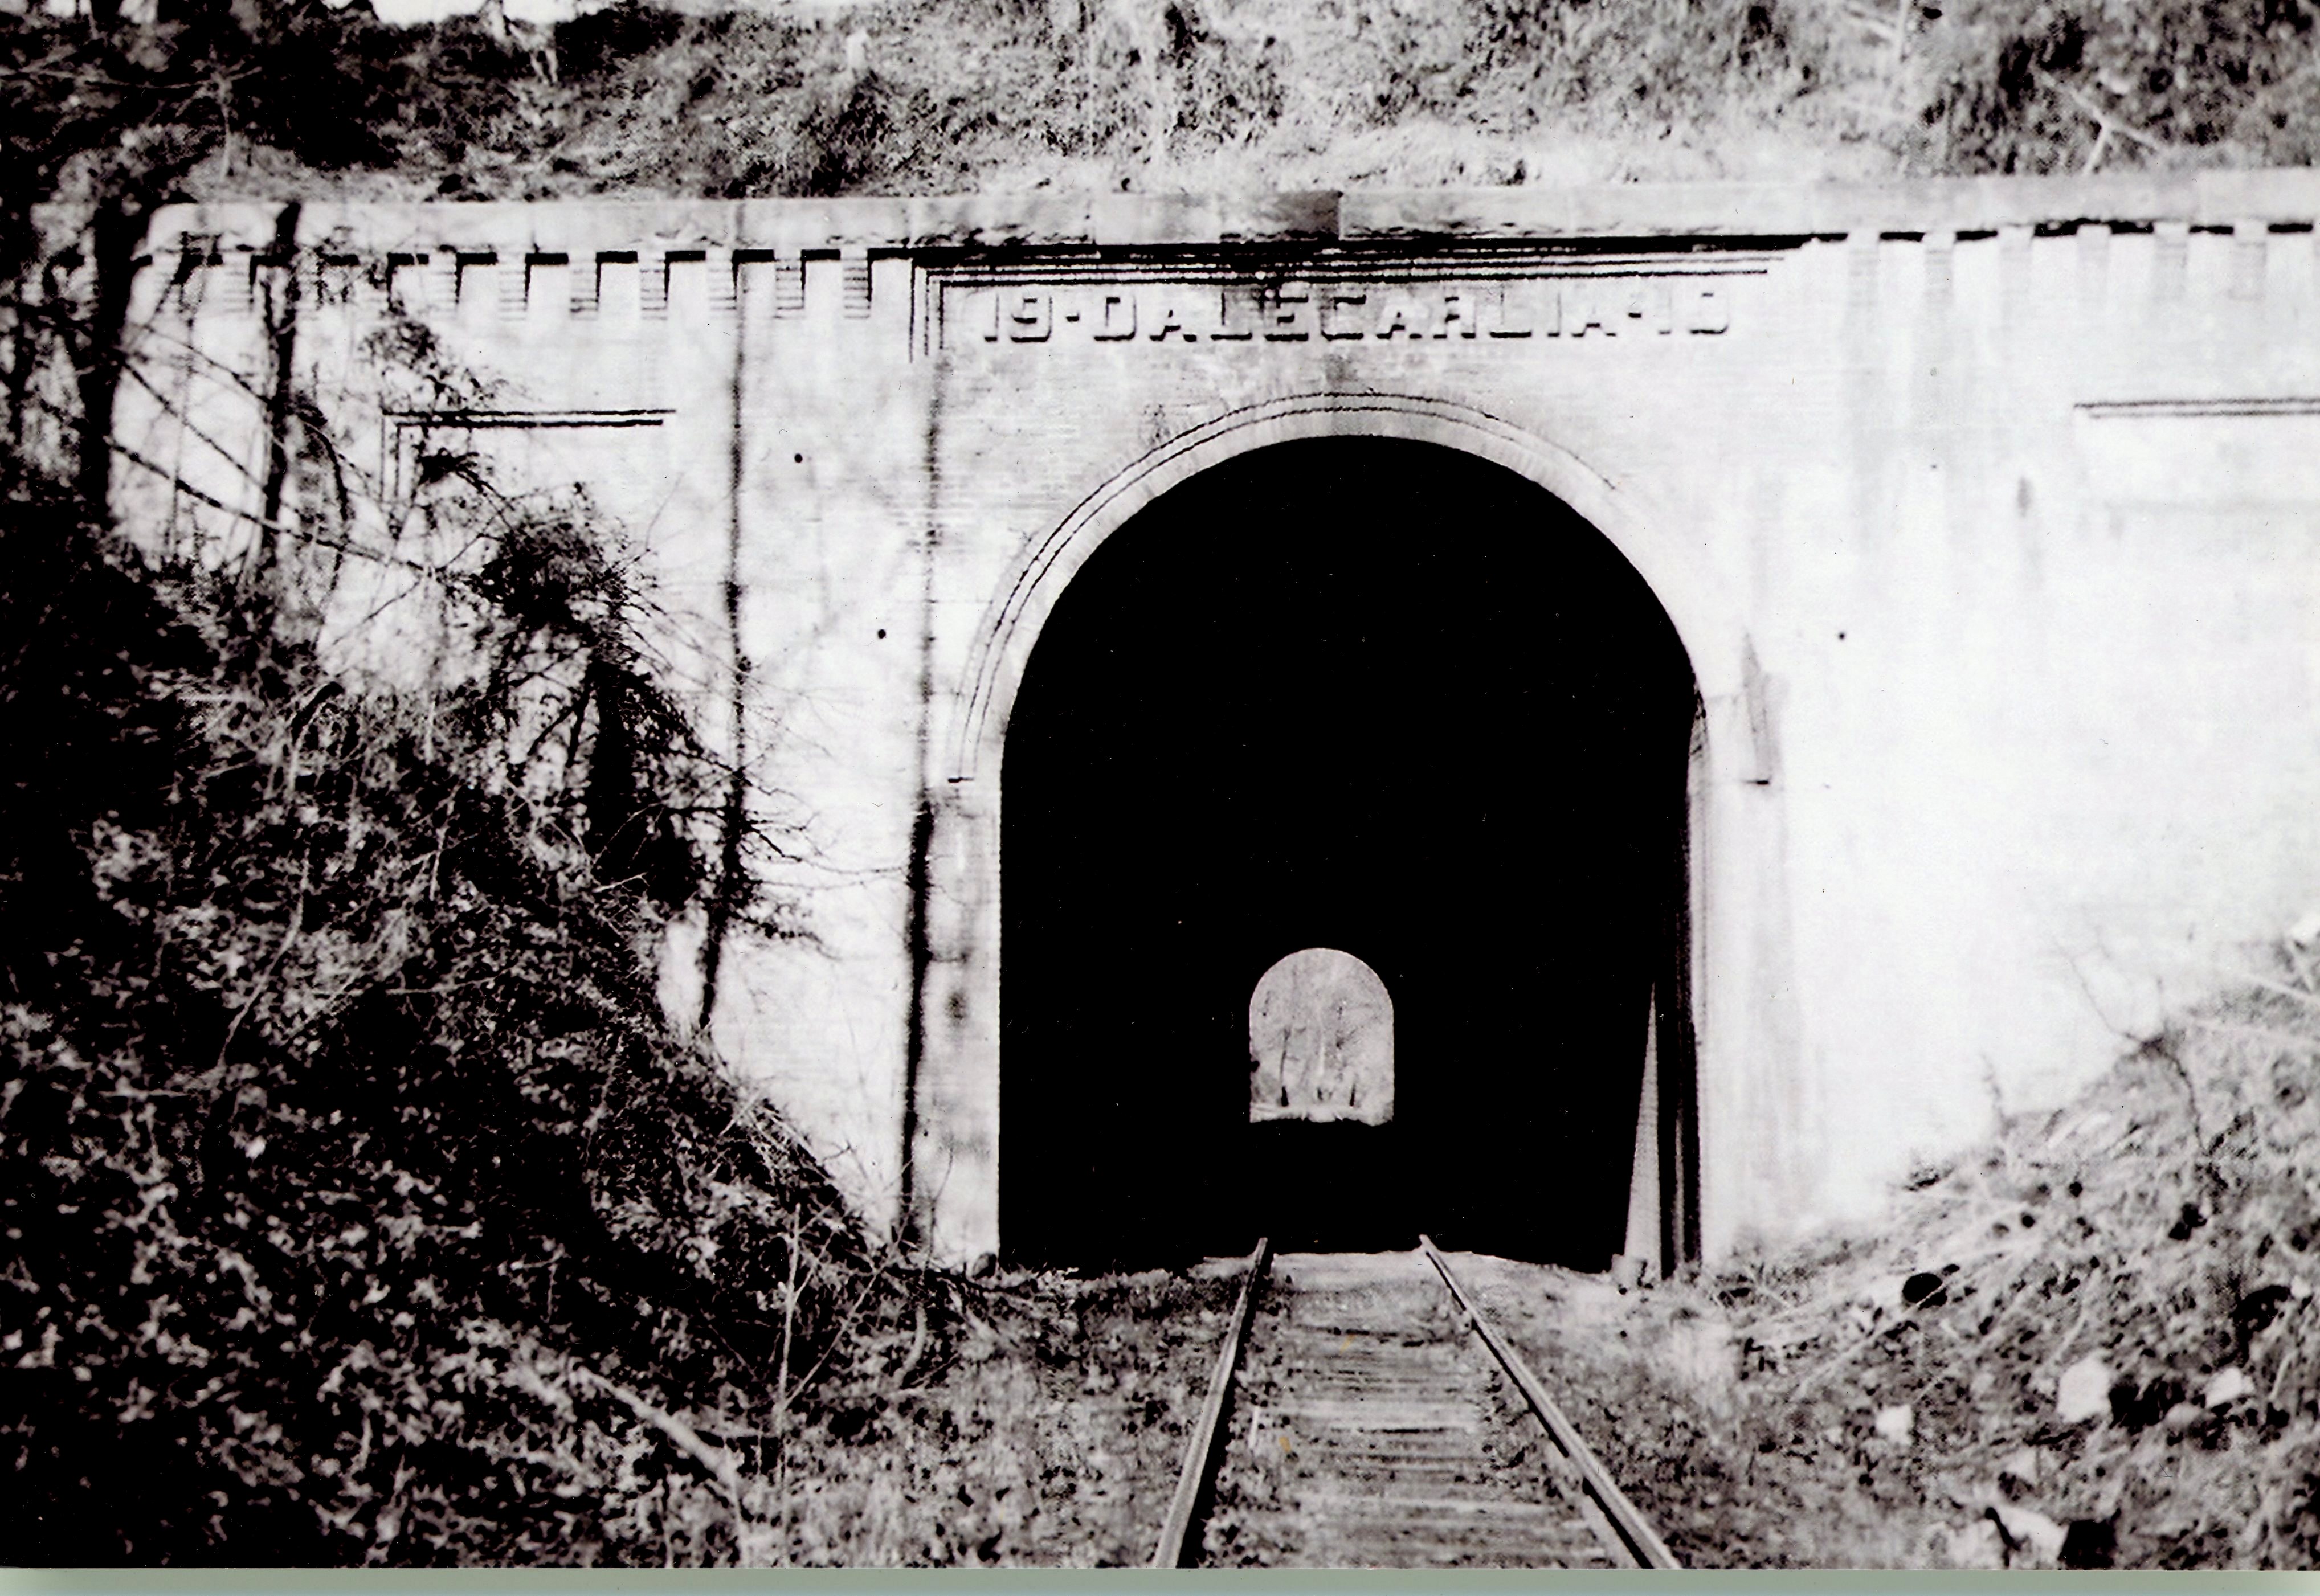
“February 17, 1949. Looking East. The Dalecarlia Tunnel, now part of the Capital Crescent Trail.” Photo by Robert Davis.
This image shows the south portal of the Dalecarlia Tunnel. For context, just eight months earlier the B&O ran an excursion for the MSME, taking Q-1c 4320 out for a grand trip to Georgetown and back.
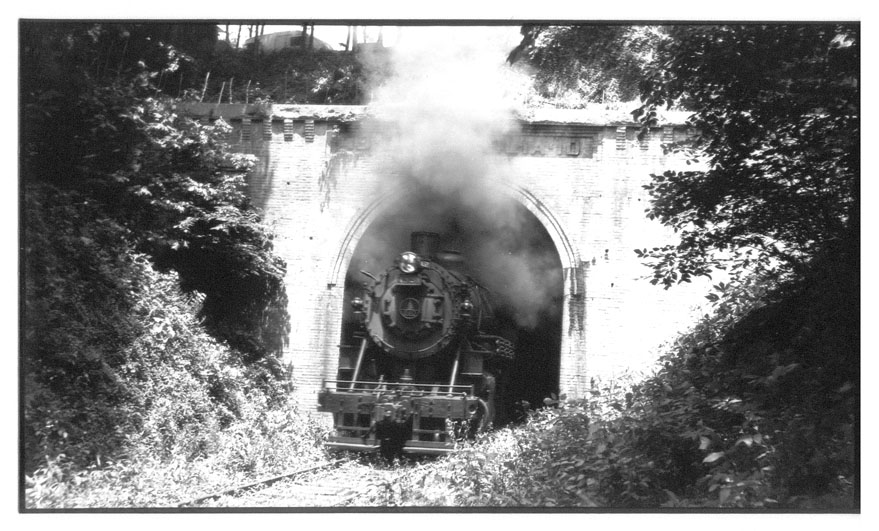
“B&O Engine emerging from Dalecarlia tunnel on Georgetown Branch, May 1948 [sic]” Photo by Paul Westhaeffer. B&ORRHS Collection.
It was a delight to stumble upon these two photos. I am always looking for images to fill in the gaps of understanding and context as I do my research and these are two that I’d never before seen. I am hoping that there are more!
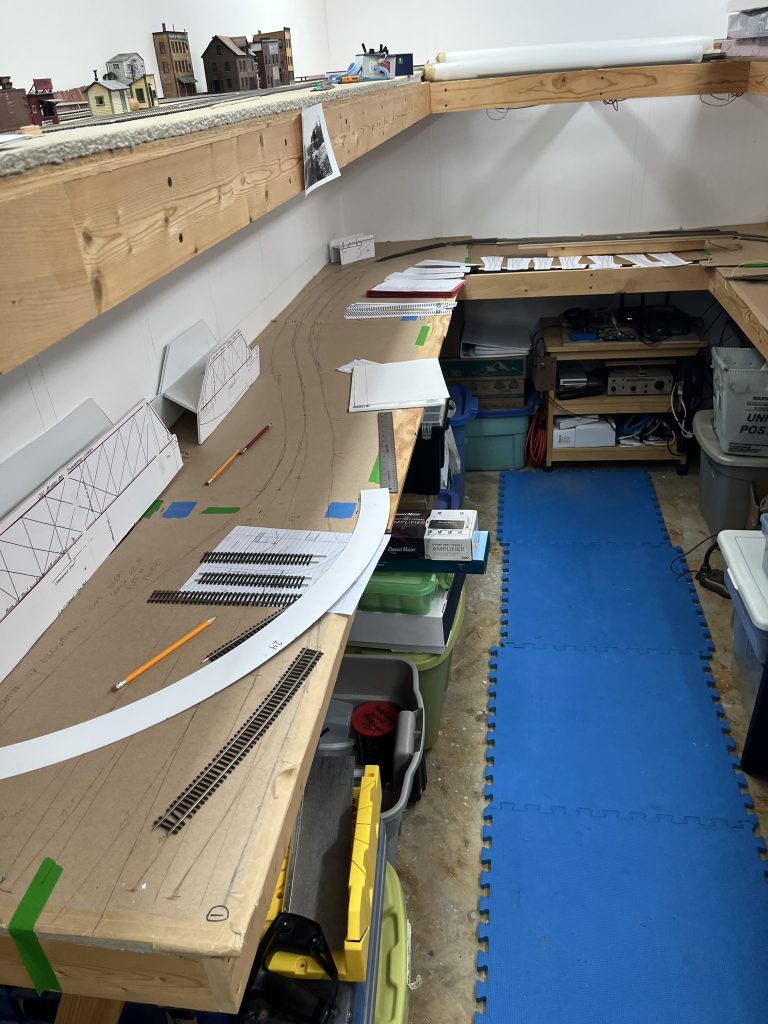
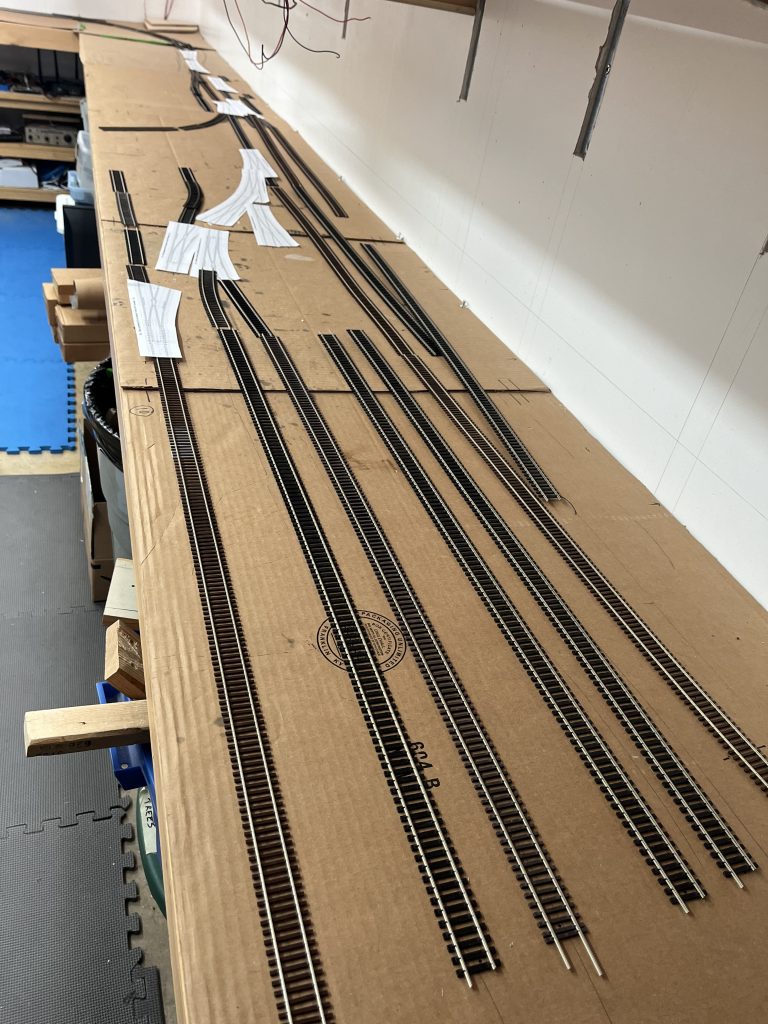
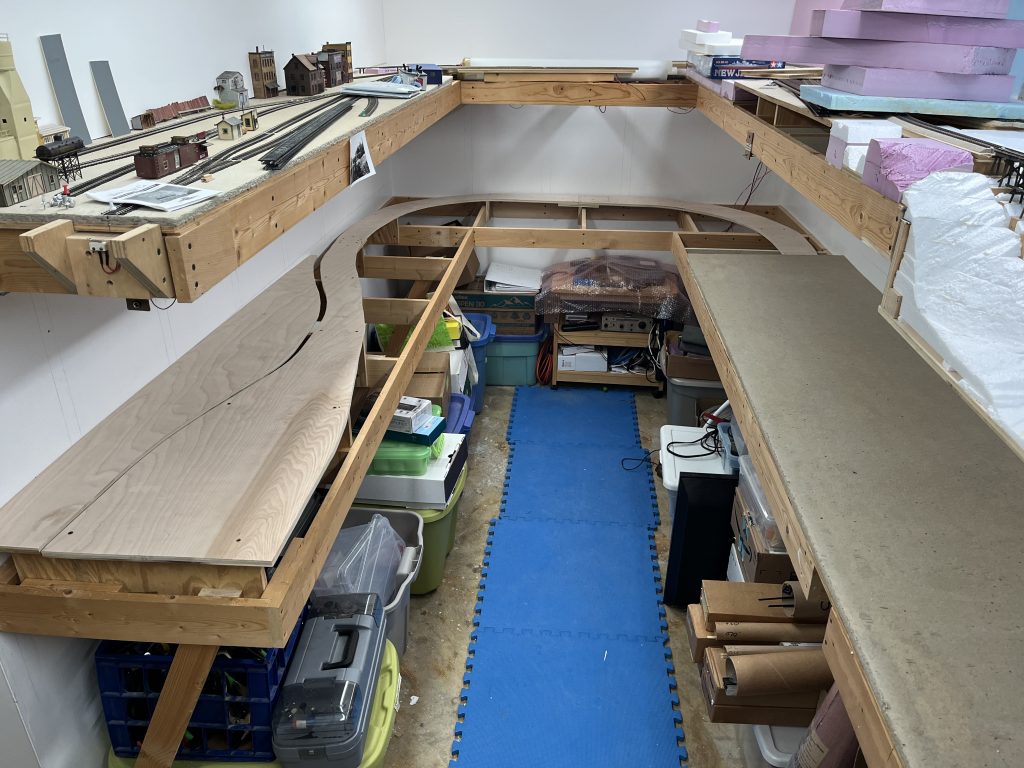
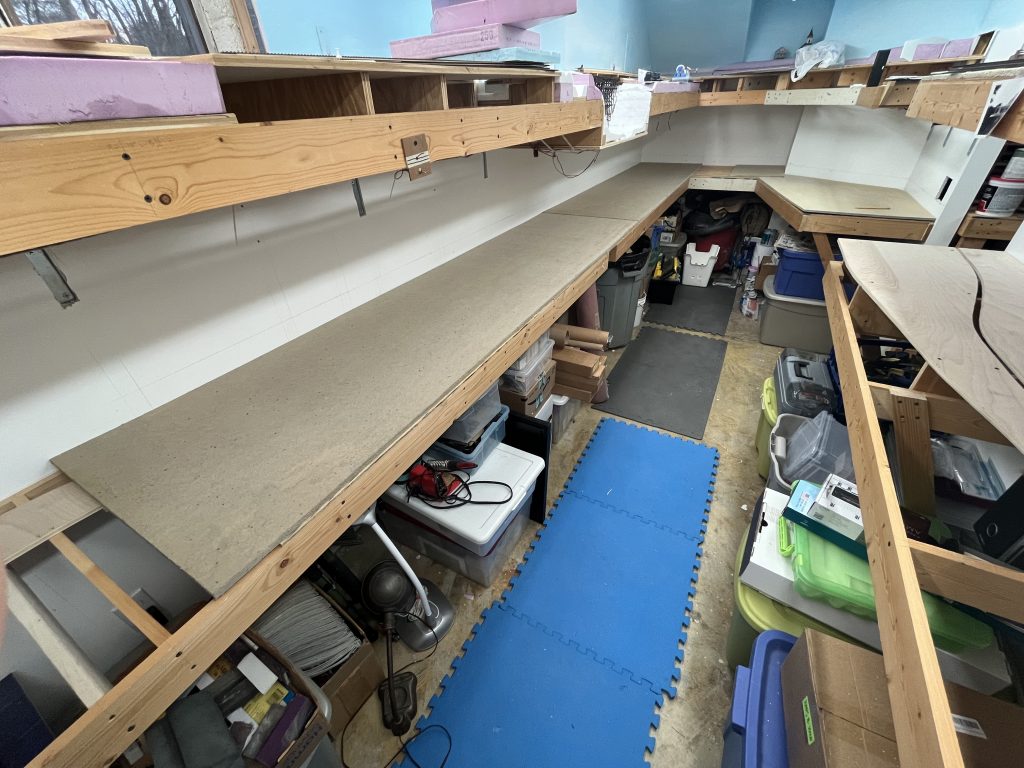
Over the last two weekends I managed to squeeze two big work sessions in and made some great progress. First up was nailing down the rough track plan based on lots of trial and error over the last year.
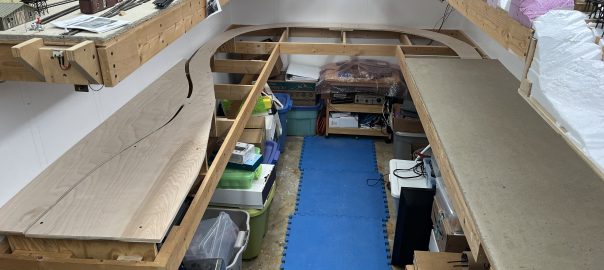
Working on the lower deck track plan, sketching and mocking things up. The tracks to the left will be Dalecarlia water treatment plant. The track curves downhill into the “long siding” west of Georgetown. If/when the bridges over the C&O Canal are built, they will go in the left corner where the track swings to the left near the wall.And some of Georgetown mocked up. This is the “new yard”. The photographer is standing at the foot of Wisconsin Ave looking West. I’ve managed to fit every track in the yard on the layout.
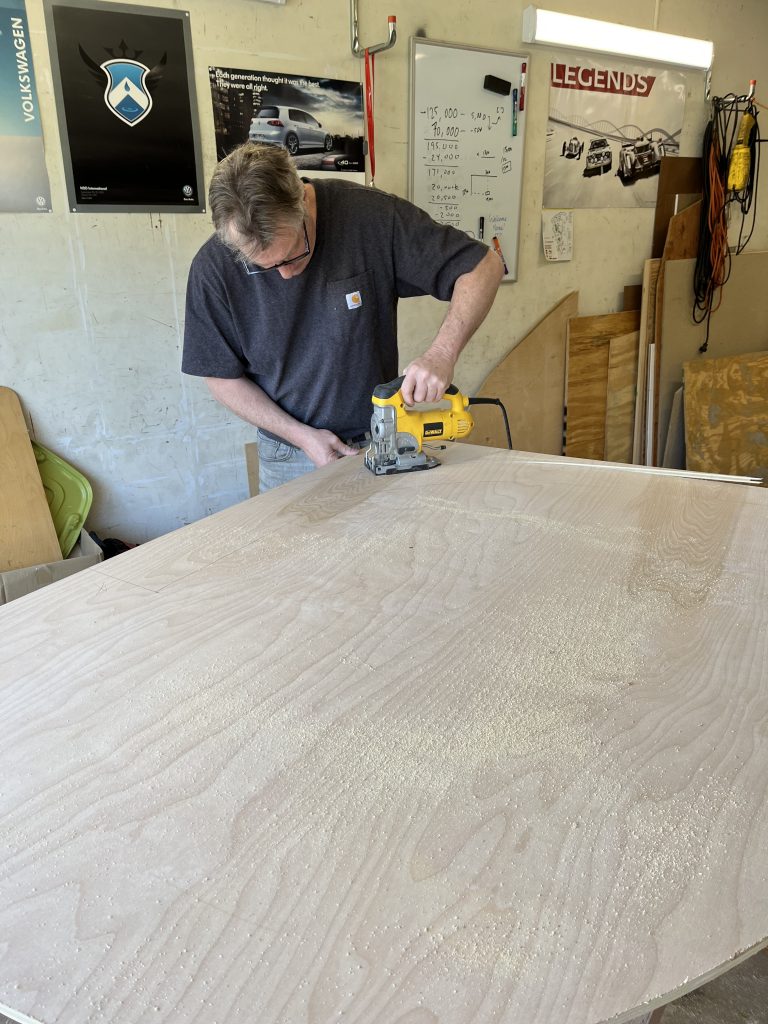
So, this weekend Kelly was able to swing by and we had a marathon construction session. After checking all of the templates and doing a lot of measuring, we took them up to the garage for some cutting.
Kelly cutting out some of the curved sub roadbed. Kelly installing the splice plate at the apex of the “long siding” sub roadbed. Having a drill and impact driver make this process go a lot faster.I persuaded Kelly to pause for a moment so I could snap a photo. This man is a force of nature!
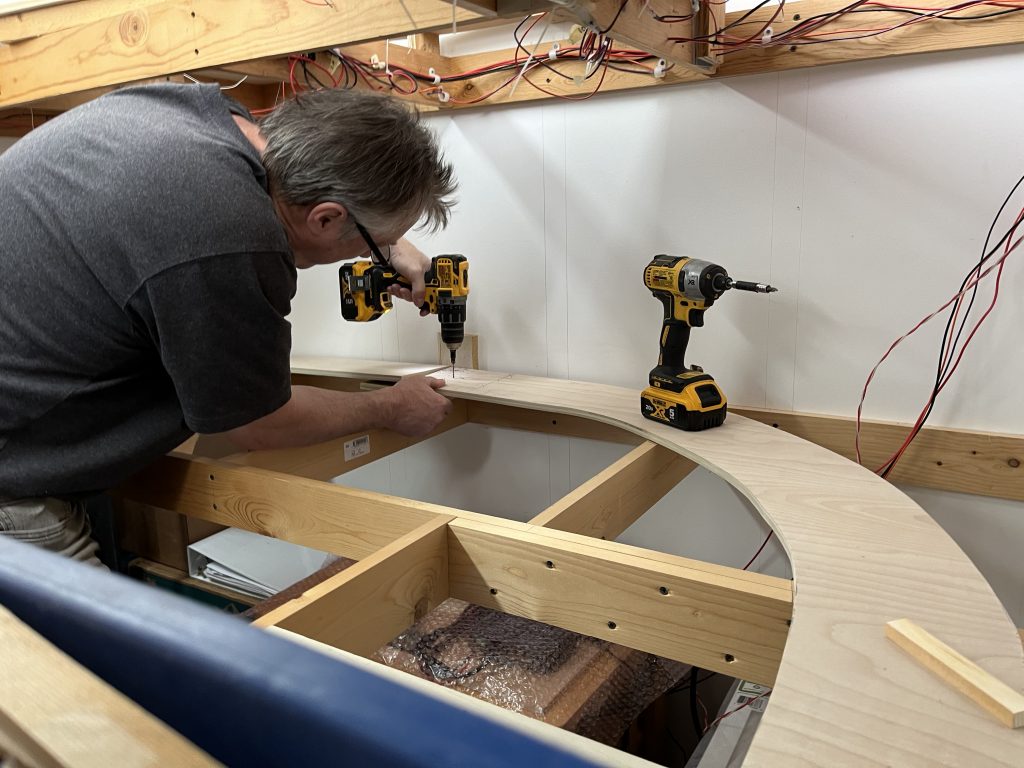
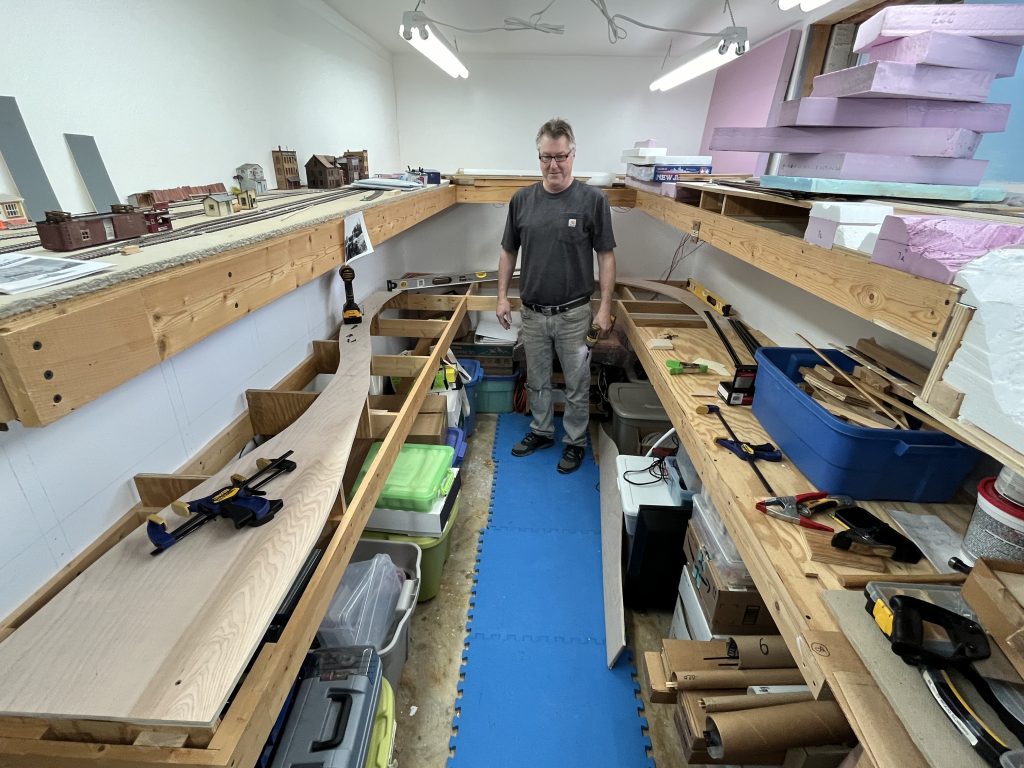
After cutting the sub roadbed and splicing it together, we measured and cut risers. We then spent a considerable amount of time figuring out the grades, as Dalecarlia is a few inches higher than Georgetown on the layout. After a LOT of fiddling and experimenting, we got it figured out and permanently installed the risers. Last was cutting and installing Homasote over all of the Georgetown waterfront area (the plywood-covered sections.) It turns out I was shot one 28″ square piece, but thankfully Kelly has some extra at his house that he is going to give to me. Sweet! Here are a couple wrap up photos of what the layout currently looks like:
Dalecarlia on the left, down-grade to Georgetown at the end of the room, Georgetown is the Homasote section.Standing at the other end of the room. Georgetown stretches out to the left.
Next steps are to do a bit of finishing on the Homasote and fasten it to the plywood base. I will also finish designing and building the bridge from the helix into the layout room, which will be a basic sheet of plywood and Masonite. I then need to empty out the room so I can get under the layout to cut holes and run bus cables. I need to do some work on the walls and figure out the backdrop corners as well as a few other things. A huge thanks to Kelly for pushing me today to get all of this done! The most progress I’ve made in a very long time.
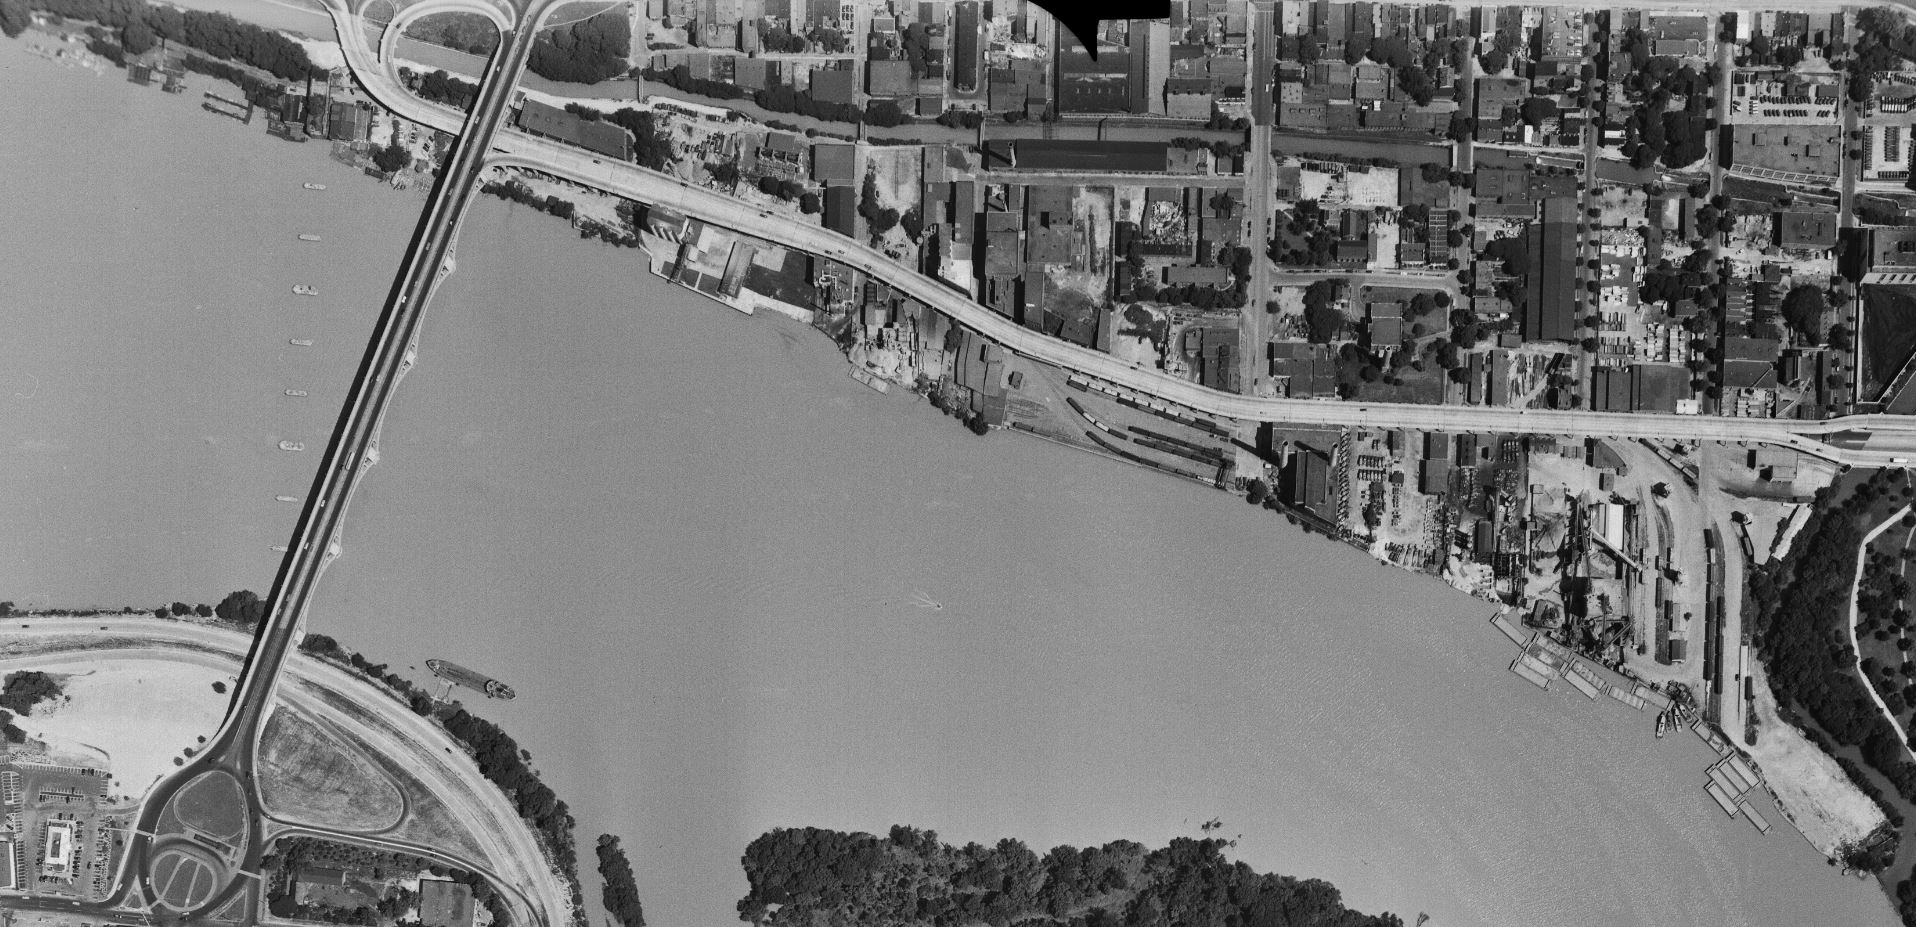
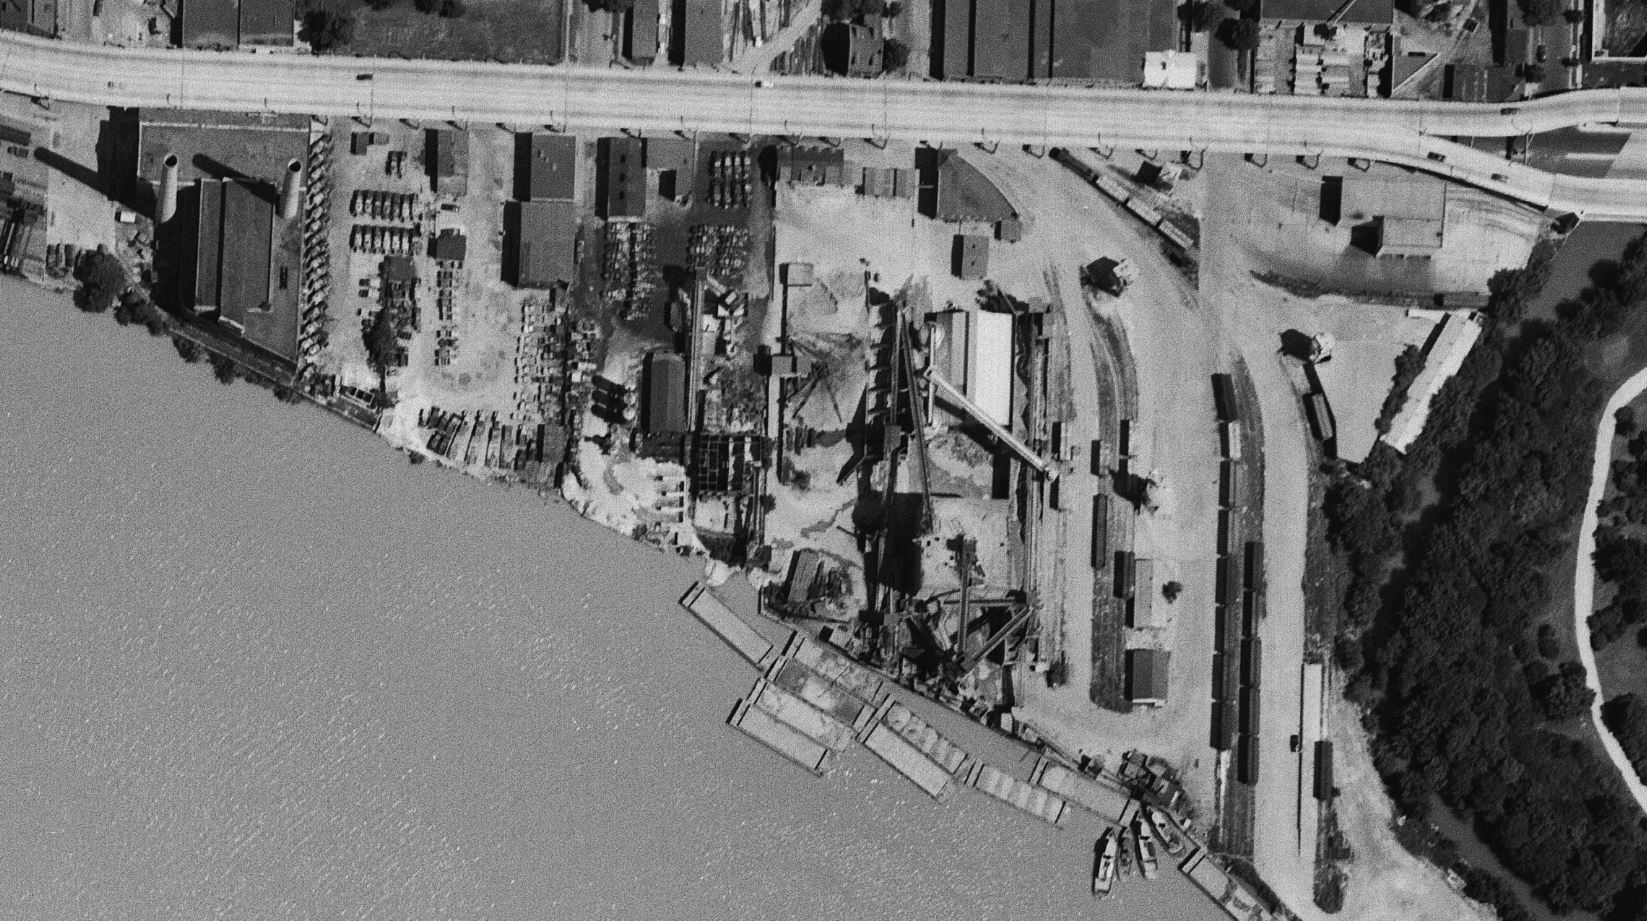
While going through some old notes today I found a link to the USGS EarthExplorer website with the note “will want to create a login.” This puzzled me, so I went ahead and explored the site a bit. After creating a login (a somewhat involved process) I was able to access some pretty wonderful imagery. There are aerials going back to 1949 and some of them are full of tremendous detail that I enjoyed exploring. First up is a crop of the downtown Georgetown area:
Georgetown, DC. July 5, 1951. USGS image.
Let’s drill down a bit.
Georgetown, DC. July 5, 1951. USGS image.
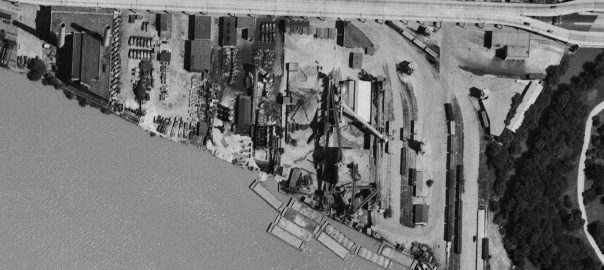
Starting on the east end of town, we see a relatively busy yard full of boxcars, covered hoppers and a gondola. The photo was taken in early July so it’s not surprising that there aren’t too many coal cars in the yard. The switching loco is visible at the top right next to the Whitehurst. Note the sharp shadows being cast. A fantastic view of the Smoot Sand & Gravel operation along with the cement vendors next door. It’s pretty incredible how many trucks they had! The idle power plant stands silent.
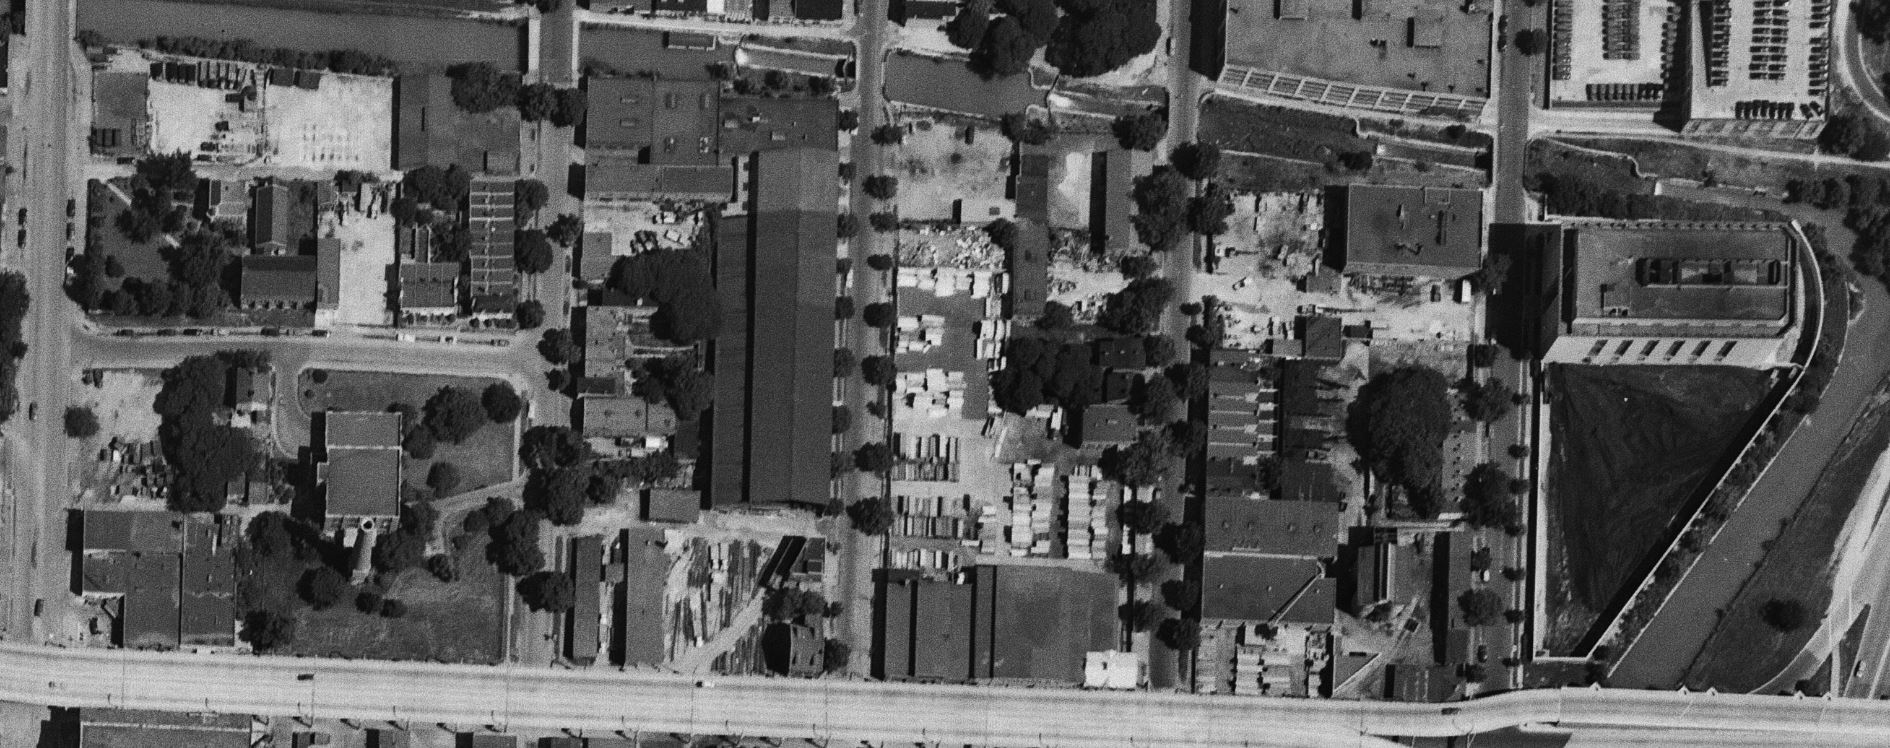
Georgetown, DC. July 5, 1951. USGS image.
On the north side of Whitehurst we get a closer look at some industries. To the right is the West Heating Plant and its large coal yard. Next is the diminutive King & Sons Coal, still in service, but not long for the world. Next door is the massive sprawling W. T. Galliher Lumber complex with its large storage yard. They were a major customer of the Branch up to near its end. Further left is the massive Rosslyn Steel shed, with a freight car on the siding leading into the plant. Note that about four years prior the massive cement silo structure which sat along that curved track had been removed. Next is the DC Incinerator and then Wisconsin Ave.
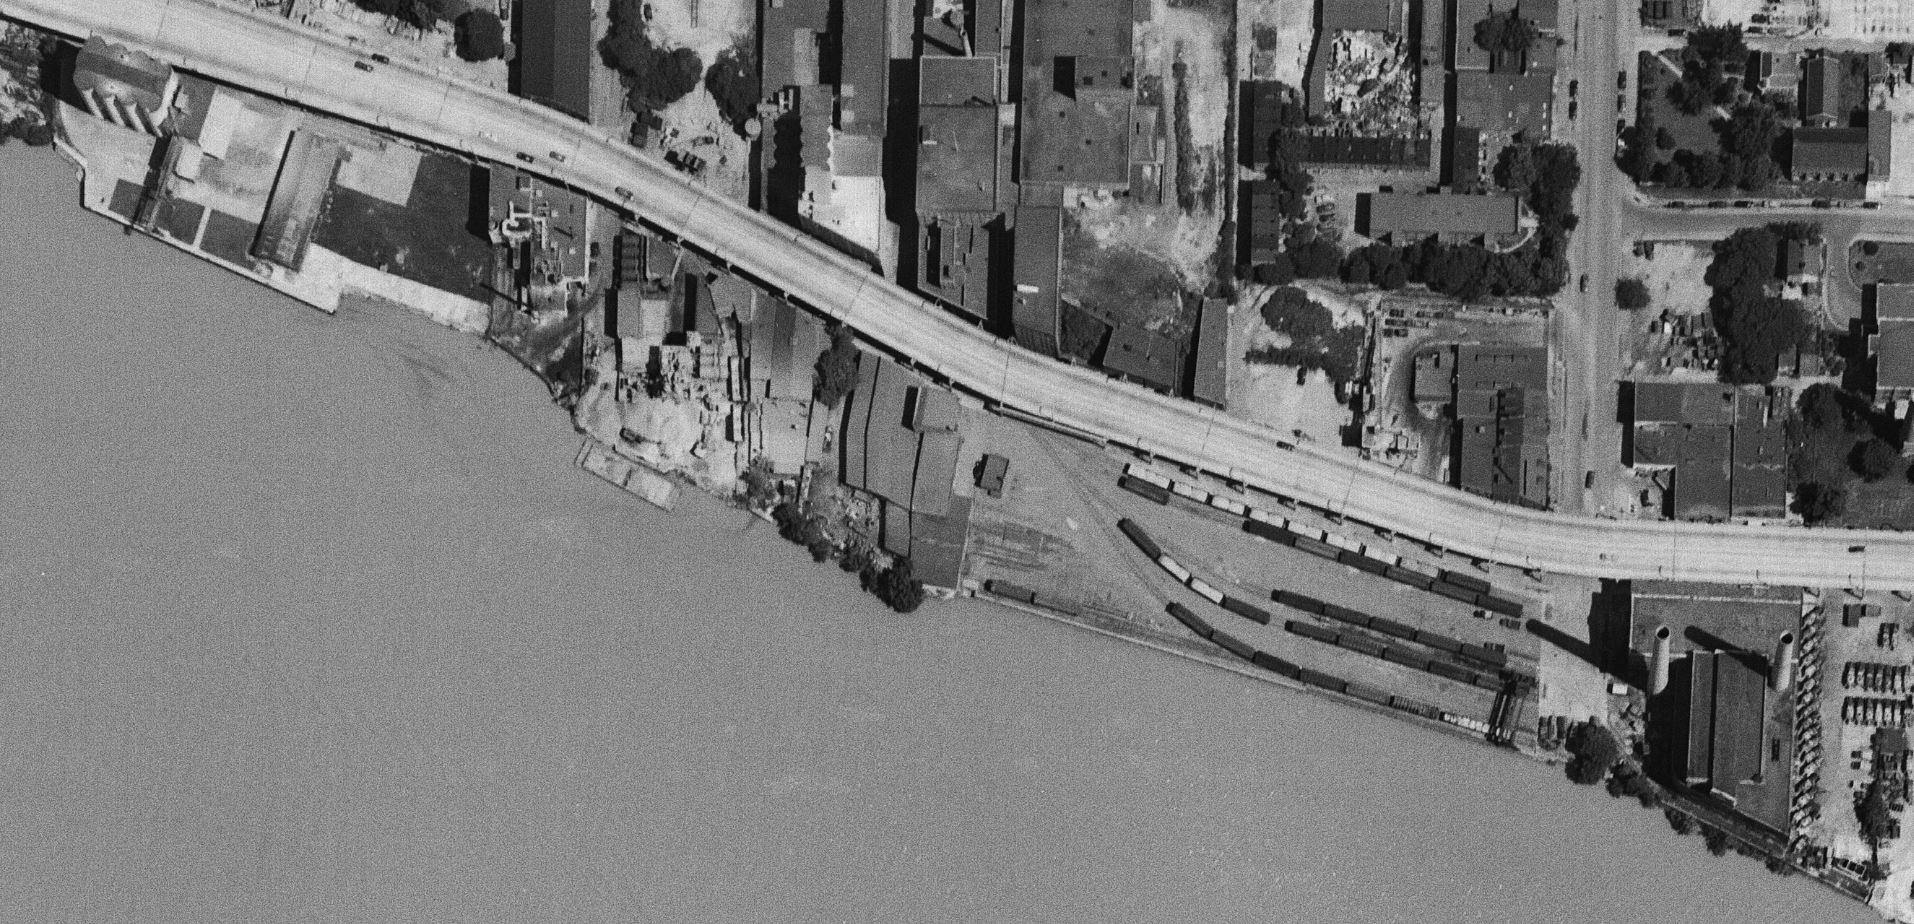
Georgetown, DC. July 5, 1951. USGS image.
Now we get a nice look at the “new yard” which is really packed! From my eyes, it looks like there’s ten carloads of gravel (or other aggregate) sitting in the yard along with many boxcars and at least one gondola. On the left side of the yard are the two old MoW cars which housed equipment. The Maloney Concrete batch plant was across the street. Several other industries are visible as we move further to the west.
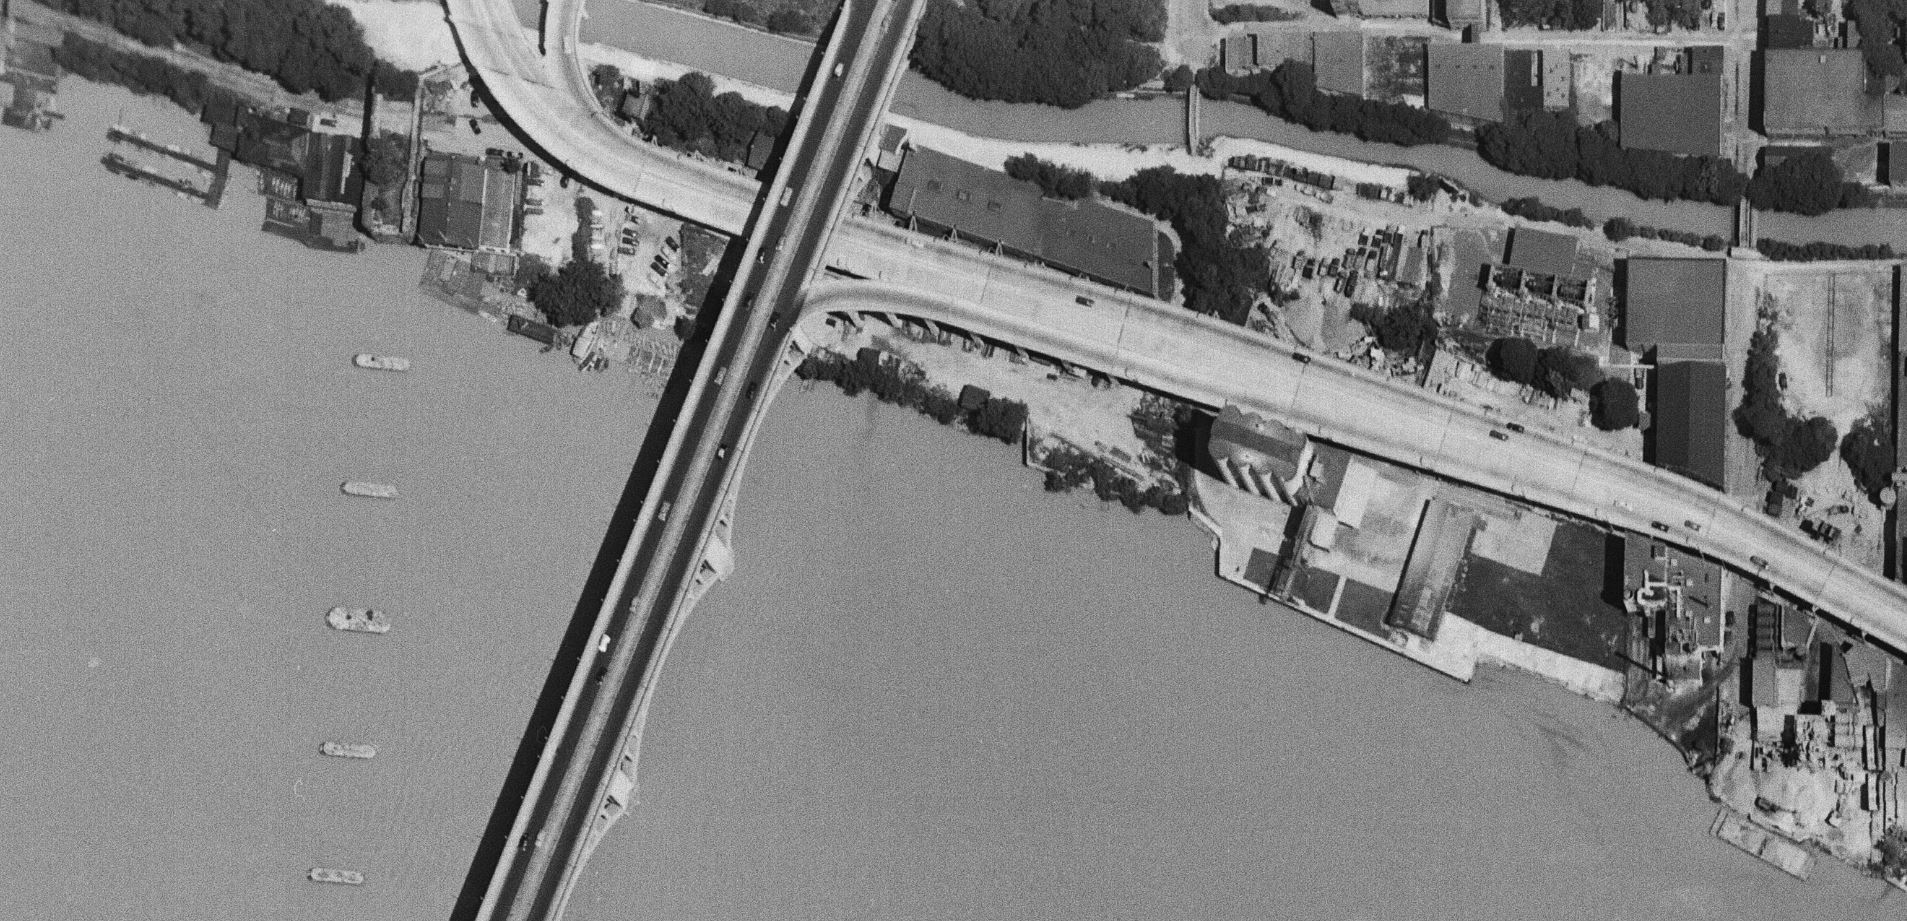
Georgetown, DC. July 5, 1951. USGS image.
Finally, here’s the west end of the industrial area of town. Some great views of Lone Star cement, Key Bridge and all the layout of industries in this area. For sure all of these images will be indispensable when planning the Georgetown area of my model RR because this is pretty much exactly how I’d like to represent it! Very exciting to find this image set.
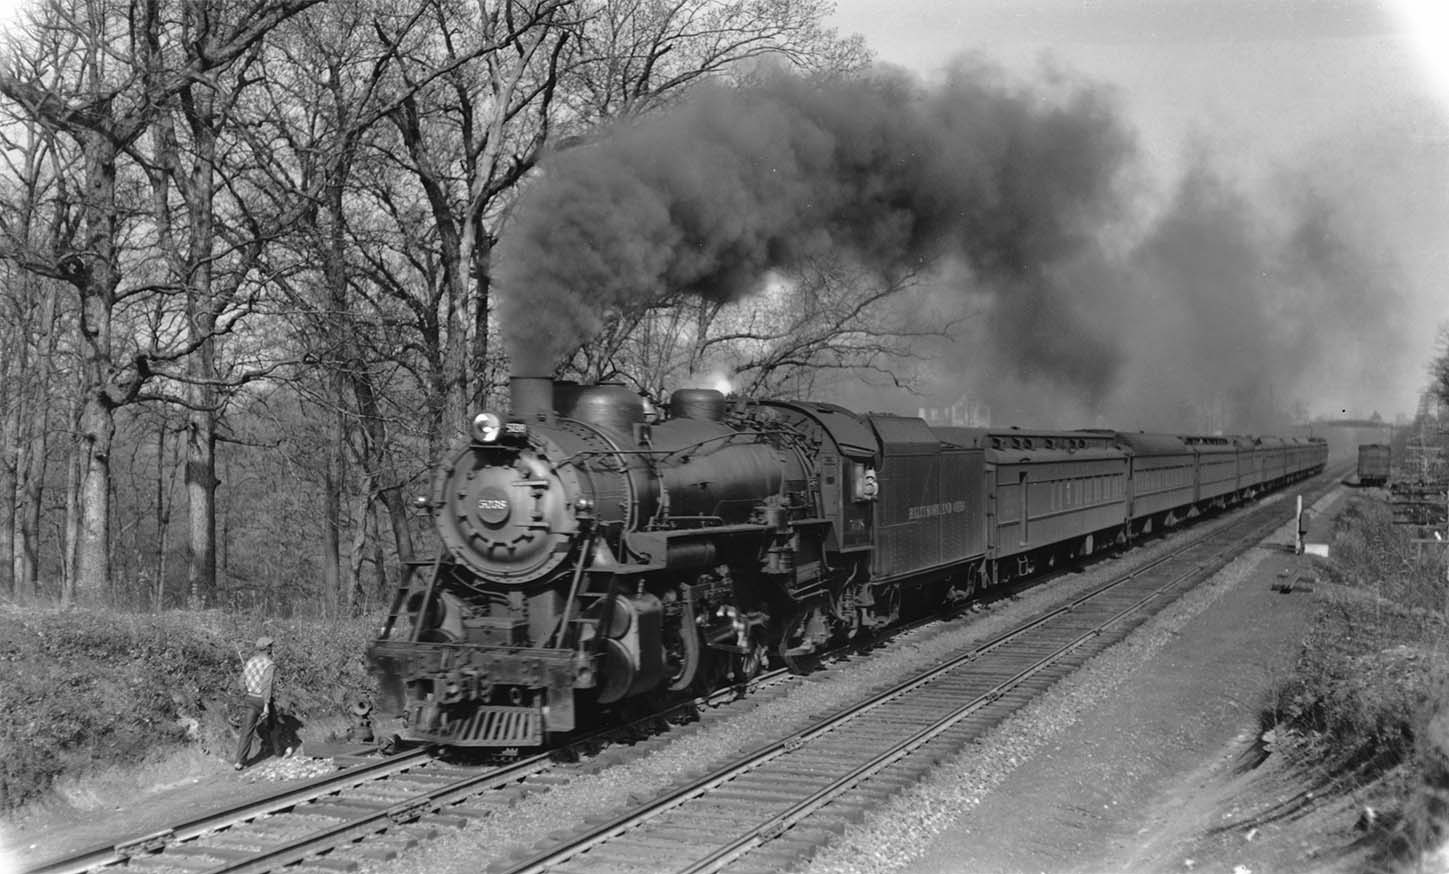
A recent eBay purchase. The caption on the back reads “B+O No. 6 “Capitol Limited” + P-1d 5038 4-6-2 Geo’town Jct, MD. 8:41AM 4-6-36 (all Pullman consist)” (Collection of Jay Williams & Big Four Graphics)
Capitol Limited thundering past Georgetown Junction.
The view is looking North, and the train is headed for Union Station, DC. It has just passed under Talbot Ave (seen in the background) and the westbound siding for the Georgetown Branch with a boxcar sitting on it. Visible just in front of the pilot is the turnout (and lantern signal) for the Georgetown Branch. Note that at this point the long siding that extended from Silver Spring all the way to the siding with the boxcar on it where it rejoined the Westbound main. A phone call box is visible to the right.
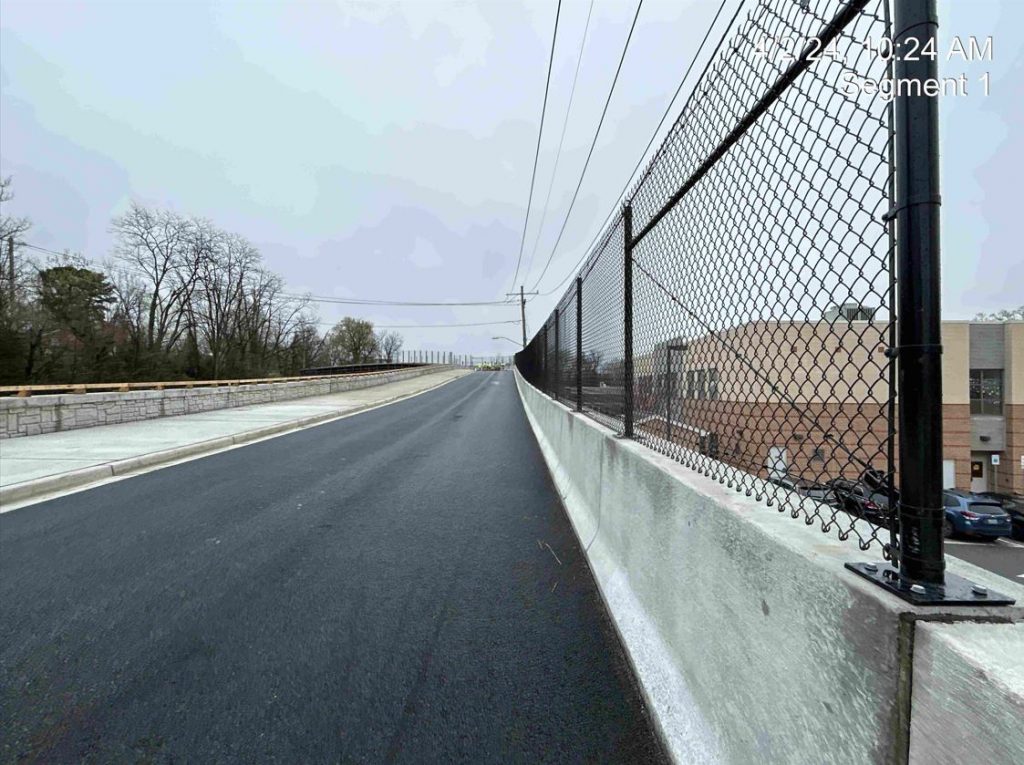
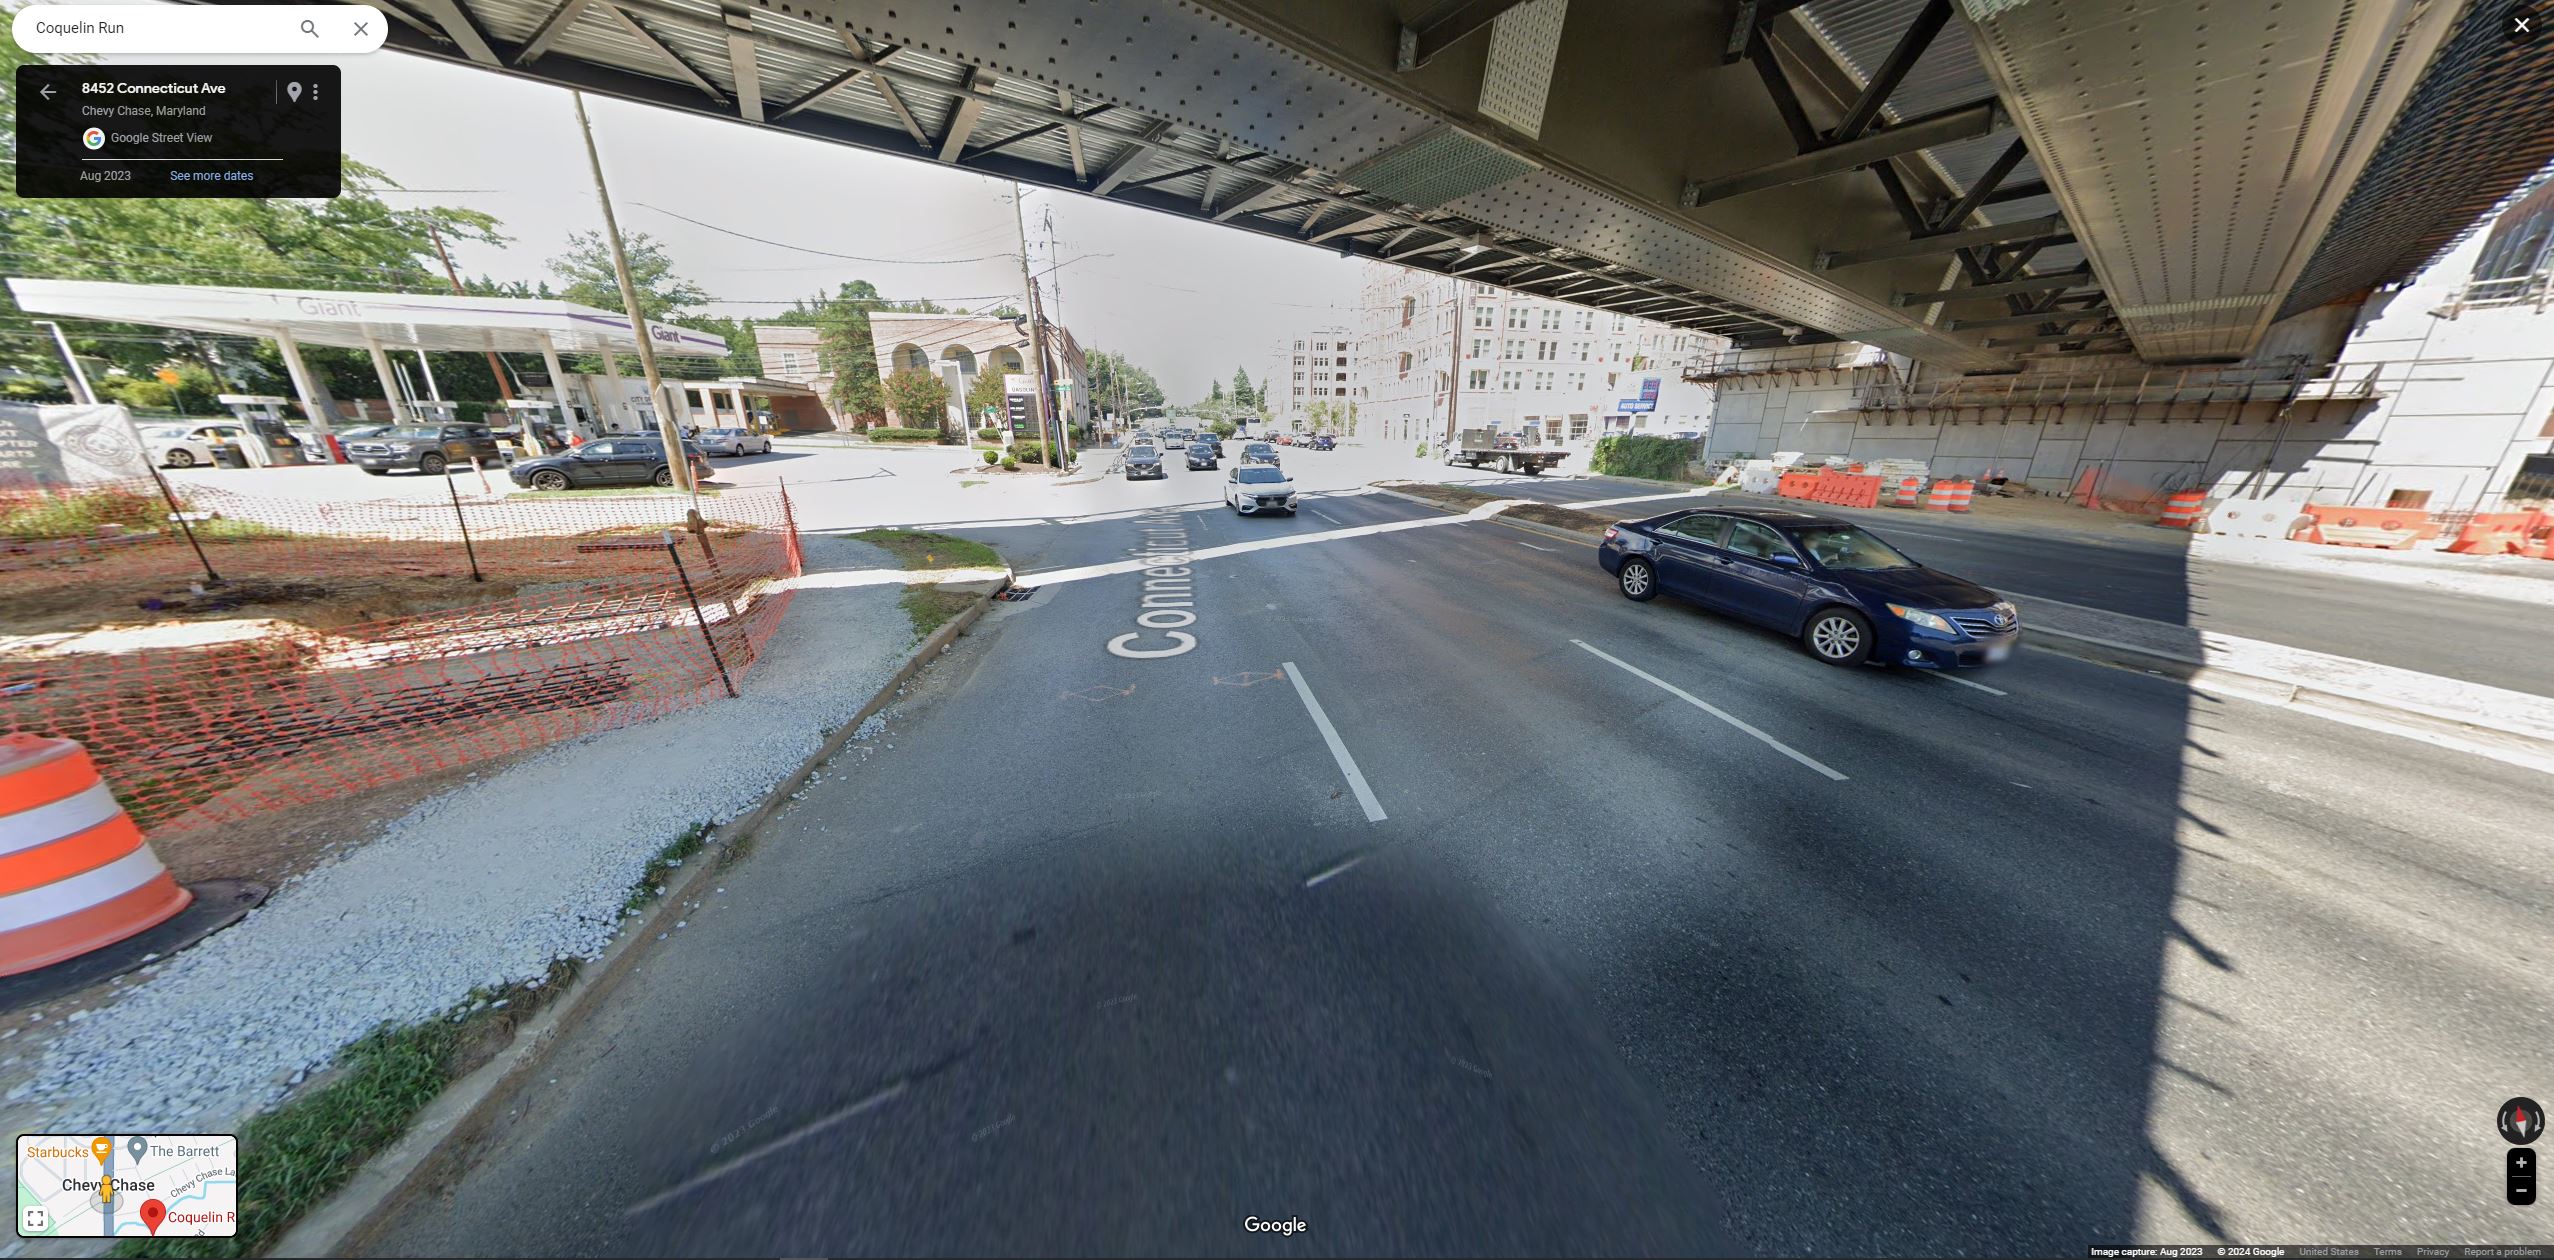
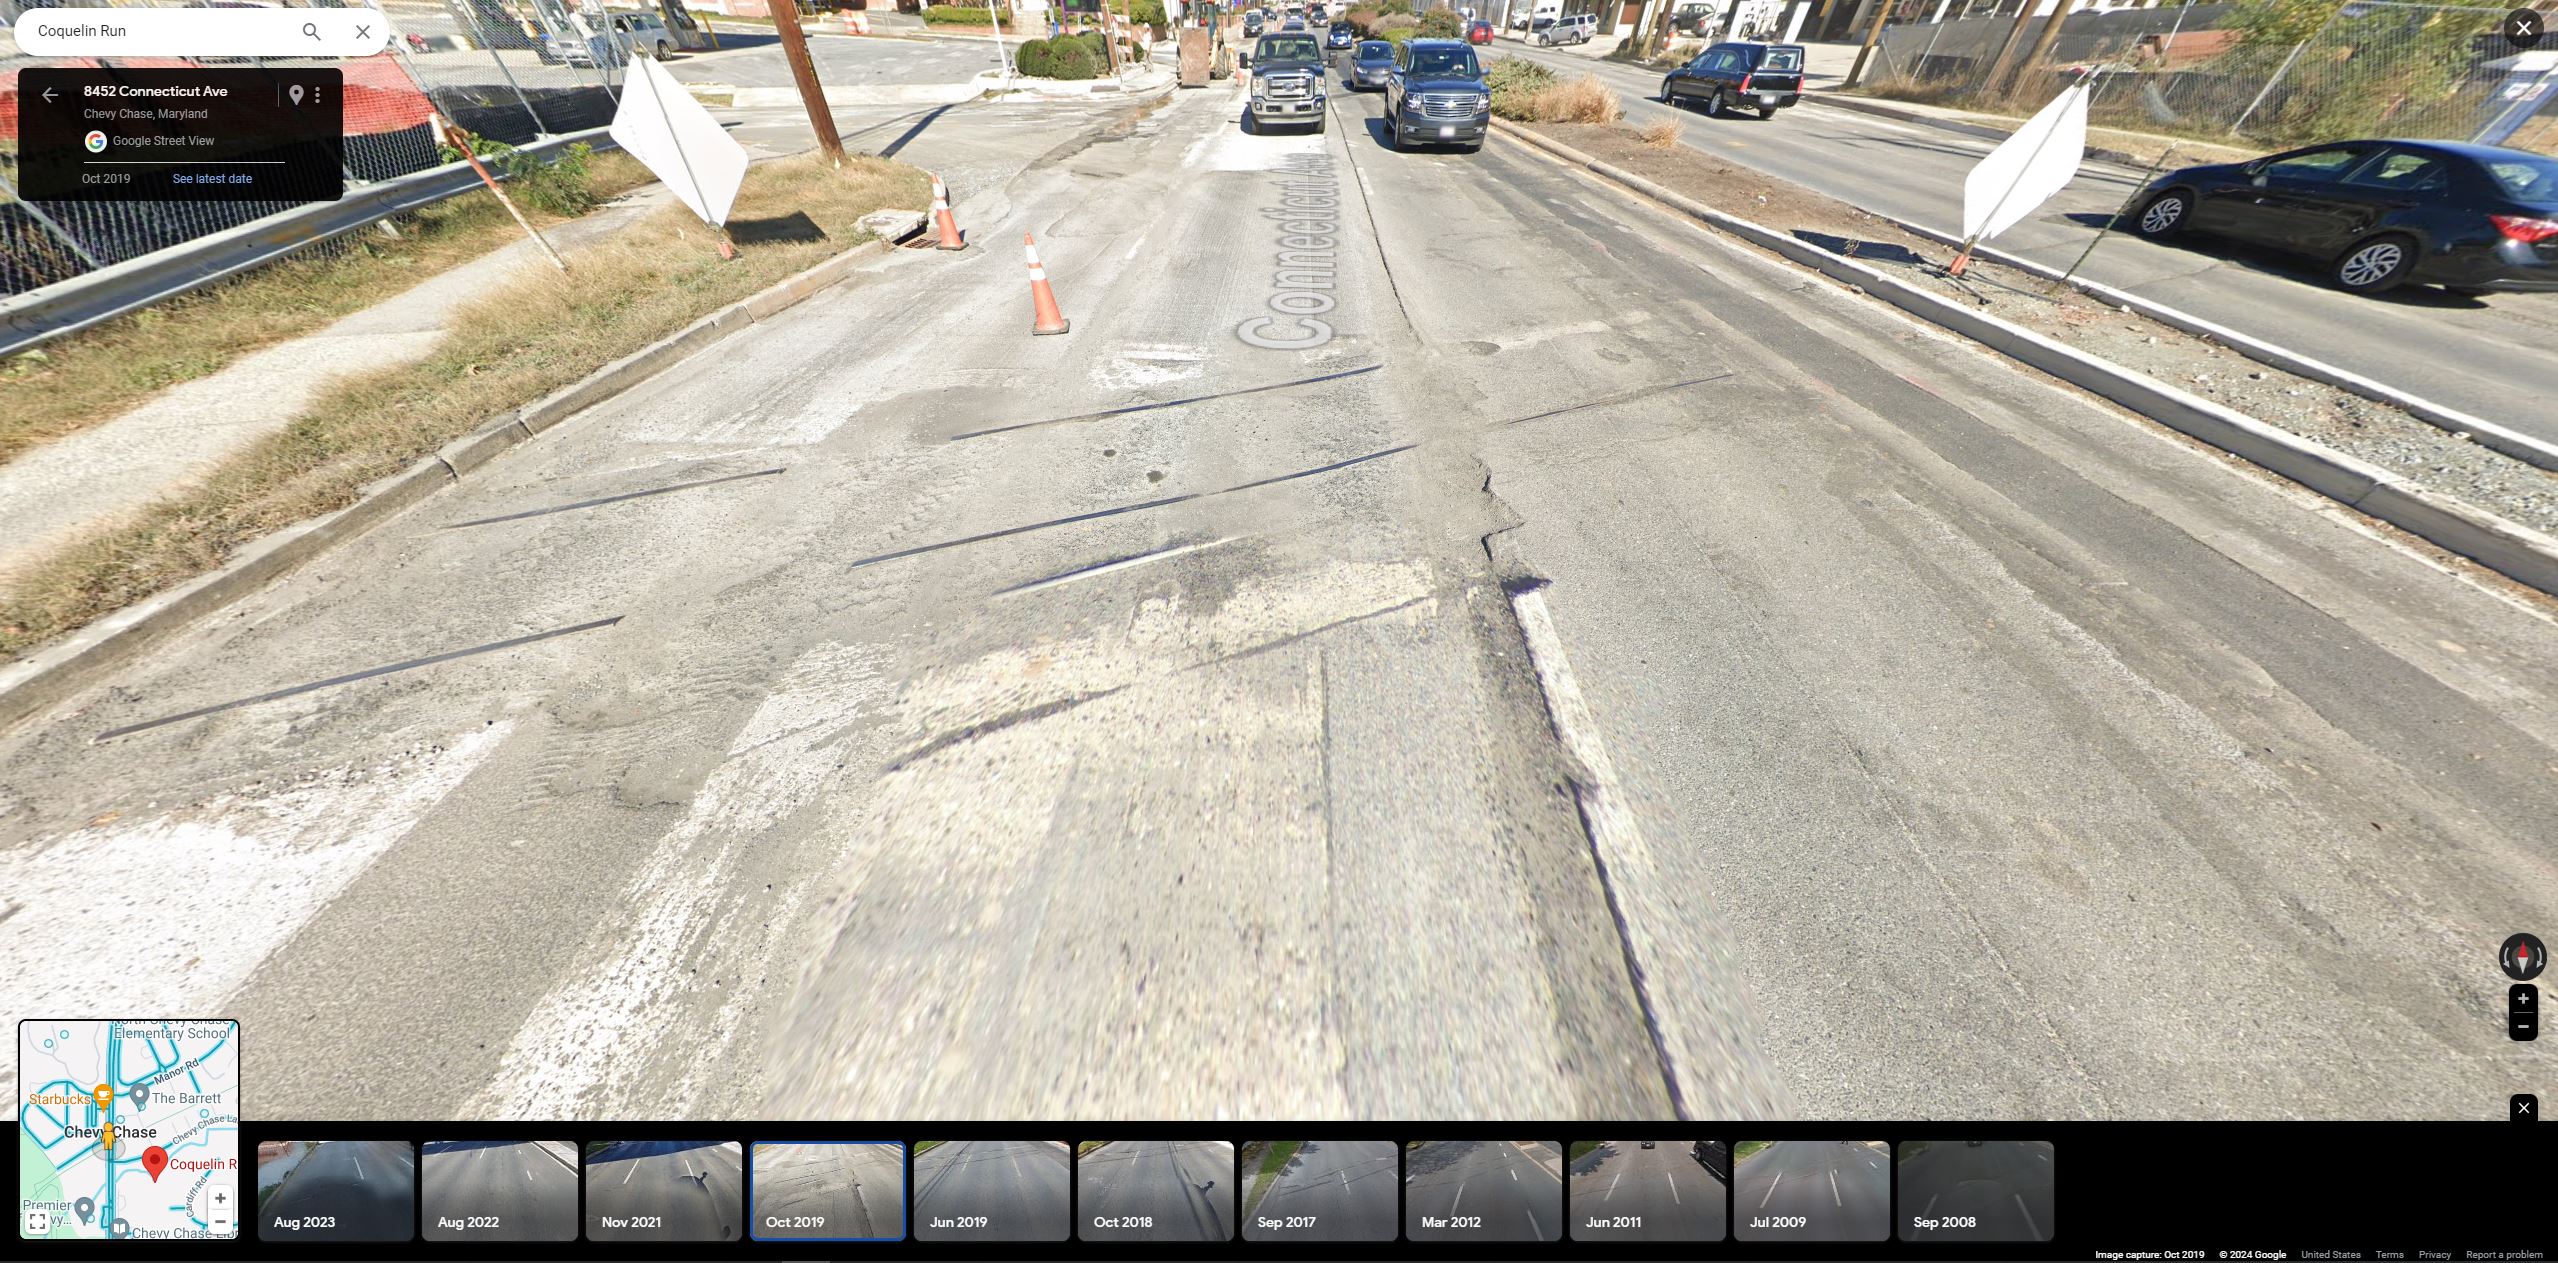
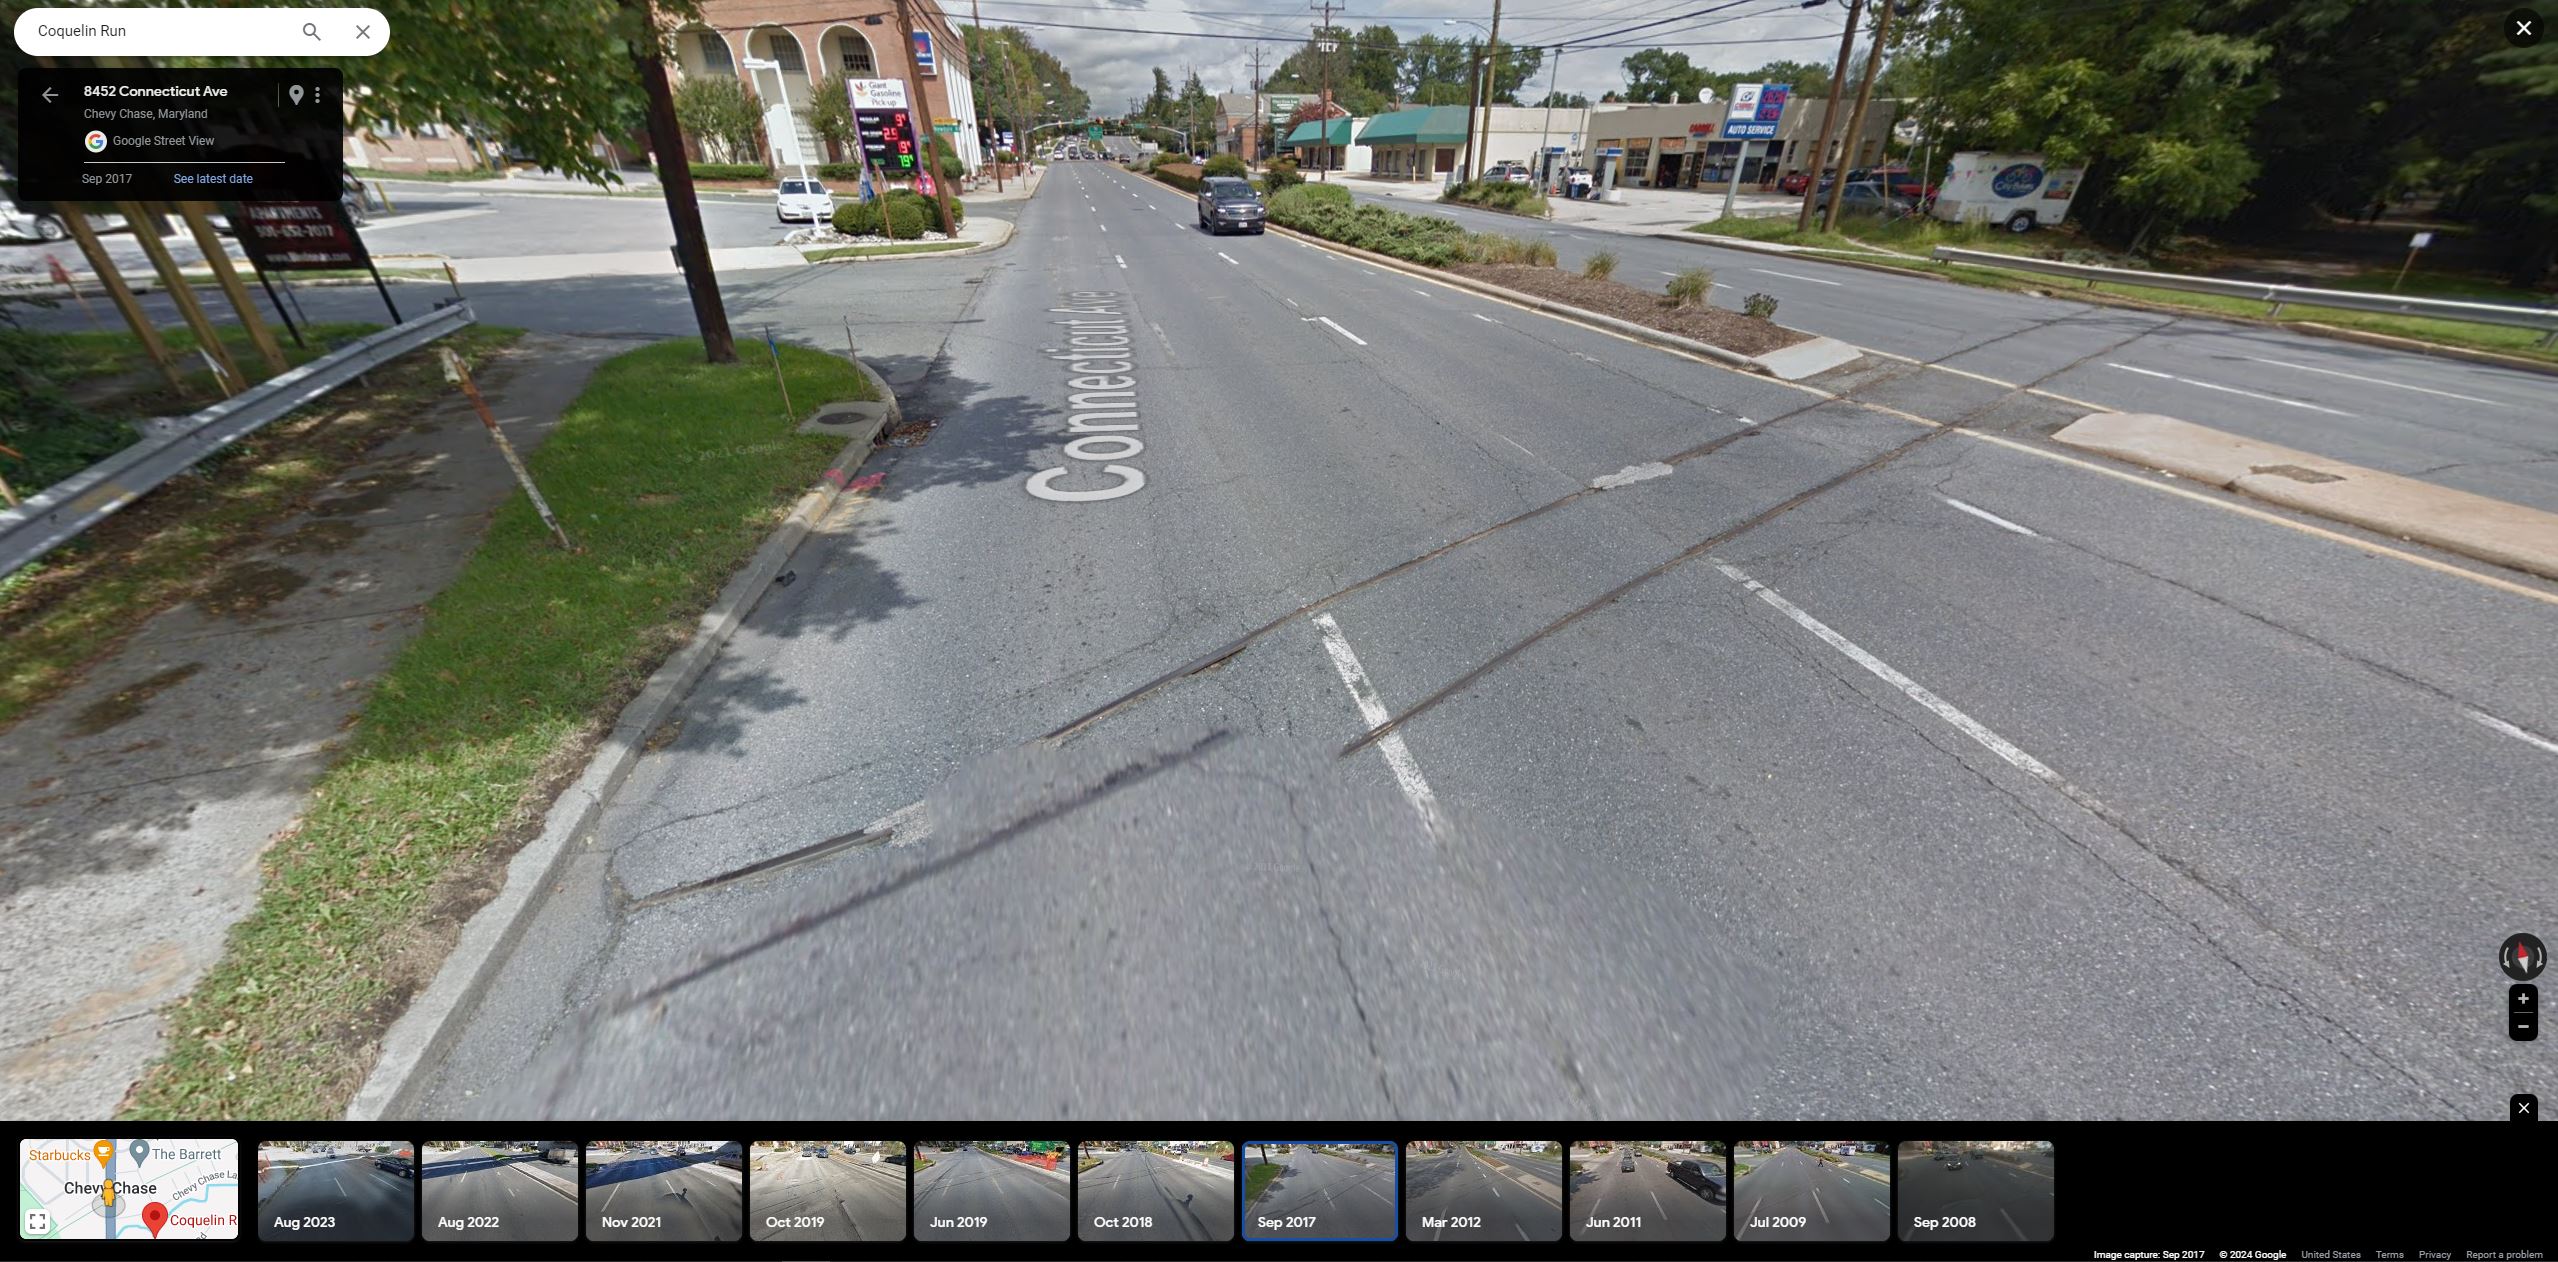
A recent post by the Purple Line folks got me thinking about how much the Connecticut Ave crossing at Chevy Chase has changed in recent years. Here are a small collection of Google Map screenshots showing the conditions:
2023 – the new overhead bridge is up, but yet, the old rails still poke through the roadway in some places. Amazing.2019 – The bridge had not been erected and the road was being resurfaced, revealing the tracks one more. Note that the island is now blocking the tracks. 2017 – As late as this, the tracks are still evident and there is a break in the right of way for the tracks to pass through. As if that train would one day come.
Stumbled across this photo on eBay earlier this week (above) and it reminded me that I’ve been sitting on a handful of really fascinating images I found on the Library of Congress site capturing the flood of May 13, 1924. Like so many things on eBay it’s far from rare or original, but rather just an overpriced print of a Library of Congress file that you can snag at high-res via the website. Pro tip – before you purchase that print, search the LoC thoroughly to possibly save yourself some dough.
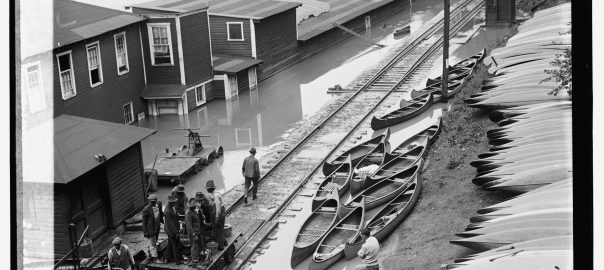
The subject matter is interesting because it shows not only the scale house in Georgetown, but also a hand cart full of railroad employees, no doubt headed out to inspect the line as the waters recede. Note the jacks and other tools they have on the cart. They would have been met with some troubling finds. There are many photos on the LoC – here is a selection of relevant ones I found interesting. In the following image I believe it is the same crew; note the lighter color pants on the gentleman standing at the back left of the hand cart, visible in both photos. Note the detail of the scale and scale house as well as all the equipment around the section shed.
May 13, 1924. The B&O section crew prepares to head out to inspect the line. The view is from the Aqueduct bridge facing west. The section shed is on the left and the scale and scale house is visible to the right. Also note the trunk of the water column in the bottom left. Flood. , 1924. Photograph. https://www.loc.gov/item/2016837495/.
A neat thing I noticed, if you look really closely in the top right, you’ll see a B&O steam loco doing some switching, with someone sitting on the front pilot. It is likely moving the freight cars you’ll see in some of the next photos. Pretty cool!
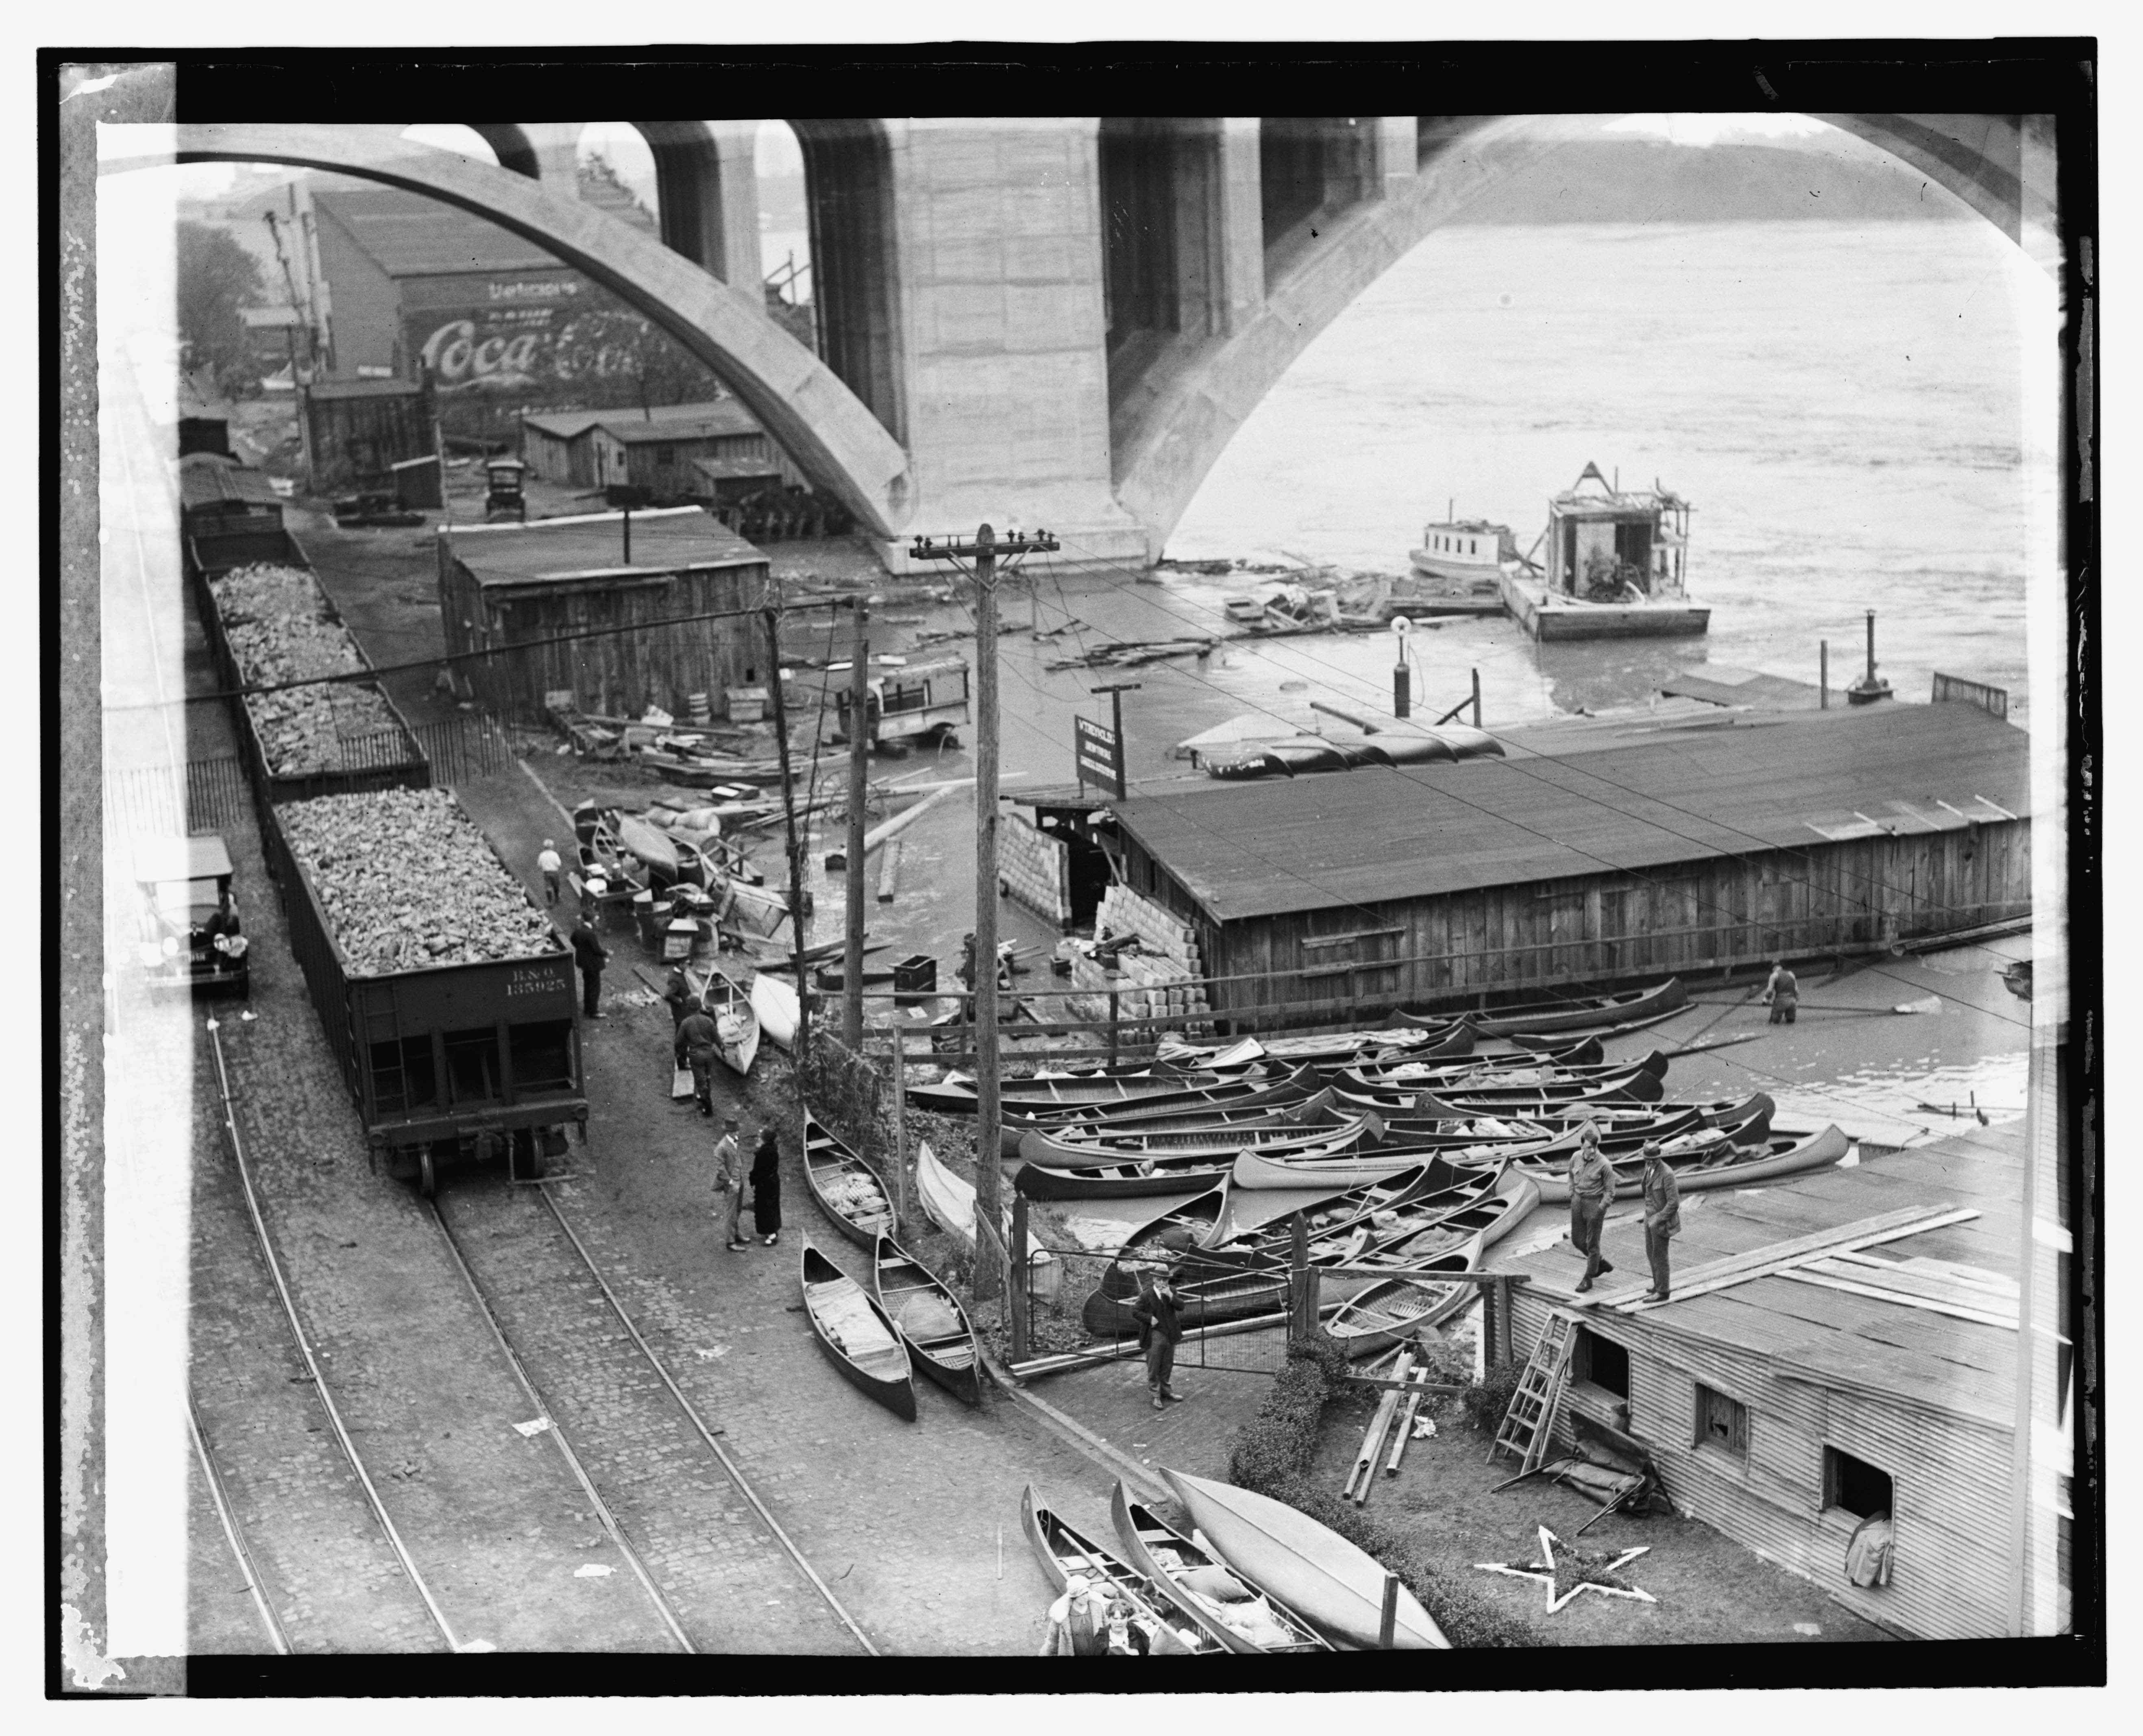
A B&O steam engine is visible in the distance. May 13, 1924 . View from the Aqueduct bridge again, now facing east. Looking down on the boat yards adjacent to the Key Bridge, much of it washed away and damaged. B&O hopper 135925 and others sit loaded with aggregates, likely from the Smoot Sand & Gravel plant. Flood. , 1924. Photograph. https://www.loc.gov/item/2016837490/.
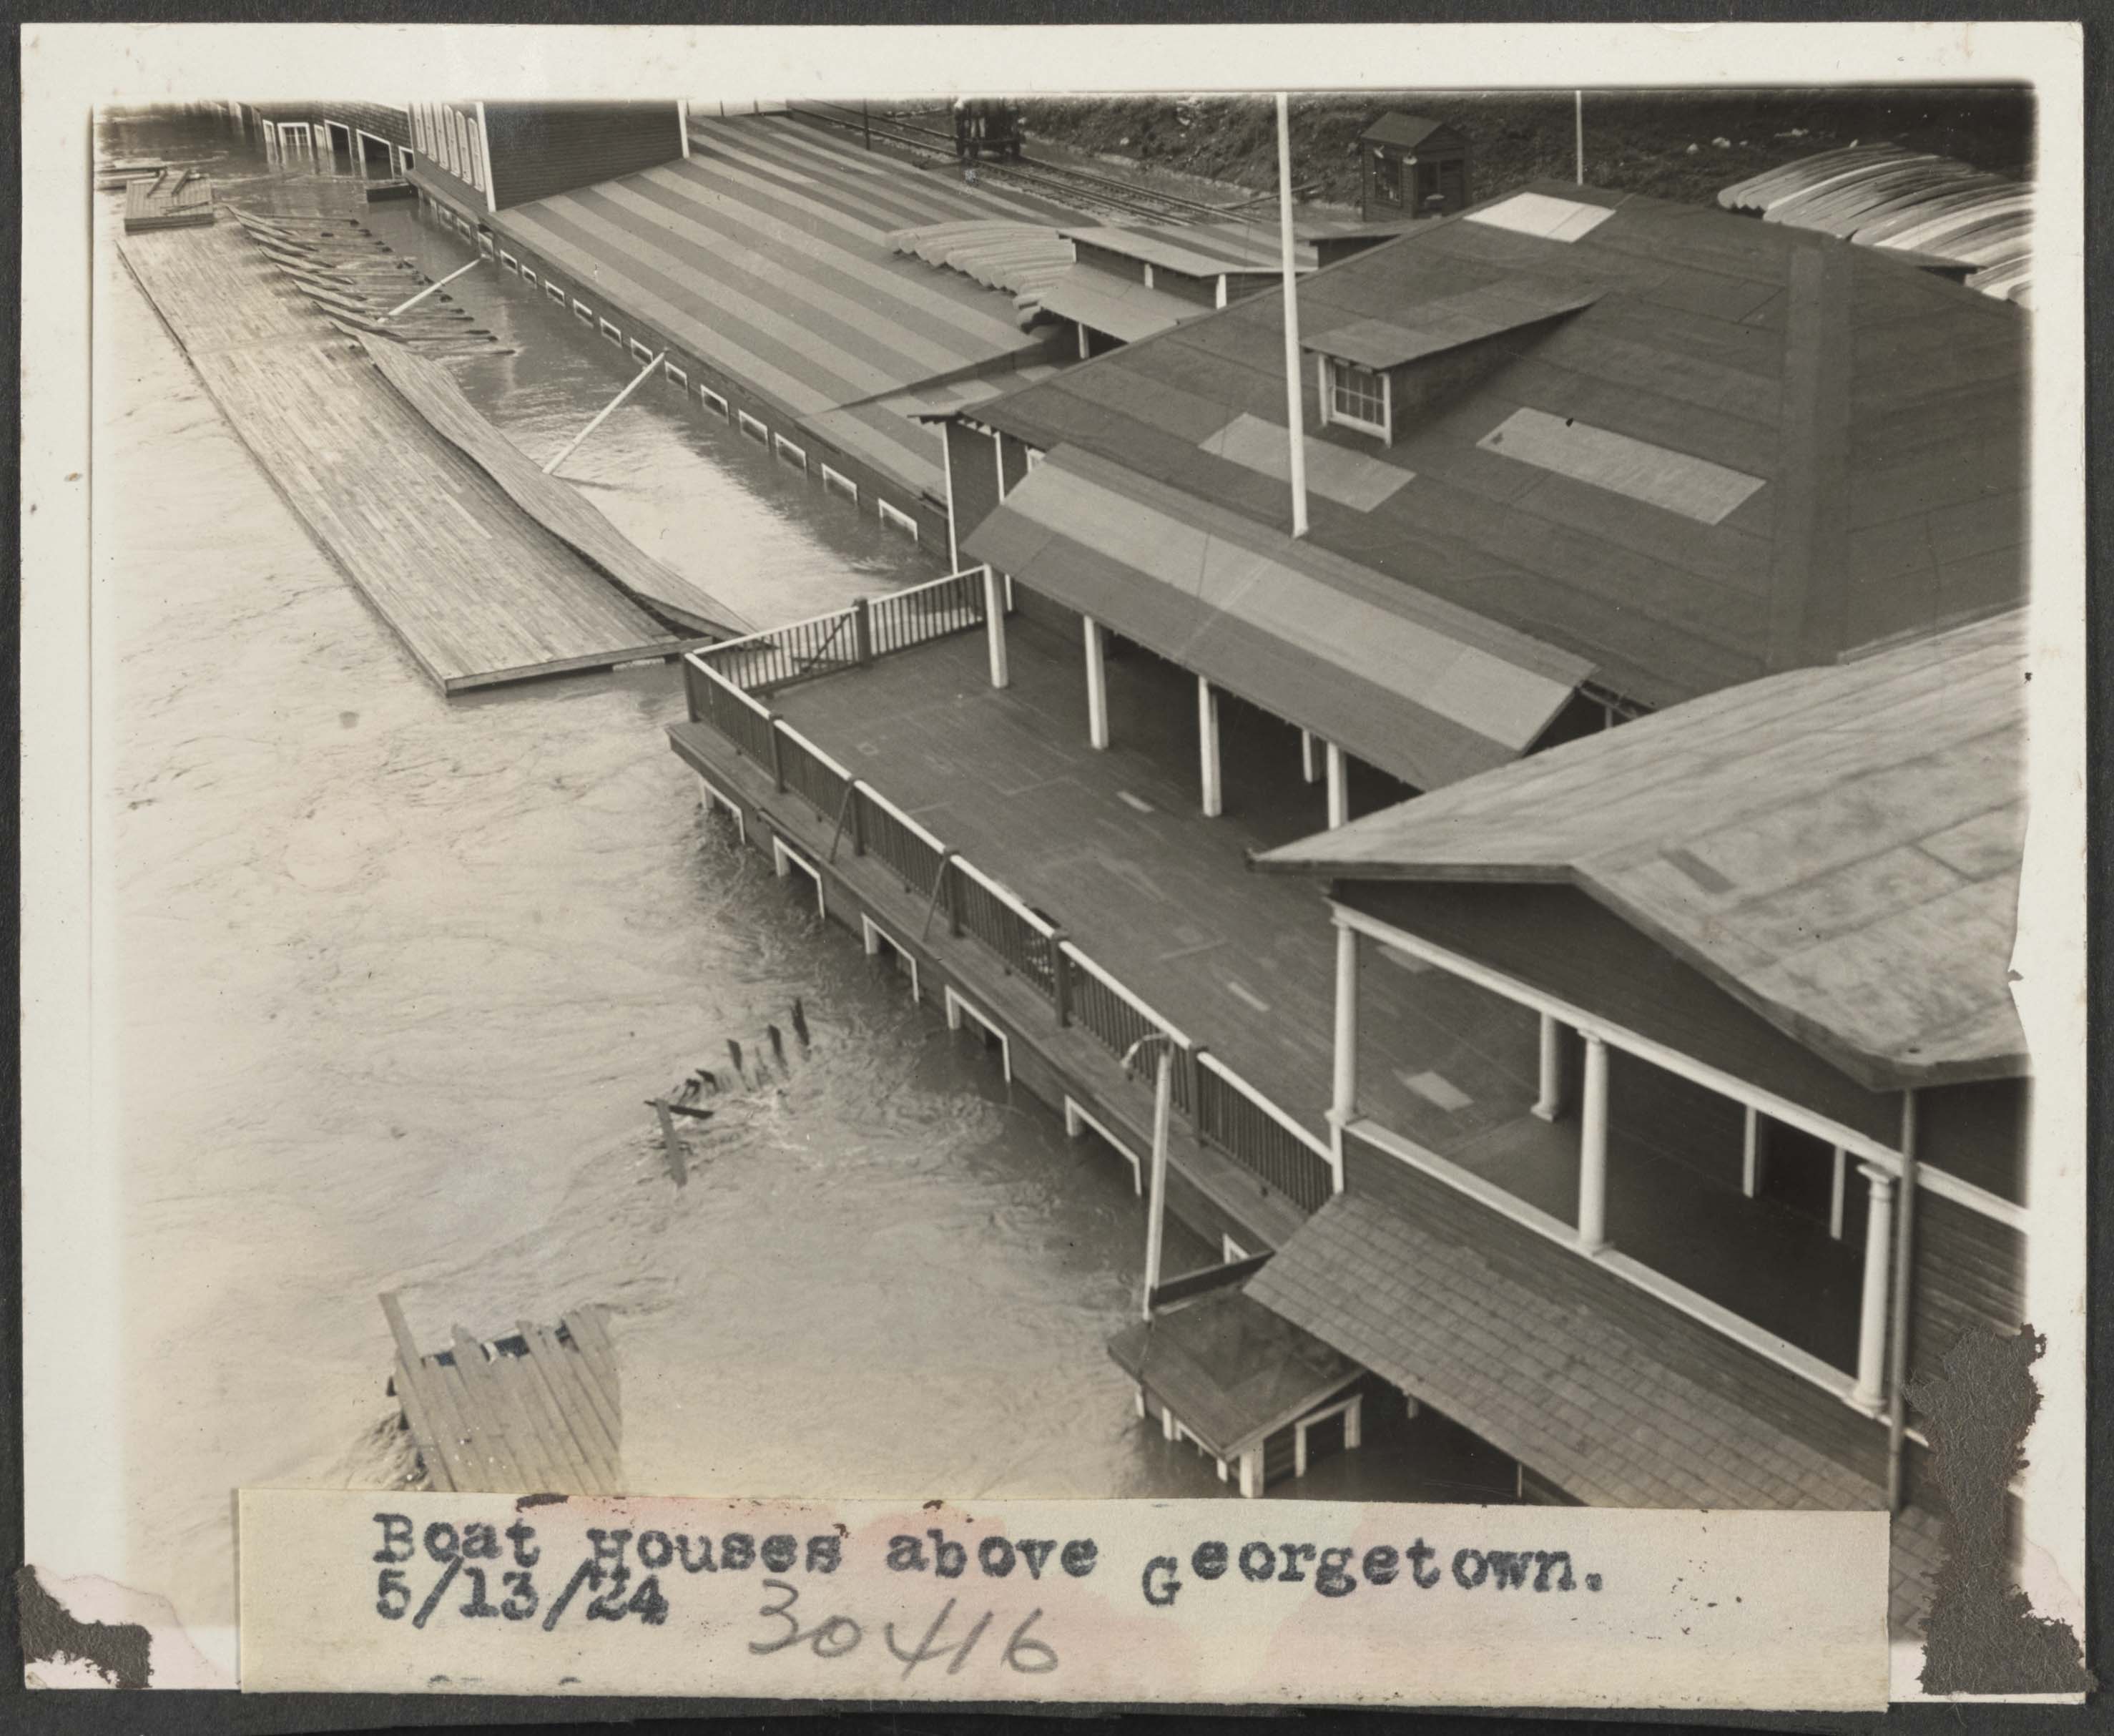
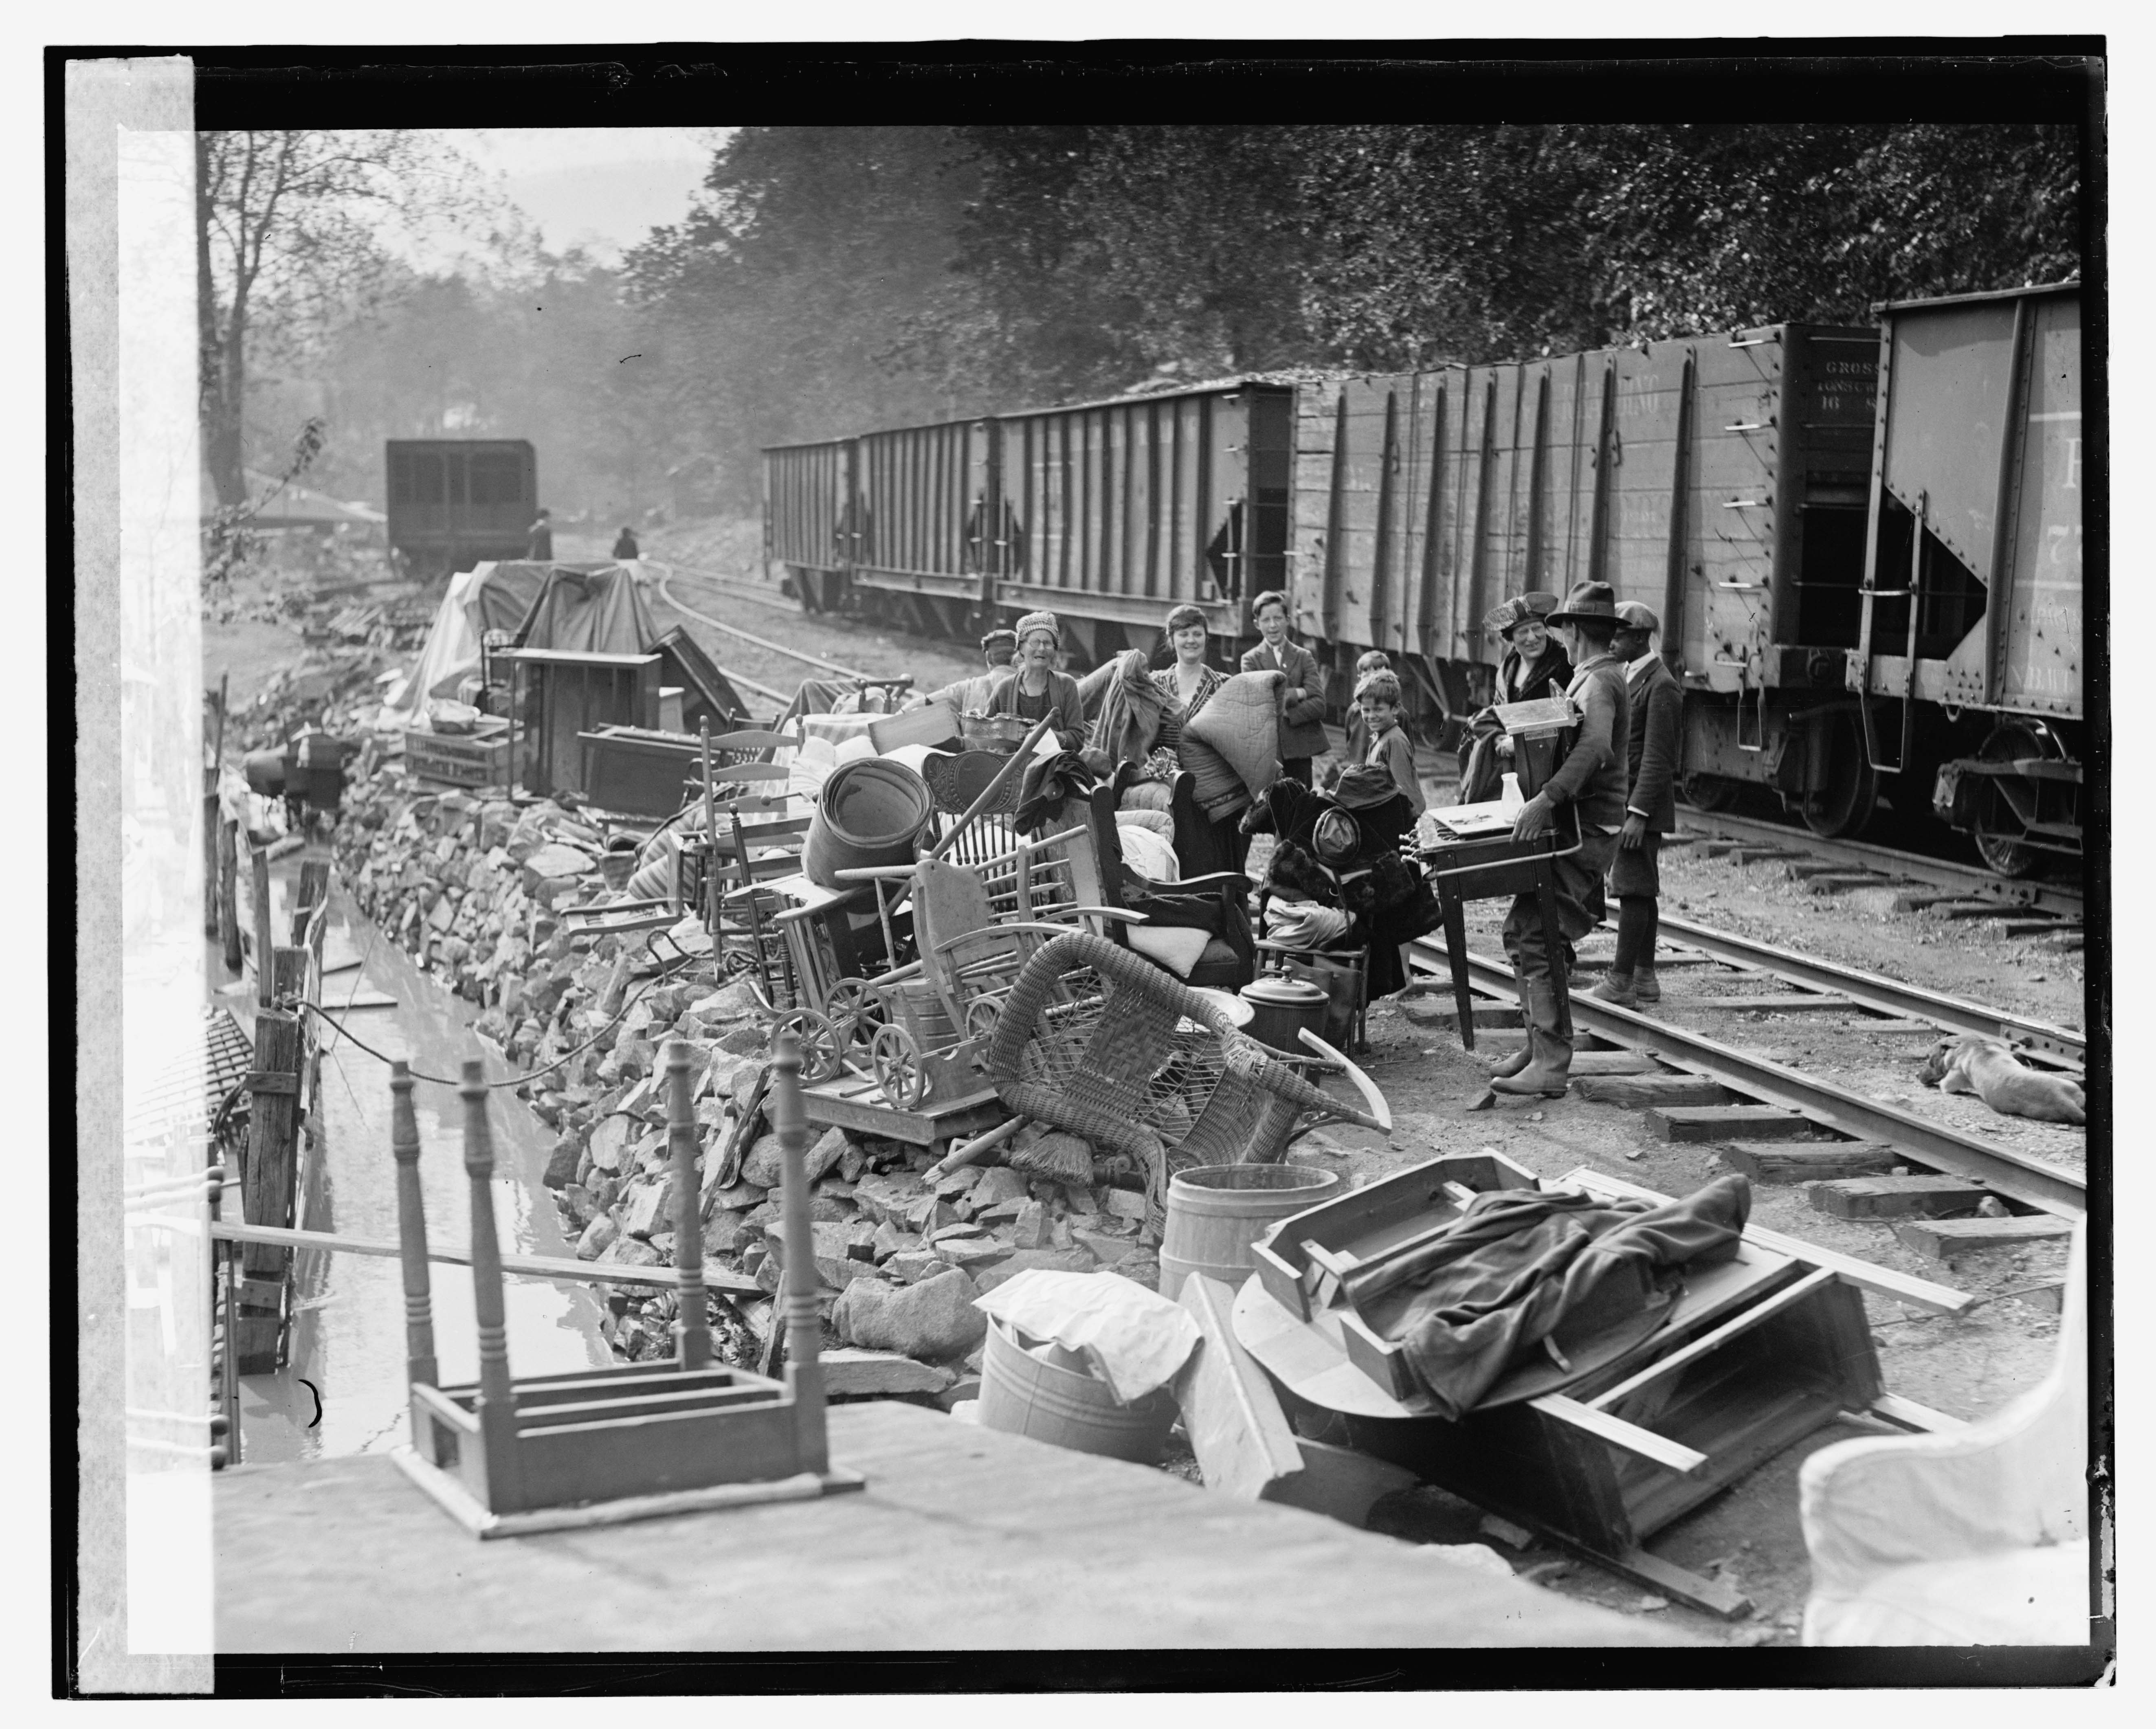
B&O Hopper 135925 is a class W-1 (135000-135999) 2511 cu/ft capacity, blt 1910. A bit further down the line, just past the boathouses and at the west end of the long passing siding, we come to another string of hoppers and some folks who have rescued their belongings from the floodwaters. The shoreline of the Potomac was absolutely littered with small shacks and cabins that folks had to escape the downtown hustle-and-bustle. Stretching all the way up to Chain Bridge, these shacks were a fascinating part of the history of Georgetown.
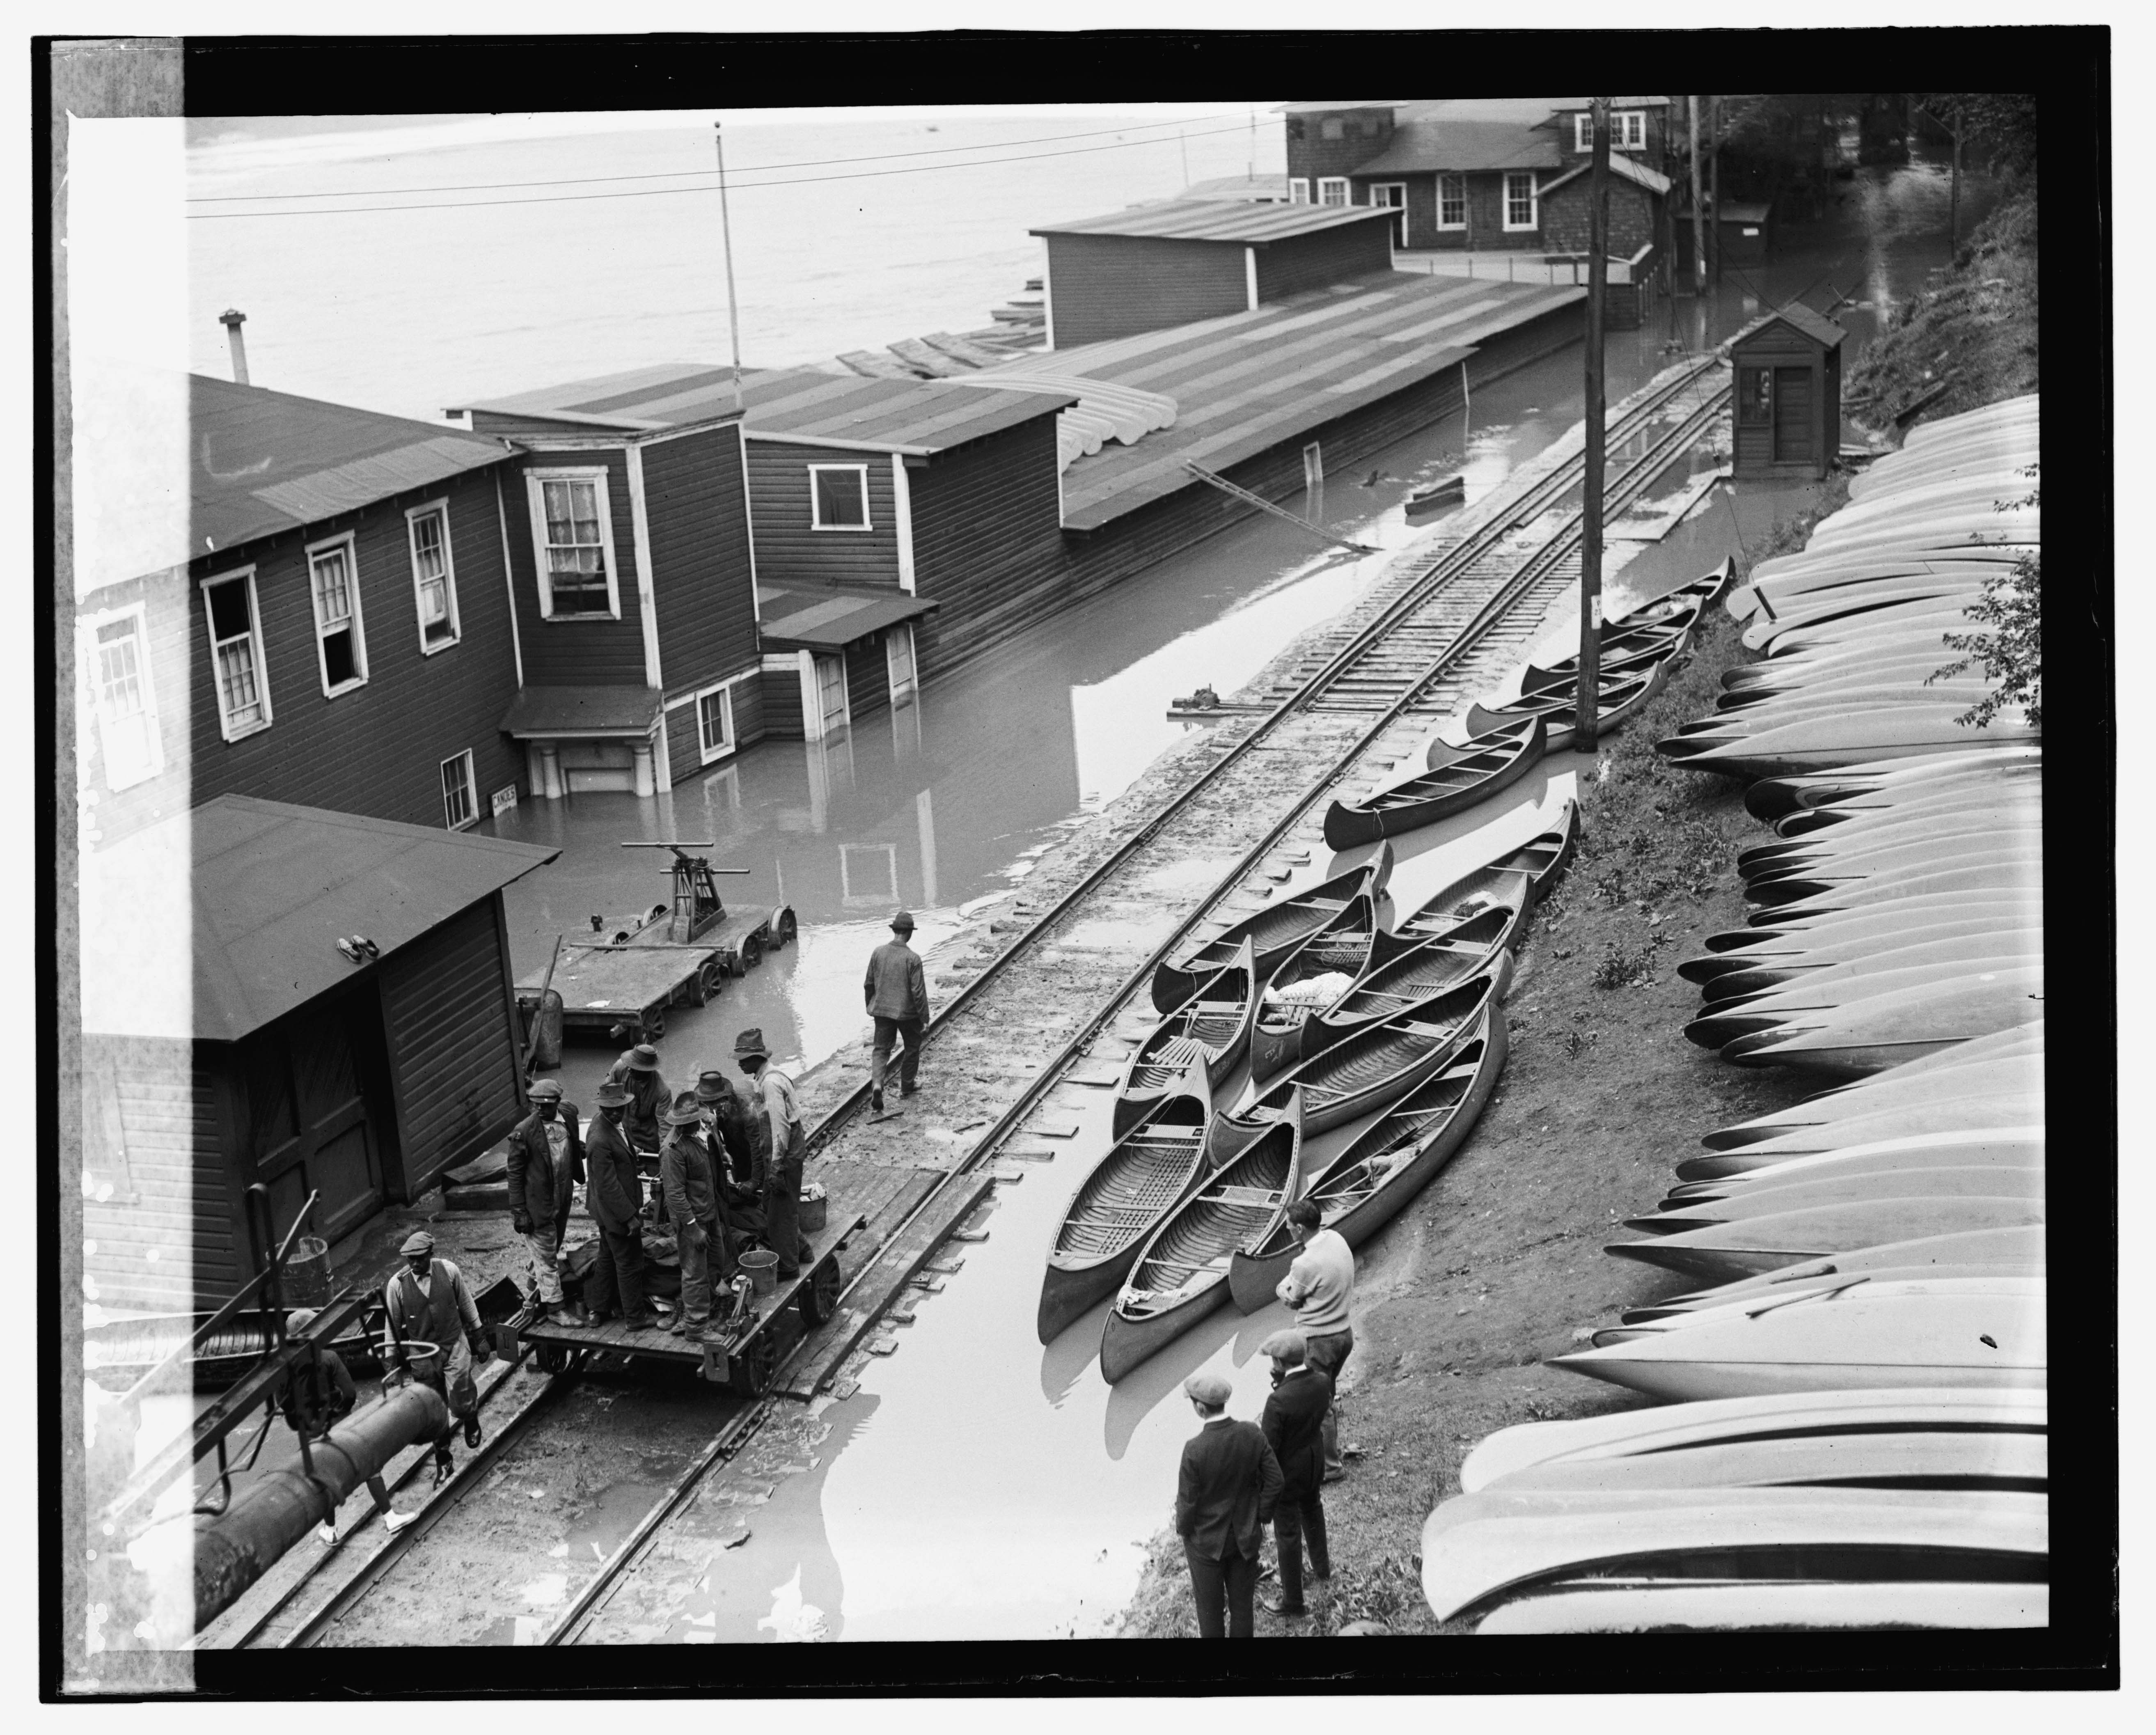
May 13, 1924. We’re a bit further west now, at the end of the long passing siding and near the small 2-track yard that was there. Have yet to figure out the purpose of that yard, but the coal car in the distance is spotted on one of the sidings. Flood. , 1924. Photograph. https://www.loc.gov/item/2016837488/.
Attempting to ID the freight cars, it looks like from the right to left we have:
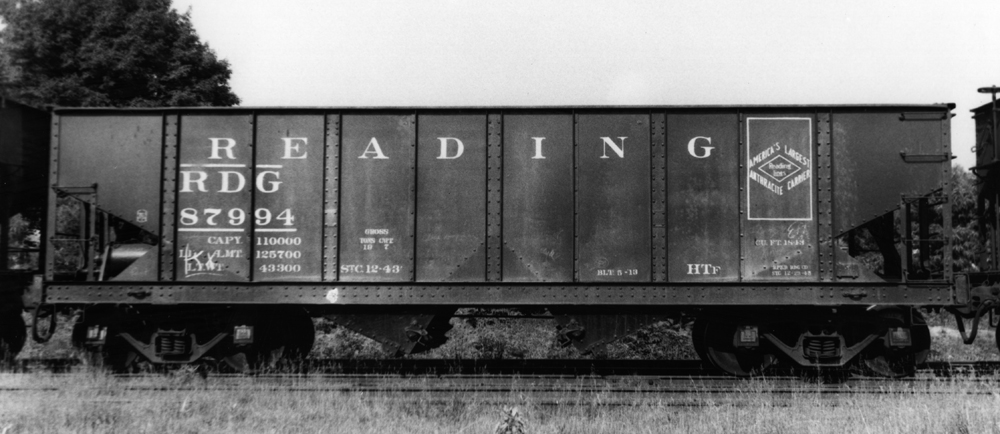
1: Philadelphia & Reading 77xxx – 34′ 55-ton arch bar trucks, 1880 cu.ft. capacity hopper, class HTh (nos 74500 – 78999), built 1916-17 by Standard Steel Car. Approx. 4495 on the roster in 1924. Detailed roster info from RT&HS. Builders photo from Kinkaid collection here and here.
3 & 4: Based on the distinctive side sills, these appear to also be Philadelphia & Reading class HTf hoppers, but slightly modified from as-built images I found. The HTf (86000-89999) was a 34′, 55 ton, 1843 cu.ft. capacity car with arch bar trucks. They were built in four batches from 1910-11 and again in 1913. In 1924 there were 3970 on the rails. Likely after shopping they received grab irons on the sides as well as some sort of bracket/brace above each bolster on the side sill. Early photos do not show these brackets. Here are some builders photos from the Kincaid collection onetwothree. Here is a photo of one with the brackets from Shamokin Div website. Detailed roster info from RT&HS.
5 & 6 These cars are just too far off for me to get a read on what they are.
I believe the cars are actually being moved. Why? Because in this next photo, which is of the same subjects, there are different cars in view:
May 13, 1924. Same spot as previous photo, looking toward the track. The freight cars have moved! BO 328805. Flood. , 1924. Photograph. https://www.loc.gov/item/2016837496/.
Two B&O Hoppers in view:
1: BO 328805, class N-12g (327000-331999) (4998 cars) 1800 cu.ft capacity, blt 1923.
2: BO ? – appears to possibly be another N-12 class.
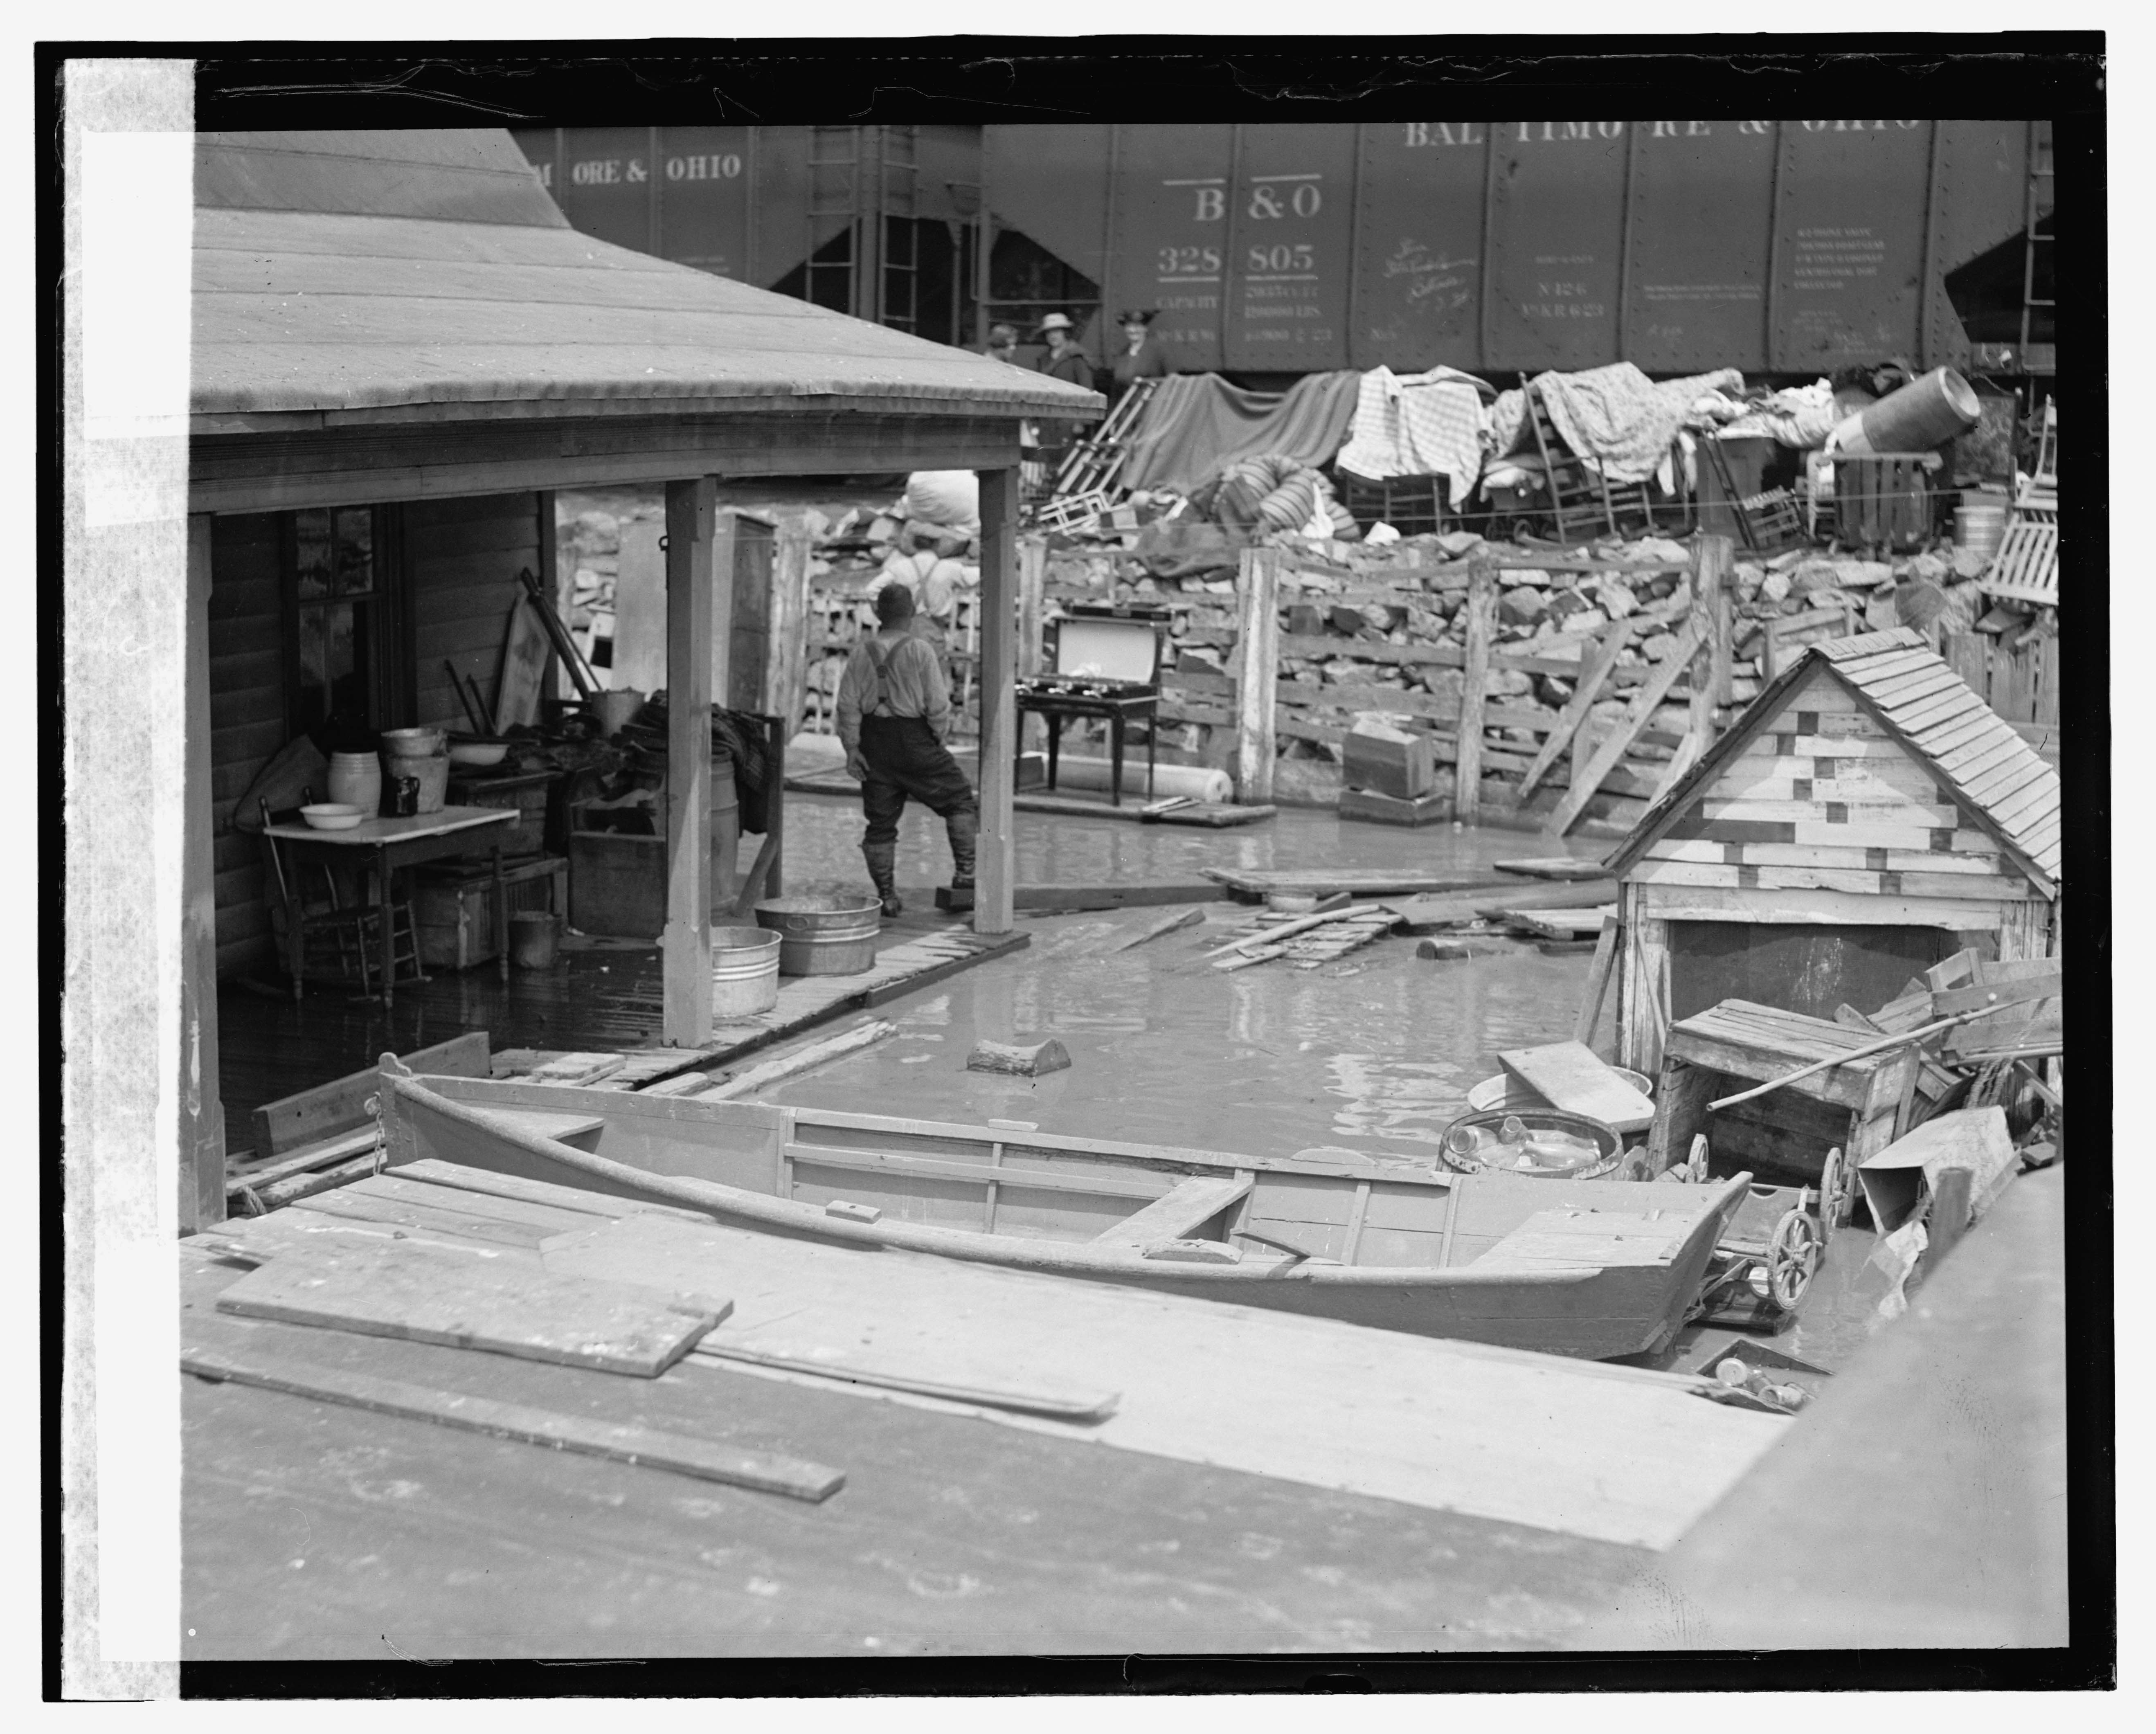
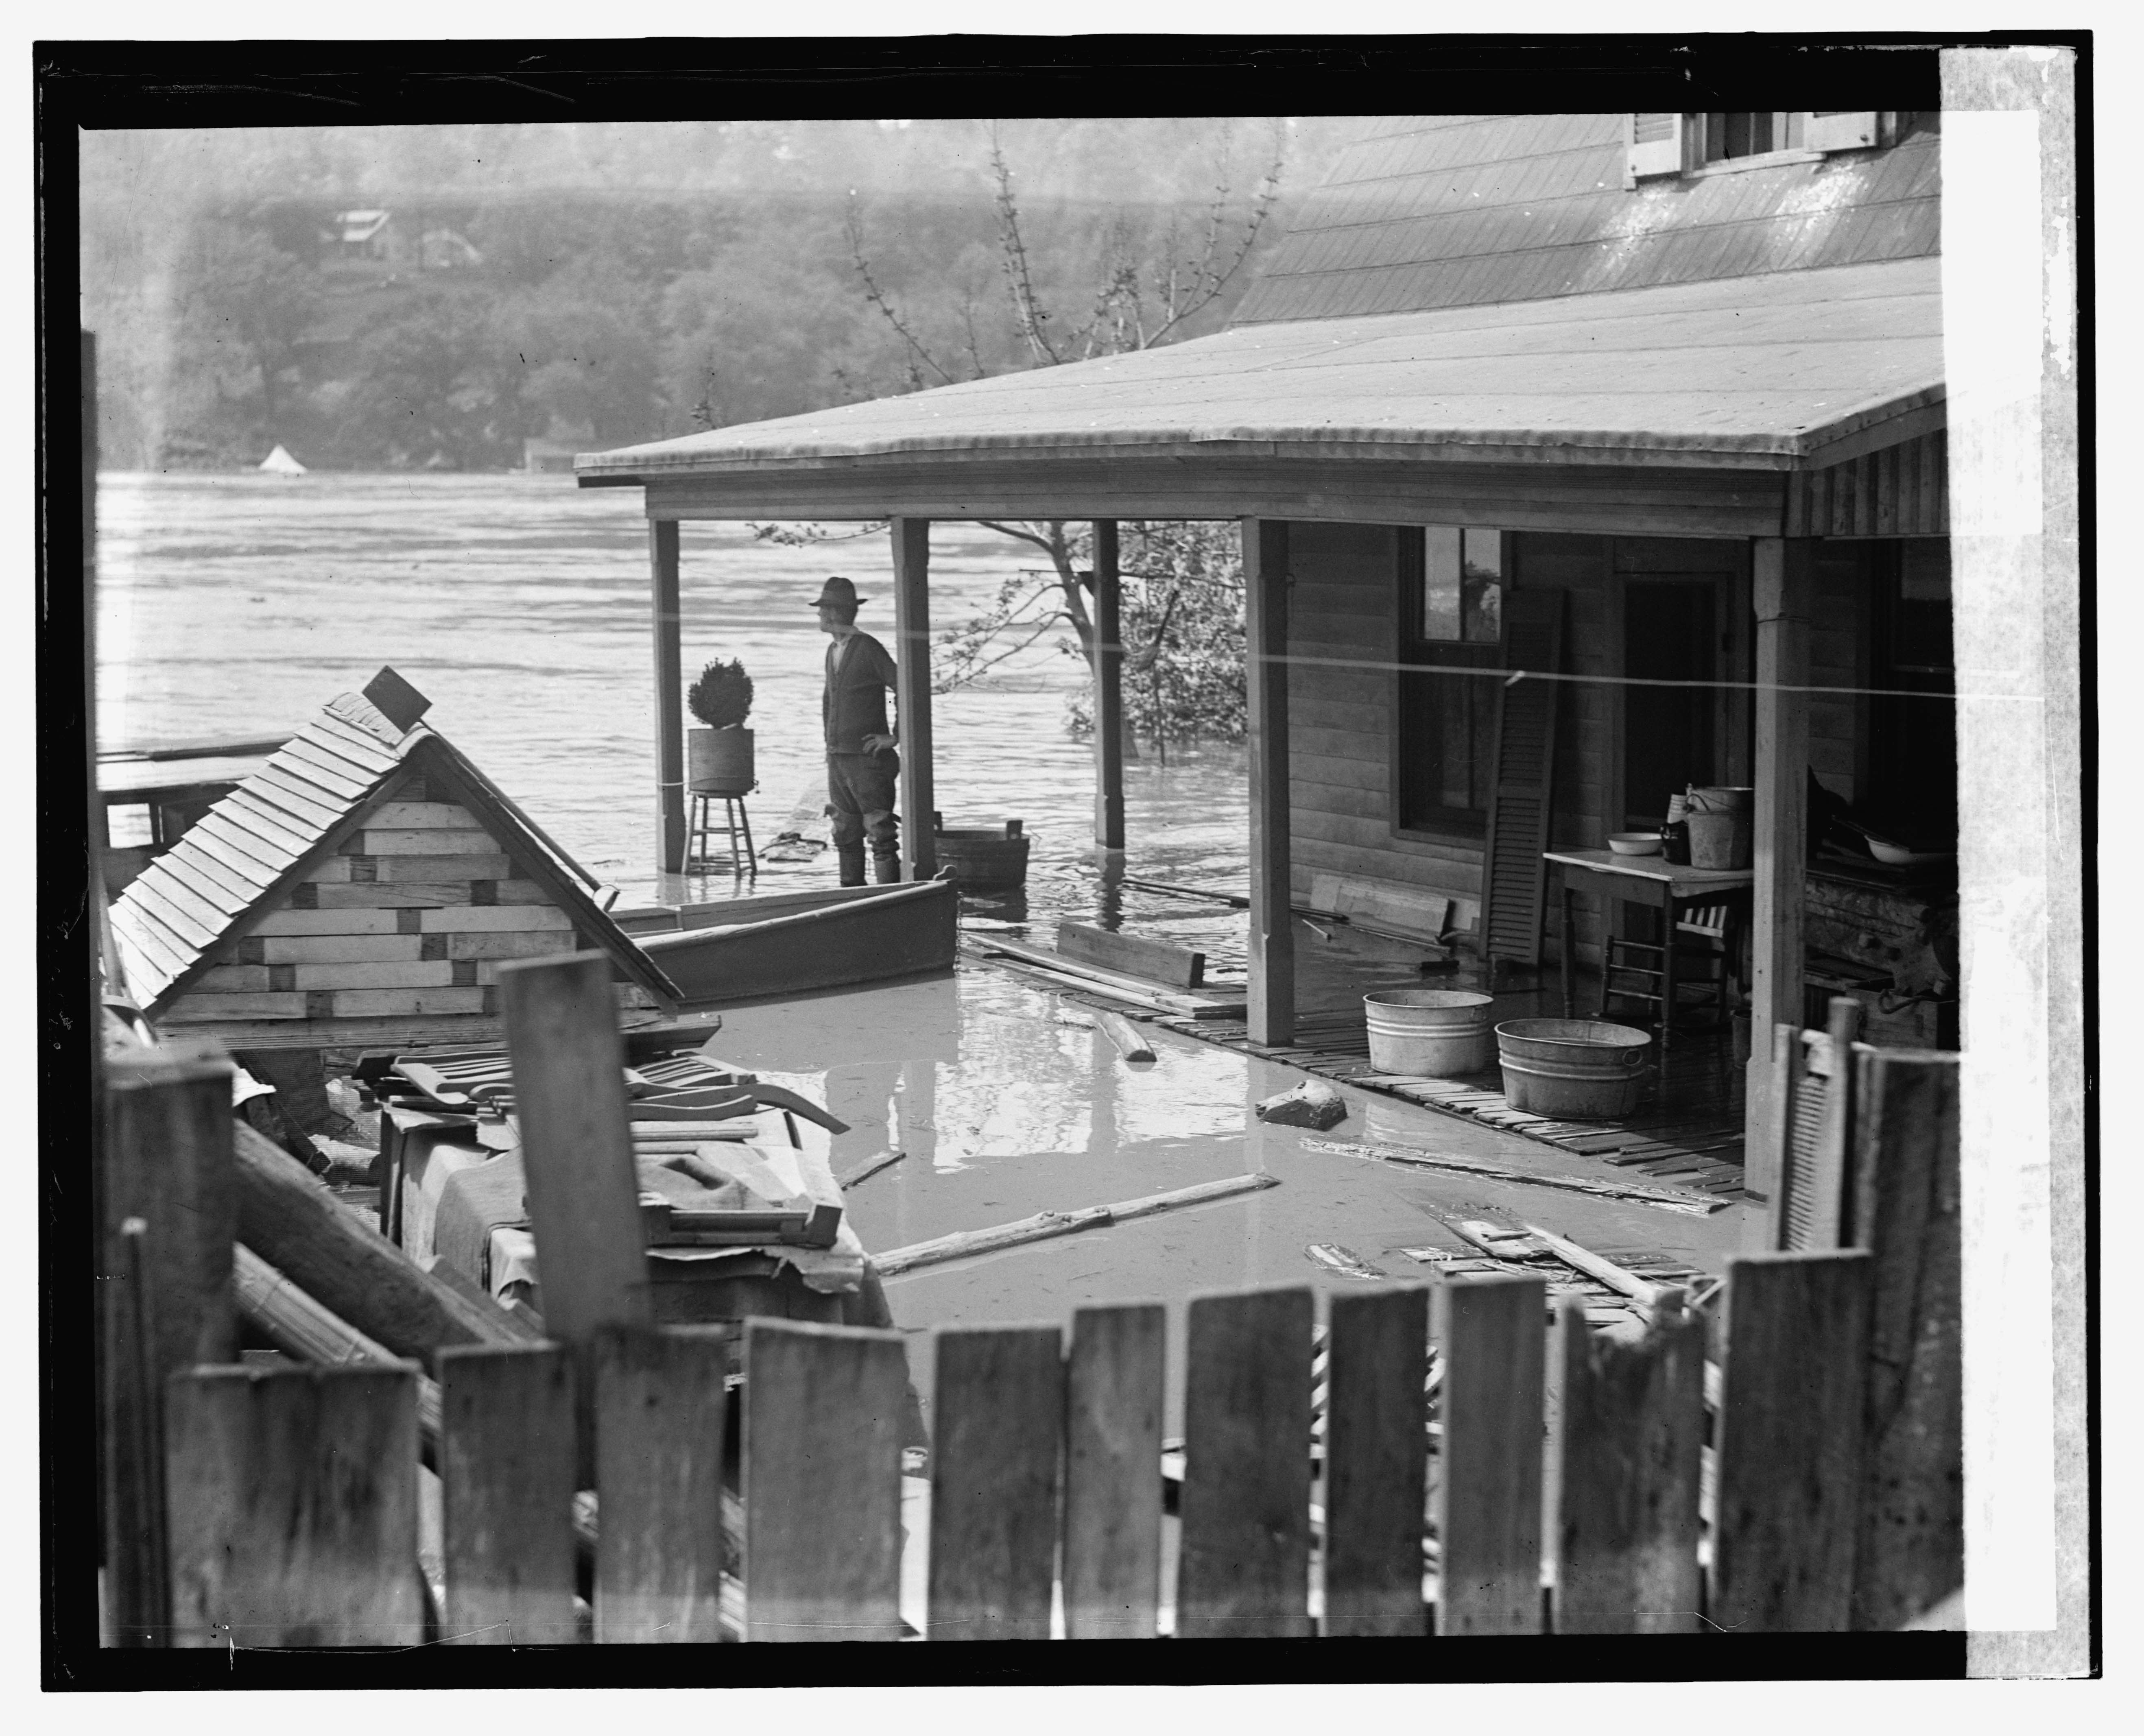
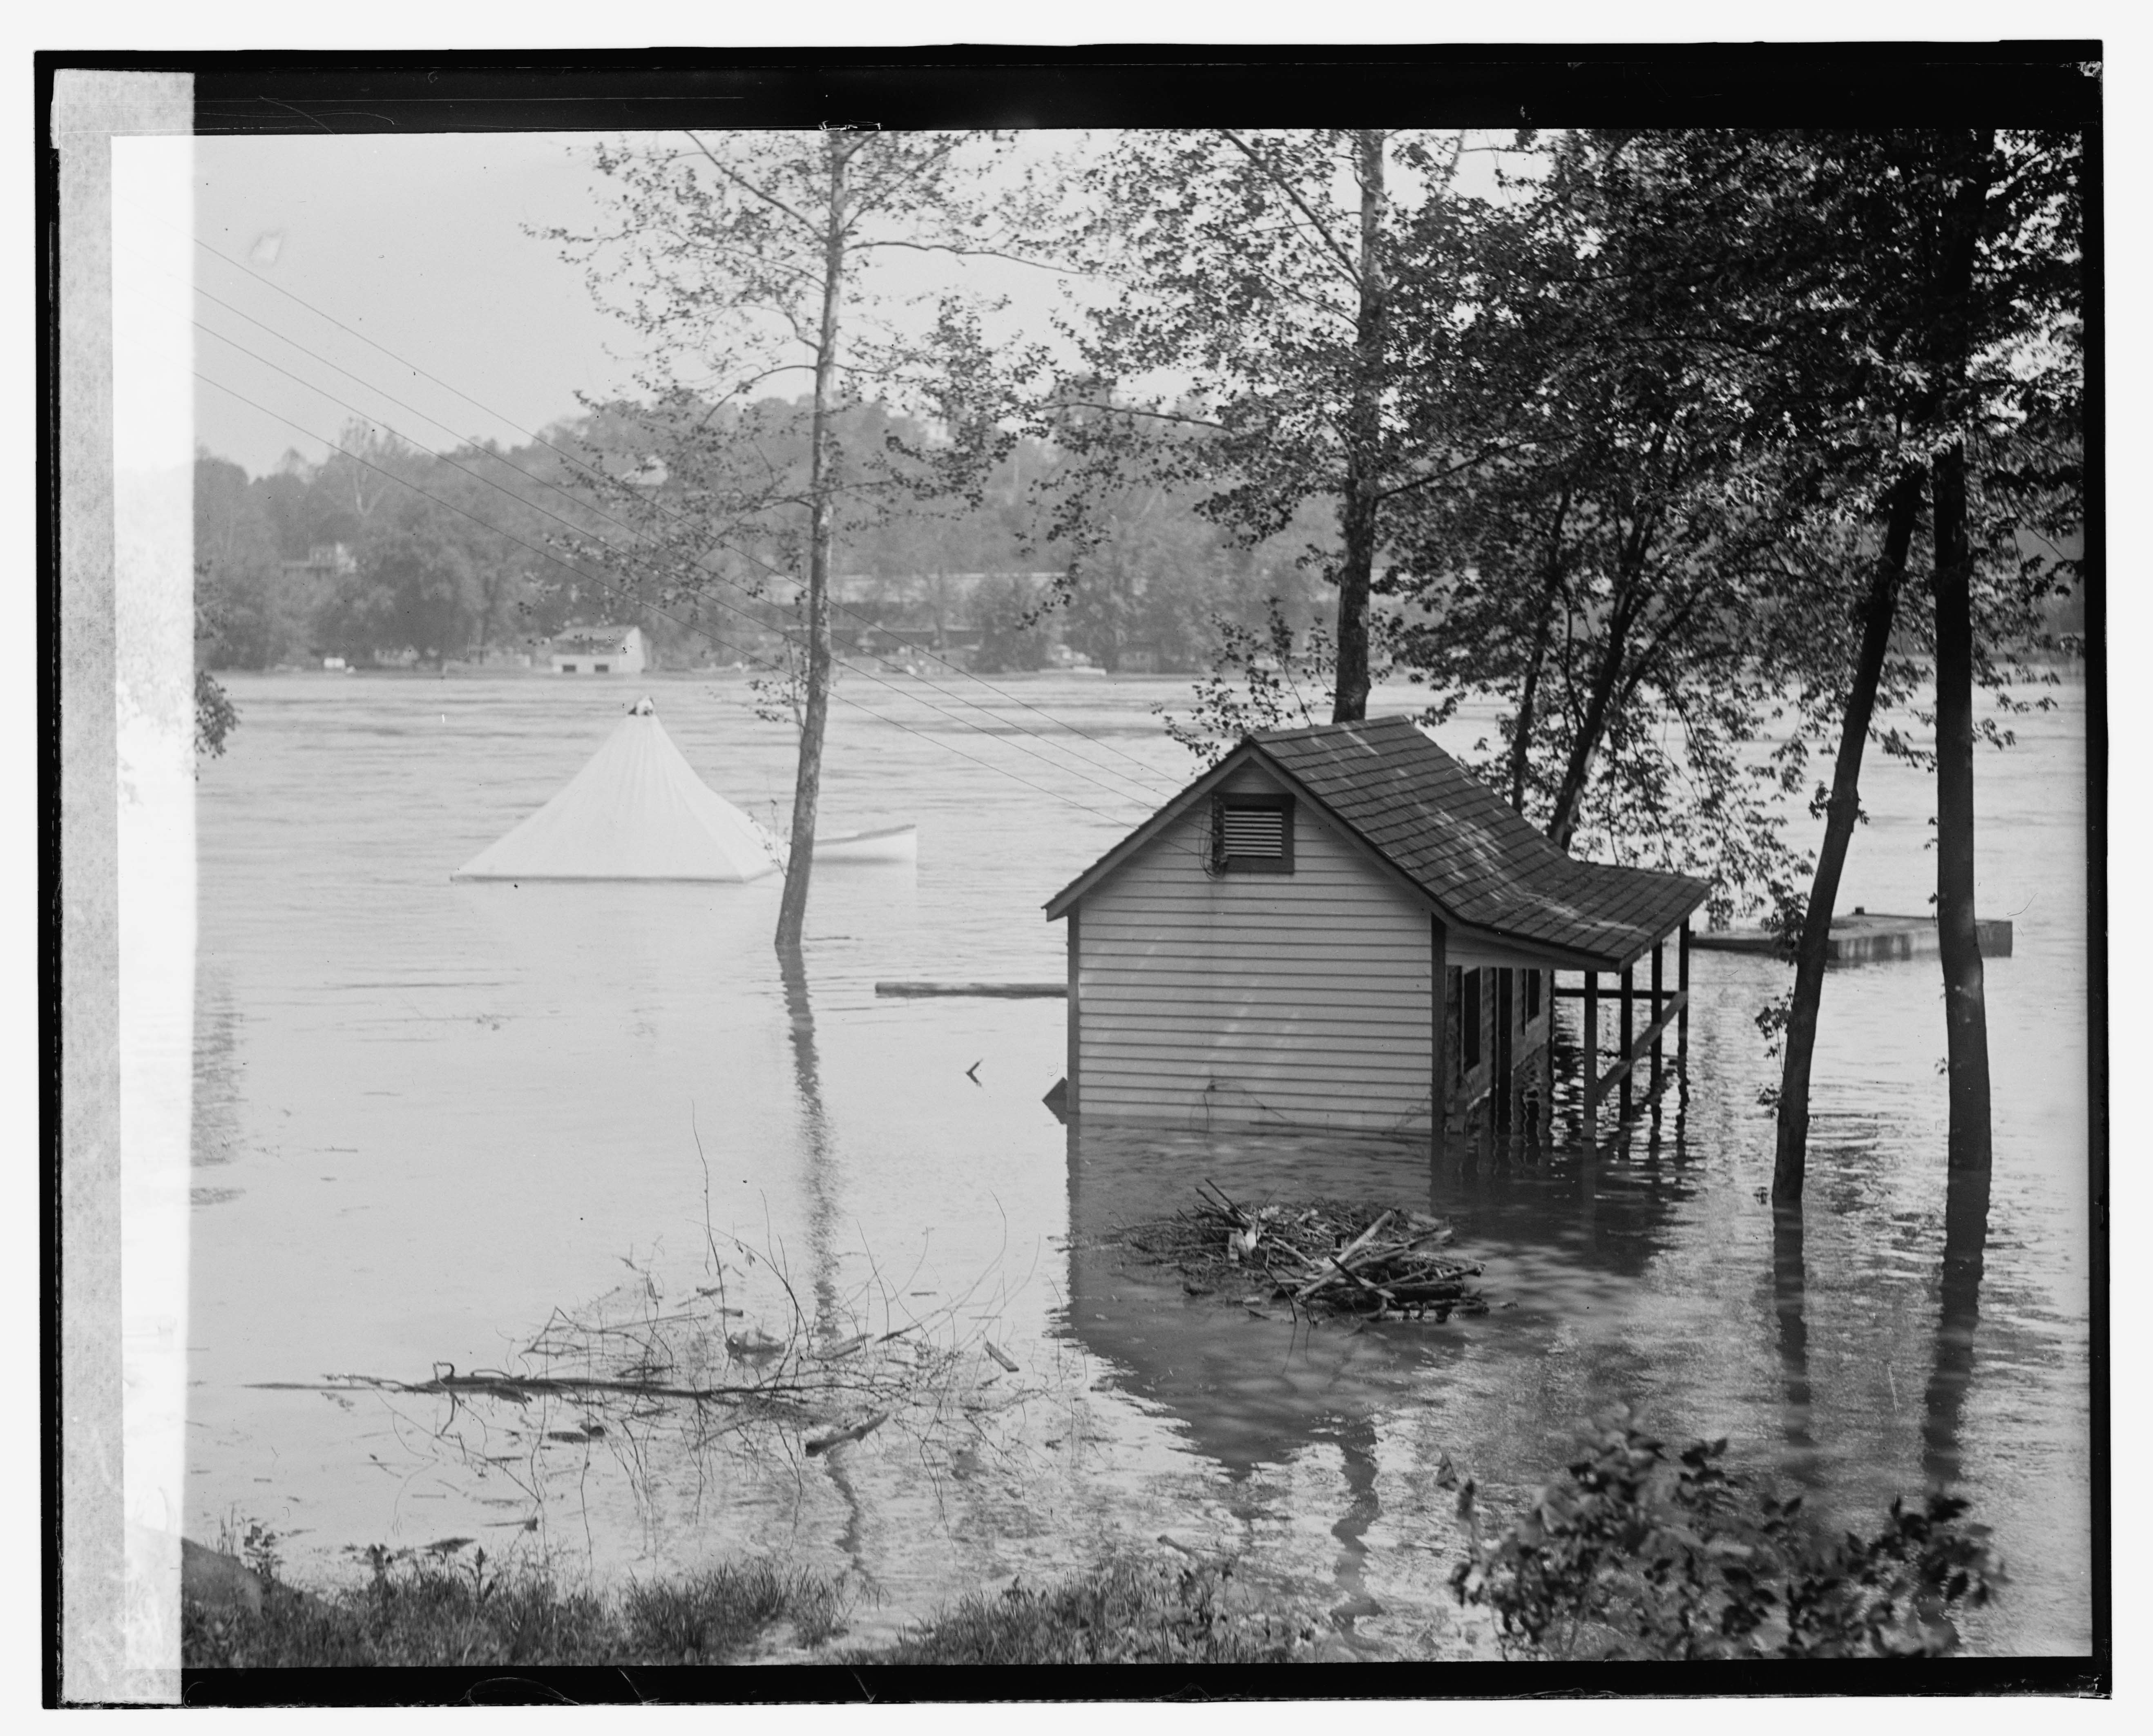
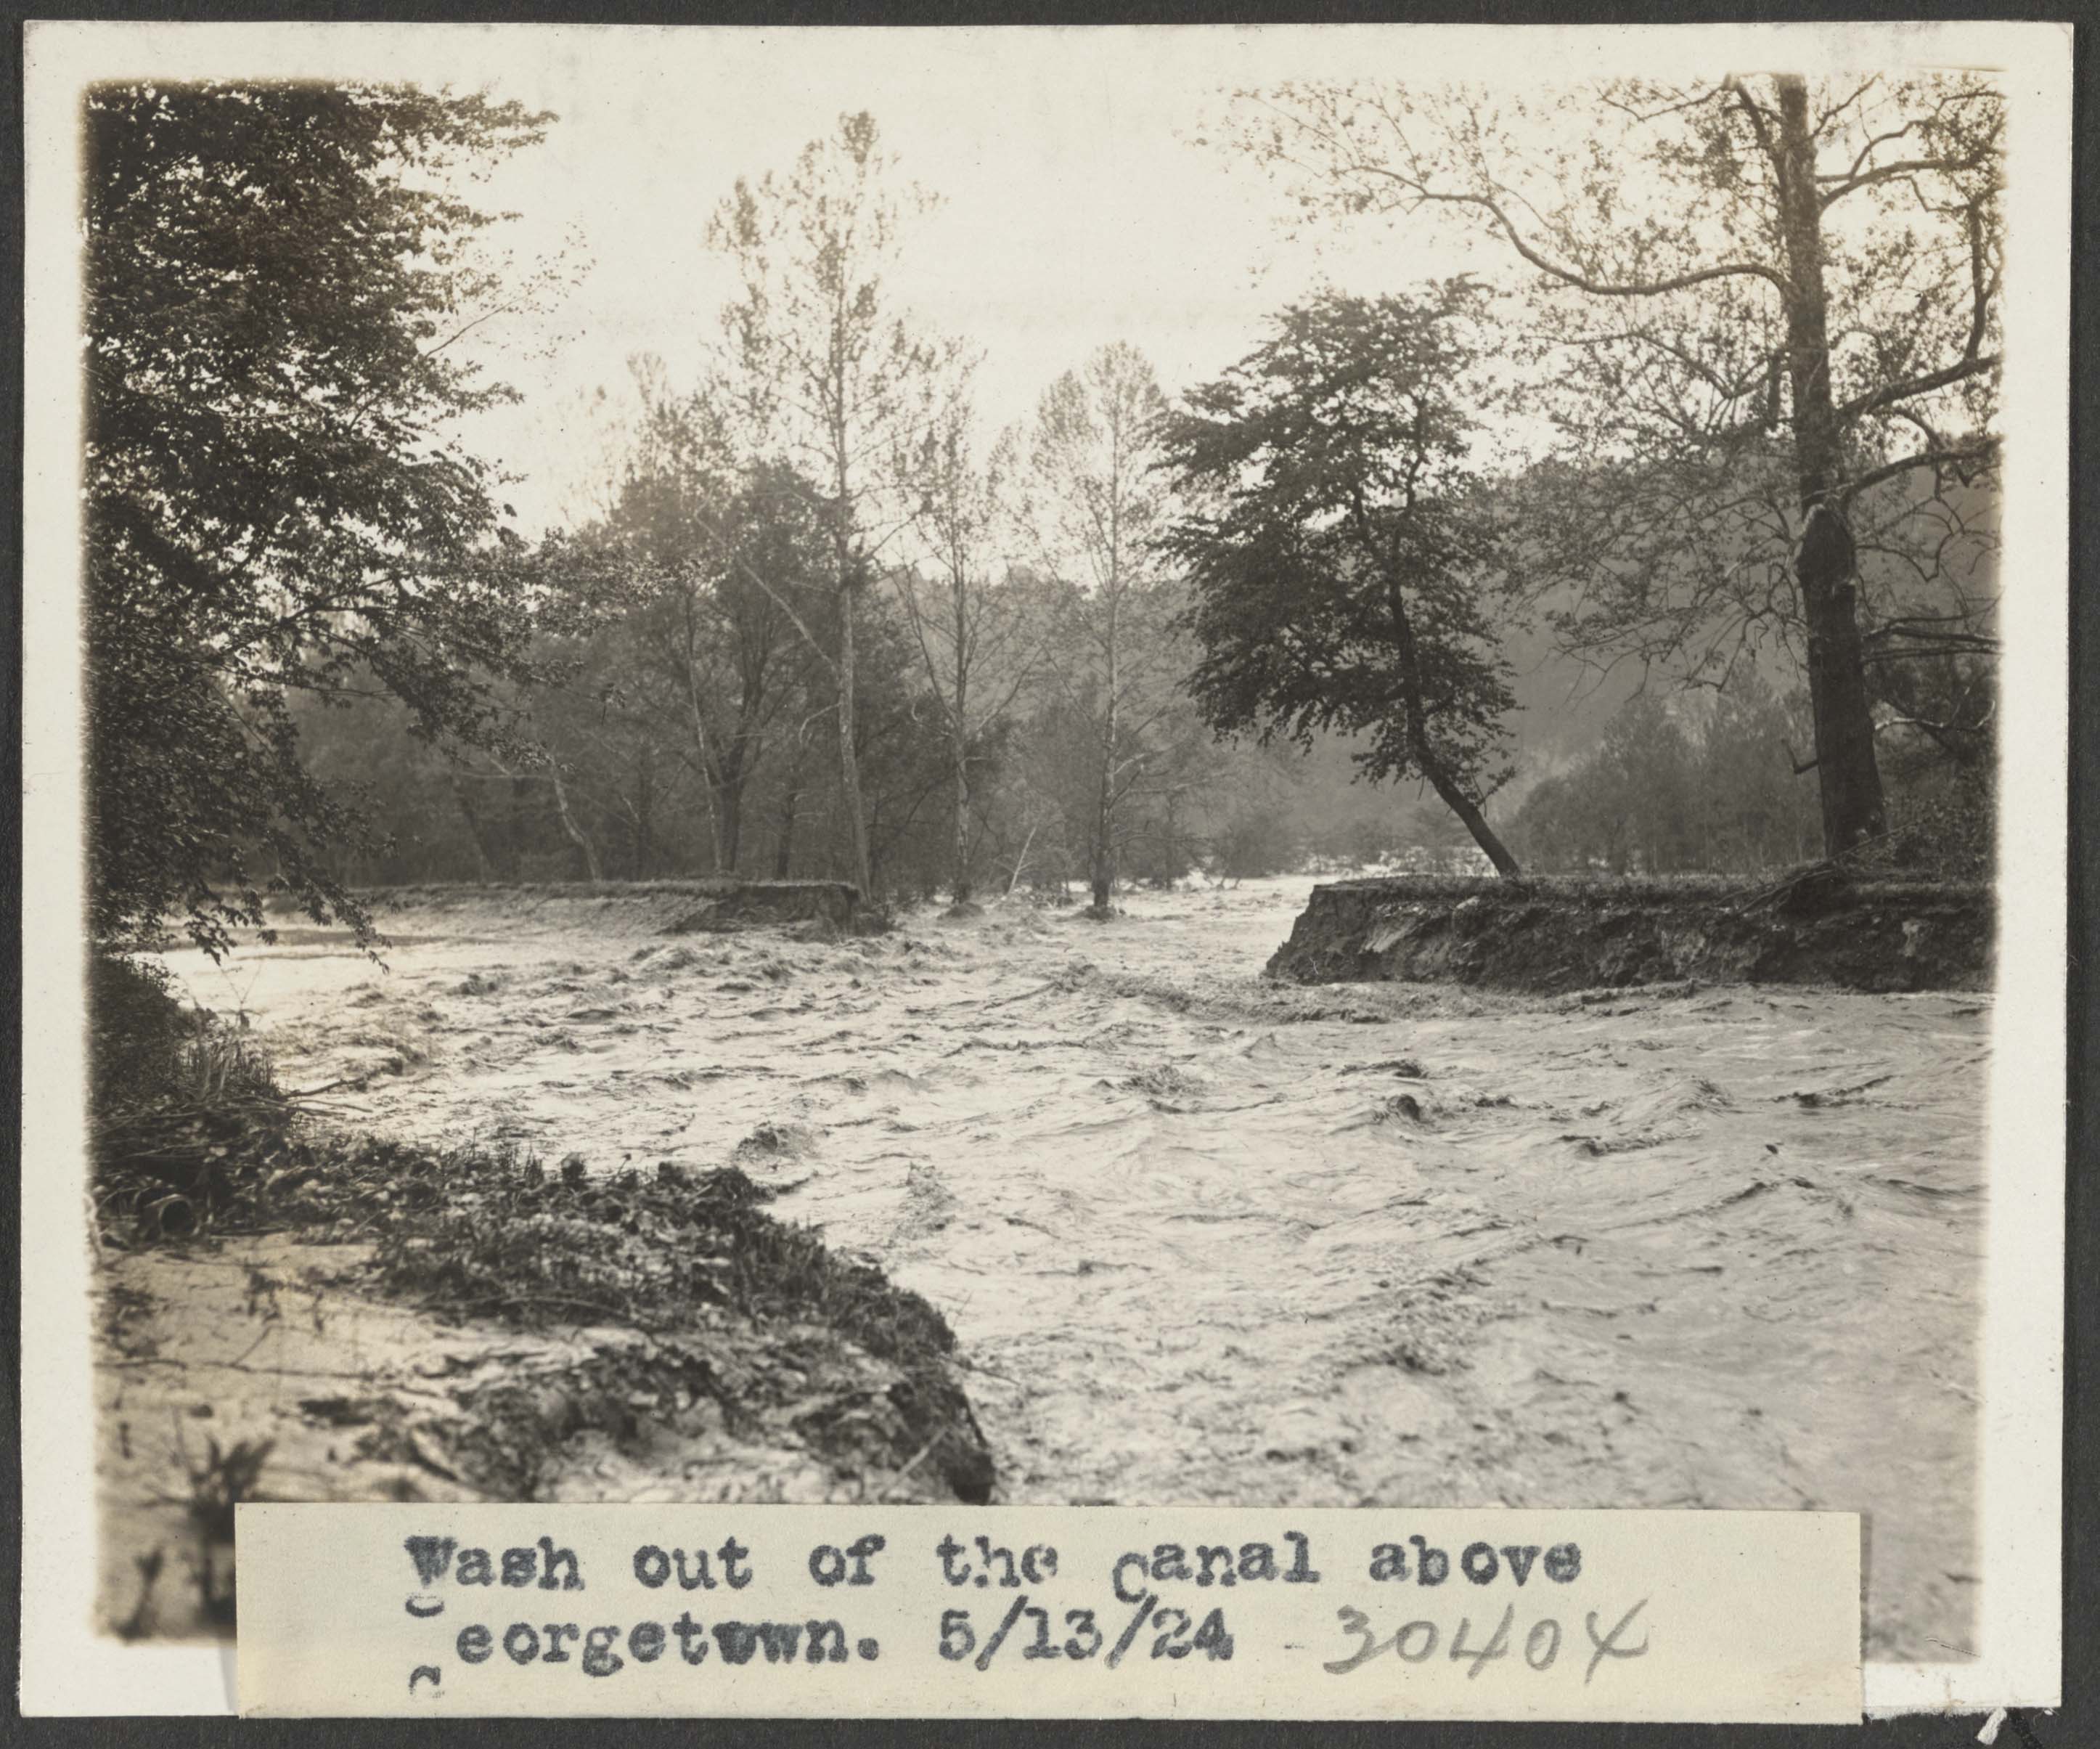
May 13, 1924. View of the shack seen above, looking out at the Potomac. Note the white tent in the distance, you’ll see it in the next photo shot from the Virginia shore. Flood. , 1924. Photograph. https://www.loc.gov/item/2016837486/. May 13, 1924. View from the Virginia shore looking back at Georgetown. The hopper cars seen above are visible just left of center. Flood. , 1924. Photograph. https://www.loc.gov/item/2016837494/. May 13, 1924, Wash out of the Canal above Georgetown. The tracks of the B&O Georgetown Branch would likely be on the other side of the Canal towpath (washed out). https://hdl.loc.gov/loc.pnp/ppmsca.86005
The B&O RR had gained a controlling stake in the C&O Canal, in 1890 it was put into receivership. The B&O wanted to prevent other railroads from purchasing the right of way. A history of damaging floods and maintenance headaches meant that the canal was holding on for dear life but thanks to many unusual years of relatively minor flood issues, the canal soldiered on. The B&O had to maintain it just enough to keep it in service, which they did. That is until 1924.
The first flood of 1924 came in March but it was largely focused on Northern sections of the Canal. Repairs were not too overwhelming and were undertaken by contractors for the B&O. The flood that occurred two months later in May was another story, and proved to be too much for the Canal to survive in the long run. By August of that year, the Canal had largely been shut down save for some sections kept open for various contract obligations.
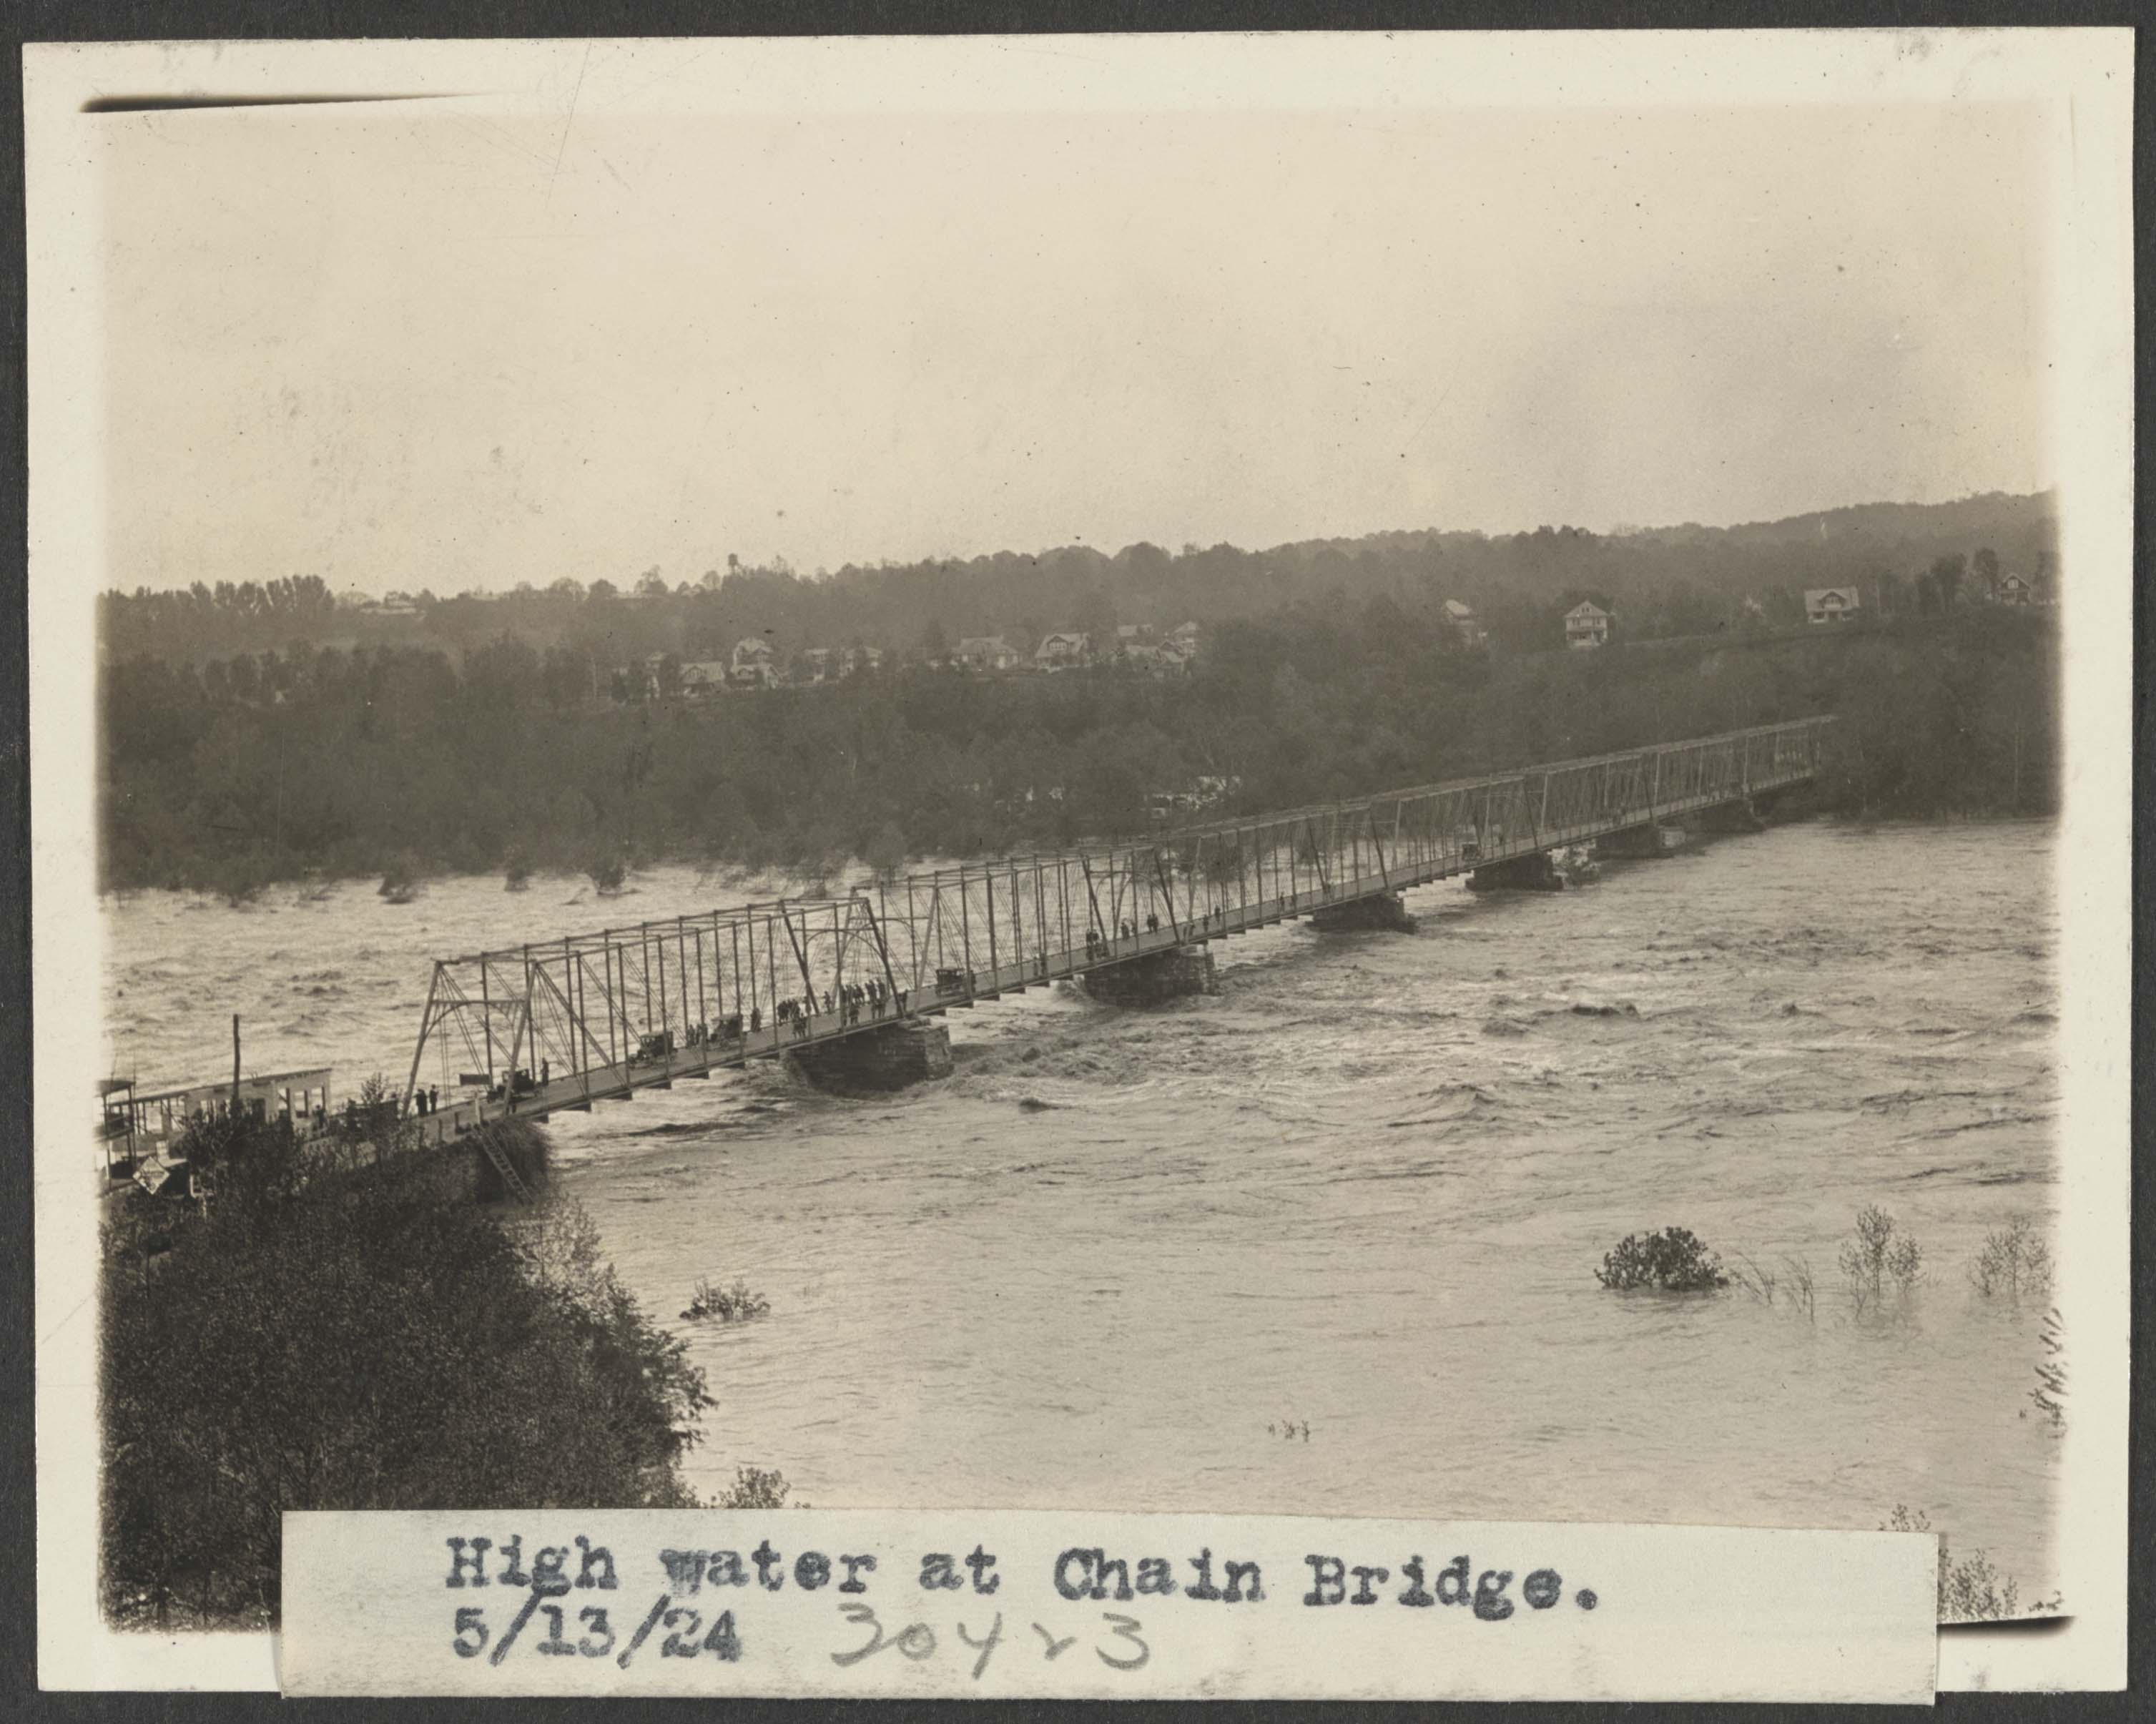
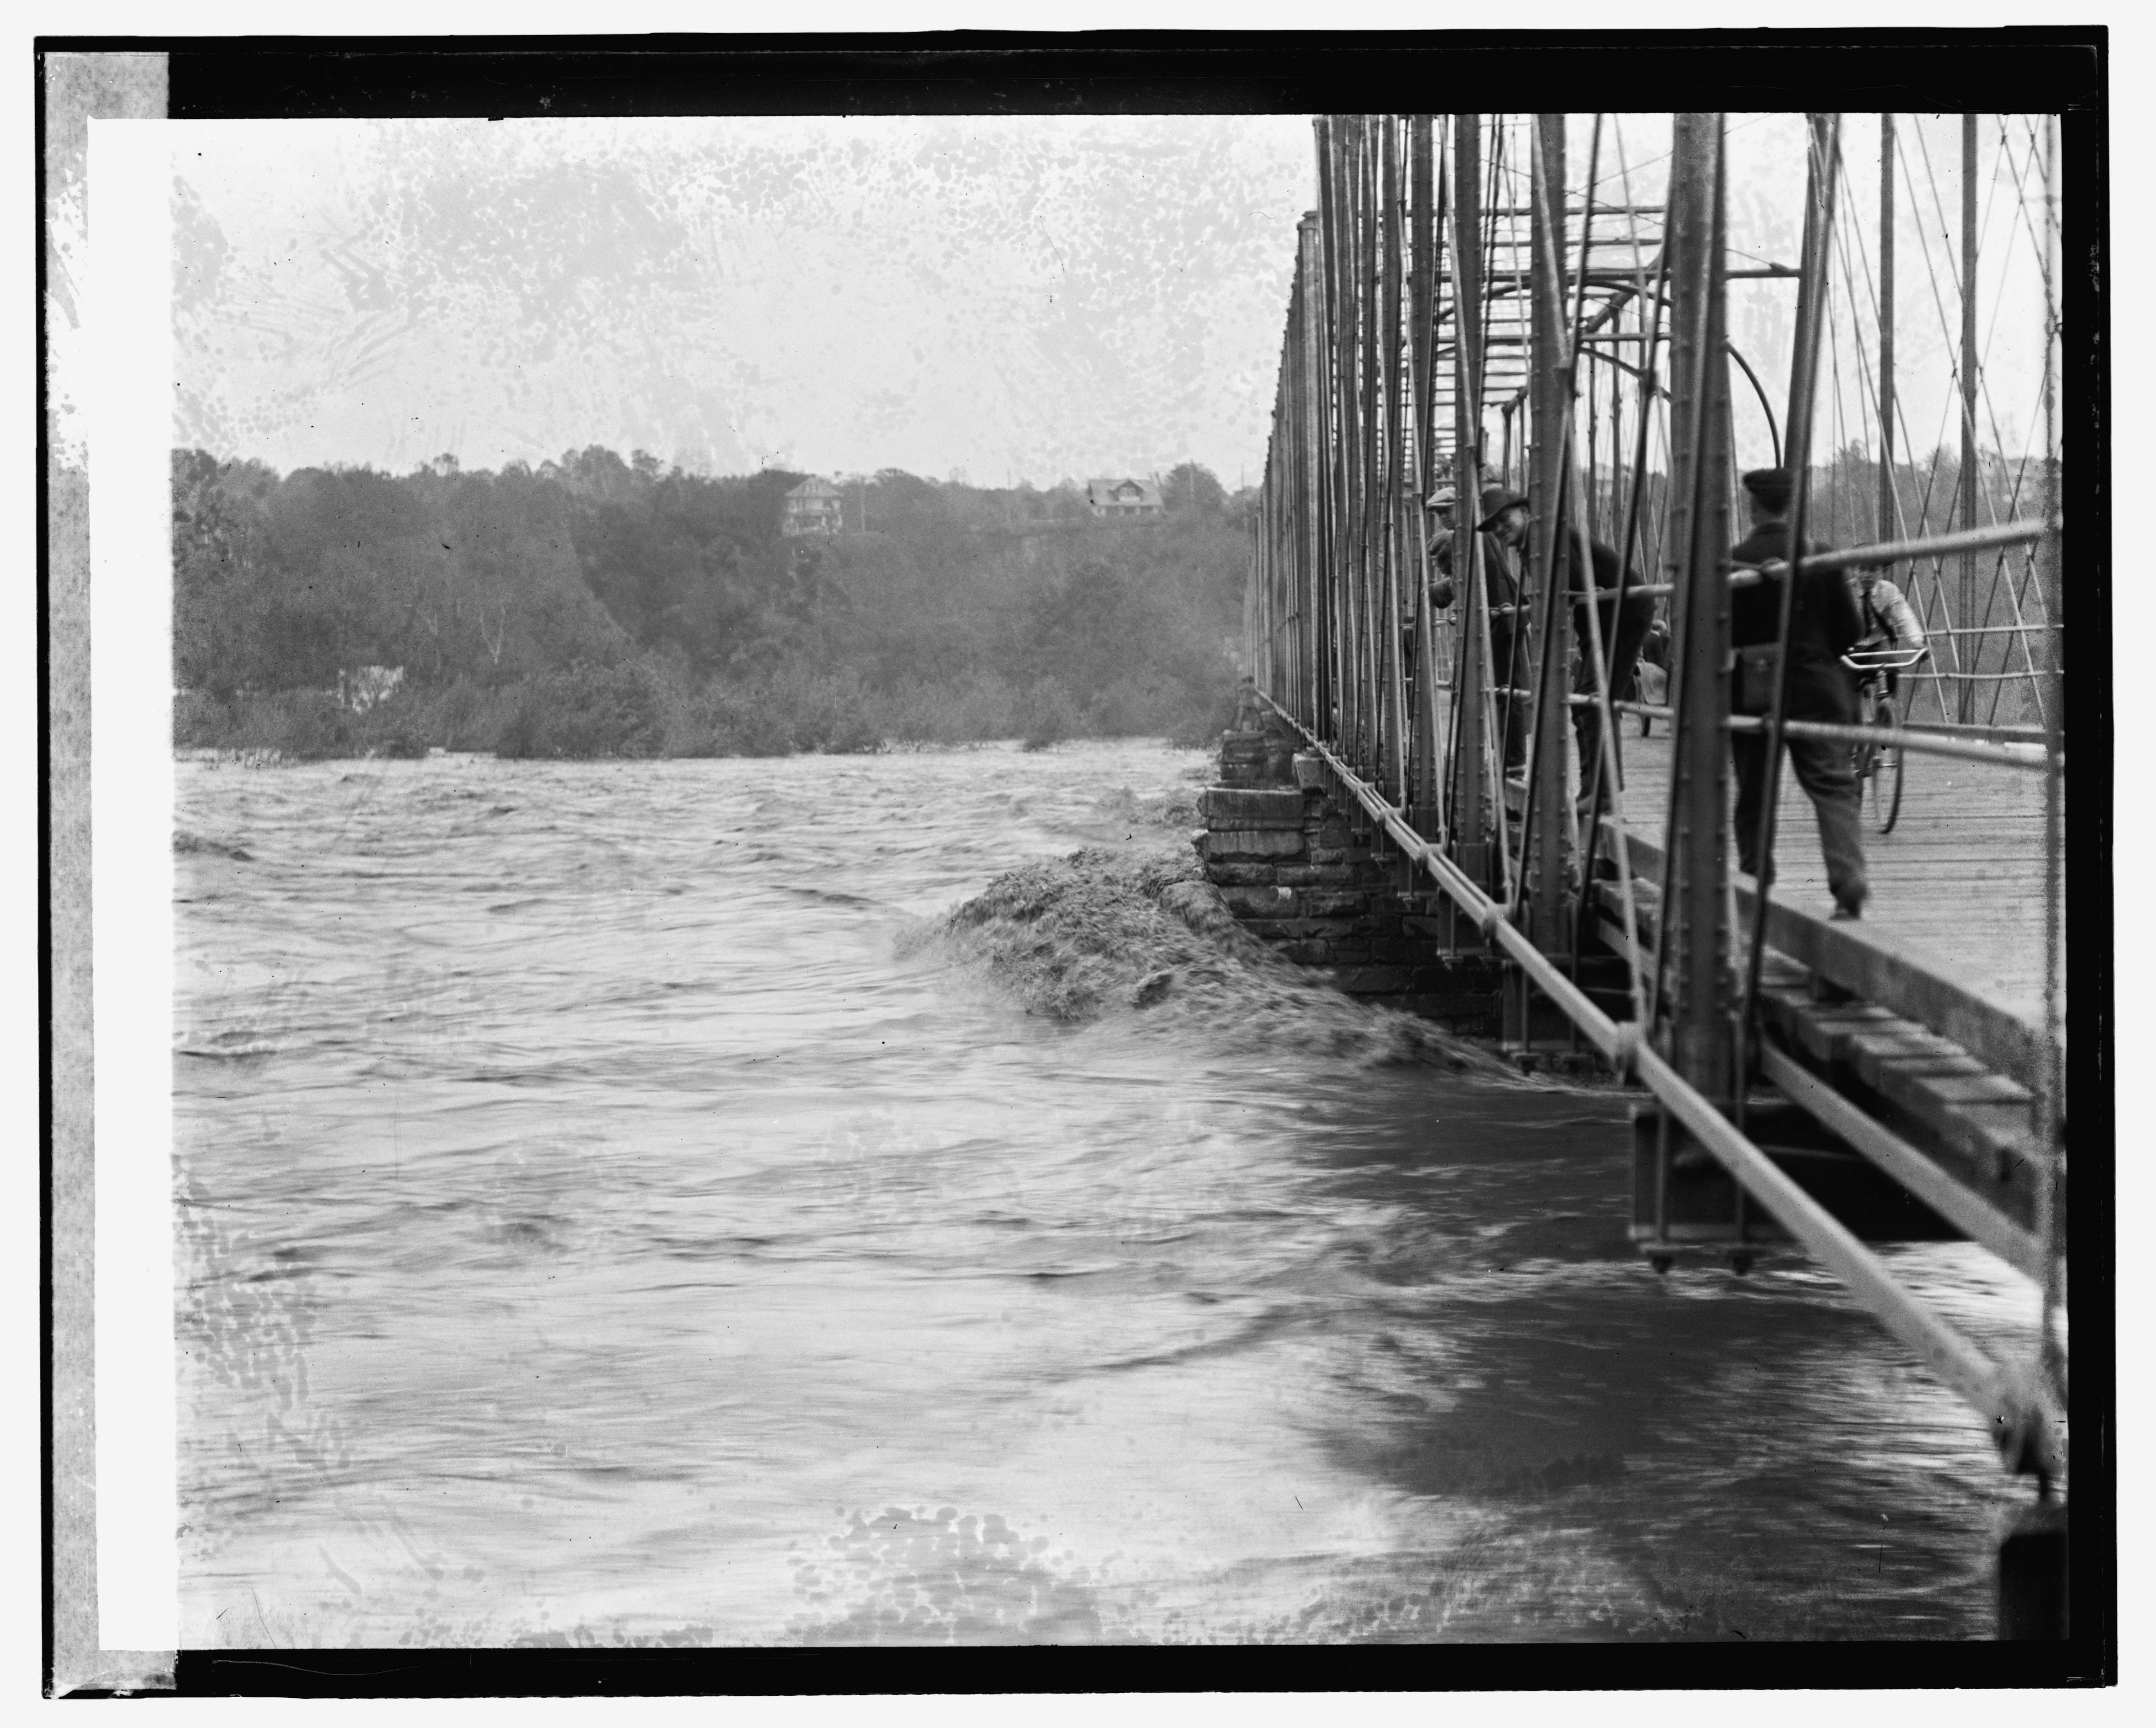
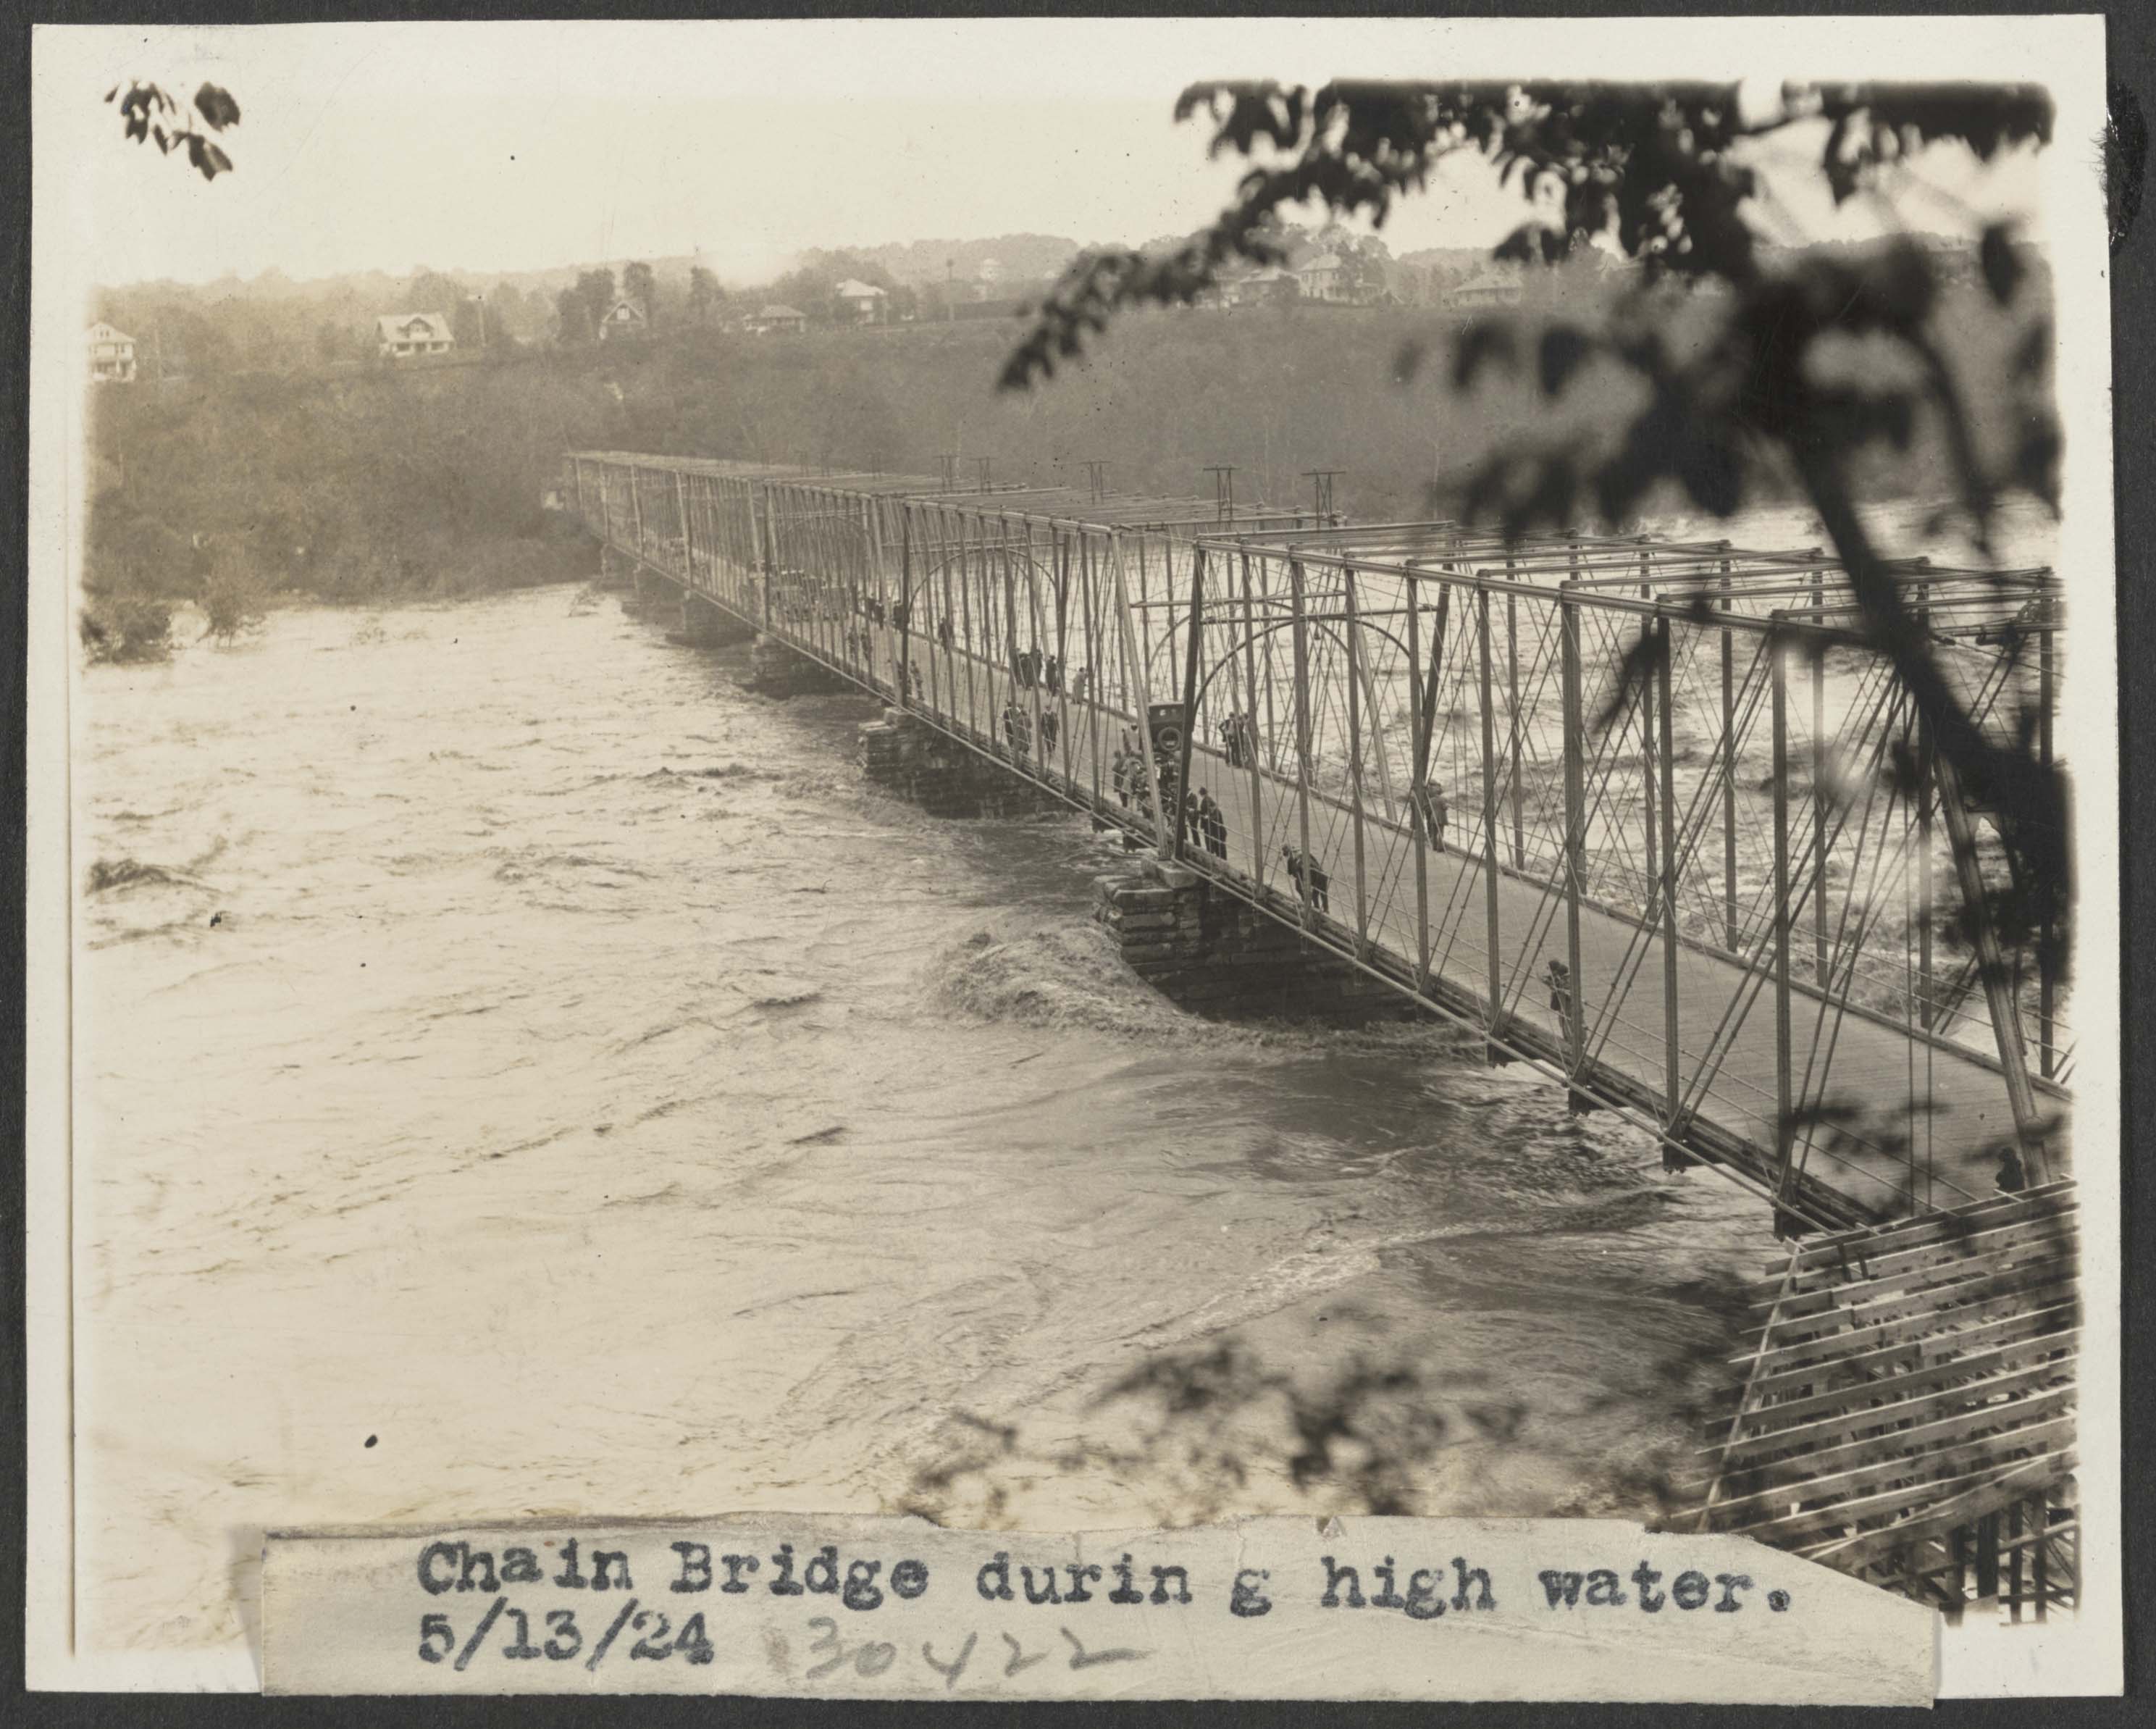
May 13, 1924, Chain Bridge during high water. View from Virginia shore. Georgetown Branch right of way in the distance. Flood. , 1924. Photograph. https://www.loc.gov/item/2016837498/.
There were many historic floods on the Potomac, and many which affected operations on the Georgetown Branch. In fact, in many instances, the flooding dictated the survival of the line – remember famously the engine that was stranded in Georgetown after the devastating flooding from Hurricane Agnes, which toppled the Rock Creek trestle and damaged many waterfront industries. The 1924 flood, in particular, was interesting because afterwards the B&O was finally able to neglect the waterway, performing only minor maintenance on it until selling to the National Park Service in the late 1930s.
