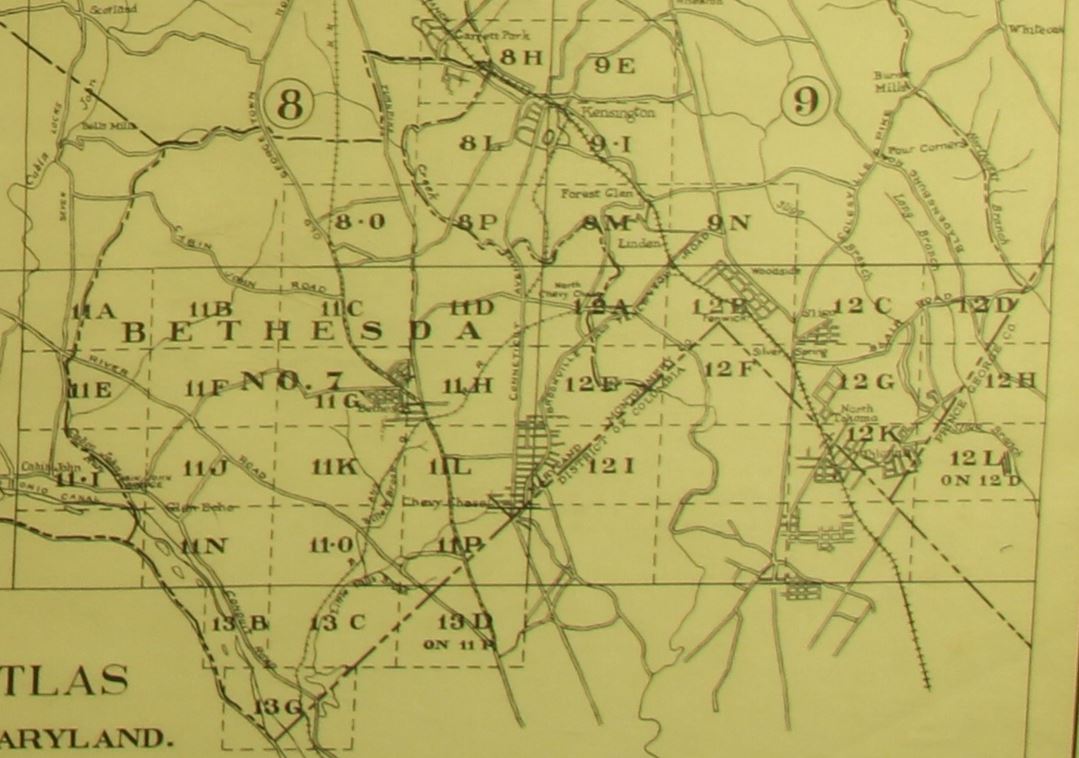
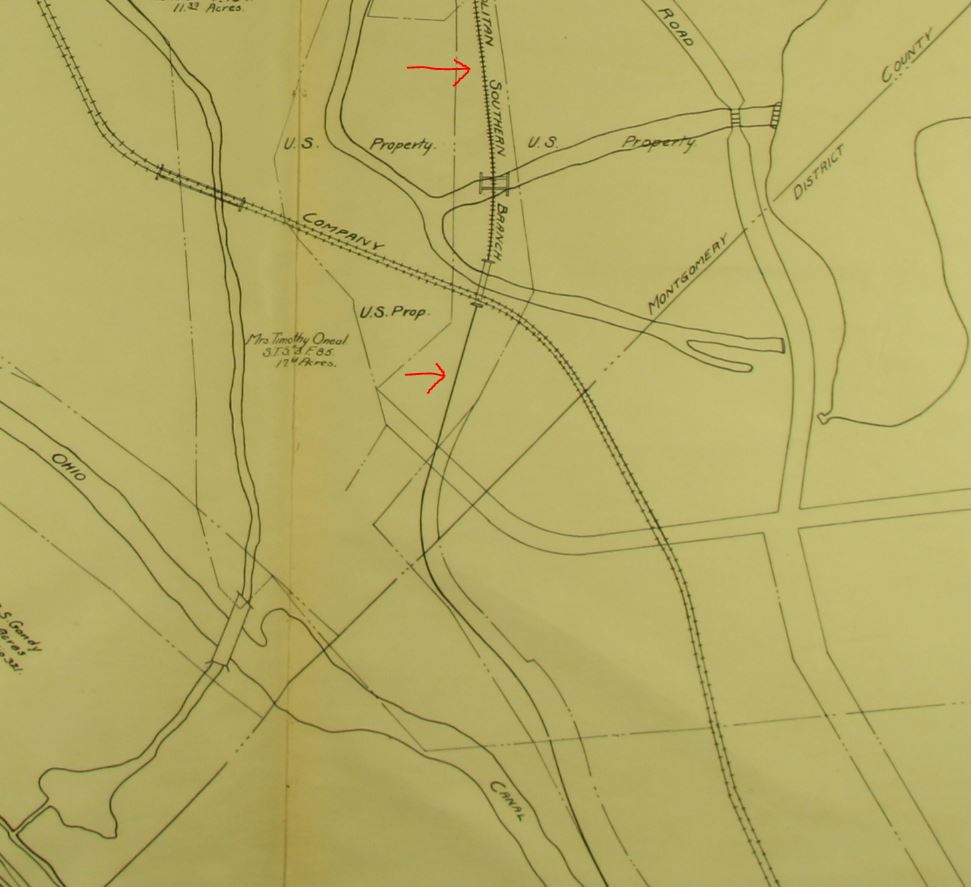
Thanks to J. Shriver for the tip on this! A link to the “Real Estate Atlas of the Part of Montgomery County Adjacent to the District of Columbia” by Deets and Maddox at Johns Hopkins. (unfortunately the images are in JPEG2000 format and will require either a Mac (Safari or Preview) or a program like Photoshop to open.) I don’t have a whole lot of background on this atlas, but it is really neat. Apparently it covers the land in Montgomery county in several volumes, this one focusing on the area just North of DC and includes the entirety of the Georgetown Branch in Montgomery County, MD. Here is an overview of the plates:
The GB begins at the Junction on plate 12B and continues through 12A, 11D, 11H, 11L, 11K, 11O, 13C and 13G. Early history sources for the GB are rare so this atlas is particularly special. The Branch had only been completed about seven years prior and was very much in its infancy with the extension to Georgetown. Many of the towns along the route had not yet bloomed and as such there is not a lot to see as far as trackage. What you do see are some of the extinct transit lines that crossed the GB at various spots like Connecticut Ave., Wisconsin Ave., Bradley Blvd., and Dalecarlia. Here are a few highlights:
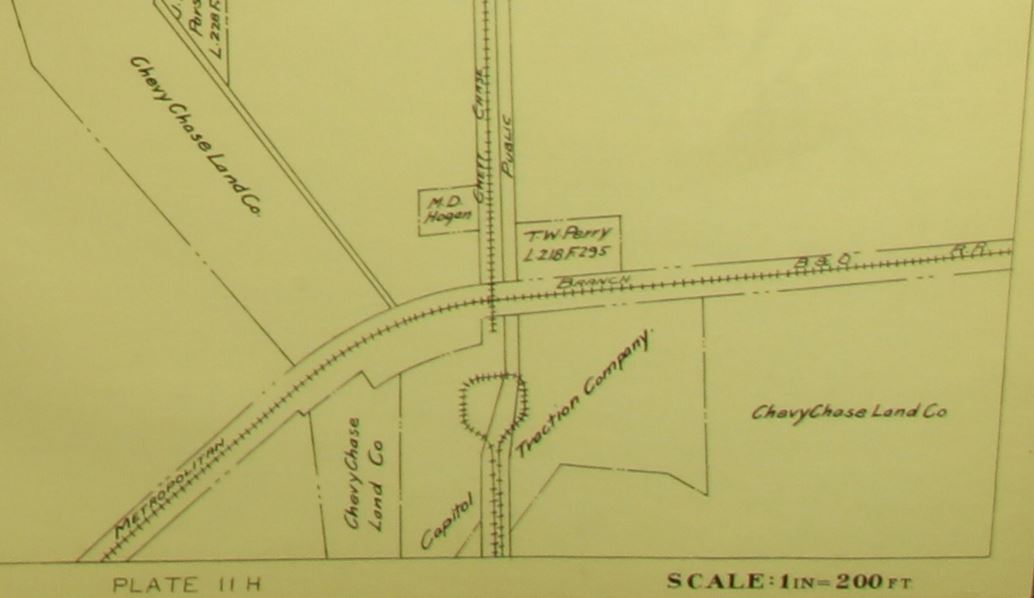
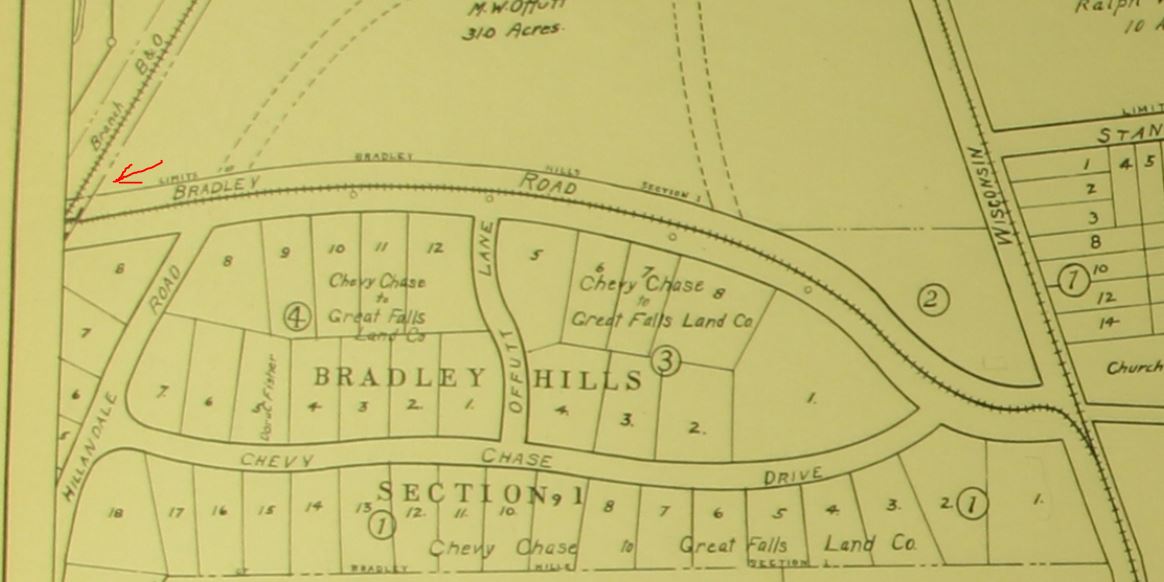
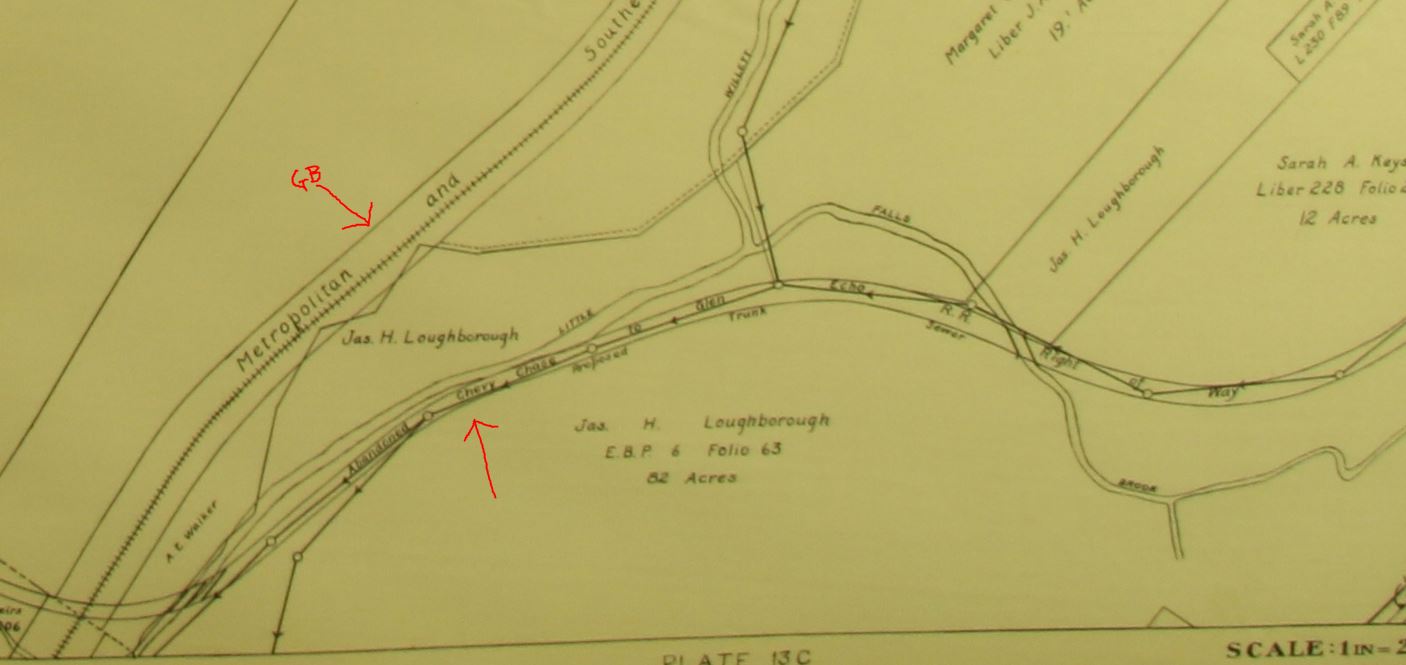
An example: Here we see Chevy Chase, MD with Connecticut Ave. running north-south. The GB runs east-west. The Chevy Chase & Kensington Electric Ry. begins just south of the GB and runs up toward Kensington. The Capitol Traction Co. had a car barn and loop here. This line never crossed the GB. Here we see the Washington and Great Falls Railway and Power Company (1913-1921) line which crossed below the GB at Bradley Blvd. The narrow underpass was quite small, being only one lane wide. In 1959 the bridge was removed and the crossing widened to what you see today. Another view, on the West side of the tracks. Note the GB is still labeled “Metropolitan Southern Branch B&O” because that is what it was named prior to it being considered the Georgetown Branch. A bit further south, just past River Rd, the line passes near the abandoned right of way for the Glen Echo Railroad (this section, ca 1891-1902) which pre-existed the GB by some time. I don’t believe the rails ever crossed each other. This area would be the current day Mass. Ave. & Little Falls Pkwy.Finally, the line continues to the Dalecarlia Reservoir area. Here we see the Capitol Traction Co. double track Cabin John line passing beneath the GB on an east-west trajectory. Of interest, note that the GB track is marked with hash marks to the North of the crossing and has no hash marks to the South. It may indicate that the line was not updated and shown as a surveyed line, or it may have just been an oversight by the cartographers. Interesting.
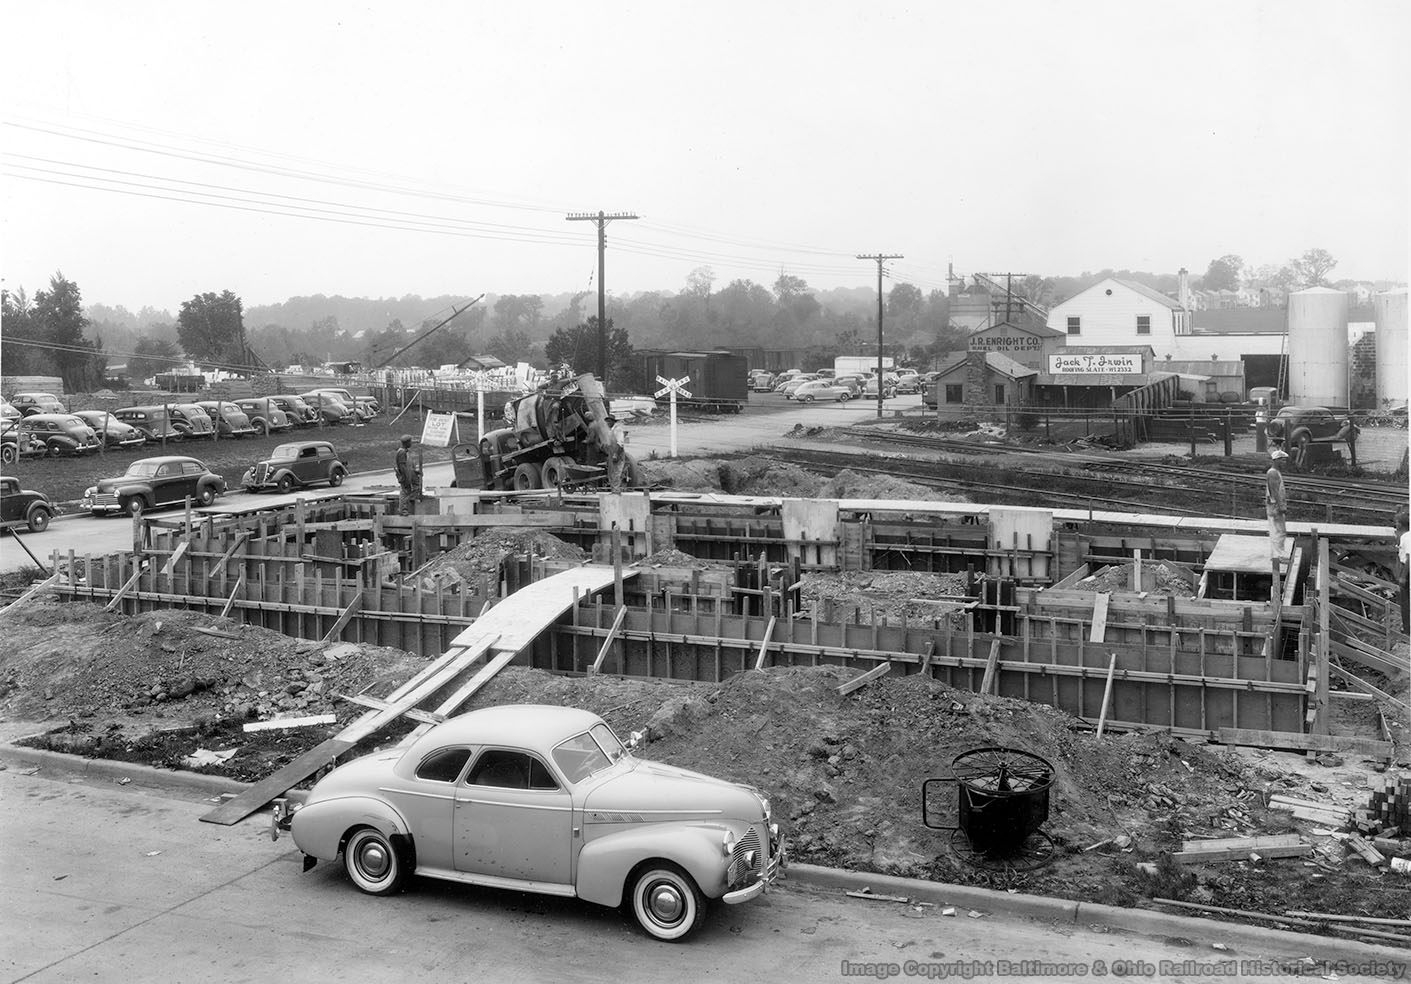
Well folks, this one’s a doozy. A friend, Brian R., who regularly volunteers at the B&ORRHS just sent me one heck of an image. You may recall a few months back he sent me a couple images of the Bethesda Freight House under construction. Well, here is one more that was shot weeks prior to the other one and shows a WHOLE LOT of the surrounding area. I get pretty excited when I get really nice photos of Georgetown Branch subjects, but this one is really very special and so chock-full of details, it’s hard to know where to begin. Let’s dig in. First, here is the full image:
Freight House Construction, Bethesda, MD, May, 1941. Photo courtesy B&ORR Historical Society. Depicts early construction of the freight house with footings being poured. Of note are surrounding yard and town area.
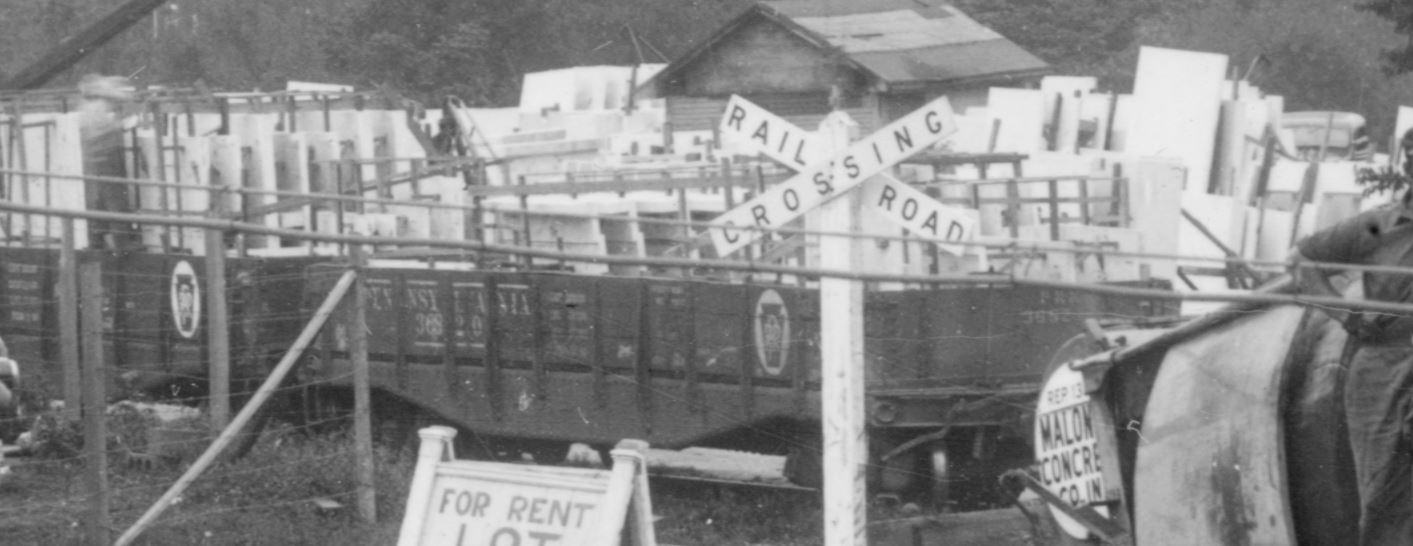
So there’s a lot in the image and what is funny to me is the construction of the freight house is not the primary interest. I picked out several things of interest. Let’s take a tour around the photo. First up is the yard area, largely visible behind the Maloney Concrete cement mixer. The yard is choc-a-block full of what appears to be marble or limestone. I have references to stone being delivered to Chevy Chase for the Washington National Cathedral and of course the extension of the line in Georgetown to serve construction of the Lincoln Memorial, but I have never heard of any stone deposited in Bethesda on a scale such as this! Have a closer look:
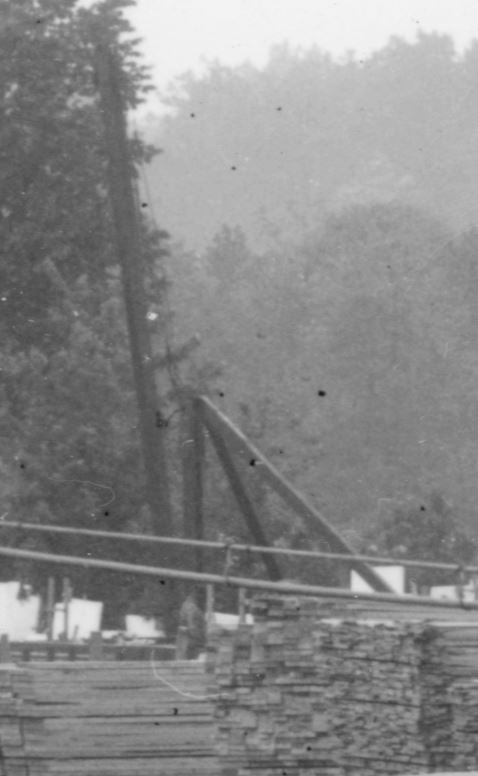
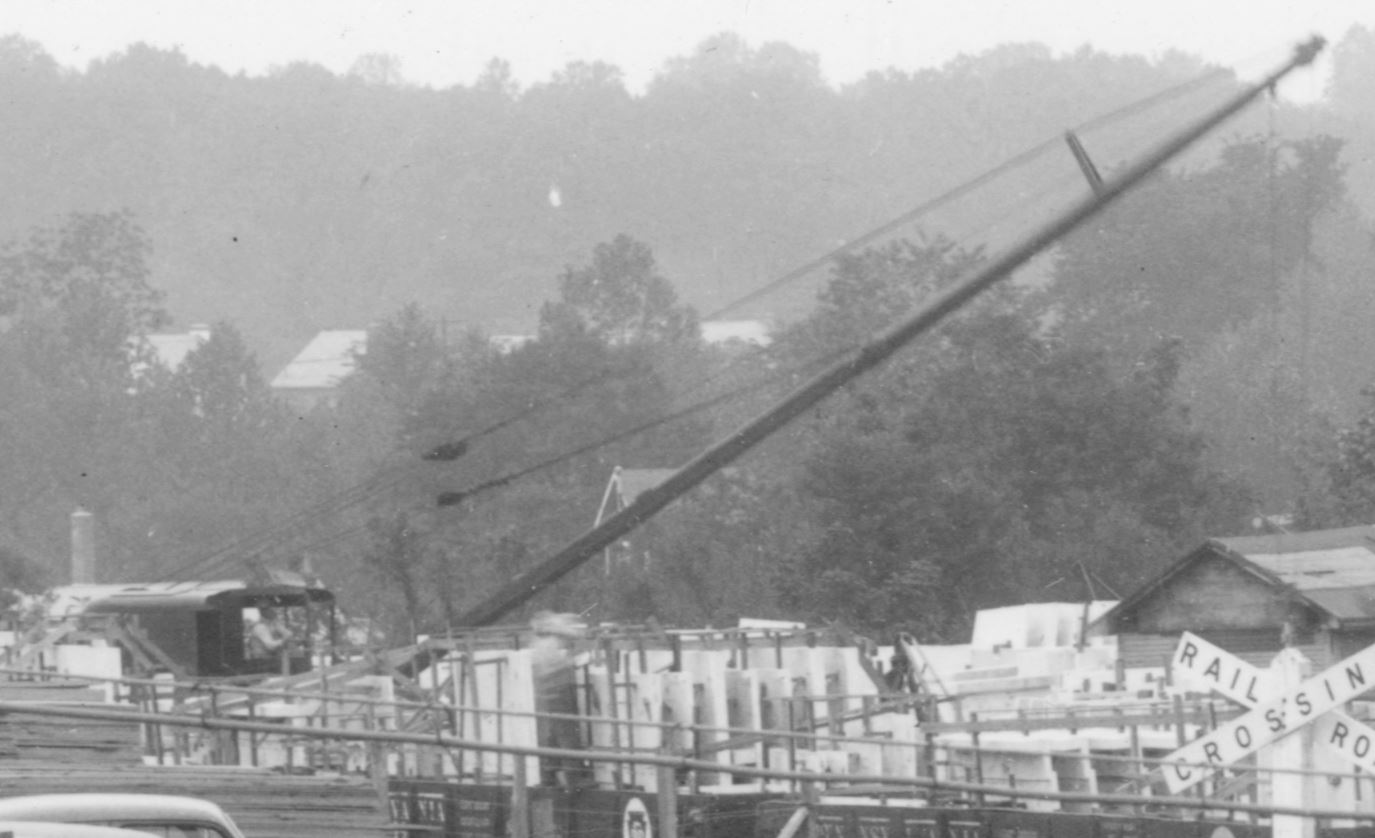
As far as the eye can see, stacks and racks and car loads of stone. Impressive! There are even two unloading devices; one, a stiff leg derrick visible to the left and a crane of some sort, likely an early Burro Type 15 or 20, similar to this one seen here.
Stiff leg derrick.Small crane. Note, the “smoke stack” seen to the left is actually from a building in the distance, not the crane. Note that the crane is facing almost perpendicular to the photographer. Also note the position of the operator in the open cab, with what appears to be the drum and hoist mechanism opening to his right. The crane is quite short in length, which steers me to think it’s an early Burro Type 15 or 20. Another image of the Type 20 patent design.
Getting a bit closer to the nearest gondola, I can see that it’s a PRR gon, and the number looks to me like 368270. A quick search in the 1943 ORER shows that this falls into the PRR GB class GRA, constructed around 1916 and modified from the GR class by adding 3′ to the overall length. These cars were somewhat plentiful in 1943 with 590 listed in the ORER. (By 1953 this number had dropped to only 31!) Thankfully, Westerfield offers a resin kit of this car, for anyone interested in modeling it.
PRR GB GRA class gondola, number 368270.
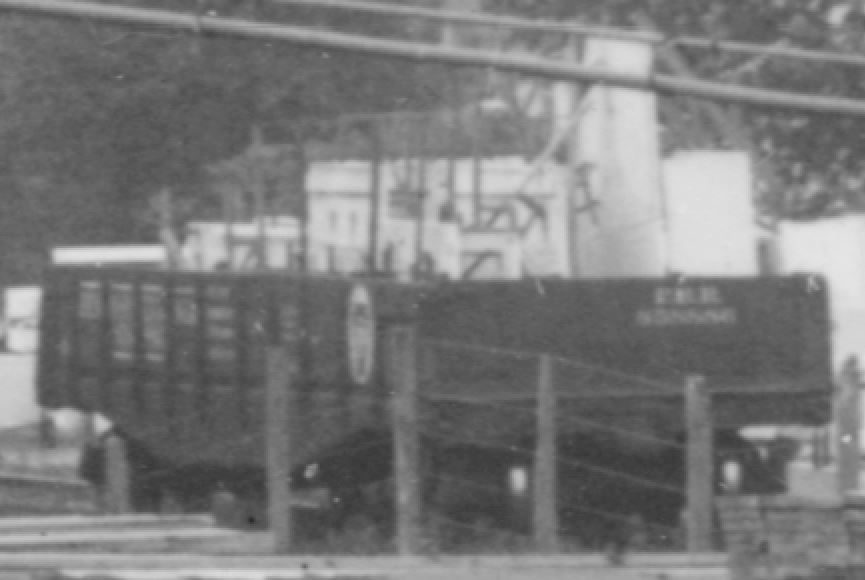
There are other GRA class gons in the yard, identifiable by the slightly stretched space between the middle braces.
Another PRR GRA gondola.
Let’s look at the other freight cars visible in the photo:
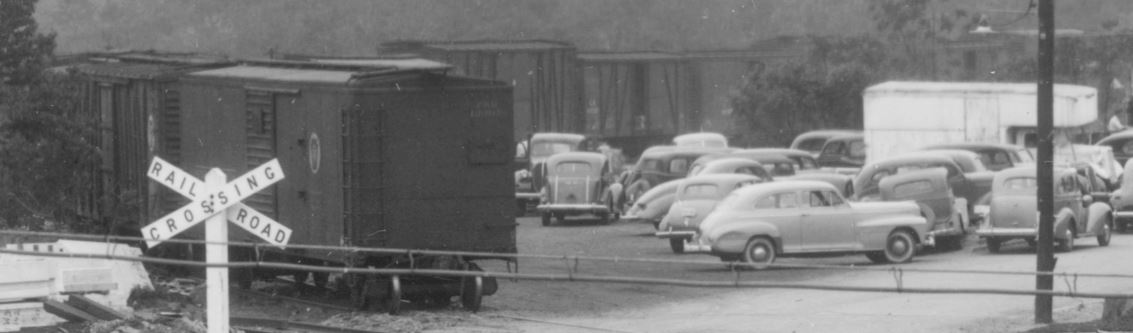
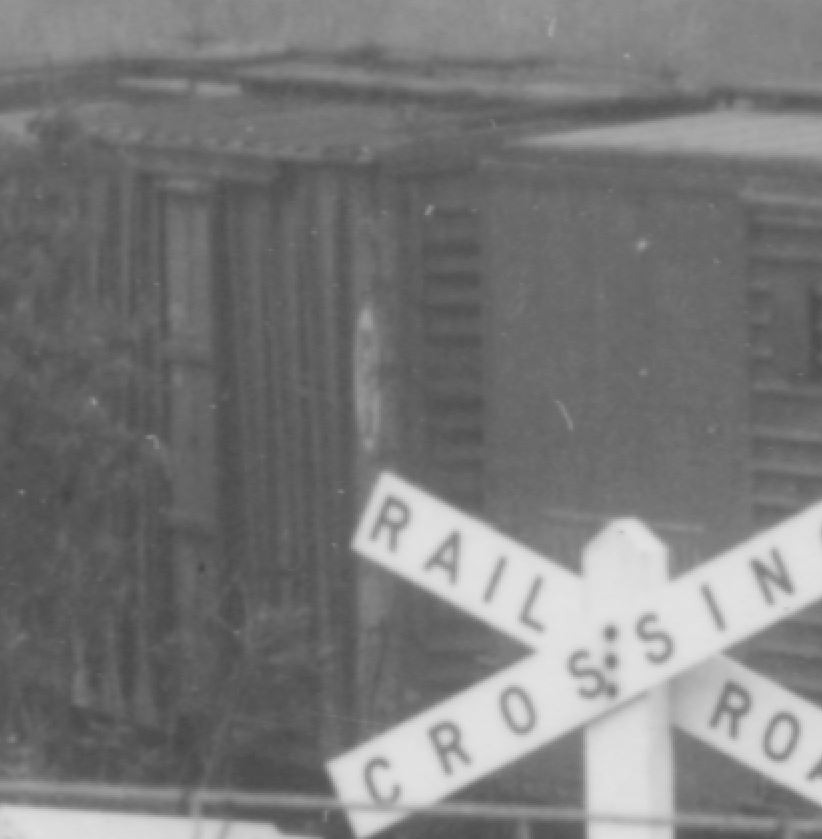
A long string of freight cars, all apparently boxcars, stretching on the siding toward Maloney Concrete.
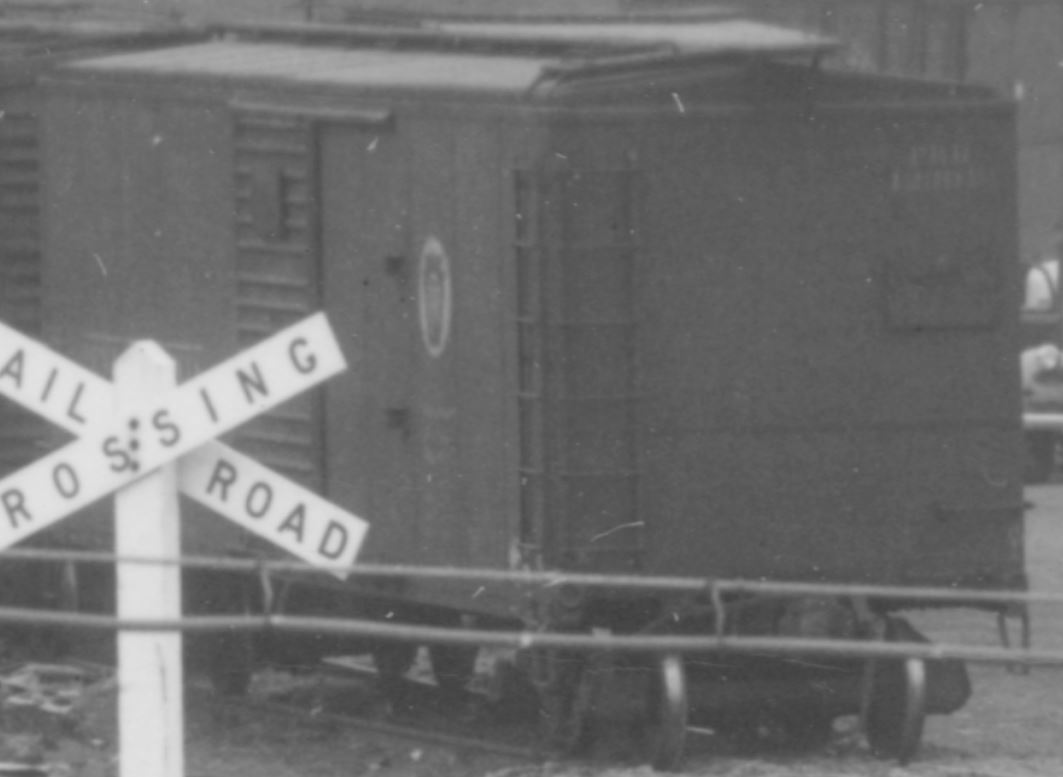
The first one is obviously a PRR car and appears to me after some careful study to be numbered something close to 123951 – my confidence is medium, here. If this is accurate, and based on the overall design I think it is, this would be a class X28a boxcar, rebuilt from door-and-a-half X28 class cars in 1933 and of which there were 4957 listed in the ORER in 1943. (In 1953 there were still 3676 listed.) Some info here. Thankfully, Funaro & Camerlengo offers a resin kit of this car if you’d like to model it in HO. Decals here.
PRR X28a boxcar.
The next car appears to be another PRR car, but there’s much less to go on. My guess based on the panels and bracing is something similar to an X26 class boxcar, as they were plentiful; in 1943 the PRR had over 6000-some listed. Again, Funaro & Camerlengo offers a resin kit of this car as well as Westerfield.
Likely PRR class X26 boxcar.
The rest of the cars are so far away it’s very hard for me to discern. Perhaps some of the steam era freight car gurus can pick them out. 🙂 Next up, check out the lumber in the Einsinger lumber yard:
Einsinger Lumber; partially a parking lot.
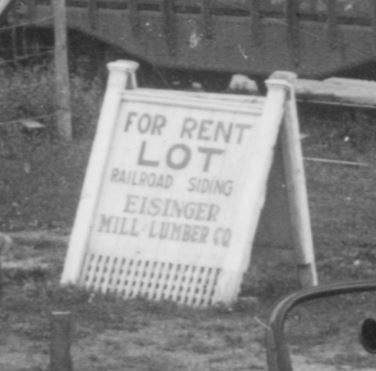
The siding is past those stacks of lumber. It’s interesting; at some point in the next few years, Einsinger would build more structures in this area to expand the lot. The cars occupy a space which would be the site of a long lumber shed. Photos from the late 40s and 50s will show the yard expansion. Oddly enough, in later years, the yard would once again be a parking lot and eventually a residential building. There was a curious sign off to the right, next to those cars:
Eisinger Lumber sign.
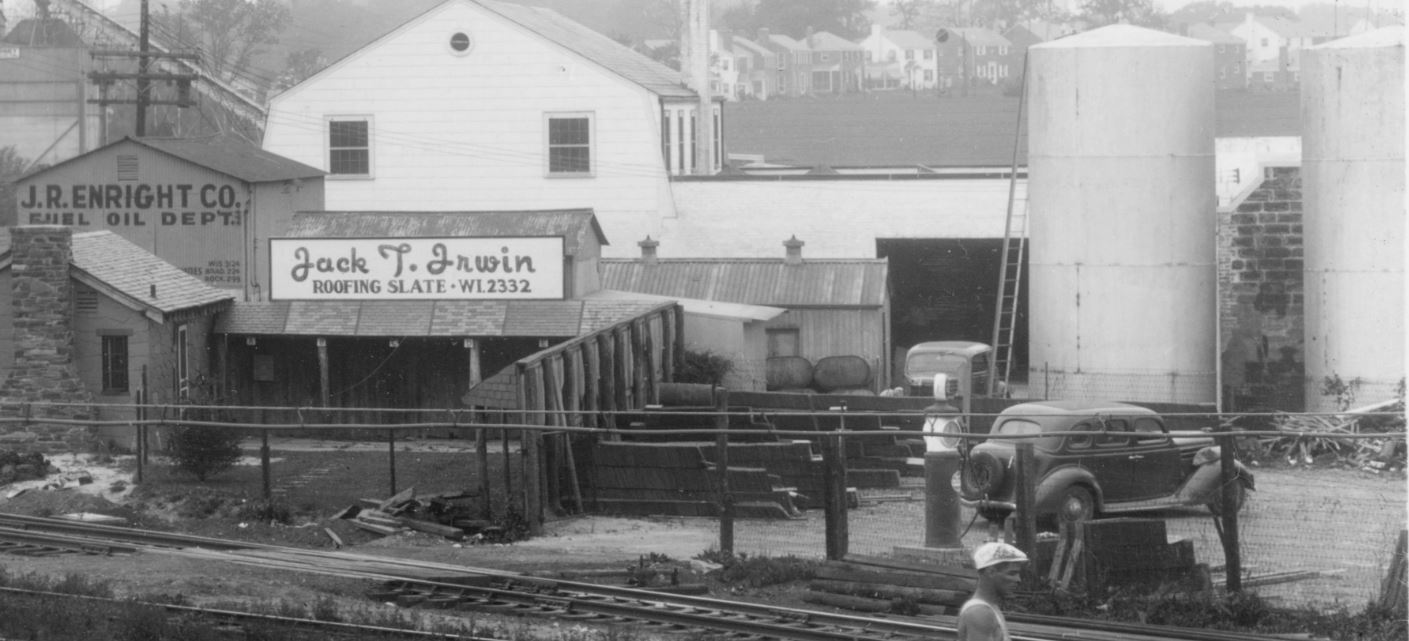
Would love to know the story behind that sign. Heading back over to the right is the Irwin Roofing shop. This is a particularly interesting spot, as it’s a showroom of sorts and there is SO much to see.
Looking closely, I see a well-maintained front lawn with a short walkway up to the small shop and a nice decorative sign hanging out front. The shop itself is adorned with stone all around. Coming out into the back yard, there is a small courtyard with an overhang, the roof of which features various types of slate roofing, each labeled with a letter; A, B, C and so on. A really neat detail! Irwin Stone is still in business today! Behind Irwin Roofing is Enright Oil:
Enright Oil.
Enright is interesting. I would imagine they unloaded from the second siding coming off the main, which would be just to the right of their plant. Unfortunately the photo cuts off there but we get some idea of their storage yard to the right. A couple storage tanks are visible as well as some bins (coal?) and a nifty gas pump which may or may not be in use there in the yard. Perhaps to fuel up their delivery trucks. I plan on modeling part of this on my layout. Obituary for J.R. Enright Jr. Also of interest here is the access to the yard with the small crossing over the yard tracks. In the distance is Maloney Concrete:
Maloney Concrete, barely visible in the distance.
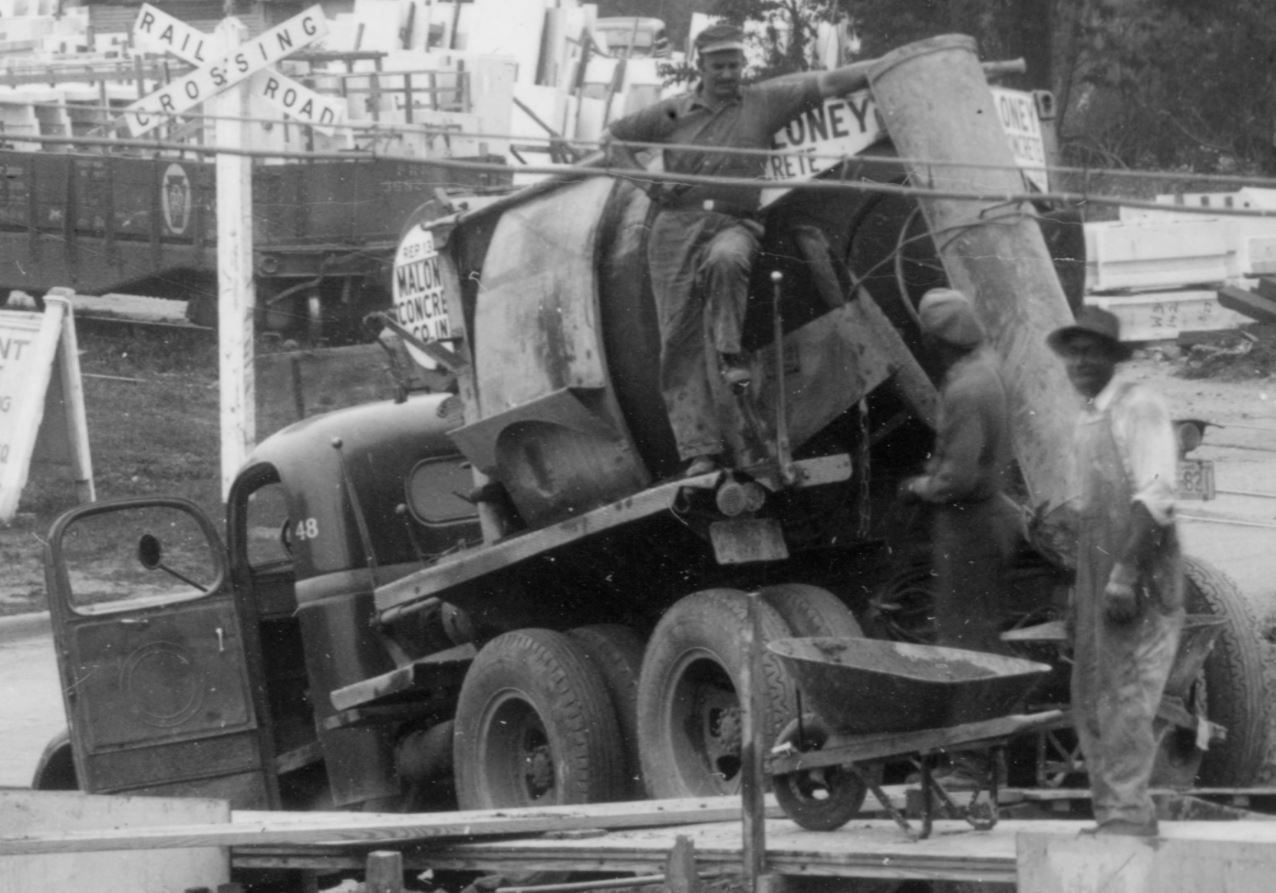
Speaking of Maloney Concrete, here is its mixer pouring ready-mix for the B&O freight station footers:
Maloney Concrete, truck no 48. If only someone would offer an HO scale model of this style mixer, I would be a happy camper!
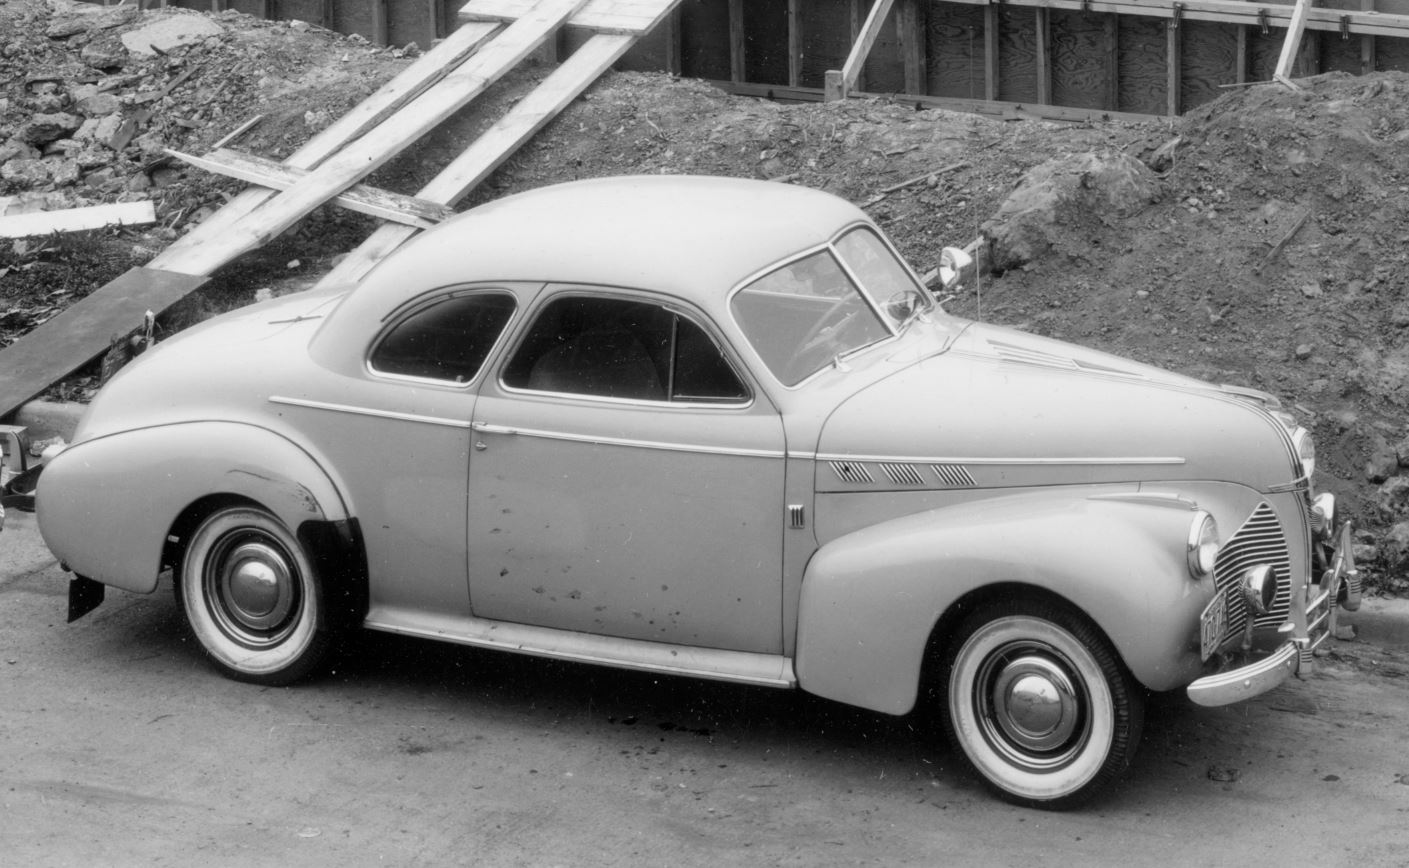
And lastly, it’s hard to ignore all of those lovely late 30s – early 40s automobiles, but since I’m no expert, I’ll focus on just one. The up front and center 1940 Pontiac Torpedo Coupe:
Well, I hope you enjoyed the photo and the details herein. What are some of your favorite finds? What did I miss?! I have many questions such as what was all the stone for? What cranes were in the yard and during what years? How did Enright Oil receive their fuel? When did Eisinger Lumber expand and who were they renting the yard to? Also of note, the buildings along “Bethesda Row” had yet to be built. And to think, roughly seven months after this photo was taken, the USA would enter into WWII, further pushing the area to develop and grow. And yet, still no one has explained the greatest mystery of all; why did the Bethesda freight house never have rail service? The design is a curious one, with a garage for storage yet no rail service. That’s a discussion for another time.
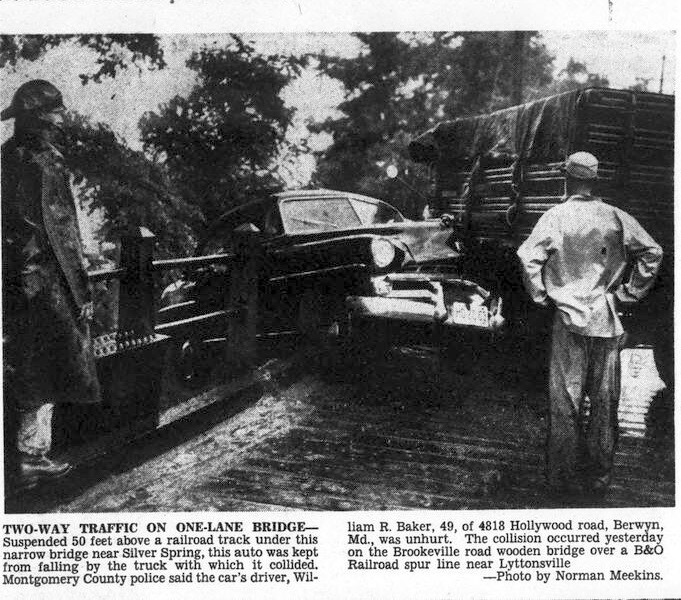
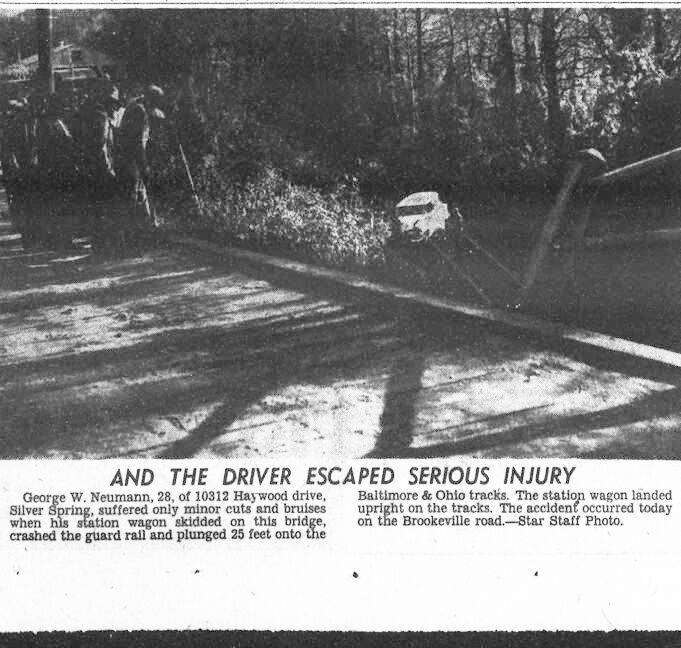
A member of the Friends of Forest Glen, Maryland Facebook Group recently posted a couple newspaper clippings from the Washington Evening Star which show two separate car wrecks that occurred at the Brookeville Road bridge crossing the Georgetown Branch. I suspect that slippery road conditions contributed to both. Pretty interesting!
Washington Evening Star, August 13, 1955Washington Evening Star, November 11, 1955
I knew that the old Linden Ln. overpass across the Metropolitan Branch just North of Georgetown Jct. was considered one of the most dangerous bridges in the country (!) at one time, but I did not know there were troubles with this smaller bridge just to the west. For reference, here is an image I scanned many years ago which was shot by W. Duvall, ca 1966:
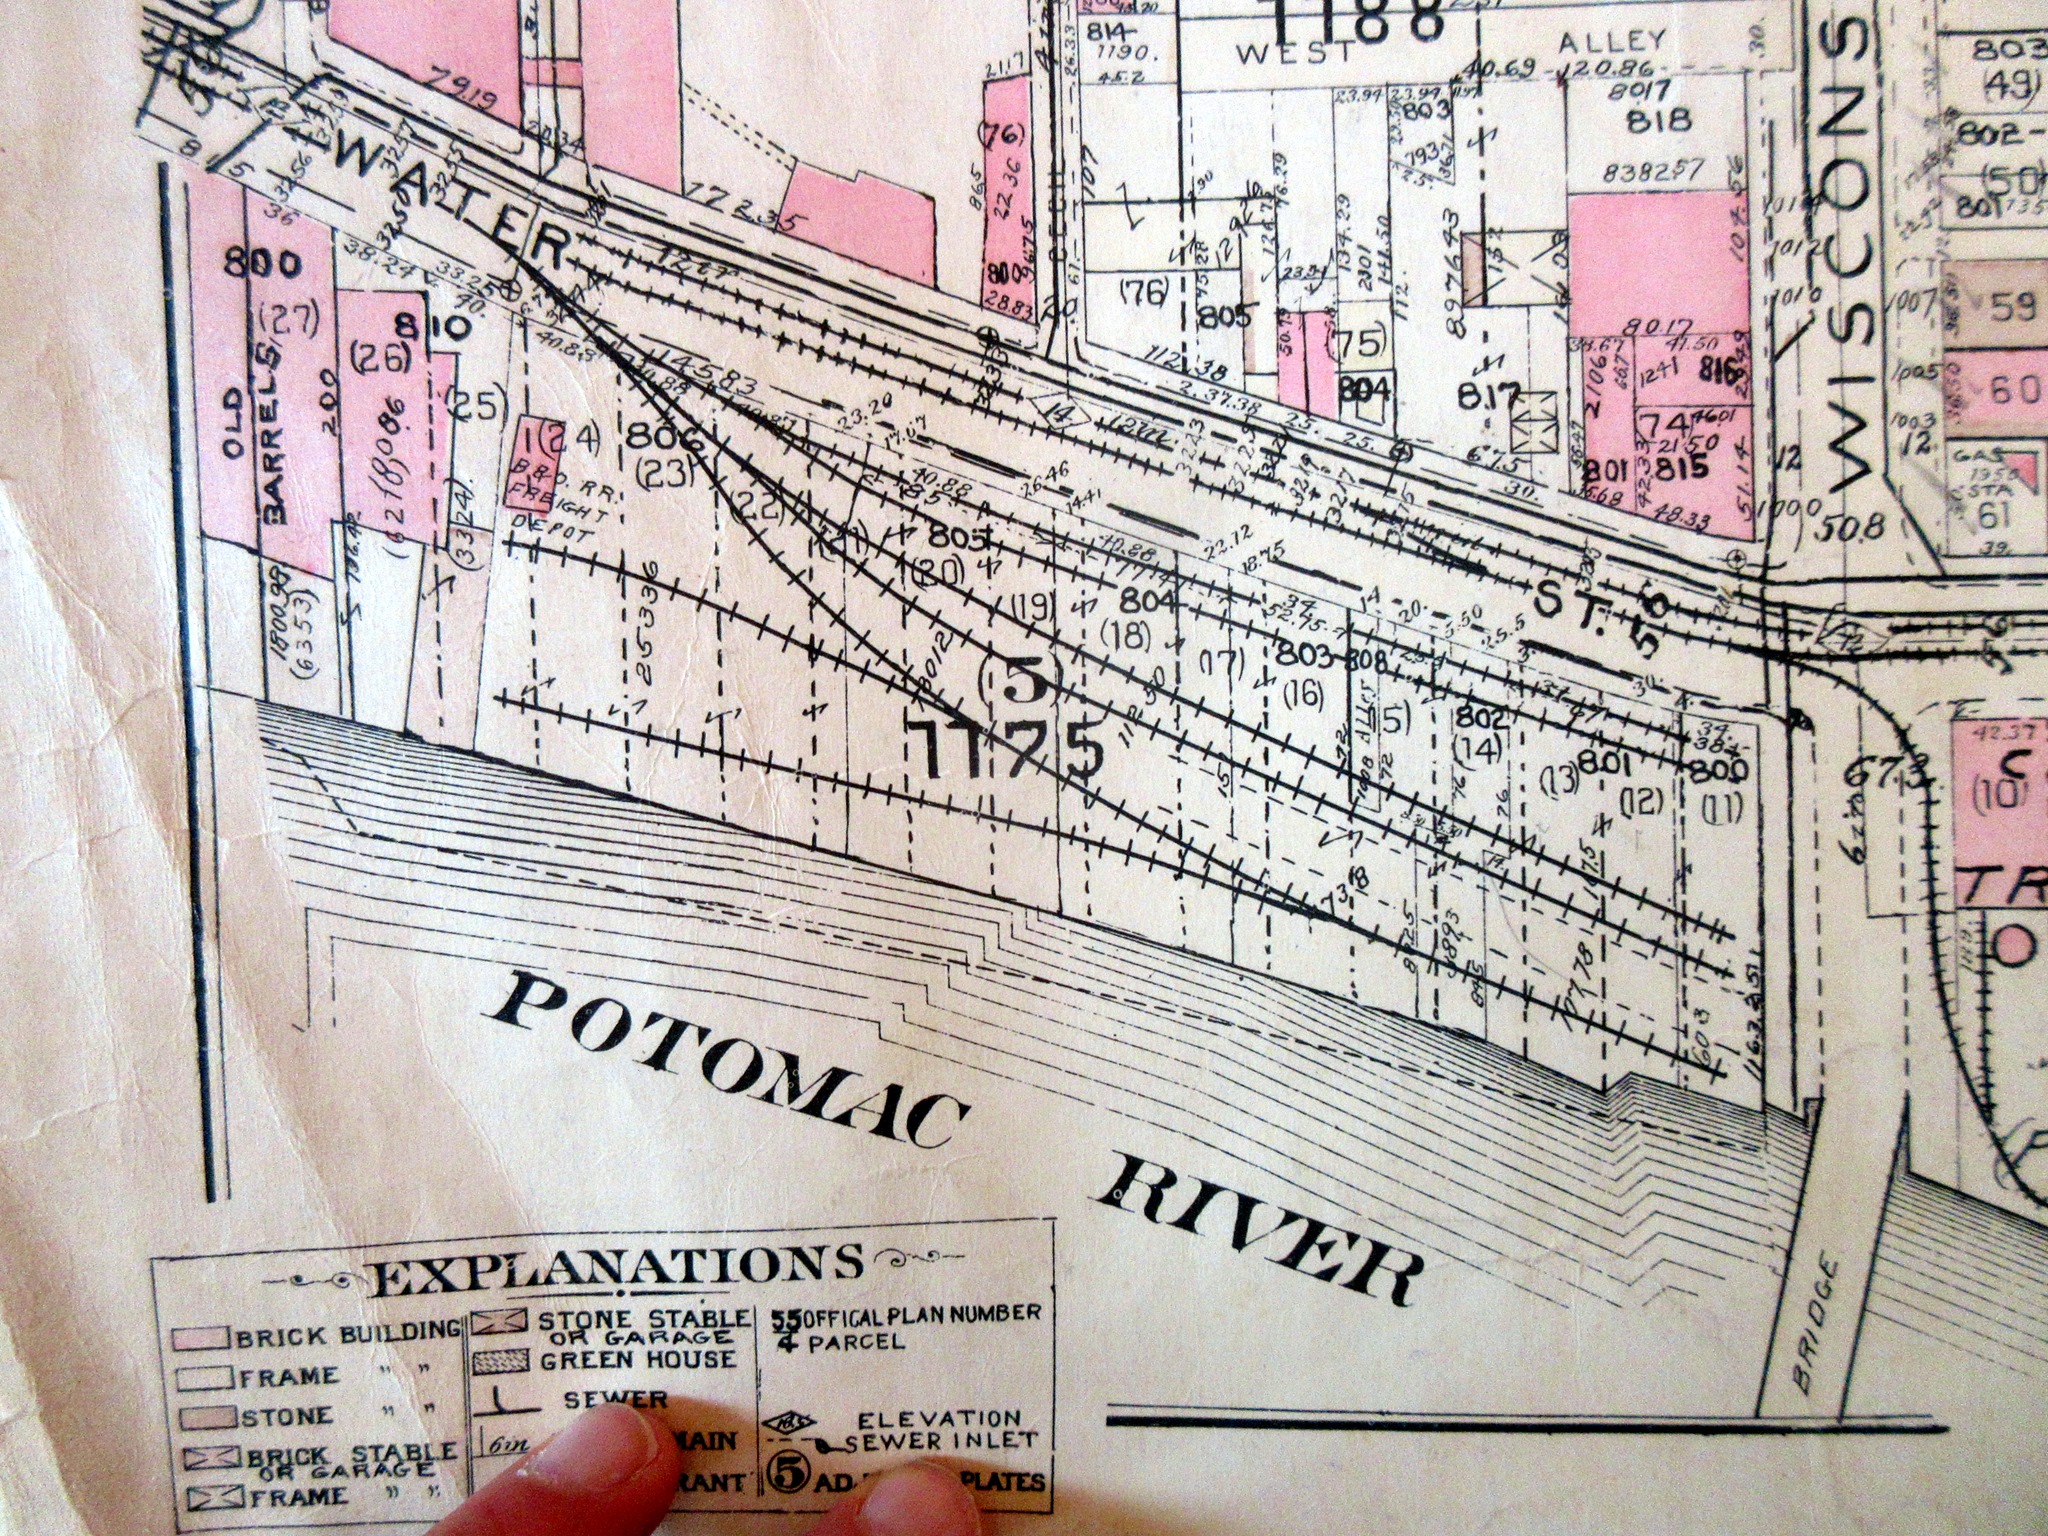
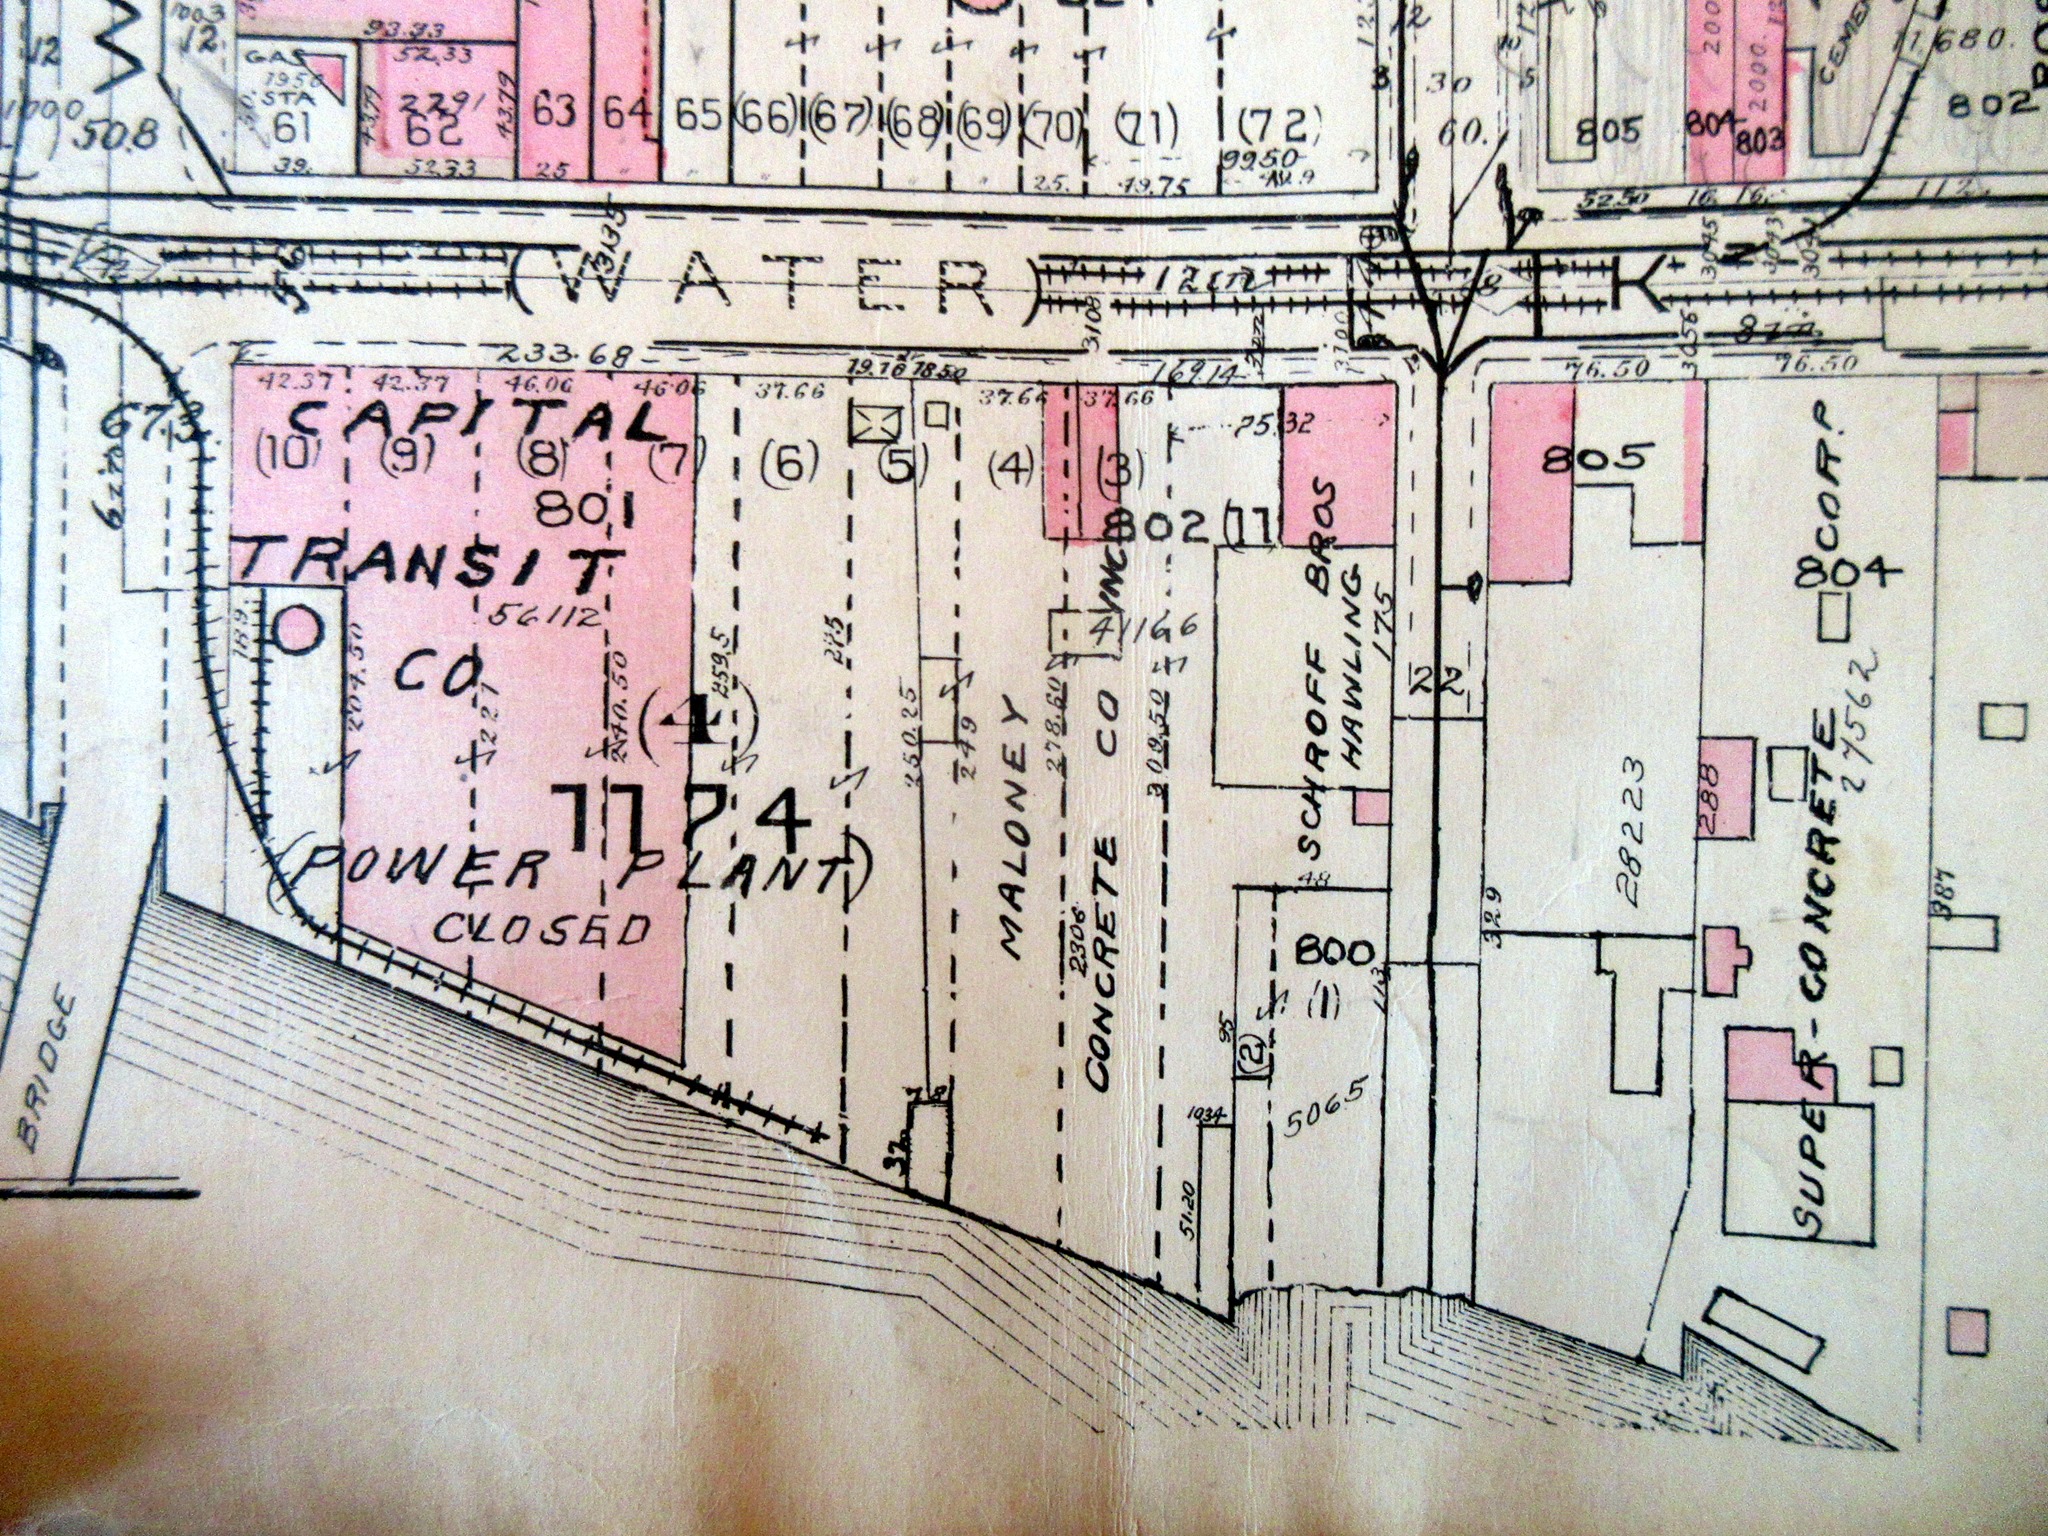
Here are a few snapshots from a 1959 Baist map from Ryan S. Thank you, Ryan!
The “old yard,” to the East.The “new yard,” at the foot of Wisconsin Ave. Note the siding for the power plant, which is incorrectly drawn. It should branch from the end of one of the sidings in the new yard. I have no idea what that bridge is indicated off of the end of Wisconsin Ave! There is a story there, for sure!Power Plant siding seems to extend a bit further on the map than in actuality, but am not certain. Also note Maloney Concrete, Schroff Bros. and Super-Concrete Corp properties.
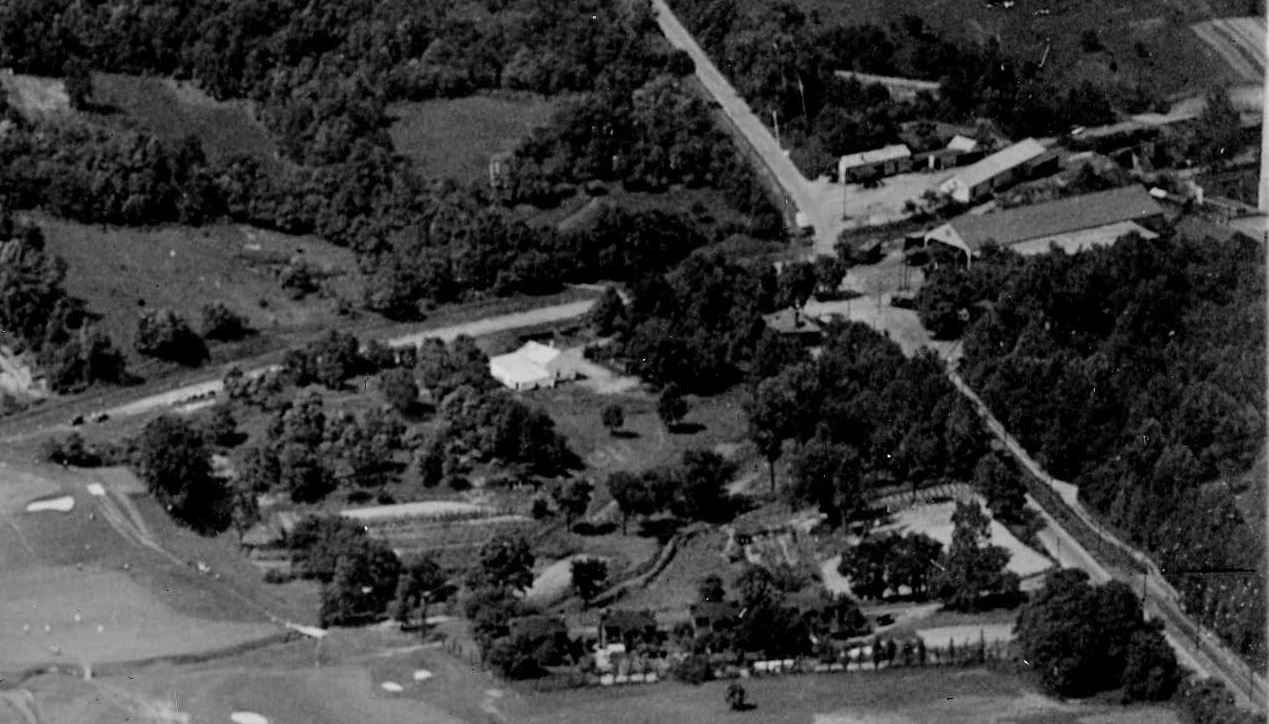
Another absolute gem from the National Archives is this aerial view of the Columbia Country Club, which the Georgetown Branch bisected. Visible in the upper-right corner is where the GB crossed Connecticut Ave and served a few industries including T.W. Perry and the Capitol Traction powerhouse, barely visible on the far right edge. It is interesting to see how T.W. Perry was configured at this time; the lumber shed is visible as is the coal trestle behind it. The large Capitol Traction car barn and Rock Creek Ry. station are both visible as well. Not yet built is the large water tower which sat next to the car barn and the well-known Chevy Chase Lake swimming pool. This was only 11 years after the line had been extended from this point down Georgetown. Chevy Chase Lake was the terminus of the branch from ca 1892 until 1910.
I have oft wondered what methods the folks at Wilkins Rogers Milling used over the years to offload/load grain and other materials at their mill. I have seen photos showing boxcars but never covered hoppers, until now. Most of the time there are various boxcars sitting at the loading dock. Some showing grain doors indicating bulk loadings and others without, indicating bagged loadings. Both are reasonable. But I’d never seen a covered hopper of any kind there in the older photos I have, which is not too many good ones.
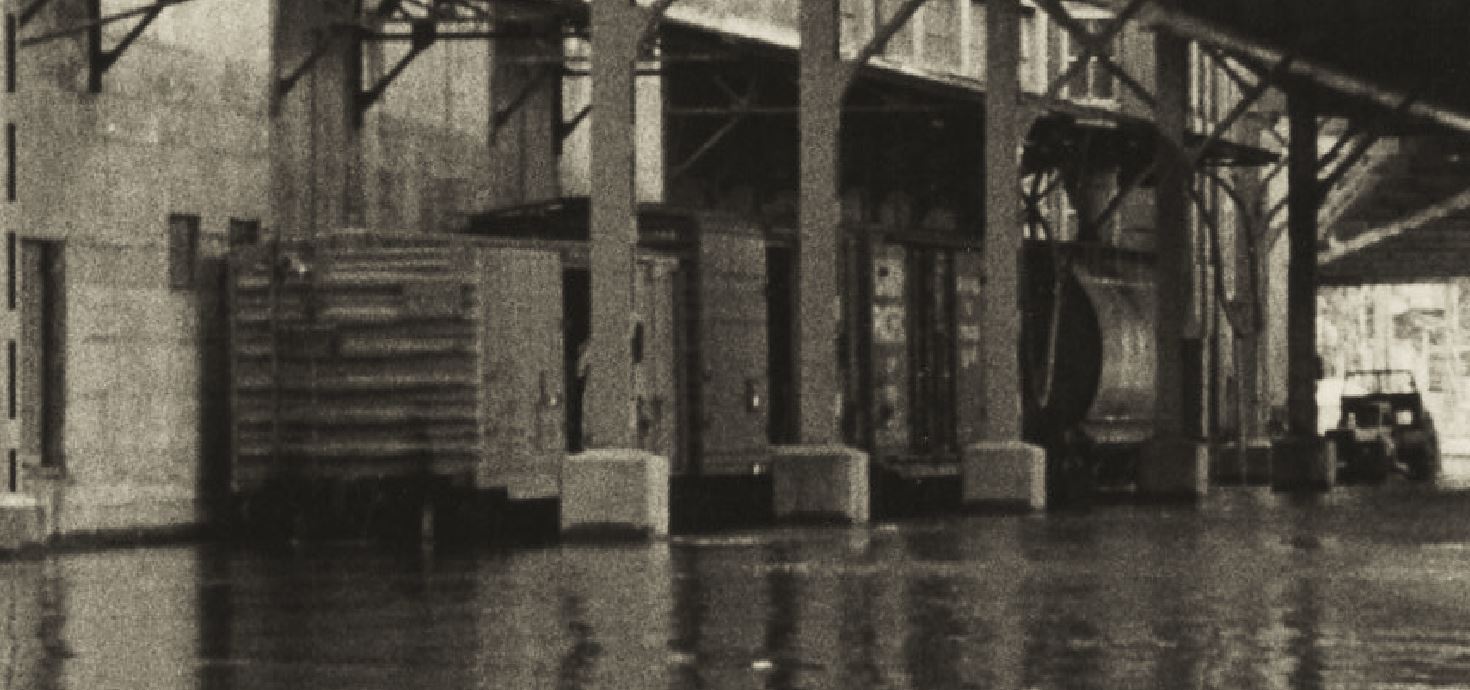
Perusing the DDoT DC archives page (which is great!) I stumbled on some photos from the flooding in Georgetown during Hurricane Agnes in late June, 1972. In one image, showing the mill, sitting on the siding at Wilkins Rogers are four cars; three boxcars (one, oddly enough, from the UP, apparently!) and one cylindrical covered hopper!
DDoT DC Archives, ca June 1972. Wilkins Rogers Milling Co siding, Georgetown, DC.
I can’t make out any reporting marks and I’m not an expert on these sorts of cars, but it seems there is an air hose connected to one end, draped up to a valve, most likely, which would be assisting in the unloading of whatever grain was inside. *EDIT- Matt R. says: Probably an ACF 3500 CuFt covered hopper. Atlas makes the model. Dates to early 60’s. Many different owners as well as ACF’s own lease fleet.
General American developed the “Airslide” covered hopper, which used air and a special membrane to move materials out of the car chutes with ease. These types of cars are new for me, as I haven’t really studied them. A quick search turned up a site with some great history and back story on these cars. As it seems they started showing up in 1954, I can include them on my layout, which really is delightful. It seems that Con-Cor produced a model of this car, which is close to what I would use. More research is in order.
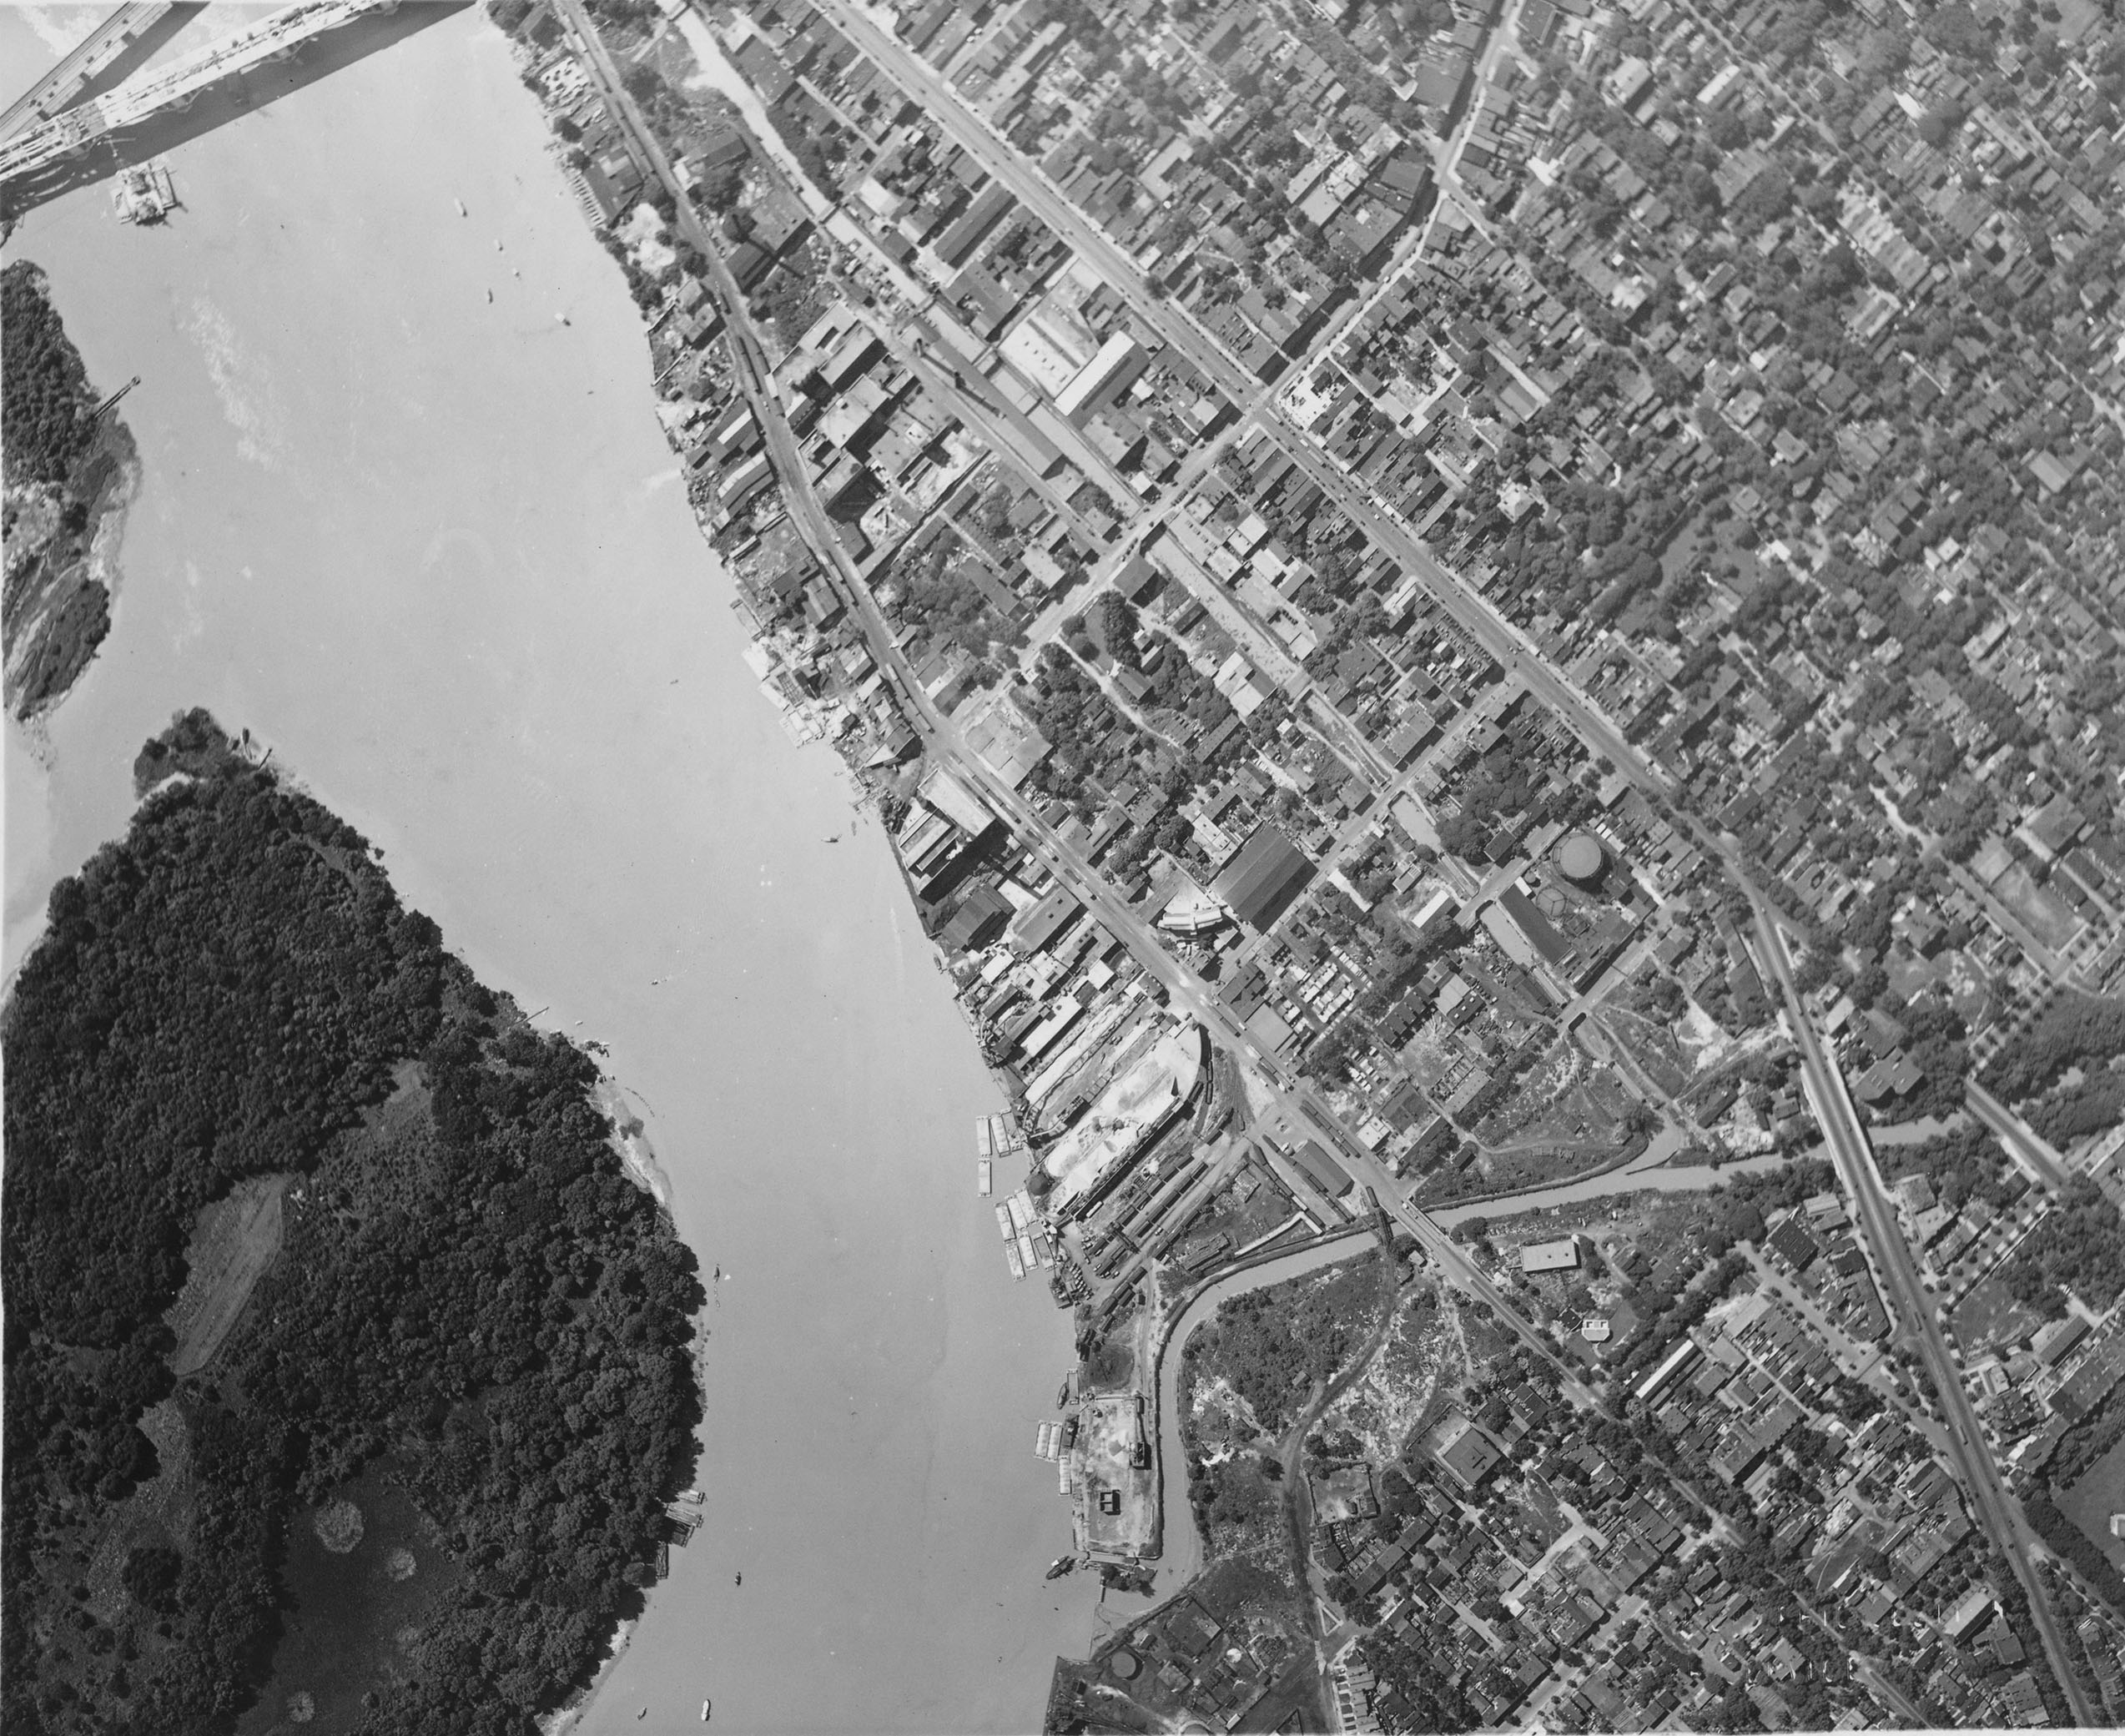
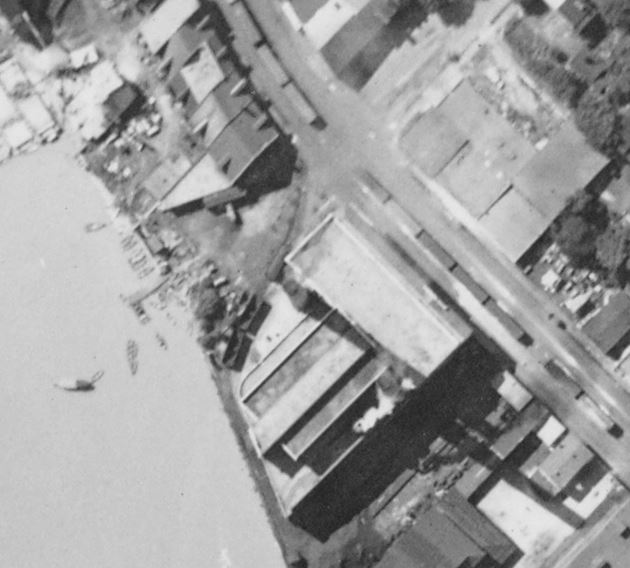
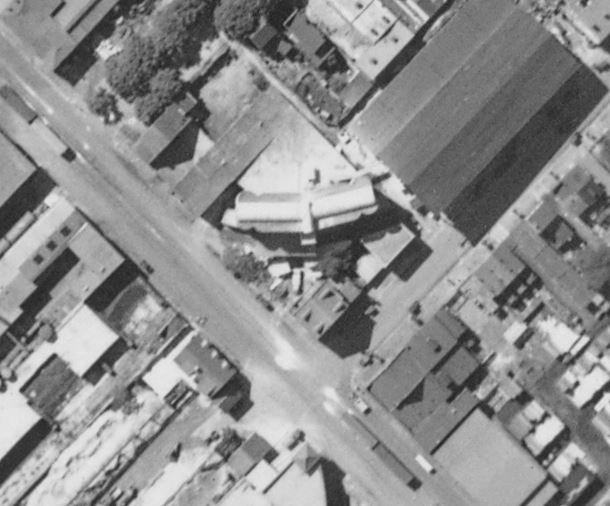
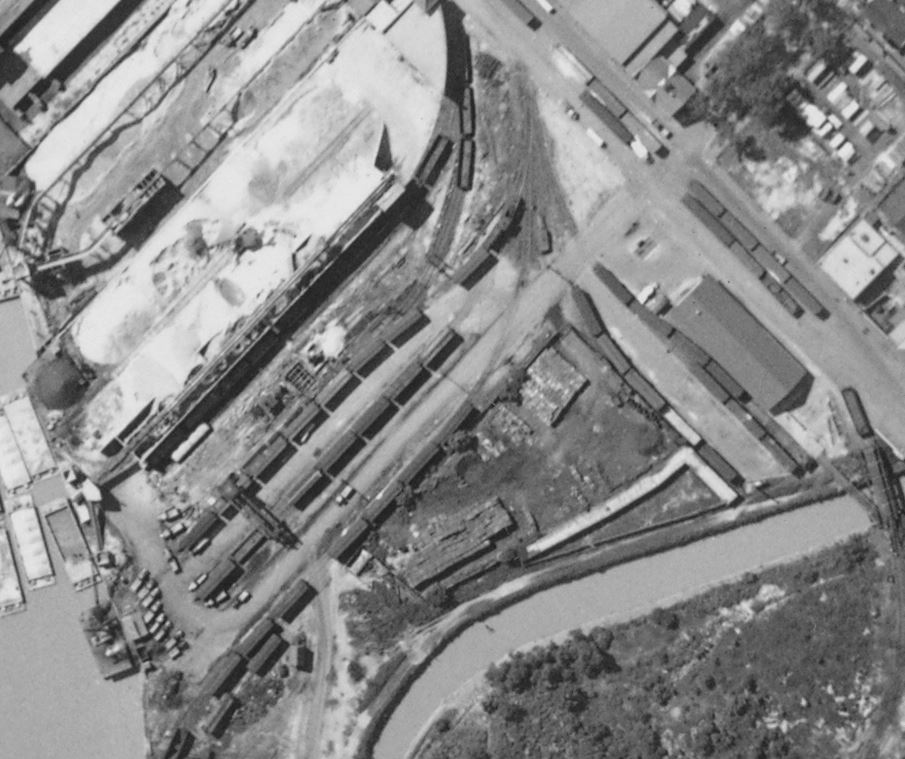
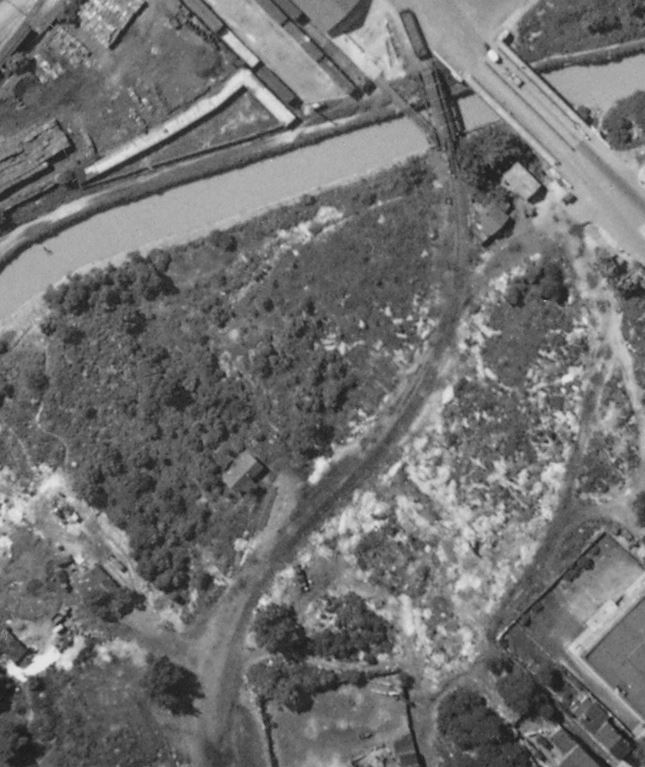
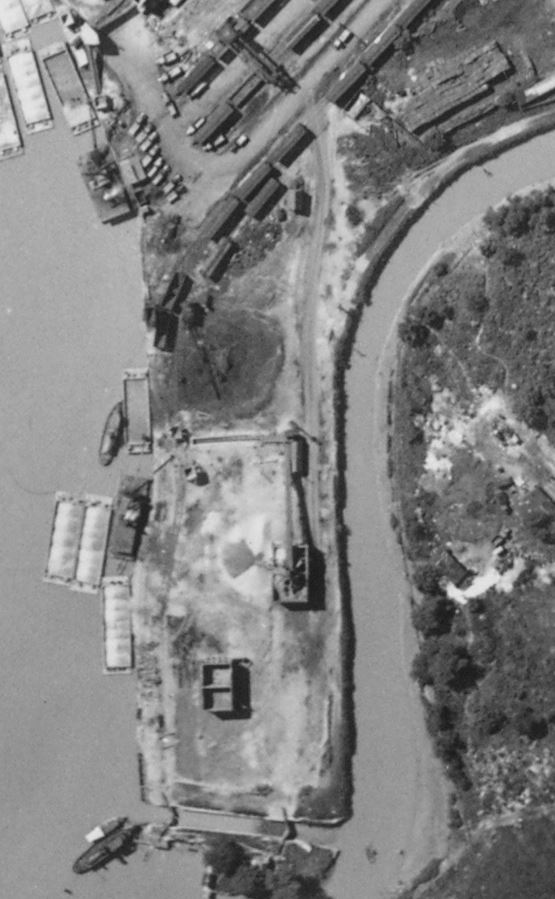
Another magnificent find from the National Archives. This one is a straight-down view of the heart of Georgetown. There are SO many things to take in here. Let’s have a look:
Ca. 1927-1928, Georgetown Waterfront, Washington, DC. National Archives Identifier: 68152327 https://catalog.archives.gov/id/68152327The Capital Traction Co. power plant. Note the two empty and one loaded hopper to the left on the short lead track which swung around the back of the plant, and switched back into the plant along the curved corner wall. The Rosslyn Steel & Cement plant. This curved tower design was somewhat special in its day. It was featured in an issue of Concrete Magazine, which you can read on Google. The track followed the contour of the building and on into that very long shed where steel was unloaded. The “old yard” was busy! Note the Georgetown Switcher locomotive was sitting just above the center of the image, facing the River, as always. The freight house is to the right. The stables for the mules used on the C&O Canal is still there, along Rock Creek toward the bottom. And what’s that I see on the far right? A special find. The siding built around 1914 to support construction of the Lincoln Memorial, which was completed in 1922. I imagine it was a low priority to remove at that point and they just left it as a stub to handle additional cars, as you can see here. Hard to tell if the tracks were still in place further down, but neat nonetheless. And finally, it’s really cool to see the industry located on this small tract of land near the mouth of Rock Creek and the old C&O canal watergate. (visible at the bottom, which allowed canal boats to enter and exit the canal system here.) There was another stone processing plant here, similar to Smoot Sand & Gravel, that dredged the river and processed the sand and stone here. It’s really cool to see the various freight cars in use here, as well as the maritime components.
Hope you enjoyed this one. It’s a real rabbit hole! I have many more to share and will over the coming months. Would love to hear what you think of this awesome image!
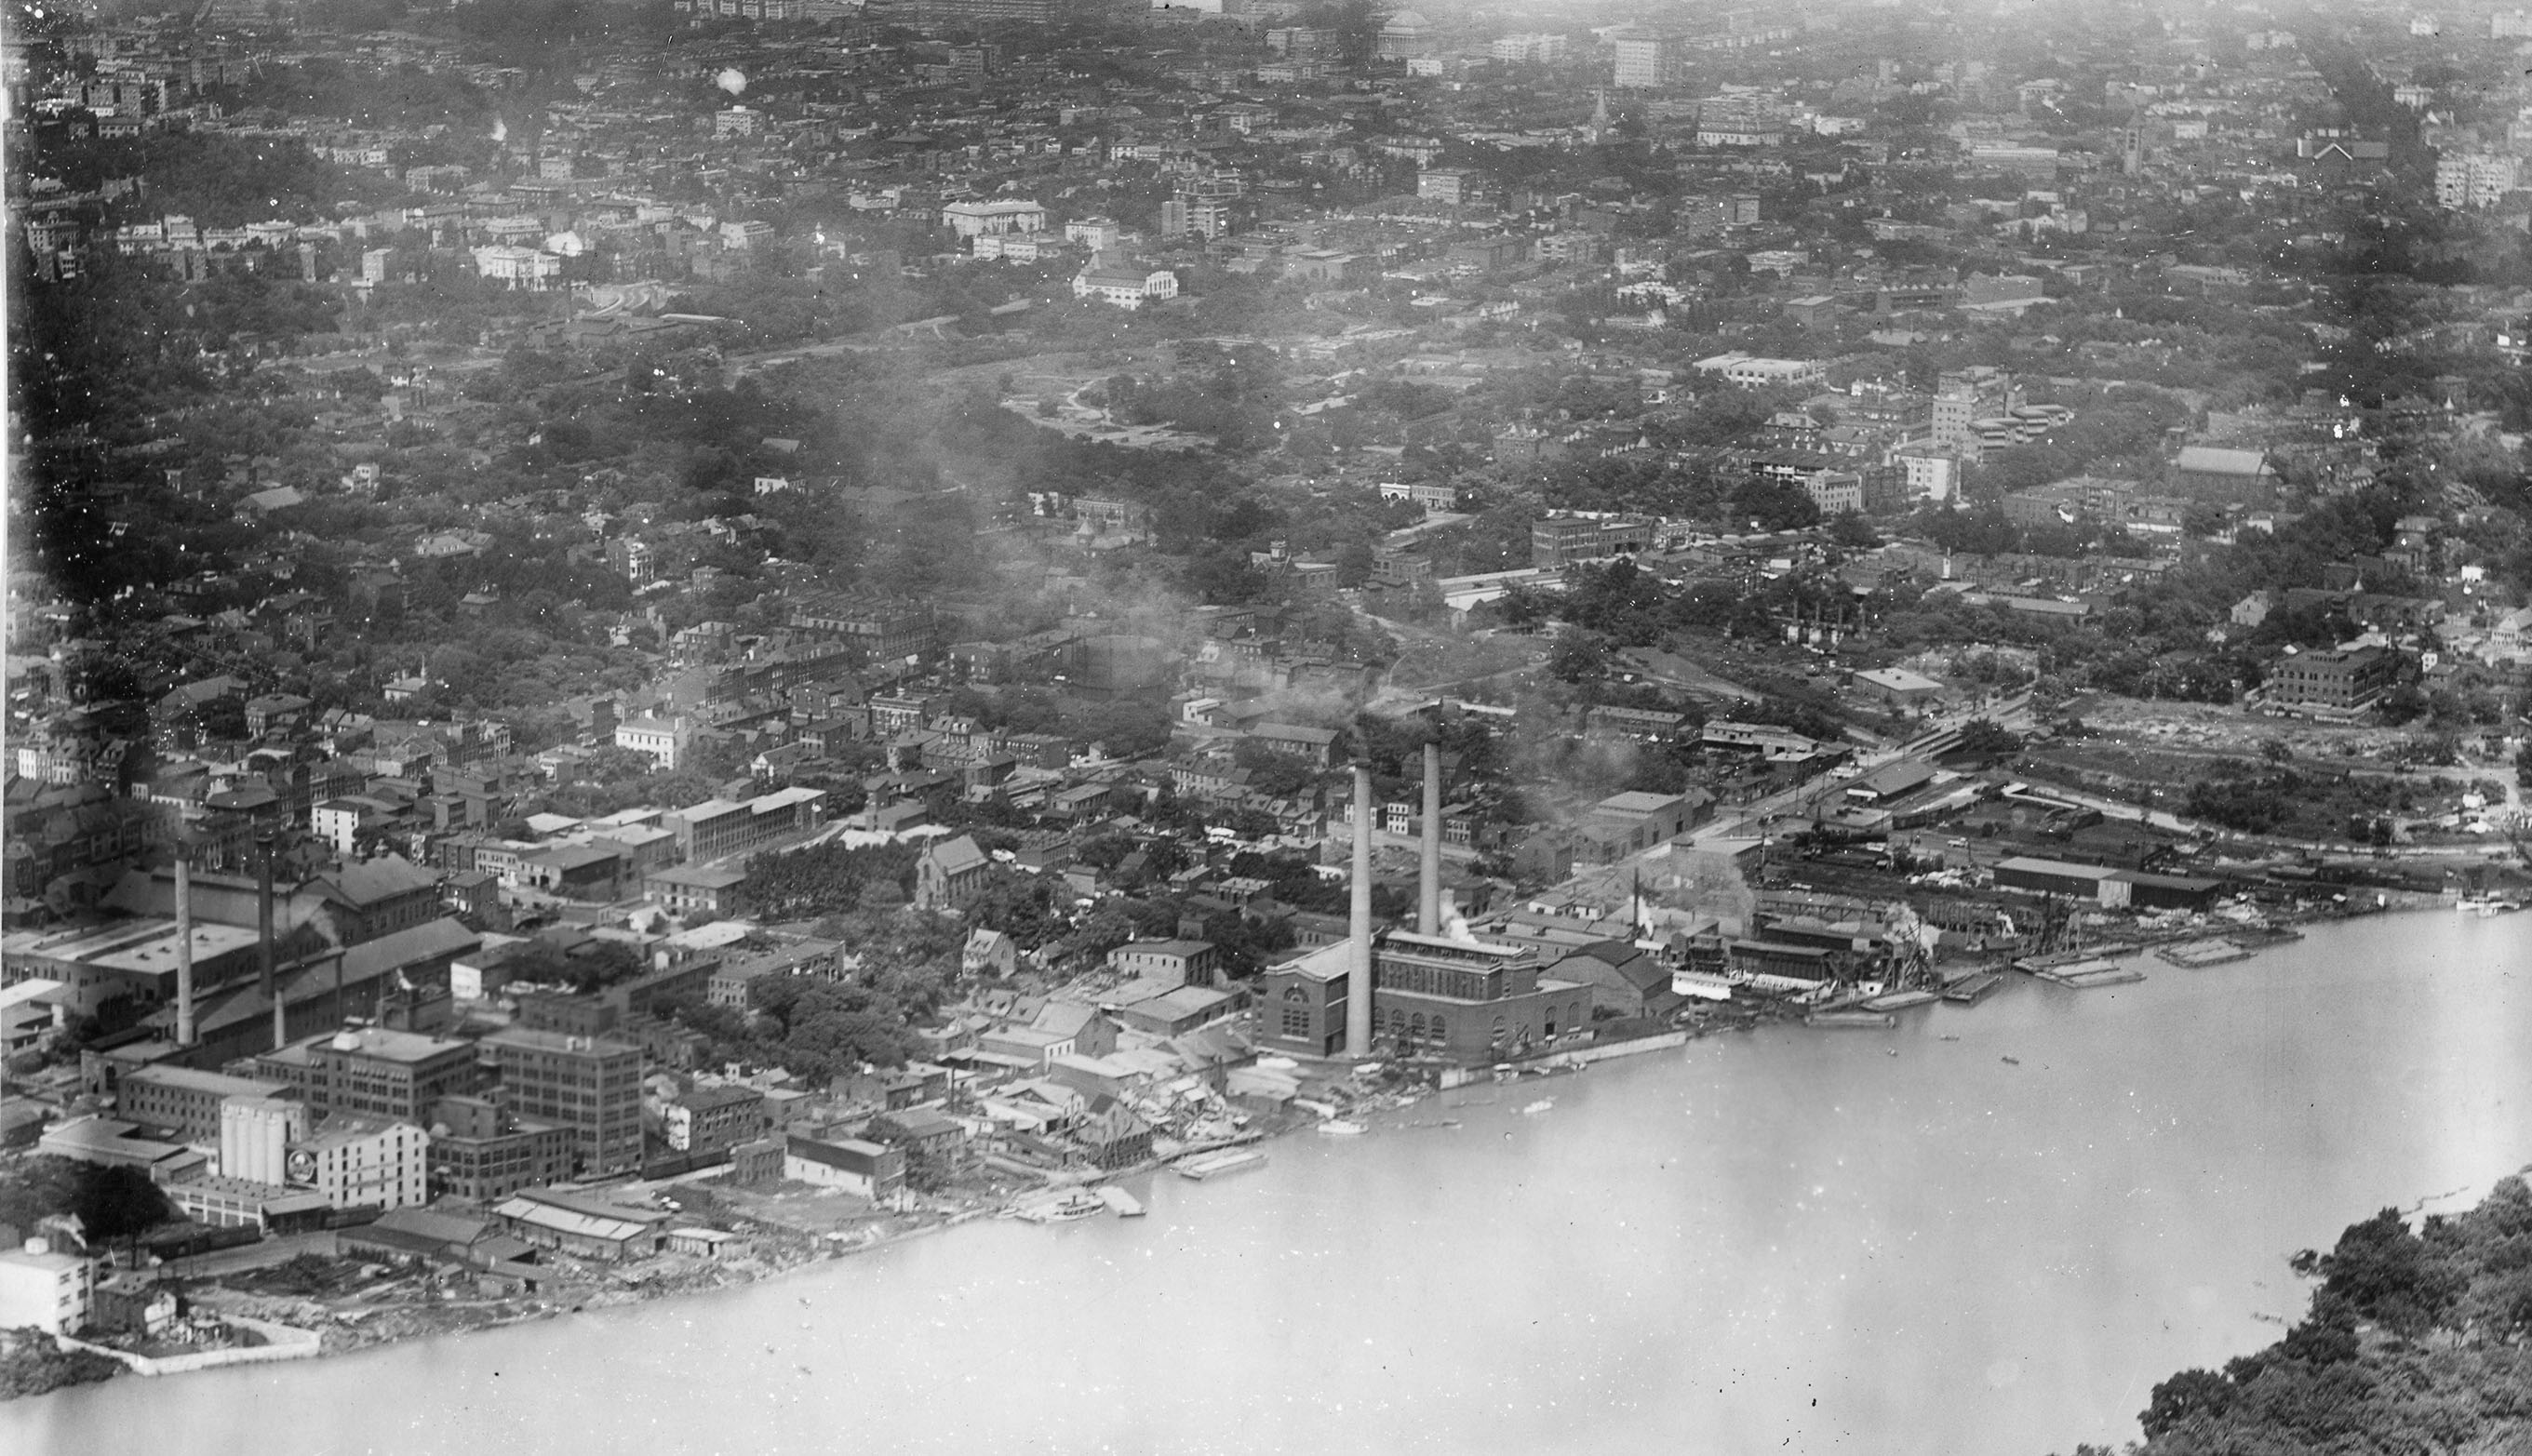
I was tipped off by good friend and Archivist Nick F. to the large collection of aerial photos at the National Archives shot during the early-mid 1900s. The most challenging part of my research has always been this period. The line was finished in 1910 and at that point and up into the late 1940s personal cameras were not really a thing. Folks weren’t out there snapping photos of common things unless they had a reason. Photos were more intentional and administrative or commercial in purpose. The B&O had a collection of valuation maps and photos shot around WWI. Over time, when a project was enacted, they would take additional photos. Of course there were roster shots and things of that nature, and it was very much documentation. So, when I saw these images, which largely span from the 19-teens up to the 1940s, I was floored. They are a window into a world that I have yearned to see. It will take me a good amount of time to get through all of the images but I plan on sharing them here when I can. Enjoy!
Ca. Nov 1921 – Airscapes – Washington DC, Georgetown & Potomac River. Negative 4205. National Archives Identifier: 68152130https://catalog.archives.gov/id/68152130
This first image is particularly interesting for a few very special reasons. Let’s start with one that I have been waiting for some time to see with clarity: the extension of the Branch that crossed Rock Creek and skirted along the Potomac to the construction site for the Lincoln Memorial. This siding made an appearance on the B&O Form 6 which listed all sidings along the line, but photos have been elusive. You can also clearly see the peculiar curved loading dock on the right side of the old B&O freight house located at the end of the line.
I also noticed that the Wilkins-Rogers Milling building looks very different and that is because this is the “old” mill that stood on the site until it burned down in a fire on July 4, 1922; a year or so after this photo was taken. There is a massive logo painted on the side of the mill which I believe is related to cotton production, which the mill apparently handled prior to being rebuilt.
There are SO many other details to soak up like the track arrangements, the old Capital Traction power plant (perhaps loading coal from barges or undergoing some construction?), The “new yard” wouldn’t be built for another 20 years or so. This was a busy time in Georgetown.
In the prototype modeling world, I have heard many folks tell me that if I can’t find source data and photos of something, then I should go ahead and build a model of it, because you KNOW once I finish some brilliant photos and blueprints will surface. Anyone who chases ghosts of bygone eras in their research and modeling knows what I’m talking about. Thankfully, there are some wonderful folks out there like Brian R. who regularly volunteers at the B&ORRHS Archives and is also a friend who knows what my model RR project entails. He reached out to me last week with three absolutely incredible photos. (Apparently there are more! I really need to get myself back to the Archives for more digging.)
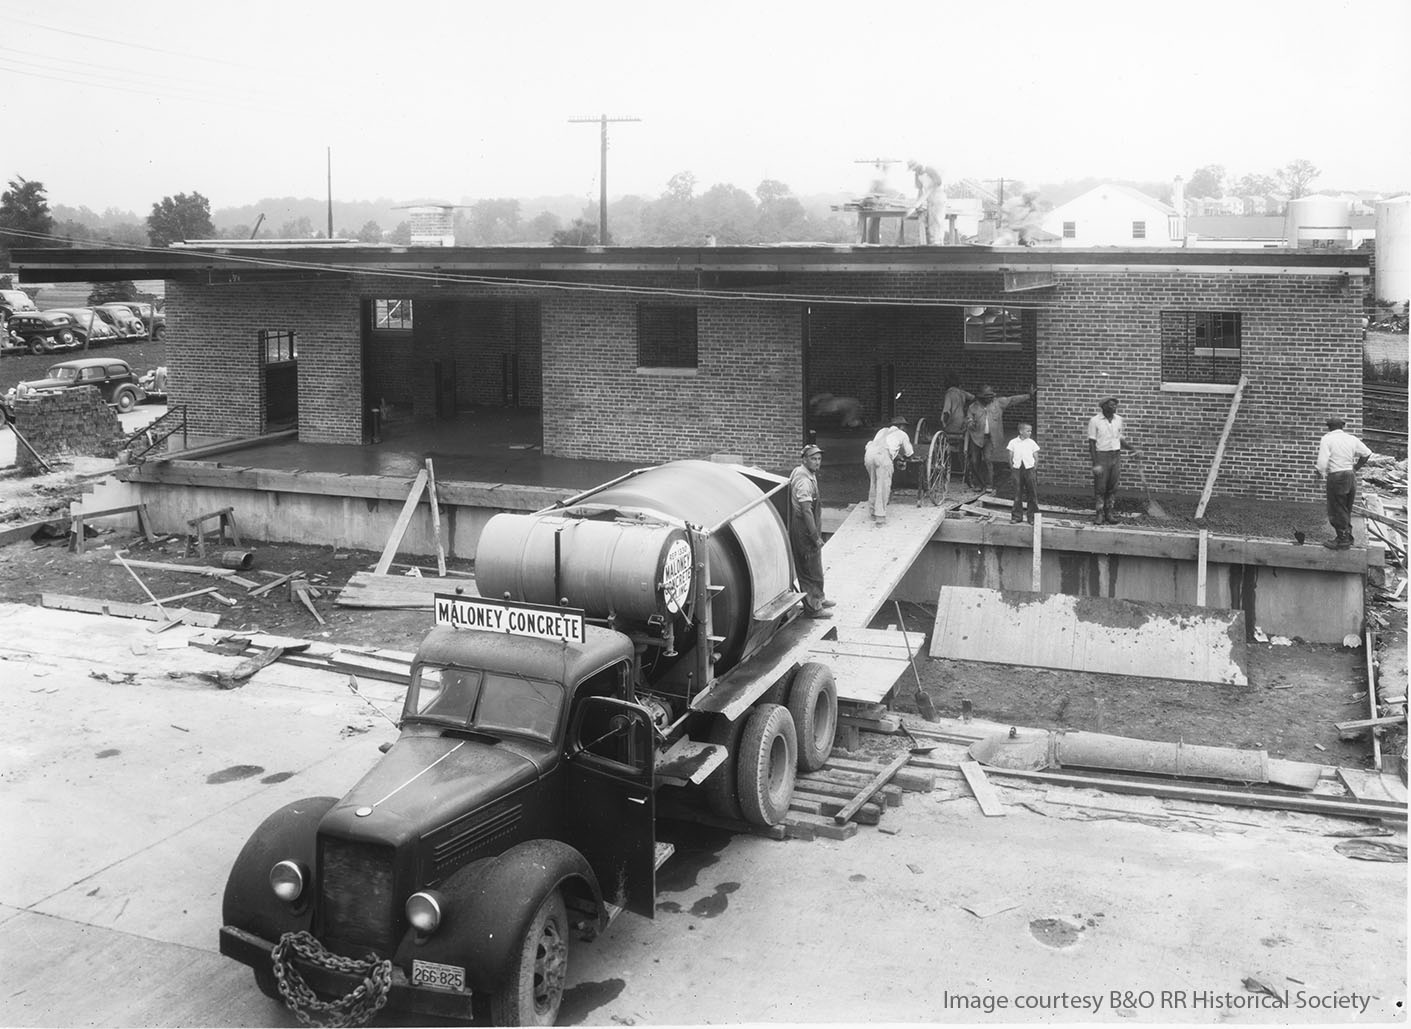
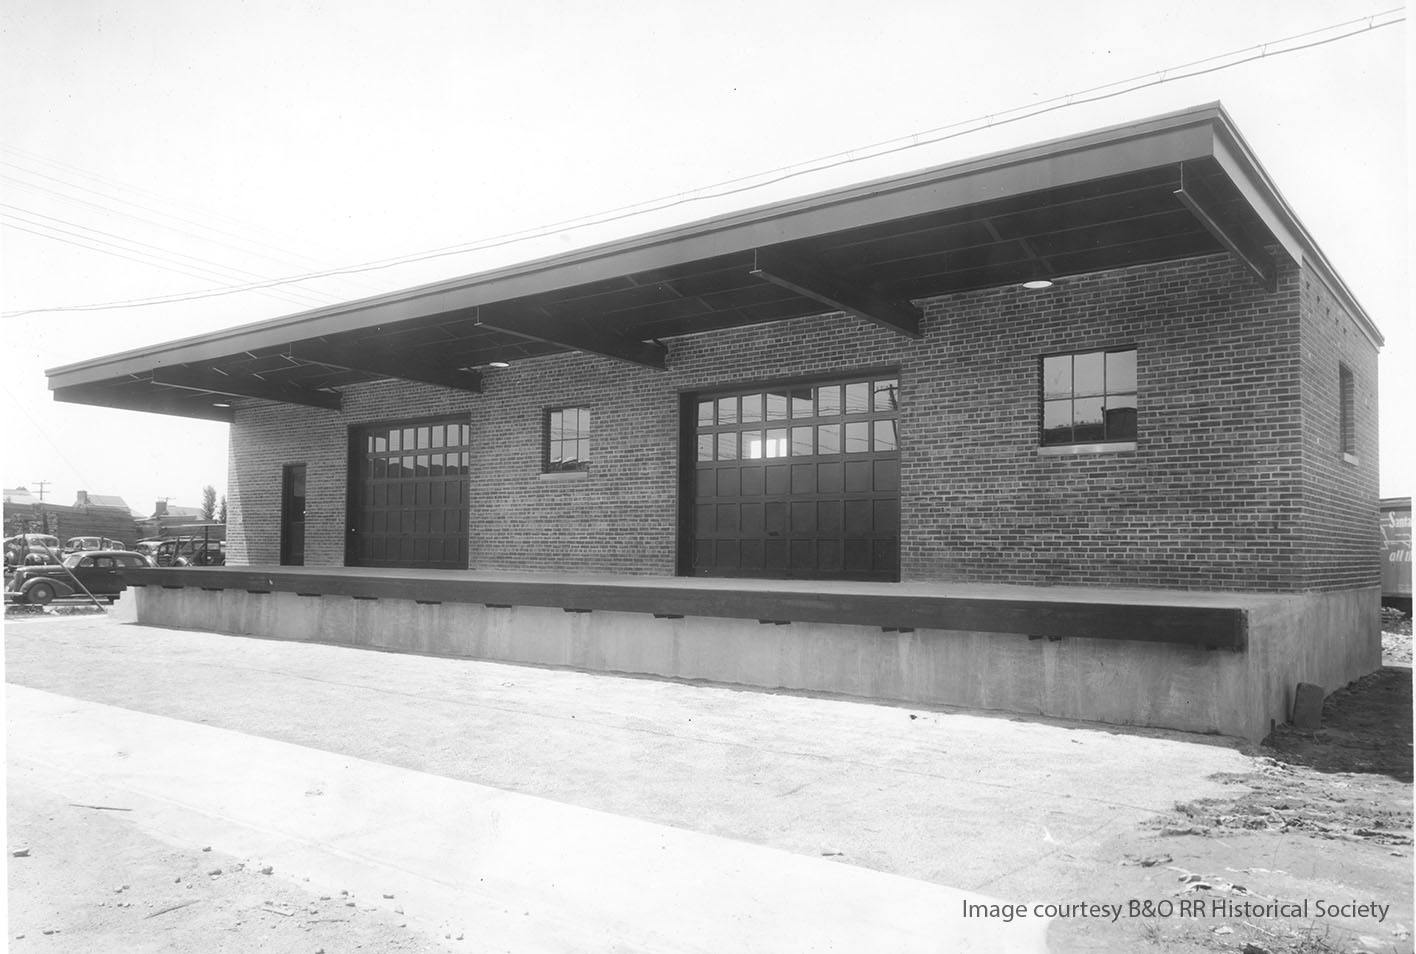
A bit of back story – Bethesda was really not much of anything when the RR came through town in 1910. Most folks in the rustic community saw it as a nuisance and impeding on their bucolic suburban hamlet. However, growth was inevitable and in the late 1930s with DC suburbs seeing lots of expansion, the B&O obviously realized that the crossroads in Bethesda were a great spot for a hub of fuel dealers, concrete plants and lumber yards and freight facilities to be located. A depot was needed. In the Spring of 1941 the railroad began construction on the depot, completing it a few months later in July. Oddly enough, they chose to build a freight house adjacent to the tracks with no provision for a connection to the railroad. Yep, take a good look at the Bethesda freight house and try to figure out why it was designed the way it was. No tracks lined up to it for trans-loading. It has a nice broad raised platform for vehicles to unload/load on, but no railroad connection. An oddity, for sure. What proceeded the brick depot is a mystery to me. Any info would be most welcome. Enjoy the following photos, courtesy B&ORRHS.
June 17, 1941. B&O RR Bethesda, MD – Freight House under construction. Maloney Concrete is providing the concrete mix today, as the floor and the loading dock is poured by hand. Workers above work on framing the roof. Photo by the B&O RR, courtesy B&O RR Historical Society.July 9, 1941. B&O RR Bethesda, MD – Freight House, front side. The structure is now complete and cleaned up for its photo op. Here is the front side. Note the custom roll-up doors with two rows of windows. Photo by the B&O RR, courtesy B&O RR Historical Society. July 9, 1941. B&O RR Bethesda, MD – Freight House, rear side. Note the large side window. The room at this end of the building was an office, sectioned off from the rest of the freight house by an inner wall. Included a chimney and no doubt had a wood-burning stove. The large window opened up with a view of the freight yard, which was behind the photographer. Photo by the B&O RR, courtesy B&O RR Historical Society.
As a sidebar, some of the blueprints I used to make my own model and drawings were also from the B&ORRHS and I shared them here: https://www.flickr.com/photos/cpl_clegg/albums/72157687317143670 These include blueprints for the railings, iron work, roll up doors, windows and concrete flooring/footings.